Updated July 4, 2023
Introduction to Layers in Illustrator
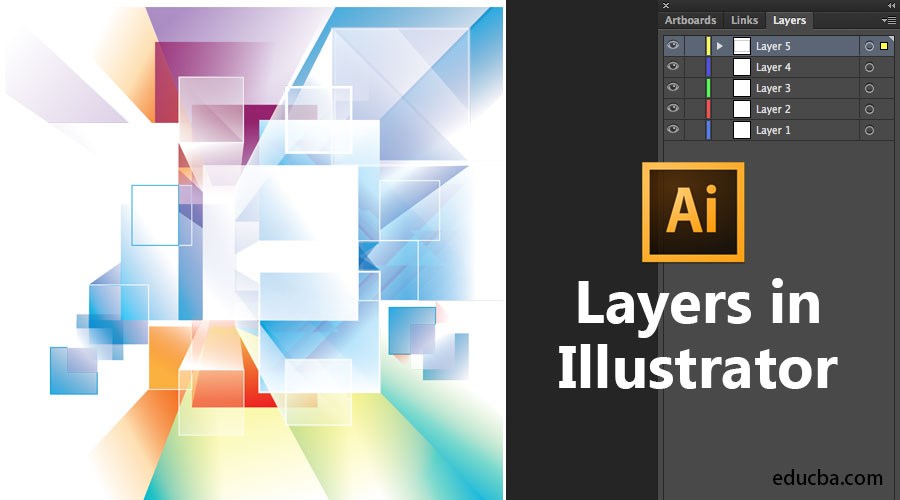
Layers in Illustrator are the transparent folders that contain text, images, and artworks. These layers can be hidden or shown at any point in time from the document as required by the user. The layers contain all the necessary information about the objects or artworks present inside that layer. The user can change the opacity of that particular layer and lock the layer to work on the other objects without touching that layer. The layers in Illustrator are very important to learn and understand because most of the work is done with the help of the layers and their functions.
Create a Layer in Illustrator
In the first section, we will discuss how to create a Layer.
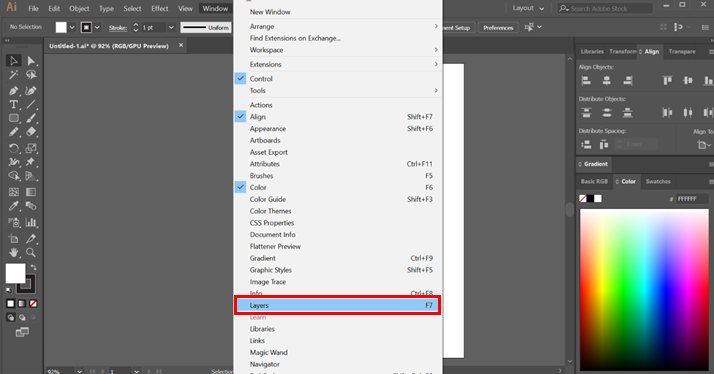
Step 1: To start using the Layers, open it from the Windows and select the Layers option.
Now you will see a layers panel in the bottom right part. You can begin using the layers options to list, manage, and control items in your work. It is recommended to always keep the layers panel activated in your document for easy access.
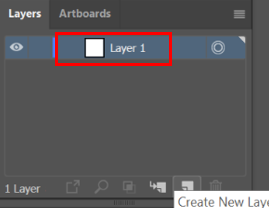
Step 2: Now, go to the Layers panel and press the icon below as shown in the image. This will create a new layer. By default, the layer is named Layer 1. You can rename it by double-clicking on the layer you want to rename.
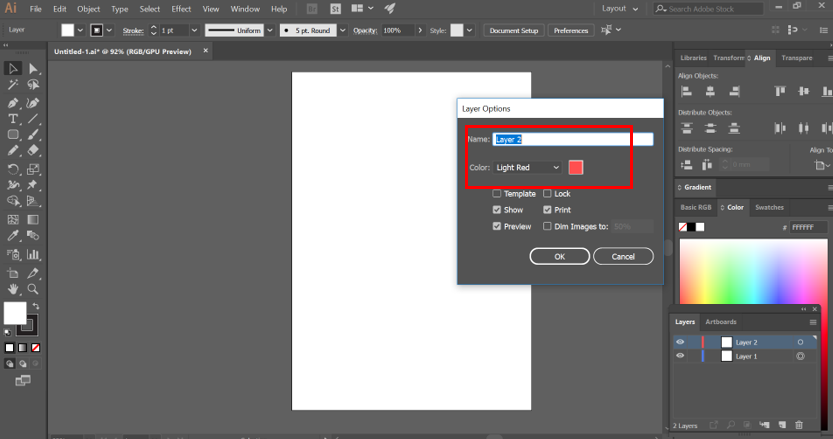
Step 3: Also, the new layer will have the default color. You can change its color by double-clicking the layer and using the layer options. See the below image.
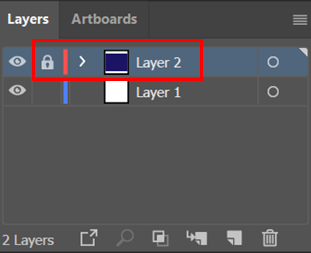
Step 4: You will find adobe illustrator layers adjacent to the created Layer. It is used to hide or show the content in the Layer.
![]()
Step 5: Press it, and the Eye icon disappears, making all the items in it out of sight. If you need to see the Layer again, all you have to do is press the eye icon area again.
![]()
Step 6: Next to the eye icon is the area to lock your Layer. On clicking there, a padlock icon appears. This means that your layer is locked, and you cannot move or select anything from the items inside the layer. Again, if you need the items, click on the lock icon, and now you can work on the Layer again.
Set Layer and Sublayer options
Illustrator allows the users to further create objects and link them with the parent layers. It is called sub-layers, where the items will be branching from the original layer. Follow the below instructions.
- Double click the object from the layers panel.
- From the layers panel, select options after selecting the item.
- Finally, select New Layer or New Sublayer from the layers panel menu
Move an Object to a Different Layer
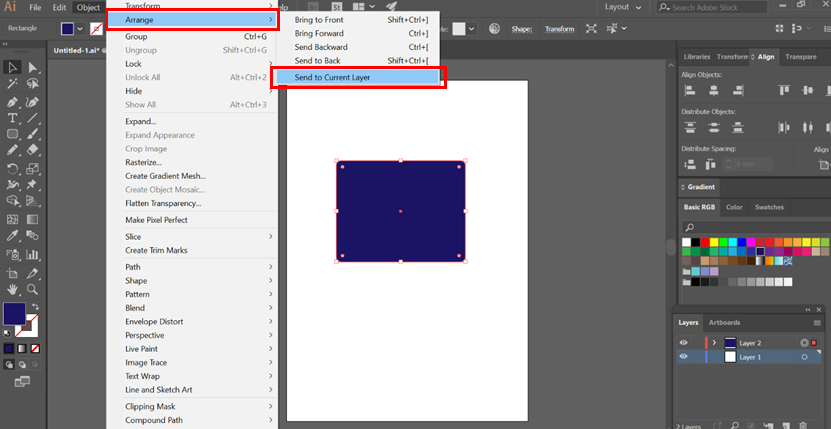
Often in Illustrator, once you have created an object, you might have to move it to a different Layer. After creating objects in a layer, you could still move them to a different Layer by following the below instructions:
- Choose the items you need to move.
- Select the Layer you want the item to be moved to.
- Now go to Object> Arrange> Send to Current Layer.
- A more simple option is to drag the object directly to the desired layer. Just be careful that you are moving the object to the correct layer.
Consolidate Layers and Groups
You have the option to fuse different layers or objects into one. If you require the need to merge or flatten layers into a single layer. Merging allows the consolidation of selected items into a single layer, while flattening makes all the items consolidate in a layer. With these two options, the stacking order is preserved; however, all the layer level elements will be lost.
- For merging items, hold the Control key if you are using Windows or the Command key in case if you are using Mac. You can also select a few objects among the layers by using the shift key. After that, using the layers panel menu, choose Merge Selected option. The result will be a merged layer based on the layer you picked last.

- If you want to flatten layers, select the layer you want to flatten. After that, using the layers panel menu, choose Flatten Artwork option.
Locate an item in the Layers Panel
There might be instances while working in your document that you might have lost track of the objects in your artwork. There is a very easy method available in Illustrator for tracking such lost elements.
- Select an object in the document window. If you select more than one object, the front-most objects in the stacking order will be located. This order is particularly useful for finding things in complex layers.
- Pick Locate Object from the options, and if the Show Layers Only is selected, the option becomes Locate layer.
Change the Display of the Layers Panel
It is upon you to decide how you want to showcase your layers panel. You can either make it simple or complex, depending on your needs. As a standard, all the items will be housed under the parent layer. Using the layers panel, you can further customize the look, color, and other properties like the lock, hide, etc.
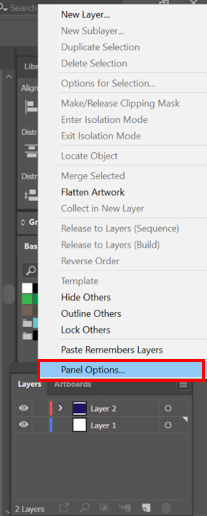
Step 1: From the layers panel menu, select Panel Options.
Step 2: For hiding the paths and clubbed objects, pick Show Layers Only from the panel options.
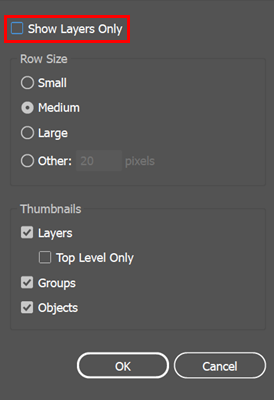
Step 3: Now, for the row size, choose one that suits your needs. Usually, you can fill between the values of 12 and 100. In the newer versions of Illustrator, you are provided with three options- Small, Medium, and Large.
Conclusion – Layers in Illustrator
Creating detailed and complex artworks is often difficult as you have to manage many elements, including shapes, path, and objects. Illustrator makes thing easy with its layer panel options that provide a lot of assortment for controlling the layers and objects. It also makes it simpler to find minute things quickly. Try using layers and optimize your workflow in Adobe Illustrator.
Recommended Articles
This is a guide to Layers in Illustrator. Here we discussed steps for Creating a Layer in Illustrator and discussed the different sub-layer options, consolidated layers, and groups. You can also look at our other related articles to learn more –
