Updated June 2, 2023

Introduction to JUnit Eclipse
JUnit is an open-source java library; with the help of the JUnit library, we can perform the unit testing, or in other words, we can say that it is a unit testing framework. We can integrate JUnit with eclipse by adding the external jar file of JUnit. Basically, JUnit is used to test the small types of functionality, or we can say that a small module of an application is normally a single class. In JUnit, we perform the validation and verification of functionality that means developed functionality work as per the customer requirement or not that should be checked in JUnit. Basically, it is a java class library, but it is included in eclipse.
JUnit Eclipse Overviews
- Unit testing is a significant part of Test Driven Development (TDD) as it helps discover issues in the code as right on time as could be expected, particularly when you create changes to the current code you can run unit tests again to ensure that the progressions don’t break the application (that is regression testing). In addition, as a software engineer, you ought to compose and run unit tests to guarantee that your code meets its plan and acts as expected.
- Furthermore, JUnit is one of the most well-known unit testing systems for Java advancement. JUnit is upheld by practically any Java IDEs and assemble tool; in this way, it is the default selection of developers to test their code. Furthermore, obscuration has awesome help for JUnit – the IDE is delivered with JUnit as its default testing library. Consequently, composing and running unit tests with JUnit in Eclipse is fast, simple, and useful.
Test case structure in JUnit are as follows:
In TDD, the littlest unit can be tried as a strategy. Normally you compose a test class to test a particular class, and the test class contains some test techniques that test the functionalities of the class being tried.
Suppose, for example; we have an arithmetic class as follows:
Code:
public class Arithmetic{
public int sum(int x, int y){
return x + y;
}
Public int mul(int x, int y){
return x * y;
}
}
Explanation:
- Here we created an Arithmetic class, and it has two methods that sum() and mul() as shown in the above class.
- Now we need to write the test script for the above class. But, first, we must ensure that the above class working is fine, and we need to follow the below structure in JUnit as follows.
Code:
import org.junit,*;
public class ArithmeticTest{
@BeforeClass
Public static void setup(){
}
@Test
public void testsum(){
}
public void testmul(){
}
@After
public void teardown(){
}
}
Explanation:
- The above example shows how to write the test script in JUnit, basically providing the different notations as shown in the above code.
Using JUnit Eclipse
Now let’s see how we can use JUnit in eclipse as follows:
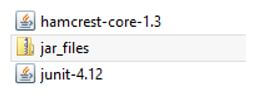
The first step is to add the external jar file into eclipse. After completion of the jar file, we need to extract that file as shown in the following screenshot as follows.
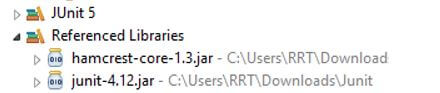
Now create a project and add this JUnit library into a created project, as shown in the following screenshot as follows.
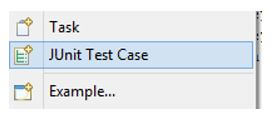
Now we need to create the JUnit class into a created project. So click on our project, select new, and here we have the JUnit Test Case option as shown in the following screenshot as follows.
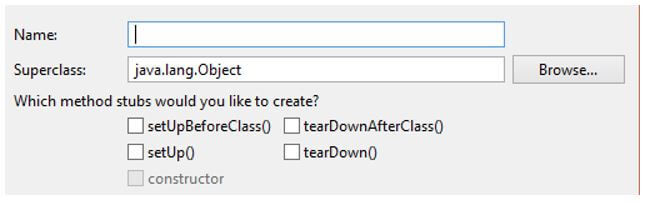
So just click on the JUnit Test Case option, fill in the required information, and start writing the test script. So now we have the right setup, we can start writing the script as per the requirement. In eclipse, we have one more way to set up the JUnit. That is, we can also use maven to set up the JUnit. Then, with the help of different notations, we can write our own test script in JUnit.
Creating a JUnit in Eclipse
Now let’s create JUnit in eclipse as follows:
In the above point, we already seen how we can add jar files into an eclipse and how we can create the JUnit Test Case.
Example:
Here we have already created a project that is day_1. First, we need to verify the JUnit installation. After that, we can write the test script.
During the creation of the JUnit Test Case class, we need to assign the name of the class, and we select different notations for those we require, as shown in the following screenshot as follows.
First, create the demo class and write the following code as follows.
Code:
package day_1;
public class demo {
private String msg;
public demo(String msg){
this.msg = msg;
}
public String DisplayMsg(){
System.out.println(msg);
return msg;
}
}
Explanation:
- In the above code, we created a demo class file and tried to print the message on the console with the help of this class.
Now create the JUnit Test class file, here we created a sample.java class file and write the following code as follows.
Code:
package day_1;
import org.junit.Test;
import static org.junit.Assert.assertEquals;
public class sample {
String str = " Hi Welcome in JUni";
demo msgutil = new demo(str);
@Test
public void testPrintMessage() {
assertEquals(str,msgutil.DisplayMsg());
}
}
Explanation:
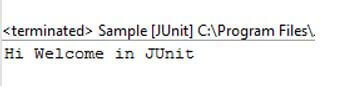
- In this, actually, we write the code to run the demo.java class file as shown. For the execution of this file, we need to right-click on the file and select Run as JUnit Test. The final output of this program we illustrated by using the following screenshot as follows.
Output:
How to Set JUnit Eclipse?
Now let’s see how we can set JUnit in eclipse as follows:
After the successful installation of JUnit, we can access the JUnit library. There are two ways to set up the JUnit in eclipse maven and jar file.
So we need to follow some steps to set up the JUnit as follows:
- First, we need to create the project into eclipse.
- After that, we need to create the simple java class file and JUnit Test Case file.
- After writing the code into both files, we need to right-click on the JUnit Test Case file and select Run as an option.
- Inside the Run, as an option, we have 1JUnit Test Command to run the JUnit Test Case class.
Conclusion
From the above article, we have taken in the essential idea of the JUnit eclipse, and we also saw the representation and example of the JUnit eclipse. From this article, we have seen how and when we use the JUnit eclipse.
Recommended Articles
This is a guide to JUnit Eclipse. Here we discuss the introduction, overviews, creating a JUnit in eclipse, and setting it. You may also have a look at the following articles to learn more –
