Updated March 14, 2023
How to Install Selenium IDE
Selenium IDE (Integrated Development Environment) is the automated tool used to develop test cases. It is both a time-saver and an awesome way of learning Selenium syntax. It records what the user’s actions are in the browser by the help of Selenium commands along with the parameters defined with the context of that particular element. It is generally the most efficient way to develop test cases and an easy to use Chrome as well as Firefox extension. In this article, we will discuss how to Install Selenium IDE.
Selenium IDE is well known for :
- Resilient Tests: What Selenium IDE does is that it will record all locators for each element it is going to interact with one locator gets failed during playback then the others will still be tried until and unless one is successful.
- Control Flow: Selenium IDE comes with loop structures like if, while and times which is an extensive control flow structure,
- Reuse of Test Case: By using the run command, we can re-use one test case that is inside of another, say, permitting us to use again and again logic of login in many places throughout a suite.
- Plugins: Through the use of plugins, Selenium IDE can be extended. They can be integrated with a third-party service.
Steps to Install Selenium WebDriver
Below are the Steps to Install Selenium Web Driver:
Step 1: Java Installation
- Download and install the latest Java Software Development Kit (JDK) from www.oracle.com/technetwork/….
- The advantage of JDK is that it comes together with Java Runtime Environment (JRE), thus saving you time and effort to download and install the JRE separately.
- When the installation is done, open command prompt and type java. You’ll get a list of details about it.

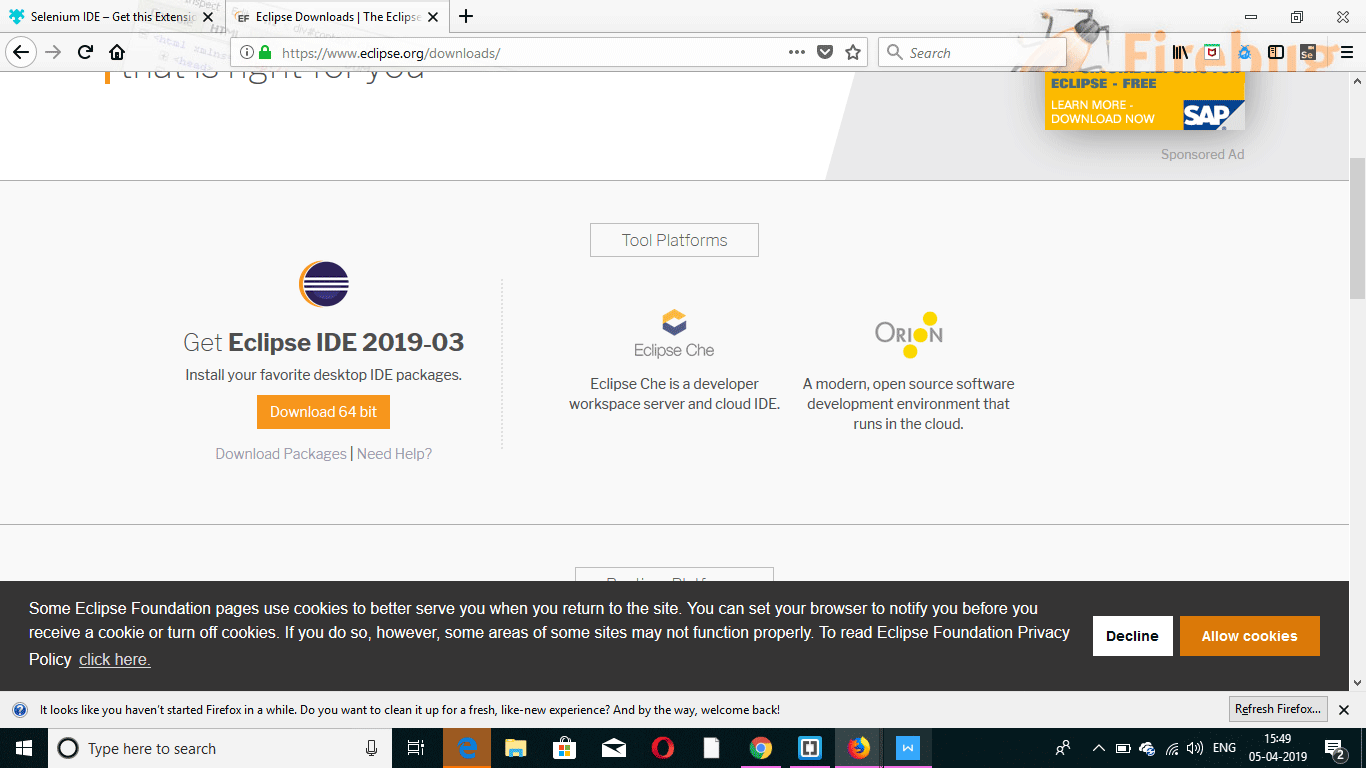
Step 2: Eclipse IDE Installation
- Download and install the latest version of “Eclipse IDE” from https://www.eclipse.org/downloads/. Take care when choosing between Windows 32 bit and 64-bit versions. An exe file would be downloaded as “eclipse-inst-win64”.
- After the installation procedure is done, click on Launch. This would launch Eclipse IDE.
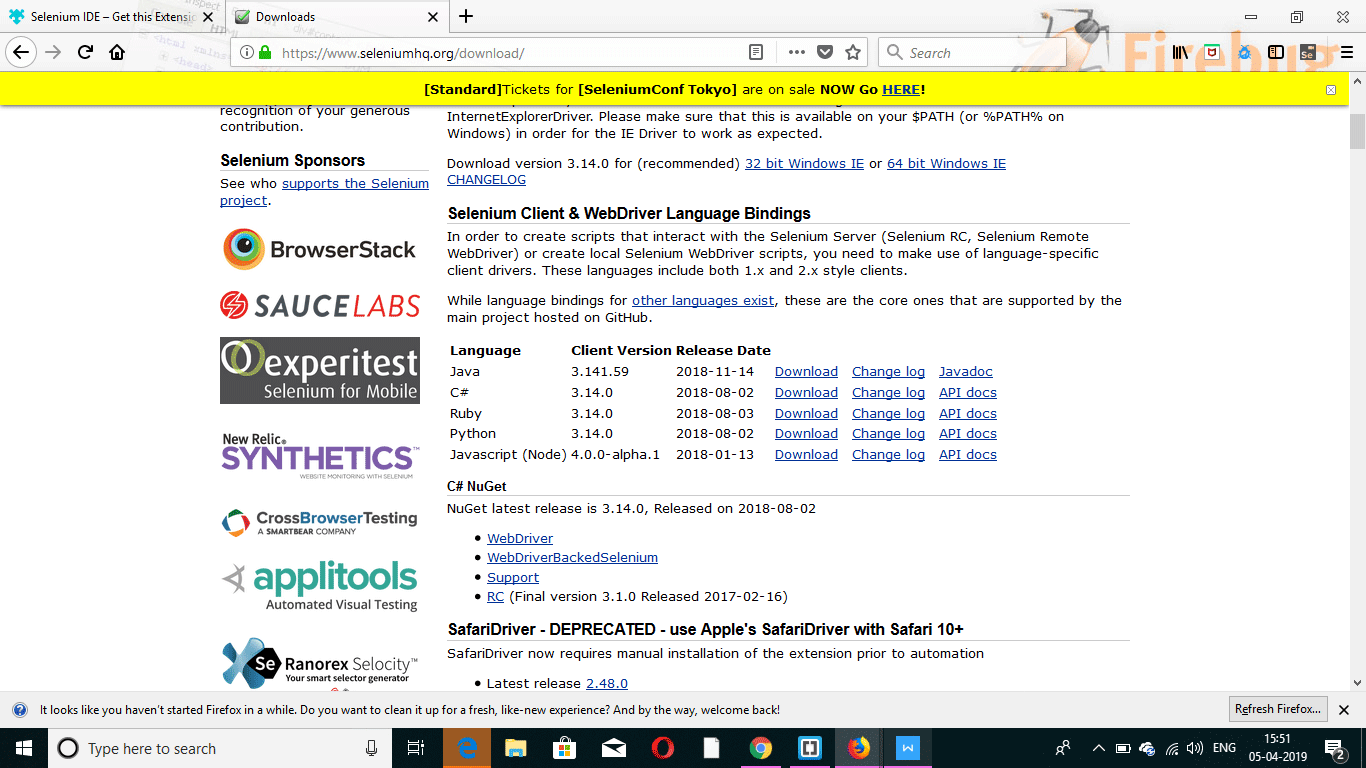
Step 3: Selenium Java Client Driver Installation
- Download the Selenium Java Client Driver from https://www.seleniumhq.dev/. Choose the client driver for Java. This will download the zipped file named “selenium-2.25.0.zip”.
Configure Eclipse IDE with WebDriver
- Open Eclipse IDE. Create a new project thereby navigating to File > New > Java Project. You can name it whatever you desire. Then click on Finish Button.
- Right-click on the created project in Package Explorer and select New > Package and name the package as “pack”.
- Create a new Java class in the pack by selecting New > Class by right-clicking on it. You can name it whatever you desire.
- Now right-click on your project and click on Properties. Next, click on Java Build Path. Click on the Libraries tab and then “Add External JARs”. Select all files inside the lib folder and also outside the lib folder. When added, click on the “Apply and Close” button.
- At last click, OK and all the Selenium libraries would be imported into the project.
Steps to Install Selenium IDE
Selenium IDE does not require any additional setup except simply installing the extension on your browser. The steps are mentioned below :
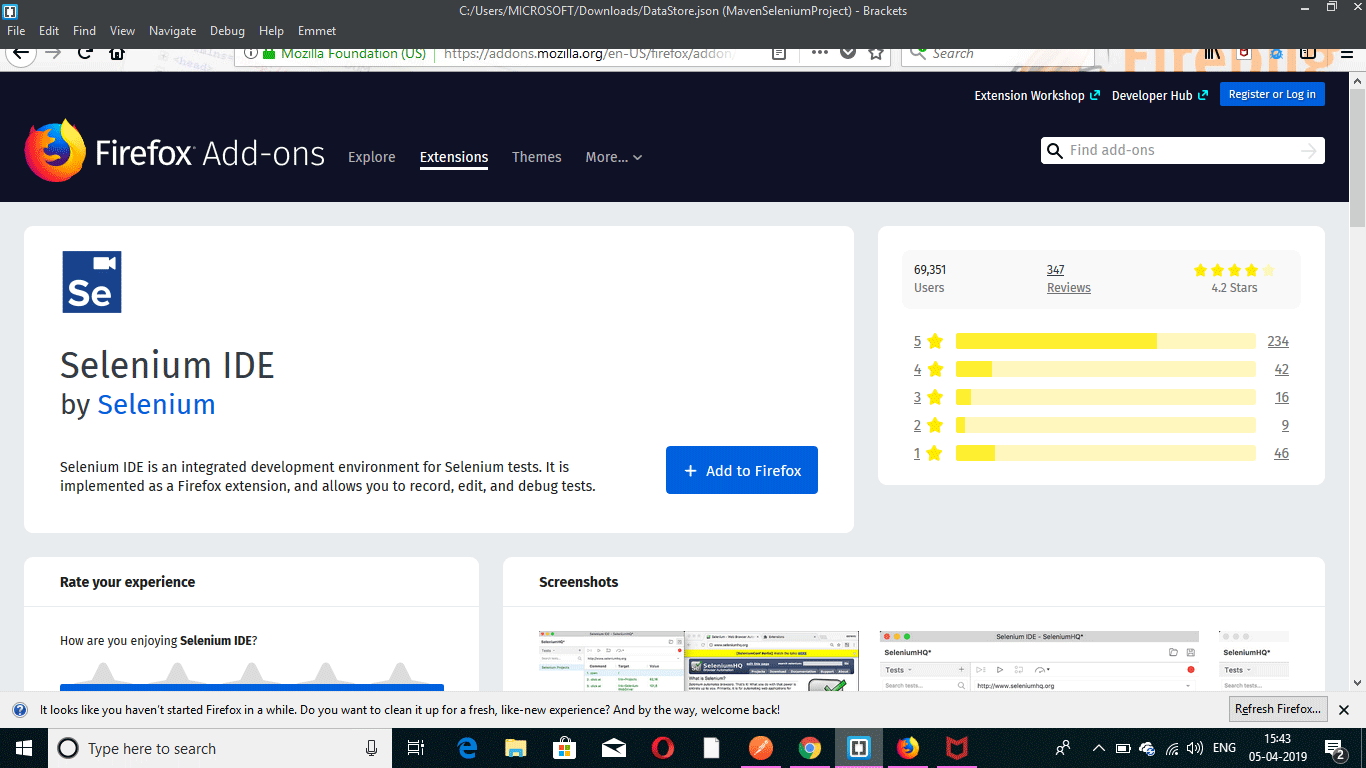
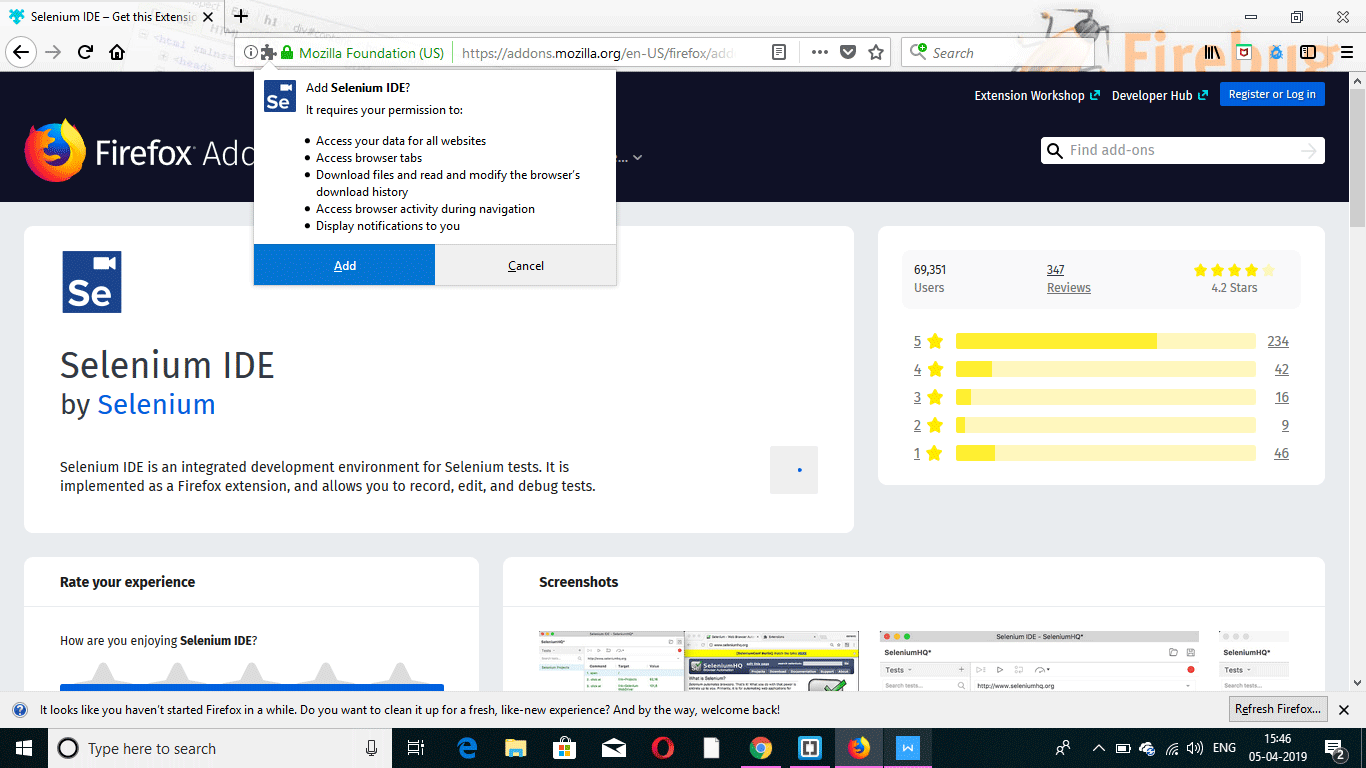
Step 1: Open Firefox Browser and navigate to https://addons.mozilla.org/en-US/firefox/addon/selenium-ide/. A window will open up. Click ‘Add to Firefox’.
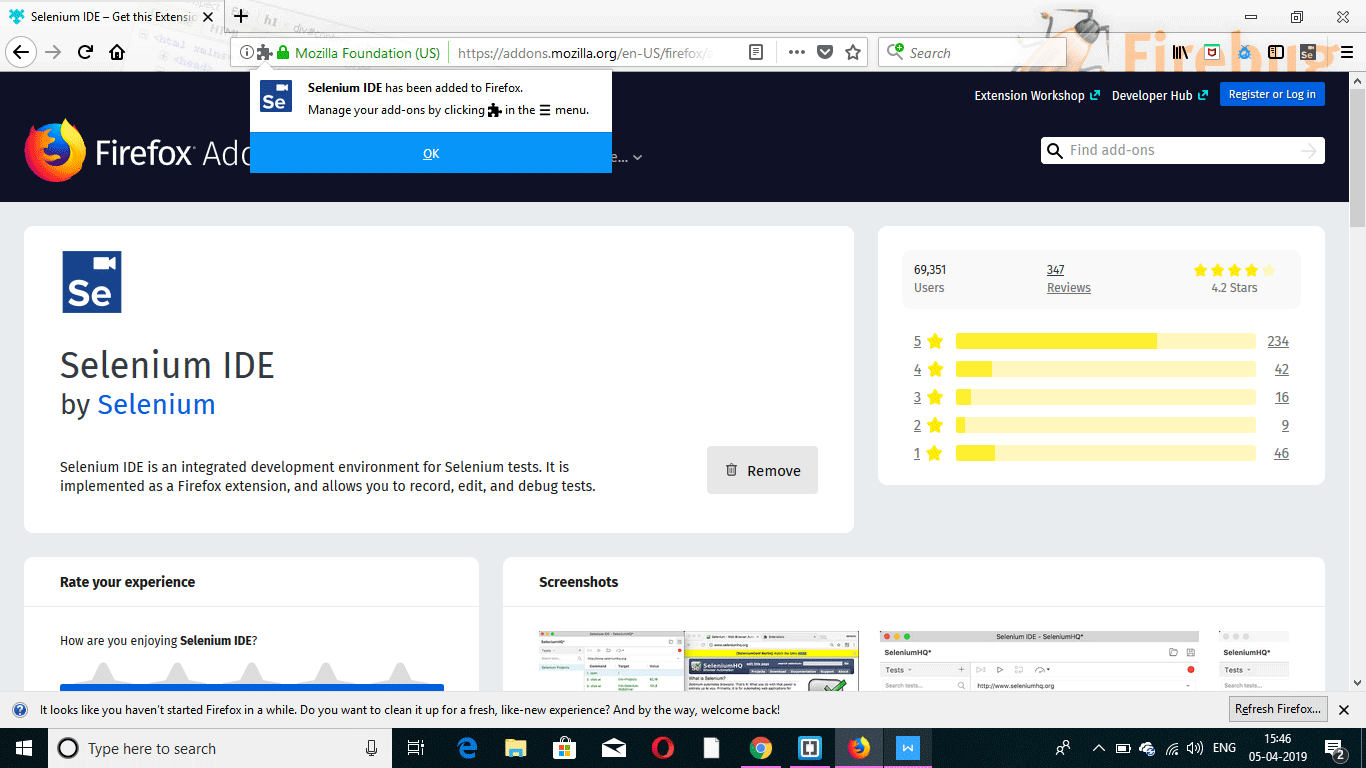
Step 2: Wait for the download to be completed. After that, click “Add.”
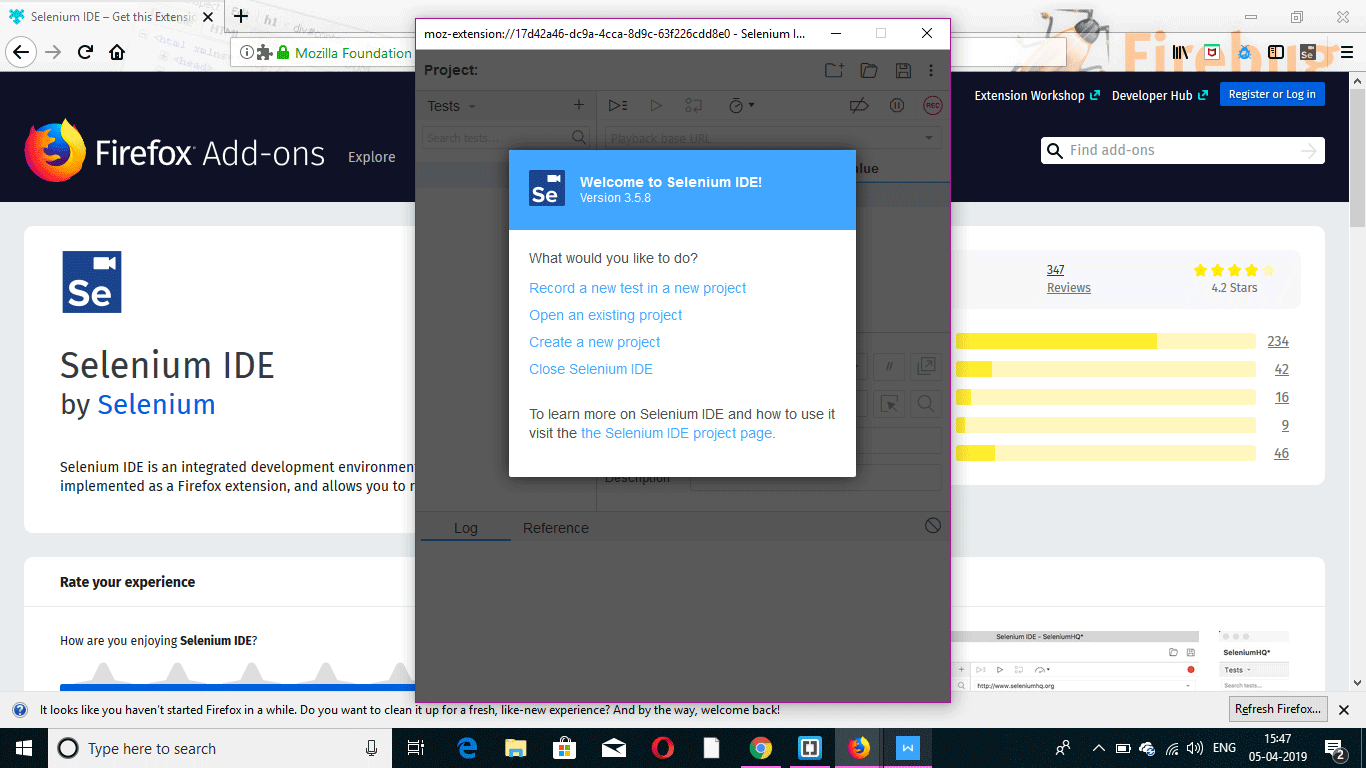
Step 3: Installation would be completed. After that click on ‘OK’.
Step 4: You would see a Selenium IDE icon on top. After clicking on it, Selenium IDE would open.
User Extensions
Selenium IDE supports many user extensions in order to render high-level capabilities. These are in the format of JavaScript.They can be installed by mentioning their absolute path in any of the below two fields in an Options dialog box.
- Selenium Core extensions: Filename is user-extensions.js
- Selenium IDE extensions
Plugins
Selenium IDE also supports Firefox plugins that are created by other users. The installation procedure is the same as you do with other add-ons.
Selenium IDE has 4 plugins by default:
- Selenium IDE: Ruby Formatters
- Selenium IDE: Python Formatters
- Selenium IDE: Java Formatters
- Selenium IDE: C# Formatters
The mentioned four plugins are used by Selenium IDE to convert Selenese which is Selenium language into other different formats.
Features of Selenium IDE
Below are some of the features of selenium ide which are as follows:
1. Actions Menu
- Record: Record feature will record all the actions that are made on the browser. It basically transforms the Selenium IDE into the recording mode.
- Play the current test case: This feature would play the current test case which had been created or recorded.
- Playtest suite: This feature would play all the test cases that are related to the current test suite.
- Pause/Resume: This feature can pause or resume the execution at any point of time.
2. Options Menu
This particular menu will allow the user to set various settings provided by the Selenium IDE. Some of these settings are mentioned below :
- Default Timeout Value: This setting represents how much time ( milliseconds ) that Selenium is going to wait for a test step to execute before it generates an error.
- Enable experimental features: When this particular field is checked for the very first time, different formats that are available will be imported into IDE.
- Remember base URL: When this particular field is checked, users would remember the URL each time that they launch it. It’s mandatory to mark it as checked.
- Record assertTitle automatically: When this particular field is checked, the assertTitle command would automatically be inserted for every visited web page along with the target value.
3. Help Menu
Help Menu is generally used to list down notes and official documentation for users.
4. Edit Menu
This menu allows users to Undo, Redo, Cut, Copy, Paste, Delete, Select All, Insert New command and Insert new comment.
Recommended Articles
This has been a guide to the Install Selenium IDE. Here we discuss how to Install Selenium IDE, its prerequisites and the steps regarding the installation. You can also go through our other suggested articles to learn more –

