Updated March 13, 2023
Introduction to Java 8
Before entering the how to install Java 8 part, we would first have a general overview of Java 8.
- Version detail – Java SE 8(LTS)
- Release date – March 2014
- Support till – March 2015
- Latest Version – Java SE 12
Always there is an Alpha release for the new addition in front of developers before the application goes for the beta release (to the community). By doing this, they get adequate responses regarding any issue and how to fix them. A kind of testing and certification process before it goes to the open community.
How to Install Java 8?
There are several OS on which JAVA 8 support to work:
- Windows
- Mac
- Linux
- Solaris
Here we will see how to install Java 8 on Windows.
Be familiar with some terminologies:
- JDK – Java development kit.
- JRE – Java runtime.
The official name of JDK is Java Platform Standard Edition of Java SE; this is a mandatory platform for writing any Java program. This JDK is available free from an ample number of websites (but I prefer the sun microsystem website).
The mother site of JDK is Oracle.
So, on the last thing, before we work on the installation part:
JRE is used to run the Java programs, whereas JDK, which has a combination of JRE plus other development tool kit, is used for writing and also to run the Java programs. One can say JRE is a subset of JDK. A user needs to have both for the proper working of the Java platform. To Install Java 8, we need Java SE 8.
Steps to Install Java 8 on Windows
Given below are the steps required to install Java 8:
Step 1: Just check in your system if there is a previous version available by default; if yes, then uninstall it to start with a fresh new version – Java 8.
Go to ‘Control Panel’ > to ‘Programs and features’ > Uninstall all the Java programs and Plug-ins like Java SE development kit, Java SE runtime, and update files.
Step 2: Type “Java SE”, which will lead you to the main site of Oracle. A user will get several links to download (prefer the official website).

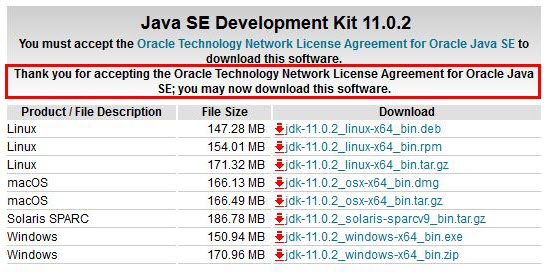
Step 3: Once the link appears, click on the ‘Downloads’ section, which will take you to the below-mentioned screen. The download page contains the entire working version download link with multiple platforms.
It looks something like this:
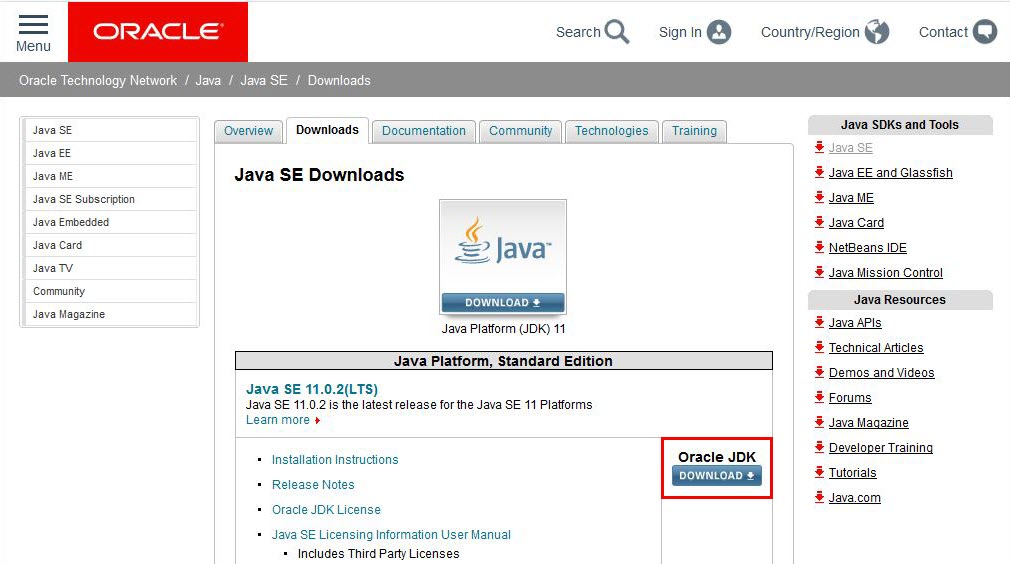
Below is the image file:
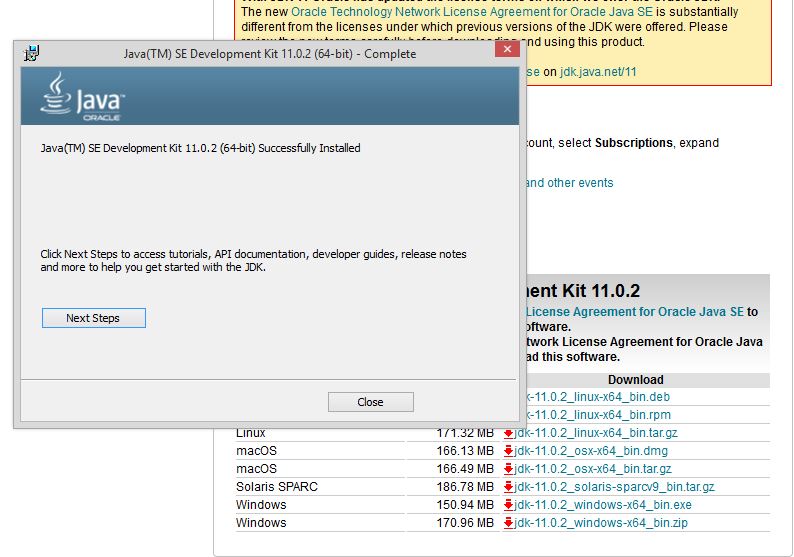
Step 4: Once a user clicks on the download button, all the available platform details for that version are popped up, have a look at the screen.
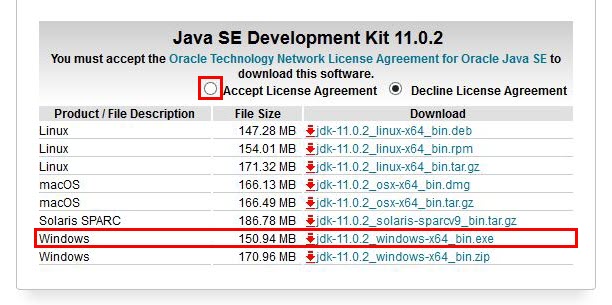
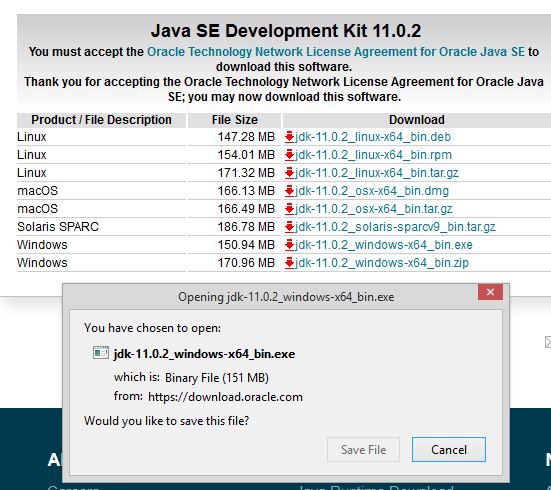
Step 5: We will go with Windows. Exe file, you have to accept the license agreement radio button before the process starts; otherwise, an error message will appear.
Some screens before the actual download happen.

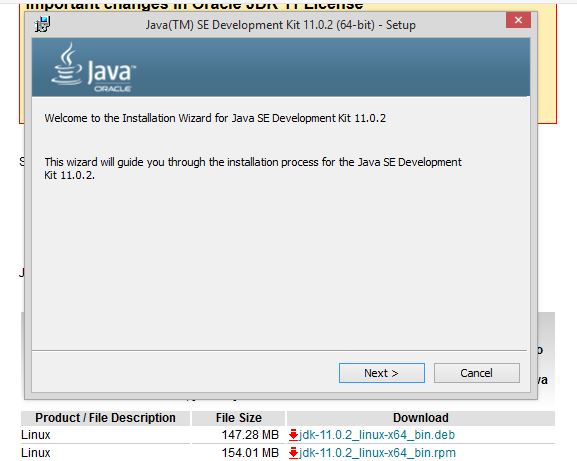
Step 6: Once the download is complete, you will get the below screen to initiate the installation of the software. This screen is called an “Installation kit for JE’”. This is a welcome screen where a user has to press the ‘Next button and move to later stages in the download process.
Step 7: This screen depicts some useful action that has to be taken by the user. It holds some crucial information lets see the screen, and then we will continue with the discussion.
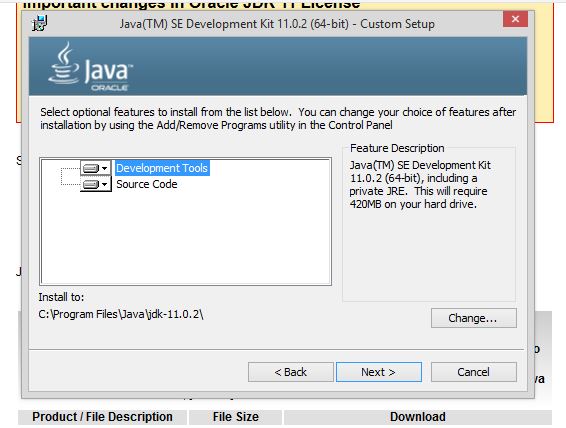
The decision a user has to make here is to select what all tools and code he needs to install Java 8. He can choose among the ‘Development tools’ and ‘Source code’ option available. Also, one more crucial decision is regarding the path location as known as “Install to”. The application will create its own directory by default; otherwise, a user has to select some specific folder by clicking on the ‘Change’ button.
Step 8: Once this is done, you have to perform 1-2 steps in the installation process until you get this screen. You have to stop your work as the installation is complete.
Step 9: With this, you are left with some minor but important settings adjustments. The environment setup, which has path details and classpath details, are even crucial to fix.
The path variable gives the address or the location of the javac, java file. The Classpath variable gives the address of the library files.
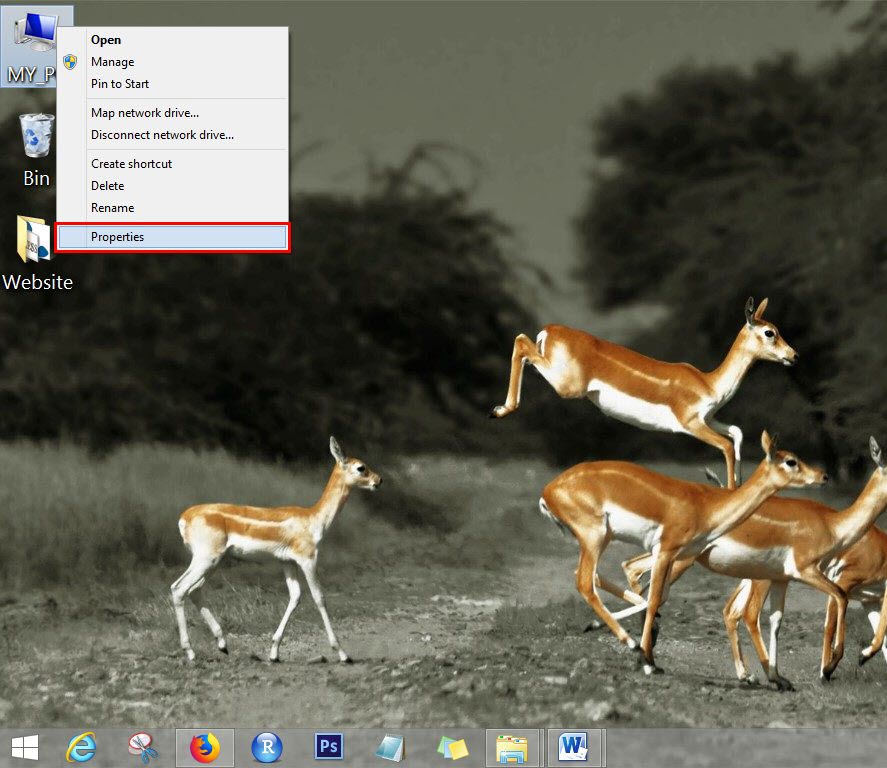
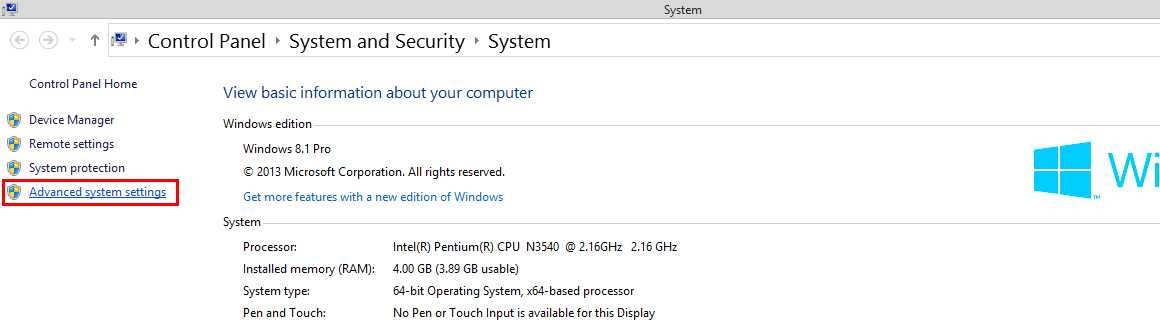
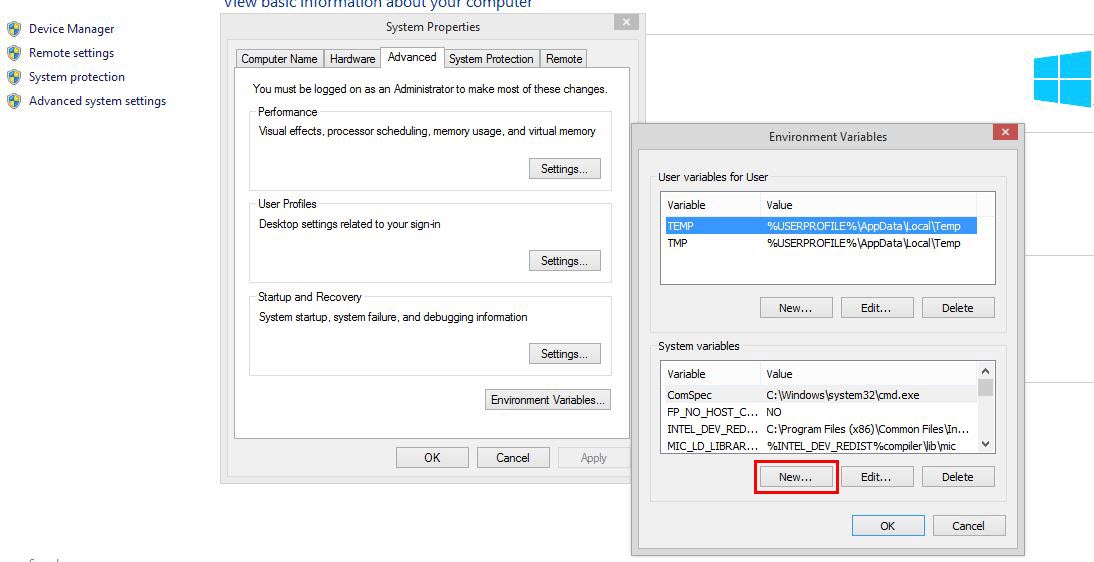
Step 10: To start the two processes, we have to see the above two screens; we have to go to System Settings. Go to the ‘MY PC’ option and click the ‘Properties’ option. With this, you will see the setting screens open up; from here, navigate to the ‘Advanced System settings’ section. Once you click it, you will get the below mentioned screen.
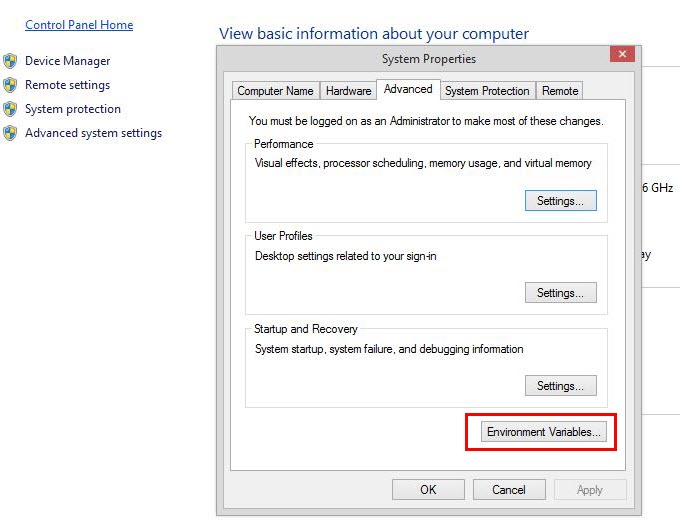
Click on the ‘Environment Variable’ button and follow the process.
In the Environment variable screen, you have to press the ‘New’ button, which will take you to the next screen.
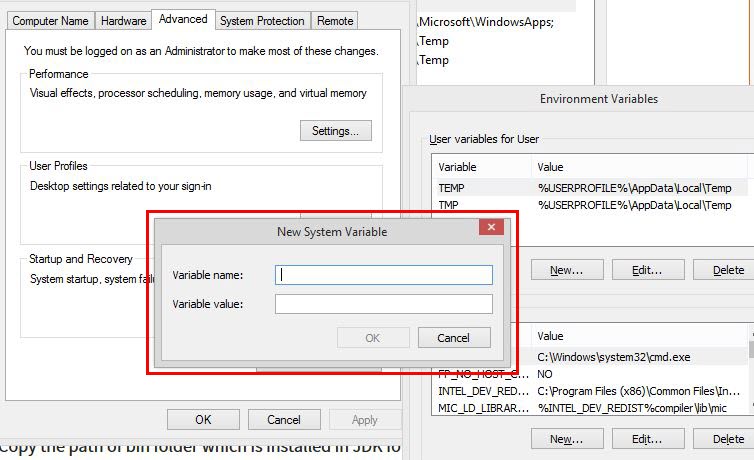
Here a user has to define ‘New System Variable’; you have to mention the pathname and then Copy the path of the bin folder, which is installed in the JDK folder.
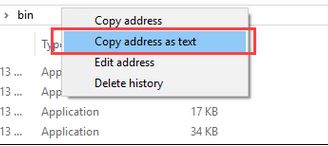
Paste Path of bin folder in Variable value and click on OK Button.
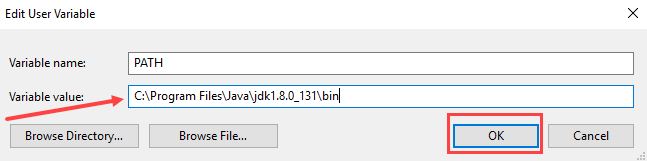
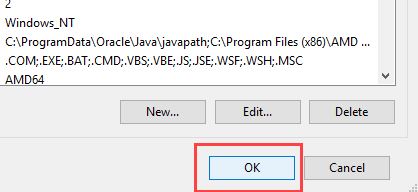
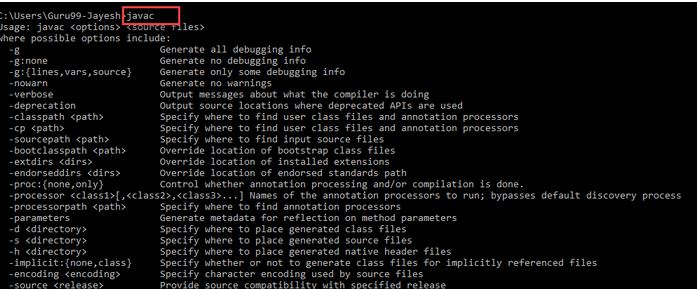
Click on the ‘OK’ button to complete the path creation work. Now go to the Command prompt window and type the following command to cross-check if the process is complete. The following screen suggests that users successfully install Java 8.
A user has to type ‘Javac’ in the command window to conform – refer to the below screen.
Features
Now since you have successfully done with the installation process, let’s see what Java can help you with.
Java 8 enables its users with the following benefits:
- Lambda expressions
- Method references
- Functional interfaces
- Stream API
- Default methods
- Base64 encode decode
- Static methods in the interface
- Optional class
- Collectors class
- ForEach() method
- Parallel array sorting
- Nashorn JavaScript engine
- Type and repeating annotations
- IO enhancements
- Concurrency enhancements
- JDBC enhancements
Recommended Articles
This has been a guide to How to Install Java 8. Here we have discussed the basic instructions and different steps of installing Java 8 in an easier and simplest manner. You may also look at the following articles to learn more –
