Introduction to GIMP resize layer
In this article, we are going to learn how to resize layer in GIMP. Layers are useful parts of the creating images as it allows us to stack images on top of each other, while everything remains in a single file and single image. Layers can be transparent and semi-transparent, and we can also apply different blend modes to change the behaviour of a layer. So, layers are very helpful if you are experimenting with stuff so you can add and remove parts without doing any permanent change in the original image. Since each layer can be controlled independently, we can create powerful image compositions our of it; and one important factor s to resize the layer, which we are going to learn.
Steps to GIMP resize layer
Different steps of GIMP resize layer are mentioned below:
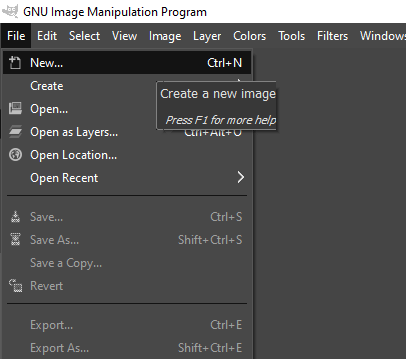
Step 1: Let’s start by creating a new composition from the file menu or press Ctrl + N. You can also start from an image, but since we are going to make a composition with two images, we will first create a new image.
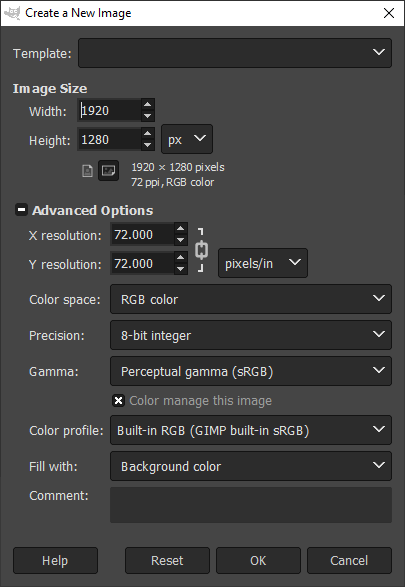
Step 2: In the create a new image dialog box, we have set the image width and height to 1920 by 1280 px in rgb color mode with 72 ppi since we are not printing which is in landscape mode. Leave other advanced options to their default values.
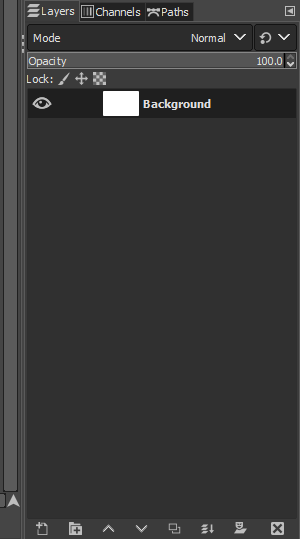
Step 3: In the layers panel, you can see there is a background layer. If the layers panel is not open, then you can press Ctrl + L or open it from the windows menu.
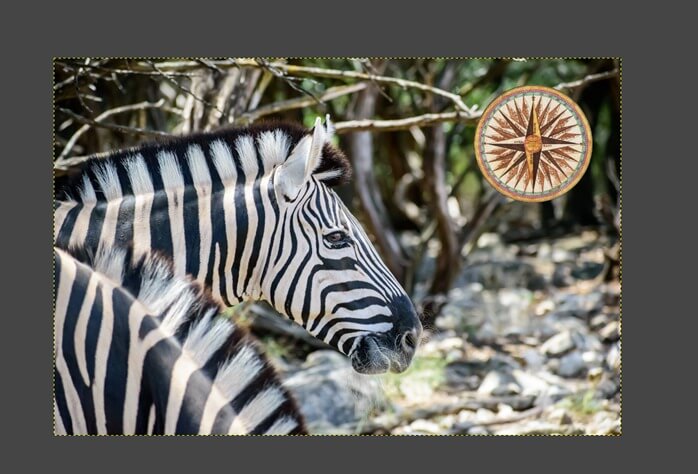
Step 4: Next, we will open an image as a layer; for that, go to the File menu and then Open as Layers… or press Ctrl + Alt + O
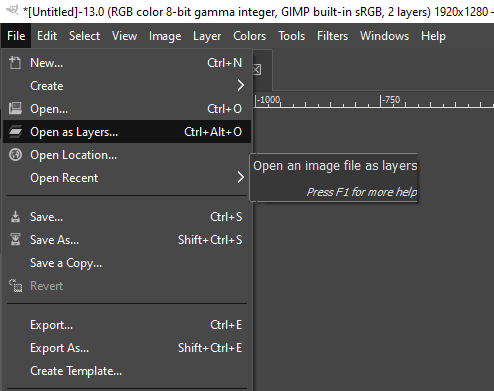
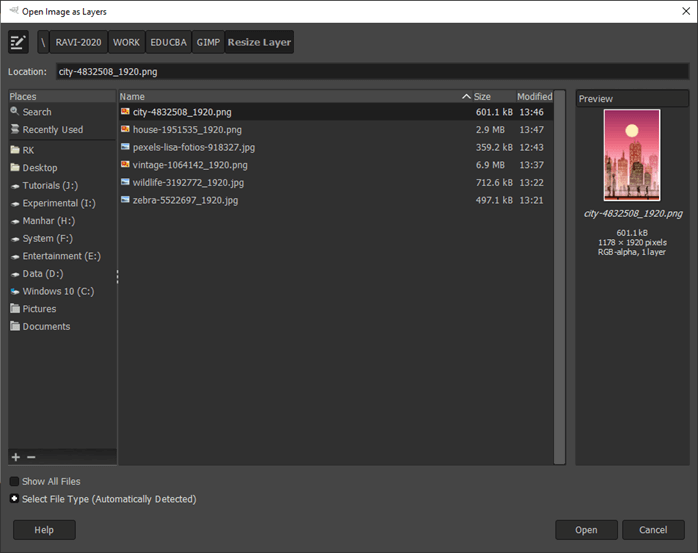
Step 5: Navigate to the location of the image file on your computer and click open.
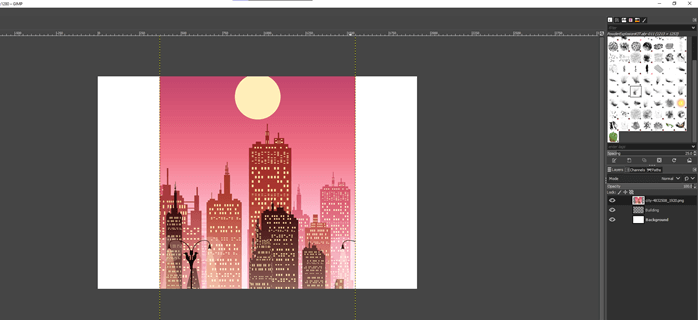
Step 6: As we can see, the image is placed at the centre but is in not in proper size.
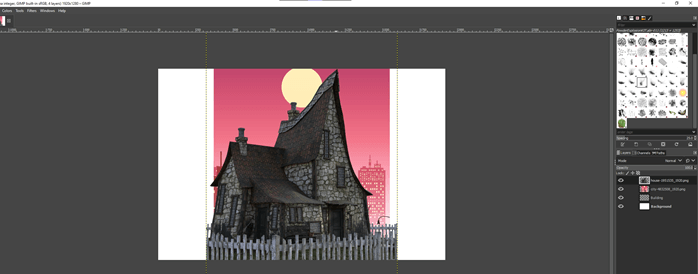
Step 7: Following the above steps, open a second image as a layer.
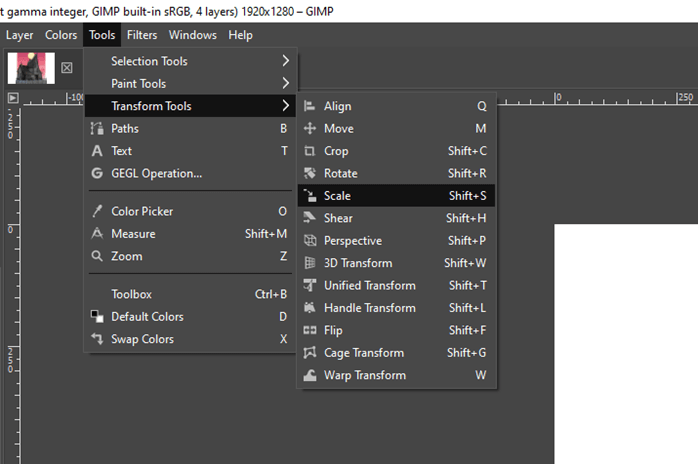
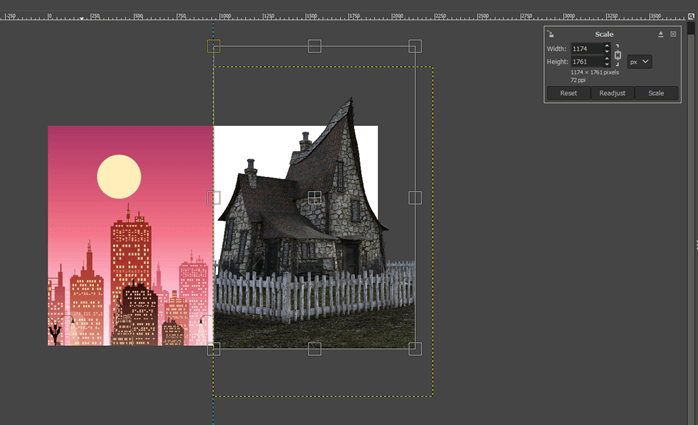
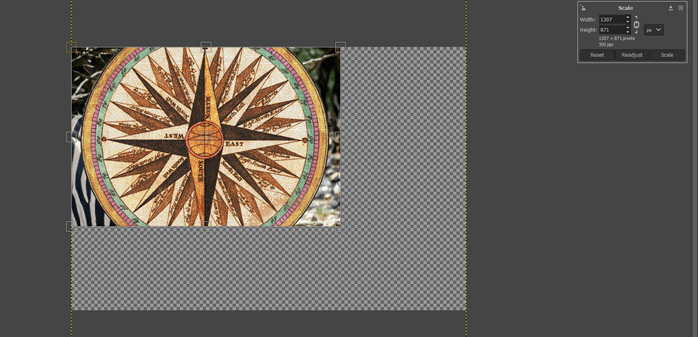
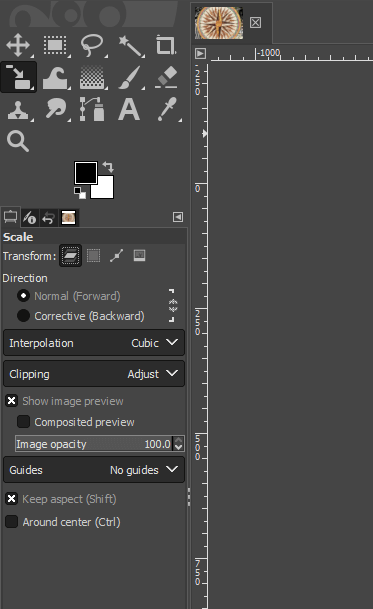
Step 8: To make the image in proper dimensions for our composition, we have to scale the image; for this, we go to Tools -> Transform Tools -> Scale or press Shift + S
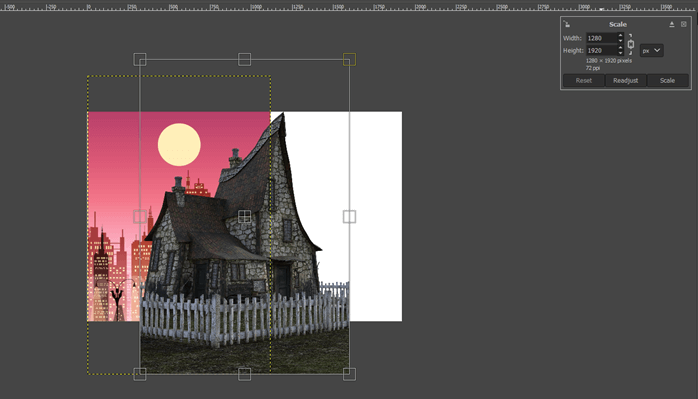
Step 9: You will get the handles on the image in which you can put the exact dimensions or drag the handle bars to scale. If you press shift, this will change the aspect ratio of the image and stretch it. Also, you can change the aspect ratio if you unlink the linked icon from the scale popup menu. But we will scale and align the image as shown. Finally, you can zoom out to see the full composition by pressing Ctrl and mouse wheel.
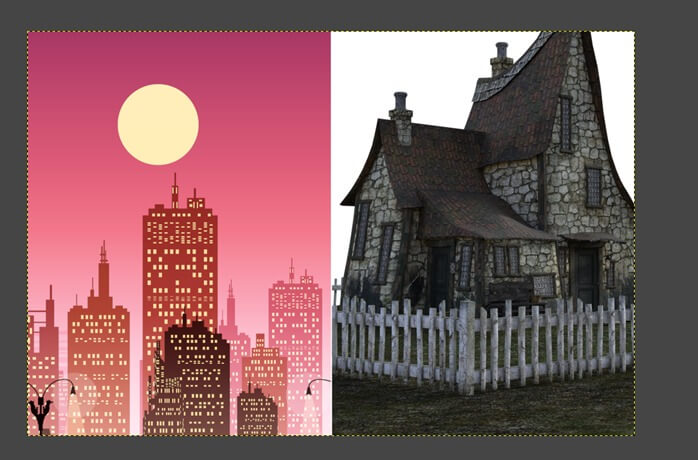
Step 10: In order to measure the exact value of how much to scale or shrink the layer, we can use a guide. So, let’s create a guide from Image -> Guides -> New Guide (by Percent). If you want to remove a guide, simply drag it outside of the image.
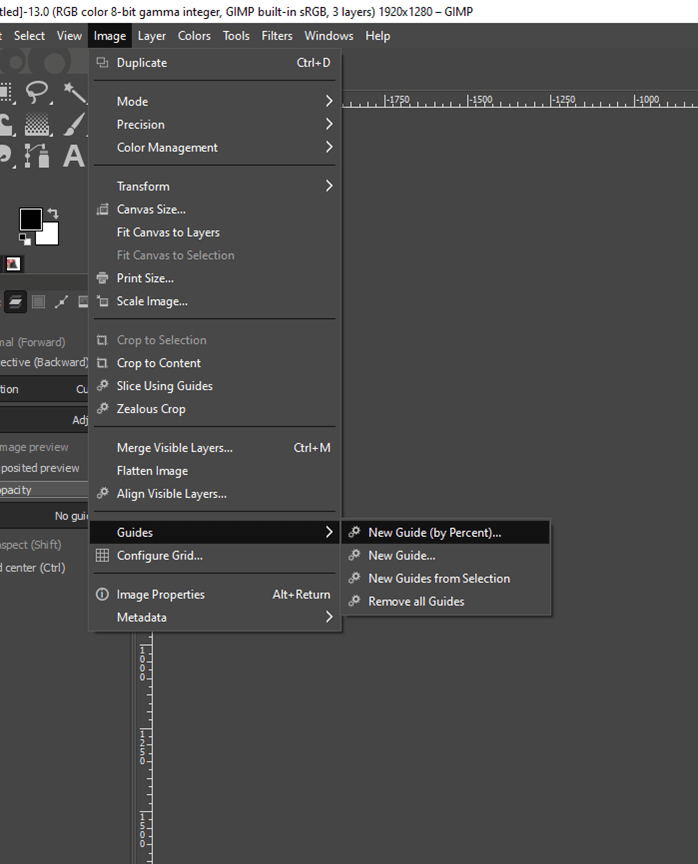
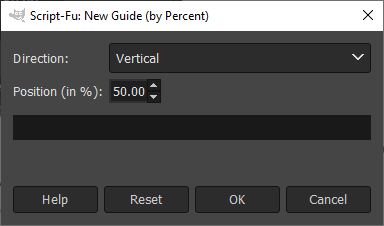
Step 11: For direction, there is an option for horizontal or vertical; we keep Vertical and at 50% of the composition.
Step 12: Now, first, we will scale and move, which you can also do from the centre transform handle and snap the right side of the image to the guide as a reference. Make sure you turn on snap to guides in the view menu.

Step 13: Select another image layer and repeat the same steps of scaling and moving for the second image.
Step 14: You can hide the guides from the view menu or press Ctrl + Shift + T to get a proper view.
Step 15: So, we have resized our layers in GIMP to create an image composition.
Step 16: Another use of resizing layers is to scale multiple layers within an image. First, we will drag an image on which we want to work from the explorer or go to File -> Open.
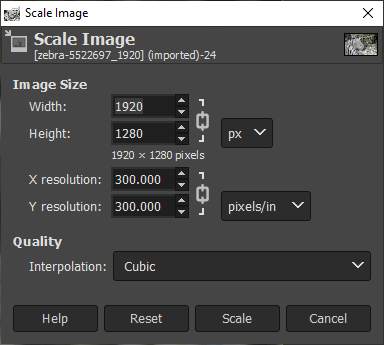
Step 17: One method to scale image is to go in Image -> Scale Image
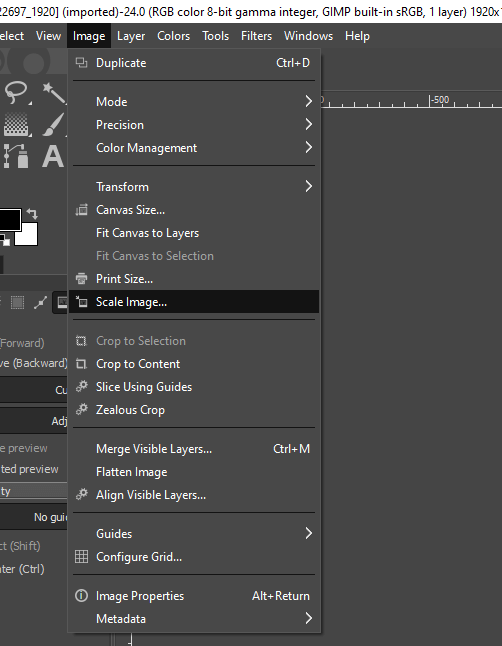
Step 18: This gives us various options for size and resolution as well as the quality, which adds or removes pixels depending on the type of interpolation, which affects the speed and quality of the results.
Step 19: Another option is to use a scale tool which you can drag and change the scale.
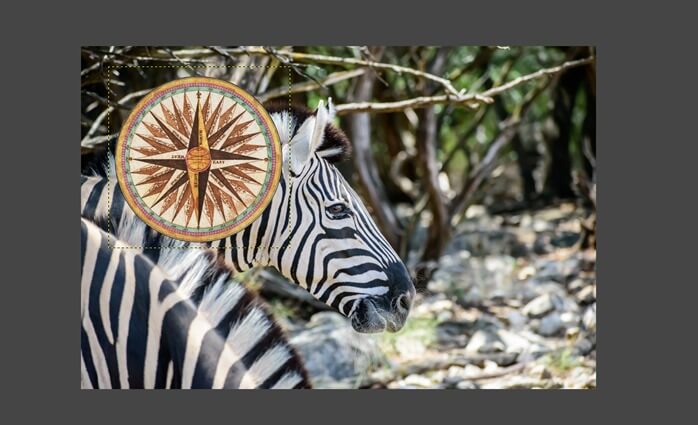
Step 20: Now, we will open an image which we will resize over the top of an image. For this, first, open the image. Now, if we use the two previous methods, which were to scale from the image menu or from the scale tool, it will resize the entire image.
Step 21: This will be the result if we scale the image. Which we do not want because we want to scale a particular layer and not the entire image. So, undo this step from the edit menu or press Ctrl + Z
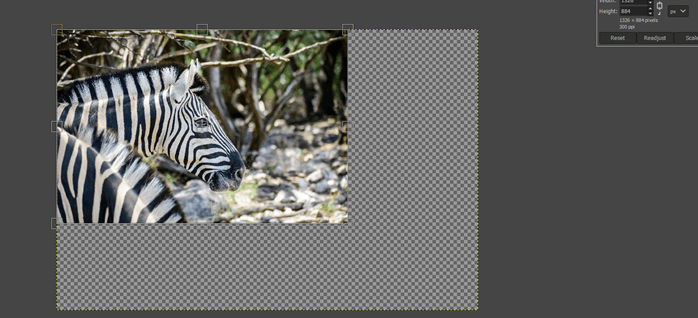
Step 22: The scale tool gives us the option to scale a layer, selection, path, or image. Up until now, we were just scaling images, but now, we will scale the layer by selecting the first transform icon.
Step 23: So now drag the image to get the appropriate size by using the corner handles
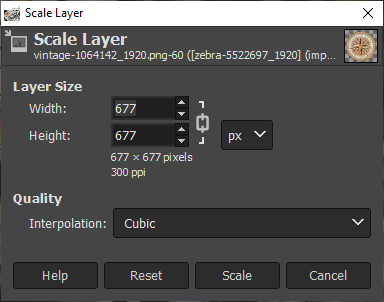
Step 24: Another option is to go to the Layer menu and then go to Scale Layer, which will also be used to change the size to the layer contents.
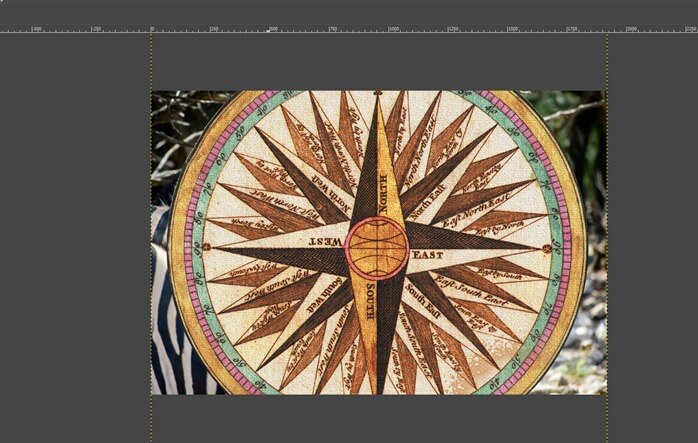
Step 25: Then move it in the proper position to get a look which we want in our composition, which is an image on top of another image. Hence, we have completed resizing layers in GIMP.
Conclusion
In this article, we have seen how to resize layers in GIMP. Furthermore, we have seen different methods by which we can scale images and layers. First, we have scaled individual images and created a composition with the help of guidelines, and then we have combined two images on top of one another by resizing layers to get the desired effect without resizing the entire image.
Recommended Articles
This is a guide to GIMP resize layer. Here we discuss how to resize layers in GIMP and different methods in which we can scale images and layers. You may also have a look at the following articles to learn more –
