EDUCBA

EDUCBA

MENUMENU
  • Free Tutorials
  • Free Courses
  • Certification Courses
  • 280+ Courses All in One Bundle
  • Login

Fisheye Effect in Photoshop

By Preeti PrajapatiPreeti Prajapati

Home » Design » Design Tutorials » Photoshop Tutorial » Fisheye Effect in Photoshop

Fisheye Effect in Photoshop

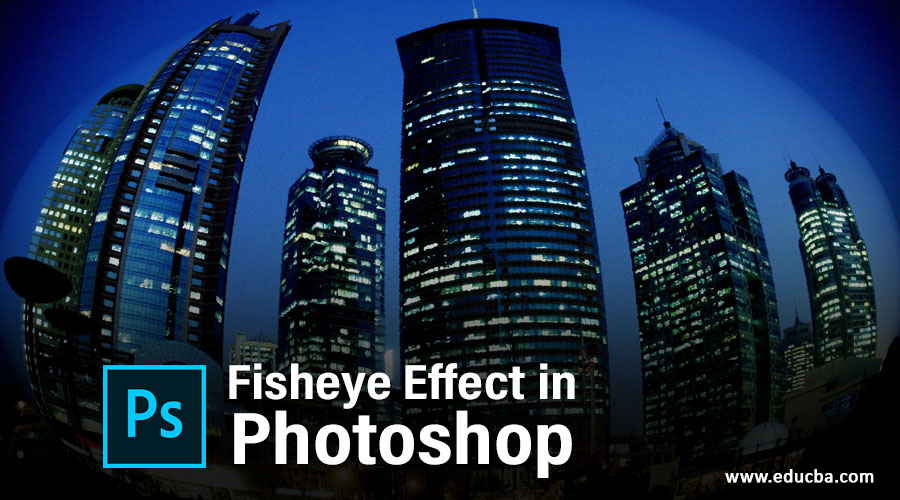
Introduction to Fisheye Effect in Photoshop

Photoshop is raster graphics editing software that was developed by Adobe Systems and widely used by the image editing professionals. We can make good and creative effects in this software by using its exciting features and techniques. Fisheye is one of the effects through which you can apply lens type effect on your image and make an effective image with your own creative idea. In this article, we will have a look at the parameters of the fisheye effect and learn about how we can apply this effect on our image for making it different from normal images. So let us discuss this topic in a very exciting manner.

How to Apply Fisheye Effect in Photoshop?

You can apply this effect on your image for getting the best result in your work by just following a few simple steps of this effect. So for a better understanding of this topic let us have a look at the user interface of this software so that there will be no problem during our learning.

Start Your Free Design Course

3D animation, modelling, simulation, game development & others

Step 1: Starting from the top of the user screen there we have a bar which is called Menu bar which contains a number of the menu for managing different parameters of this software. Below this bar, we have a property bar of active tool or active image through which we can manage the parameter of that tool or image for making the change in them. Below this bar, we have some sections in which at the left side we have a toolbar which has the number of tools, at the center we have display window in which we can see our work, at the right side we have some tabs such as color, layer, and some others. You can make settings of all these sections as per your requirement.
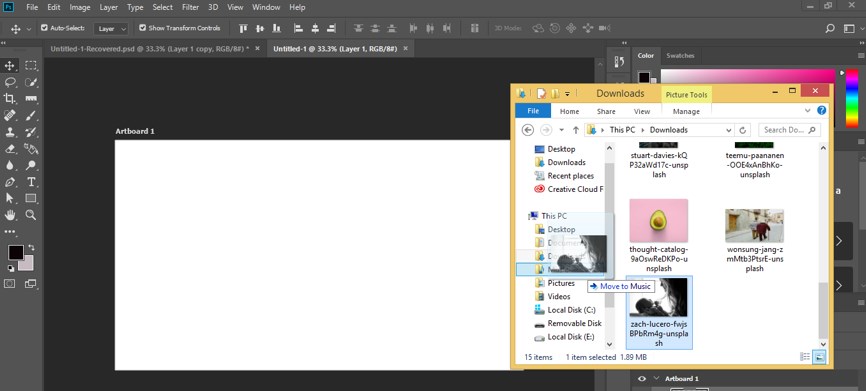
Menu bar

Step 2: First of all let us have an image for learning about this topic. You can have your own image for this purpose or download it from the internet. I will download it from the internet. Now open the folder of your saved image then pick it with mouse left button from there and go to display window area of Photoshop software and release the mouse button for dropping it there.

window area

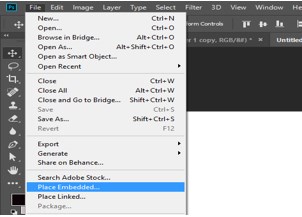
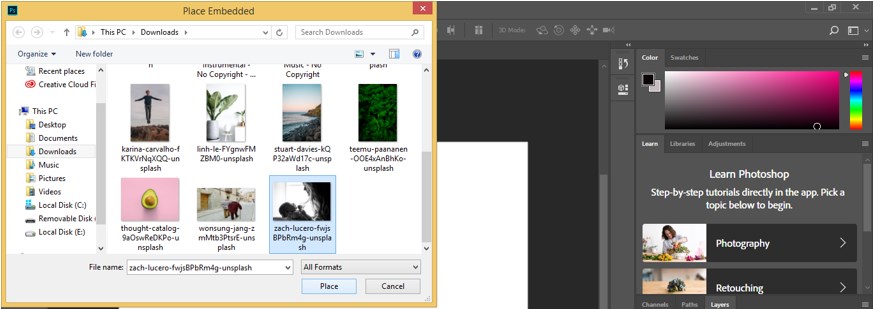
Step 3: Or you can go to the File menu of the menu bar and click on it. Click on Place Embedded option of the opened drop-down list with the mouse left button.

File menu

Step 4: Once you make click a Place Embedded box will be open for placing the image in this software. Select your desired image by click on it then click on the Place button of this dialog box for placing the image.

Popular Course in this category
Photoshop Training (9 Courses, 12+ Projects)9 Online Courses | 12 Hands-on Projects | 78+ Hours | Verifiable Certificate of Completion | Lifetime Access
4.9 (7,062 ratings)
Course Price

View Course

Related Courses
Adobe Premiere Pro Tutorial (2 Courses, 7+ Projects)All in One Design Bundle (280+ Courses, 100+ projects)

place Embedded box

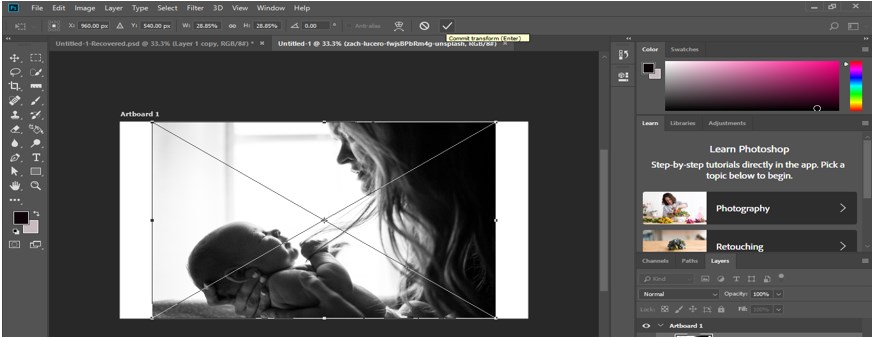
Step 5: Adjust the size of your image according to you then click on the Commit Transform button of the property bar of this image or you can press the enter button of the keyboard.

Commit Transform button

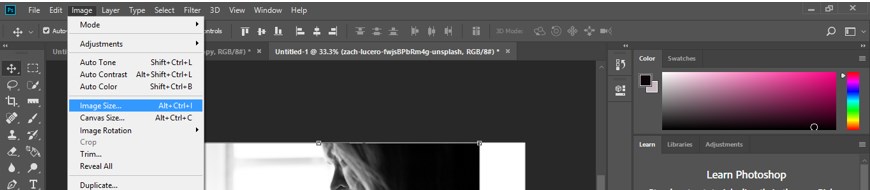
Step 6: Now go to the Image menu of the menu bar and click on the Image size option of the drop-down list for further changing the size of the image.
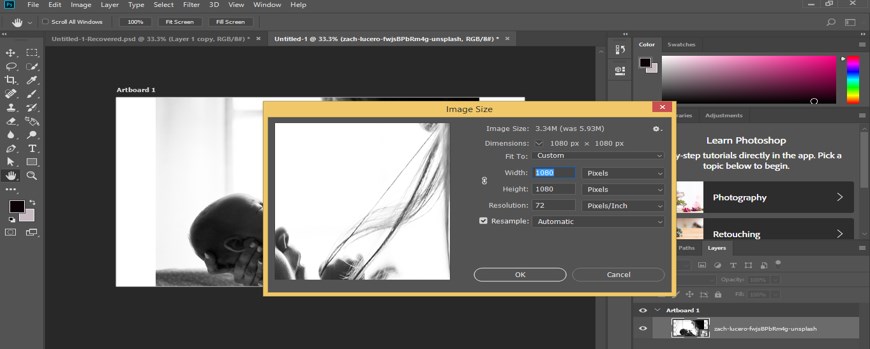
Image size option

Step 7: I want to make a square image so I will give some value in the box of Width and Height of this image then press the Ok button of this Image size box. I am making this image square so that the fisheye feature of this software can give its effect properly.

Image size box

Step 8: Now I will rename this image. For renaming make double click on the name of the image and name it as per your choice. I will name it as Pic 1.

rename

Step 9: Now press Ctrl + J for making the copying of this image for future use.

Fisheye Effect in Photoshop - 9

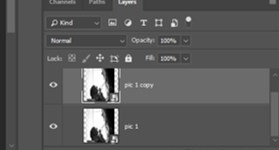
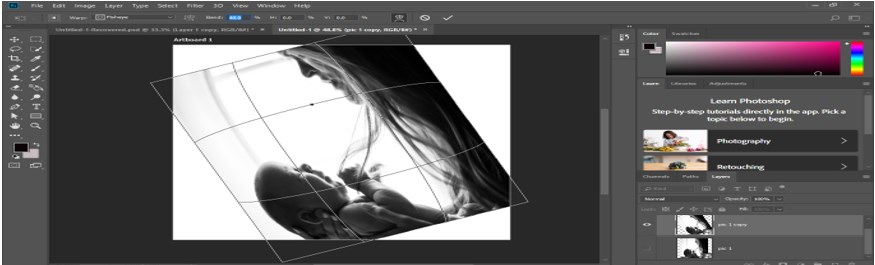
Step 10: Now press Ctrl + T button from the keyboard for rotating this image like this and click on the tick mark of the property bar of this image for applying this transform.

Fisheye Effect in Photoshop -10

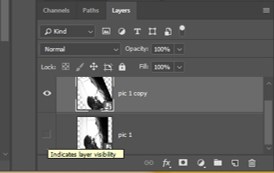
Step 11: Now go to the layer panel of this software and click on the eye button of the Pic 1 layer for hiding it.
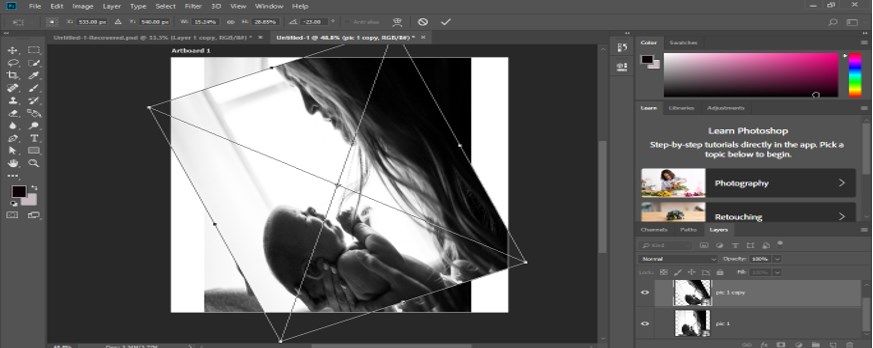
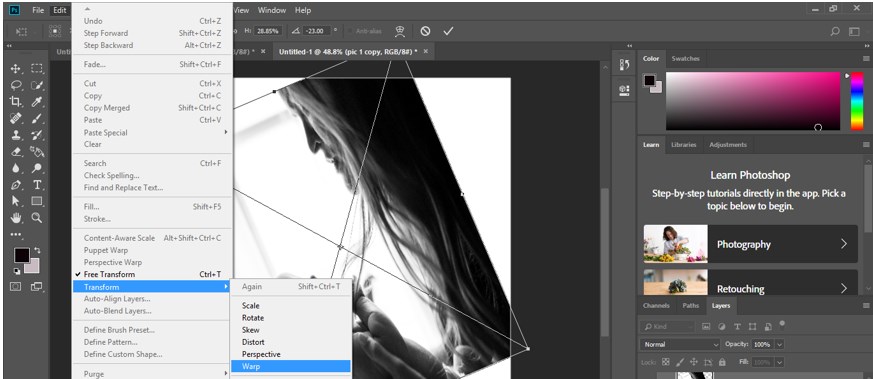
Fisheye Effect in Photoshop - 11

Step 12: Now again press Ctrl + T for transform box around this image. Make right-click with the mouse button and choose Warp option from the drop-down list of the transform box by click on it.

Fisheye Effect in Photoshop - 12

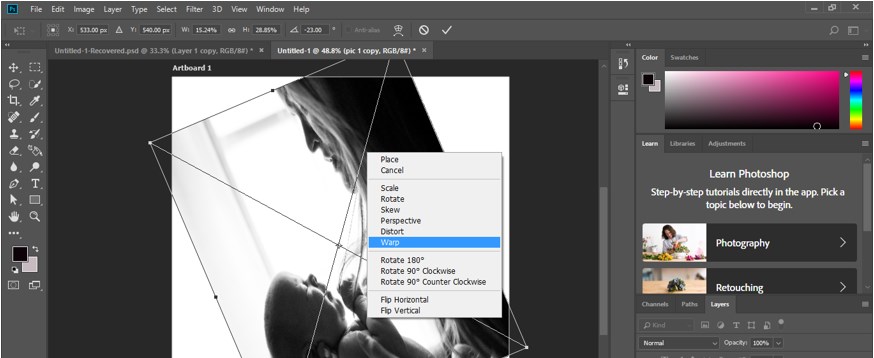
Step 13: Or you can go to the Edit menu of the menu bar of this software and go to the Transform option of the drop-down list. Choose the Warp option from the new drop-down list by click on it.
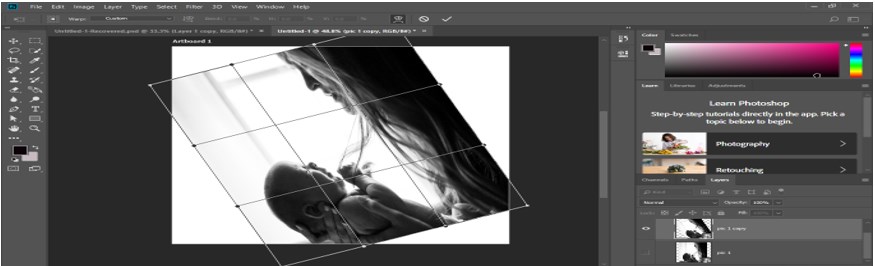
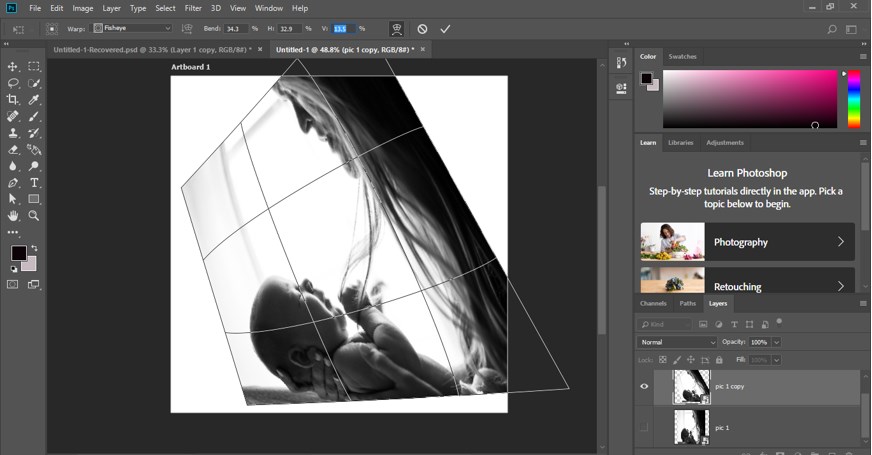
Fisheye Effect in Photoshop - 13

Step 14: Once you make click a warp a bounding box will come around your image like this.

Fisheye Effect in Photoshop - 14

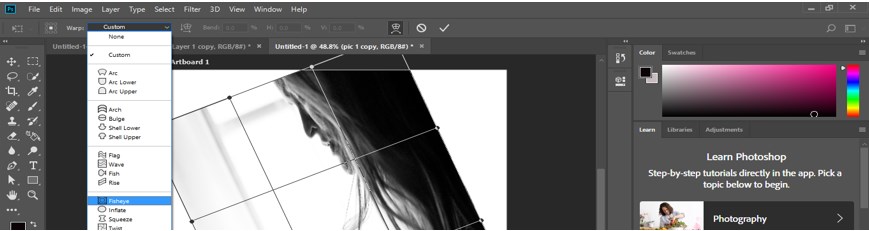
Step 15: Now click on the drop-down arrow of the Custom option of property bar of Warp and click on the Fisheye option of drop list of warp.

Fisheye Effect in Photoshop - 15

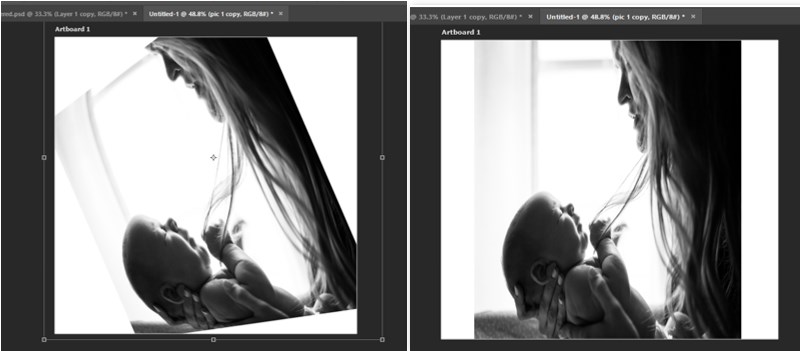
Step 16: Once you click on the Fisheye option warp bounding box will change like this.

Fisheye Effect in Photoshop - 16

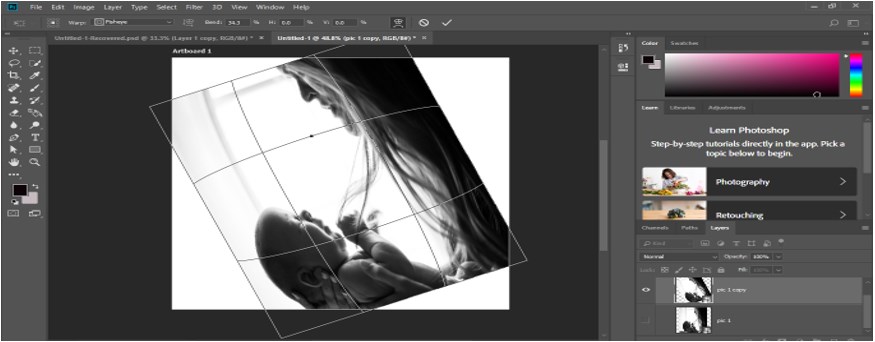
Step 17: You can increase the value of the Bend option of the property bar of warp for increasing the effectiveness of an eye on your image like this.

Fisheye Effect in Photoshop - 17

Step 18: You can change the value of the H option of the property bar of warp option for changing the horizontal scale value of this image.

Fisheye Effect in Photoshop - 18

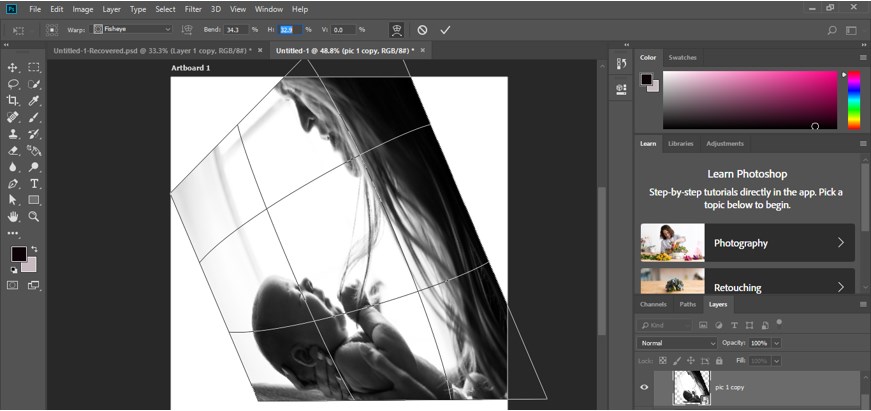
Step 19: You can change the value of the V option of the property bar of warp option for changing the vertical scale value of this image.

Fisheye Effect in Photoshop - 19

Step 20: Once you did, make click on the ‘commit transform’ tab of the property bar of the warp or press enter button of the keyboard.

Fisheye Effect in Photoshop - 20

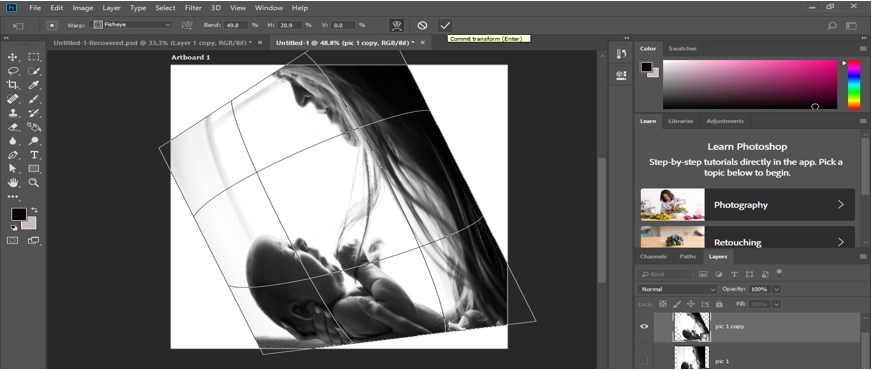
Step 21: And your image will look like this. You can see the difference between the previous image and your edited image.
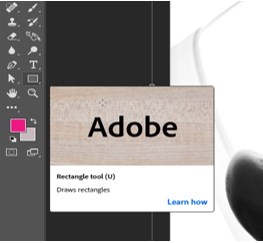
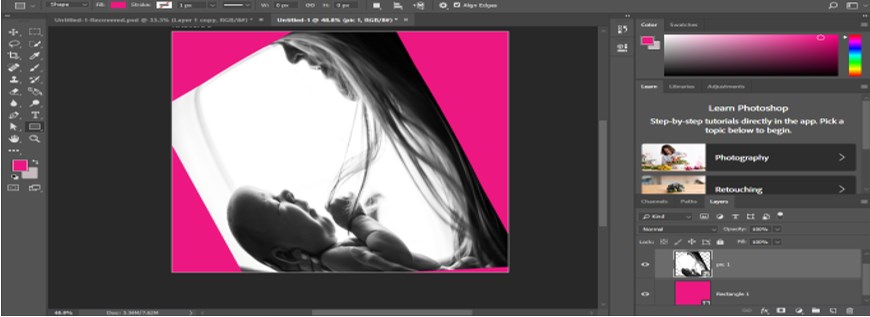
Fisheye Effect in Photoshop - 21

Step 22: Now take a rectangle tool from the toolbar of this software by click on it.

Fisheye Effect in Photoshop - 222

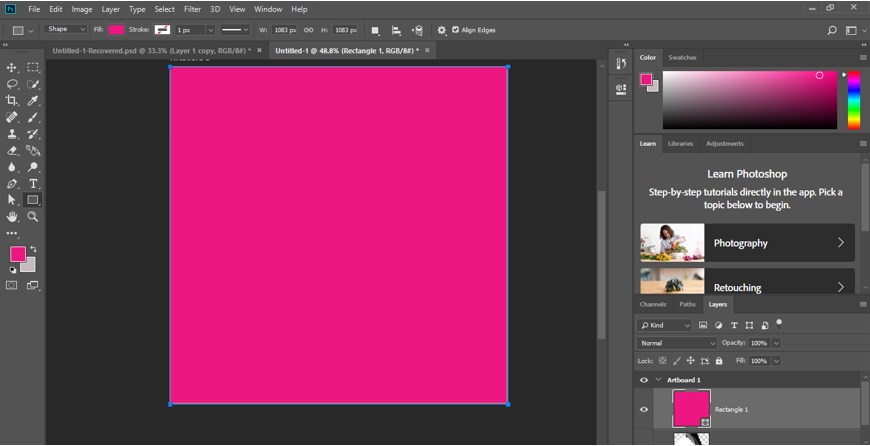
Step 23: And draw a rectangle like this with the help of a rectangle tool. You can change the color of this rectangle according to you.

Fisheye Effect in Photoshop - 23

Step 24: Now go to layer panel of this software and drag the image layer above to this rectangle layer with the help of the mouse left button.
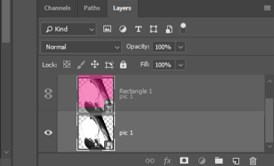
Fisheye Effect in Photoshop - 24

Step 25: Once you drag your image will come above this rectangle layer and you will find an effective image with the background. You can use your own idea for manipulating your image.

Fisheye Effect in Photoshop - 25

Conclusion

Now after this fisheye effect article of Photoshop software you can understand the Fisheye effect and can also analyze how you can apply this effect on your image for getting an effective result in your work. You can have a good command of your work by practicing on it.

Recommended Articles

This is a guide to Fisheye Effect in Photoshop. Here we discuss an introduction, how to use fisheye effect in photoshop in a step by step manner. You can also go through our other related articles to learn more –

  1. Metallic Effect Photoshop
  2. Portrait Effect in Photoshop
  3. Motion Effect in Photoshop
  4. Fire Effect in Photoshop

Photoshop Training (9 Courses, 12+ Projects)

9 Online Courses

12 Hands-on Projects

78+ Hours

Verifiable Certificate of Completion

Lifetime Access

Learn More

0 Shares
Share
Tweet
Share
Primary Sidebar
Photoshop Tutorial
  • Effects
    • Text Effects in Photoshop
    • Metal Text Effect in Photoshop
    • Reflection Effect in Photoshop
    • Snow Effect in Photoshop
    • Mirror Effect in Photoshop
    • Motion Effect in Photoshop
    • Oil Paint Filter in Photoshop
    • Plastic Effect in Photoshop
    • Rain Effect in Photoshop
    • Gold Text Effect in Photoshop
    • 3D Text in Photoshop
    • 3D Text Effect in Photoshop
    • Clipping Mask in Photoshop
    • Fill Color in Photoshop
    • Delete Background in Photoshop
    • Transparent Text in Photoshop
    • Make Logo in Photoshop
    • Blend Images in Photoshop
    • Website Layout in Photoshop
    • Change Hair Color in Photoshop
    • Change Color in Photoshop
    • Highlight Text in Photoshop
    • Change Text Color in Photoshop
    • Change Shirt Color in Photoshop
    • Filters in Photoshop
    • Portrait Effect in Photoshop
    • Fire Effect in Photoshop
    • Ice Effect in Photoshop
    • Metallic Effect Photoshop
    • Photoshop Font Effects
    • Glow Effects in Photoshop
    • Tree Brush Photoshop
    • Shiny Effect Photoshop
    • Morphing in Photoshop
    • Dispersion Effect in Photoshop
    • Photoshop Distort Effect
    • Typography in Photoshop
    • Photoshop Cinemagraph
    • Glitch Effect in Photoshop
    • Photoshop Straighten Image
    • Stamp Effect in Photoshop
    • Warp Image Photoshop
    • Fix Perspective in Photoshop
    • Vanishing Point in Photoshop
    • Fisheye Effect in Photoshop
    • Distortion Effect Photoshop
    • Resize Object in Photoshop
    • How to Paint in Photoshop?
    • How to Print in Photoshop?
    • Perspective Correction in Photoshop
    • Photoshop Sun Effect
    • Photoshop Gold Gradient
    • Night Effect in Photoshop
    • What is Masking
    • Photoshop Polaroid
    • Pixel Effect Photoshop
    • Vaporwave Photoshop
    • Vintage Effect Photoshop
    • Photoshop hologram effect
    • Templates in Photoshop
    • MP4 to GIF Photoshop
    • Photoshop Cheat Sheet
  • Basic
    • Introduction to Photoshop
    • What is Photoshop
    • Career in Photoshop
    • Install Adobe Photoshop
    • Plugins in Photoshop
    • Photoshop Versions
    • Uses Of Photoshop
    • Adobe Photoshop Shortcut Keys
    • Adobe Photoshop Commands
    • Adobe Photoshop
    • Is Photoshop Free
    • Top 10 Features in Adobe Photoshop
    • Layers in Photoshop
    • 10 Free UI Kits For to Download
    • Smart Objects in Photoshop
  • Tools
    • Adobe Photoshop Tools
    • Clone Stamp Tool in Photoshop
    • Eraser Tool in Photoshop
    • Selection Tool in Photoshop
    • Blur Tool in Photoshop
    • Eyedropper Tool in Photoshop
    • Move Tool in Photoshop
    • Paint Bucket Tool in Photoshop
    • Patch Tool in Photoshop
    • Pencil Tool in Photoshop
    • Line Tool in Photoshop
    • Color Replacement Tool in Photoshop
    • Background Eraser Tool in Photoshop
    • Burn Tool in Photoshop
    • Custom Shape Tool in Photoshop
    • Magic Wand Tool in Photoshop
    • Quick Selection Tool in Photoshop
    • Red Eye Tool in Photoshop
    • Ruler Tool in Photoshop
    • Sharpen Tool in Photoshop
    • Smudge tool in Photoshop
    • Sponge Tool in Photoshop
    • Rectangle Tool in Photoshop
    • Lasso Tool in Photoshop
    • Adobe Photoshop Elements tools
    • Photoshop Mixer Brush Tool
    • Watercolor Brushes in Photoshop
    • Artboard in Photoshop
    • Crop Tool in Photoshop
    • Healing Brush Tool in Photoshop
    • Transform Tool Photoshop
  • Interview Questions
    • Photoshop Interview Questions

Related Courses

Photoshop Training Course

Adobe Premiere Pro Training Course

Design Training Course

Footer
About Us
  • Blog
  • Who is EDUCBA?
  • Sign Up
  • Corporate Training
  • Certificate from Top Institutions
  • Contact Us
  • Verifiable Certificate
  • Reviews
  • Terms and Conditions
  • Privacy Policy
  •  
Apps
  • iPhone & iPad
  • Android
Resources
  • Free Courses
  • Photoshop Tutorial
  • 3ds Max Tutorial
  • All Tutorials
Certification Courses
  • All Courses
  • Design Course - All in One Bundle
  • Photoshop Course
  • Maya Course
  • Unreal Engine Course
  • Unity Course
  • DaVinci Resolve Course
  • Pro Tools Course

© 2020 - EDUCBA. ALL RIGHTS RESERVED. THE CERTIFICATION NAMES ARE THE TRADEMARKS OF THEIR RESPECTIVE OWNERS.

EDUCBA Login

Forgot Password?

EDUCBA
Free Design Course

3D animation, modelling, simulation, game development & others

*Please provide your correct email id. Login details for this Free course will be emailed to you
Book Your One Instructor : One Learner Free Class

Let’s Get Started

This website or its third-party tools use cookies, which are necessary to its functioning and required to achieve the purposes illustrated in the cookie policy. By closing this banner, scrolling this page, clicking a link or continuing to browse otherwise, you agree to our Privacy Policy

EDUCBA

*Please provide your correct email id. Login details for this Free course will be emailed to you
EDUCBA
Free Design Course

3D animation, modelling, simulation, game development & others

*Please provide your correct email id. Login details for this Free course will be emailed to you

Special Offer - Photoshop Training (9 Courses, 12+ Projects) Learn More