Updated August 25, 2023
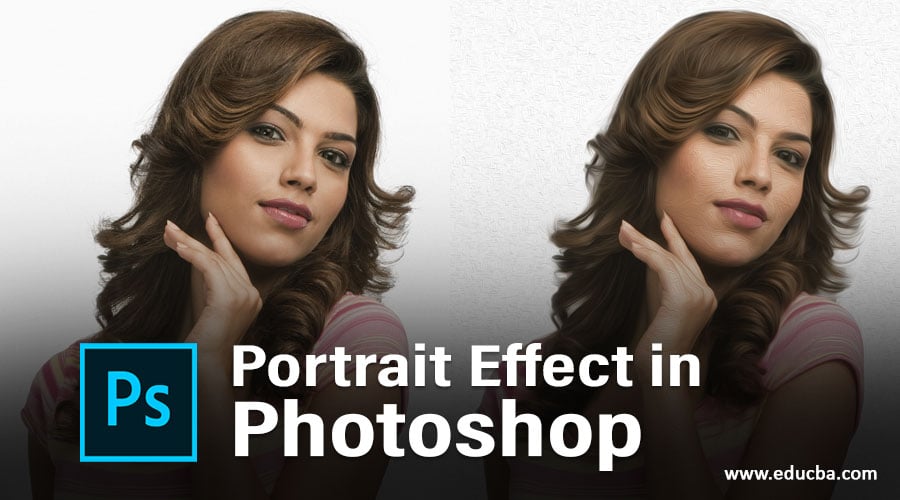
Introduction to Portrait Effect in Photoshop
Adobe Photoshop is an enormous program loaded with an amazing set of tools and functions that are used to create some stunning effects. One such effect that is usually created with the help of Adobe Photoshop is the Portrait effect. The portrait effect can be created on the program using the amazing tools and brushes present in the program. The effect is useful when taking pictures with a different background, changing the type of background, and adding effects. Any image can be converted to a portrait-style image that has realistic looks and results.
The use of this type of effect comes into use when the user needs to change the image taken to a portrait format or give an effect that is on the basis of the effect.
What is Portrait Effect?
Portrait Effect is just like other effects also created using a number of tools and functions. It’s the user’s choice about how he wants to create an effect and use which tool and method. Though, there is an infinite number of methods and techniques to create an effect in Photoshop.
The portrait effect is not a straight and direct effect like the Fire effect. A portrait is any picture created in the vertical direction with some random effects given to the portrait. Similarly, a portrait effect can be created using multiple tools also. There is no proper definition that can be given to this effect. So, we can create any effect in Portrait mode, and that can be termed as the Portrait effect.
Adding Portrait Effect to the Image
Below are the examples to create a Portrait effect in photoshop in a very simple manner:
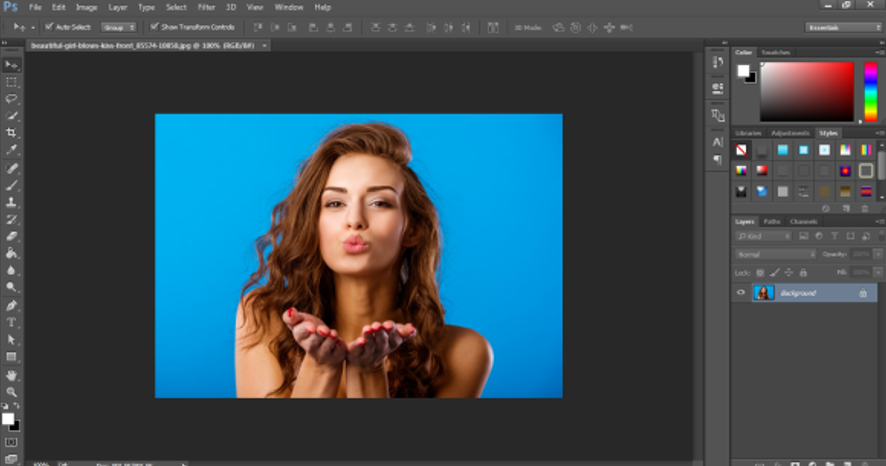
Step 1: Open Photoshop. Open the Portrait image that needs to be created and edited.
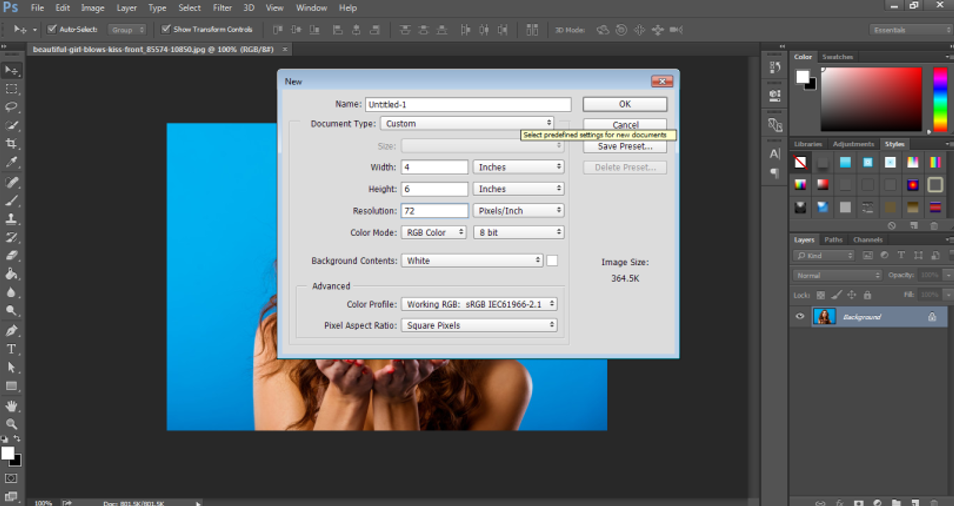
Step 2: Create a new document in Photoshop. The document should have 72pixels of resolution to it. This resolution is given to the document so that we can create bigger clouds as a background in the document. If we provide a 100 percent pixel quantity to the document, we will not be able to produce big clouds as needed in the example. Since the filter we will be applying is the Clouds Filter and this filter depends on the resolution of the document.
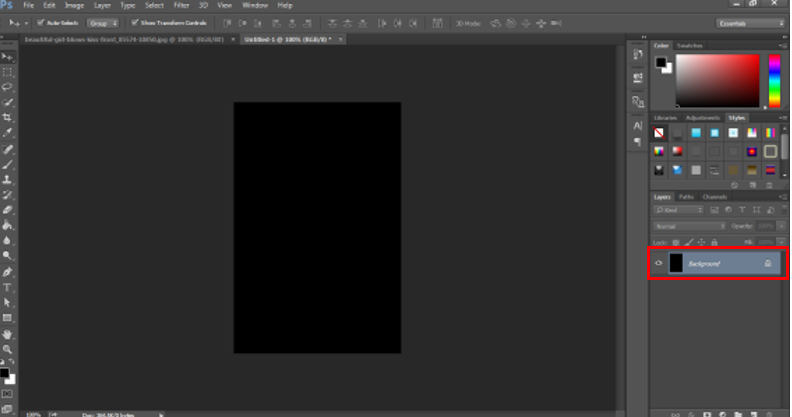
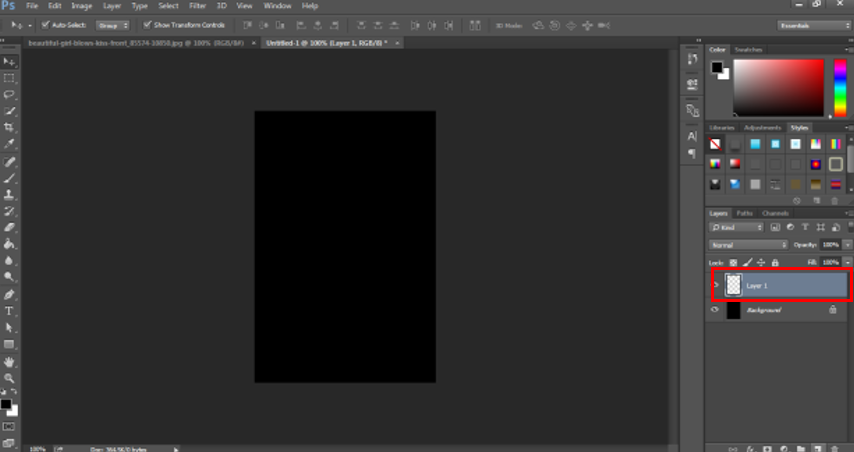
Step 3: Next, the background color needs to be black. So, change the background as shown in the image below and press Alt+Backspace to fill the document with black color.
Step 4: Now, go to the layers option, and create a new blank layer, as shown in the image below.
Step 5: Now, keep the new layer selected and go to the filter gallery.
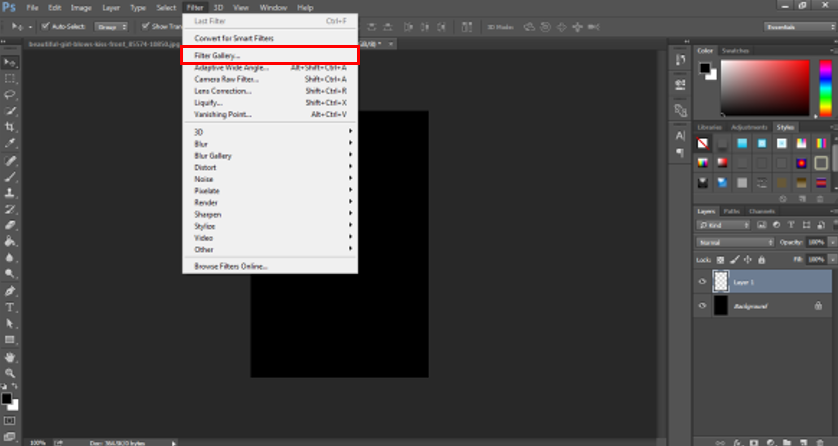
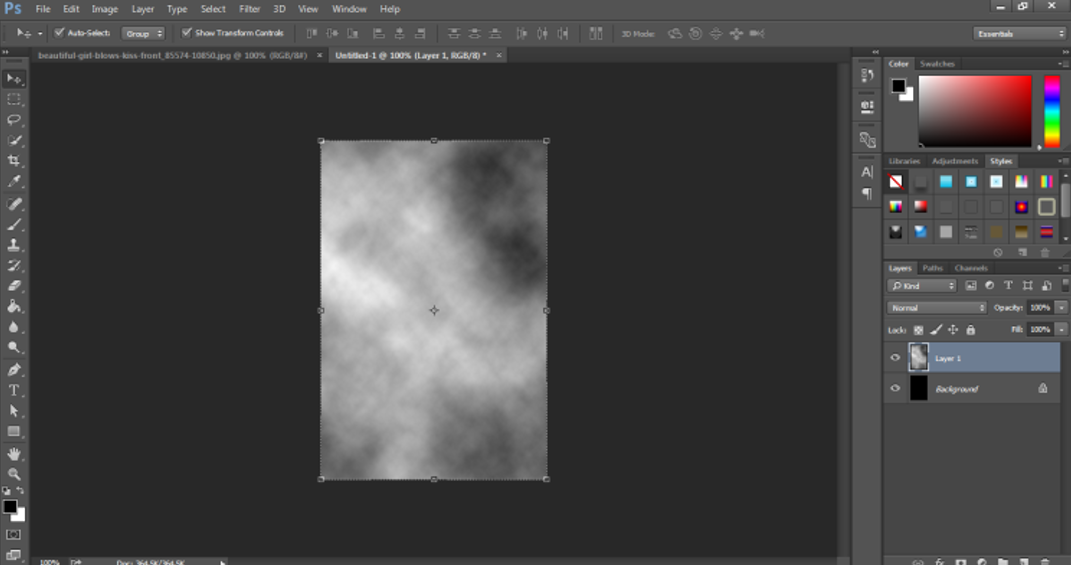
Step 6: From the Filter gallery, choose the Render option and then Clouds from the menu. Every time this filter is applied, it gives a new and different look to the image. We can try and use the filter as needed.
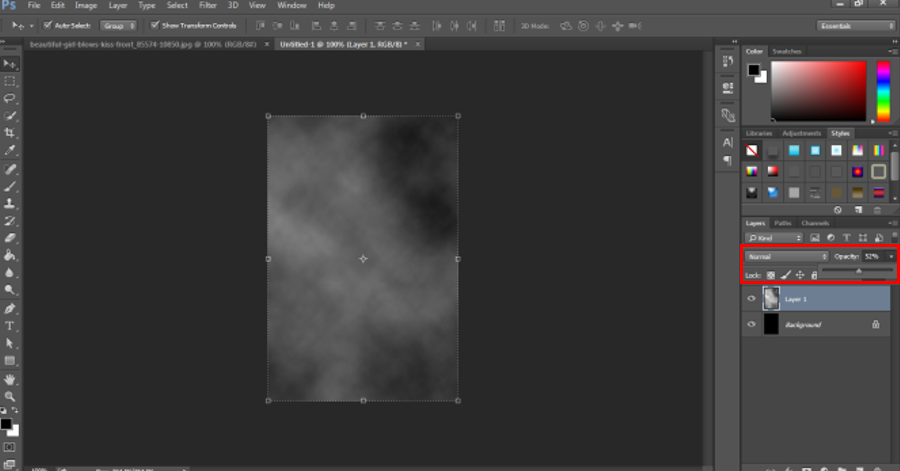
Step 7: Now, minimize the transparency of the clouds layer. As shown in the image below.
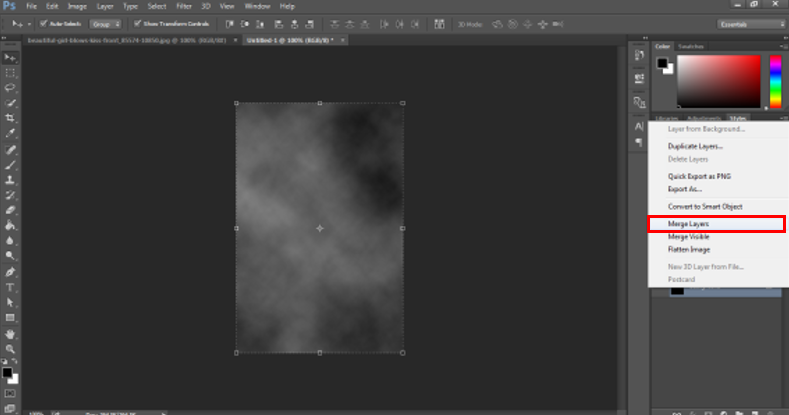
Step 8: Next, merge the background layer with the clouds layer, as shown in the image below.
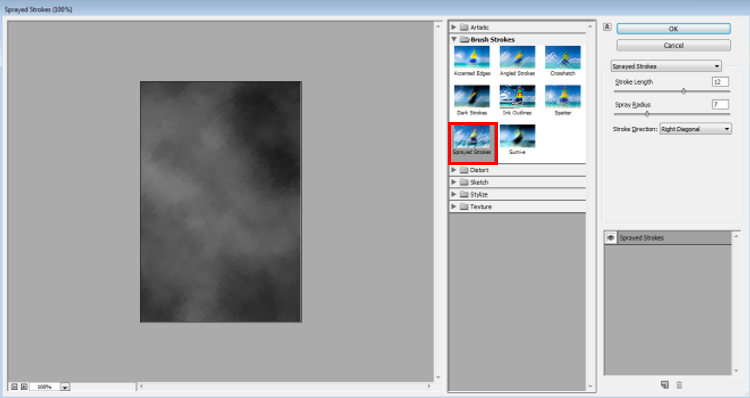
Step 9: Next, we will apply another effect to the background. Go to the filter option and choose Brush Strokes and use Spatter to the same.
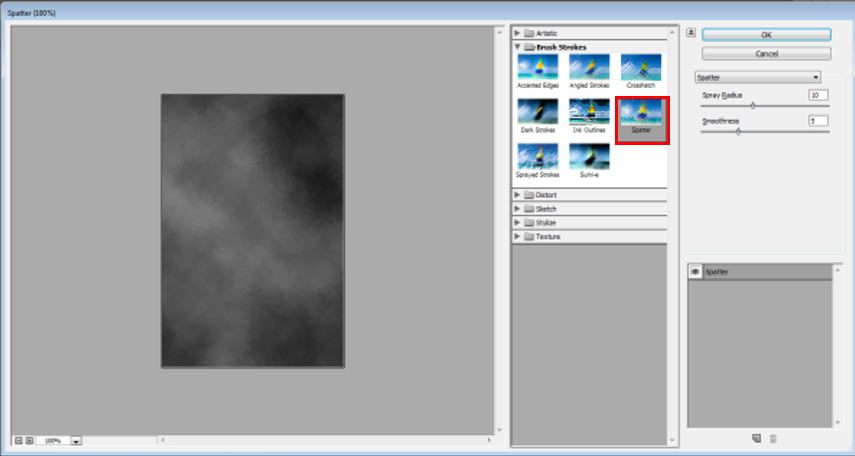
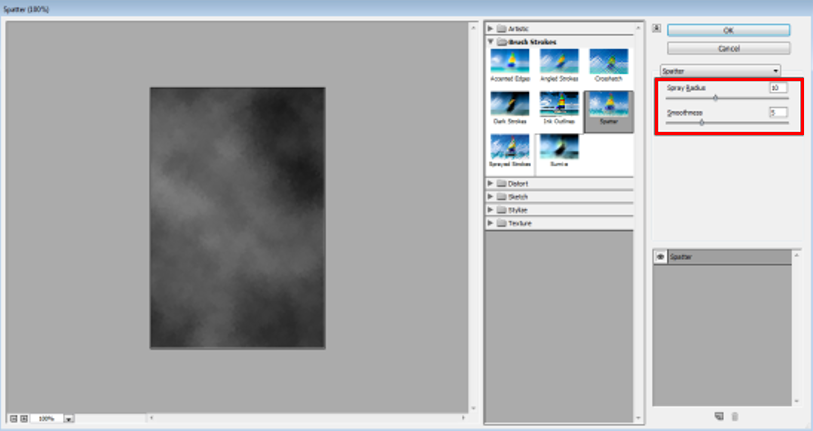
Step 10: A dialog box will appear; use 10 as the spray radius and 5 as the dialogue box’s smoothness. This filter will add more haziness and texture to the background image.
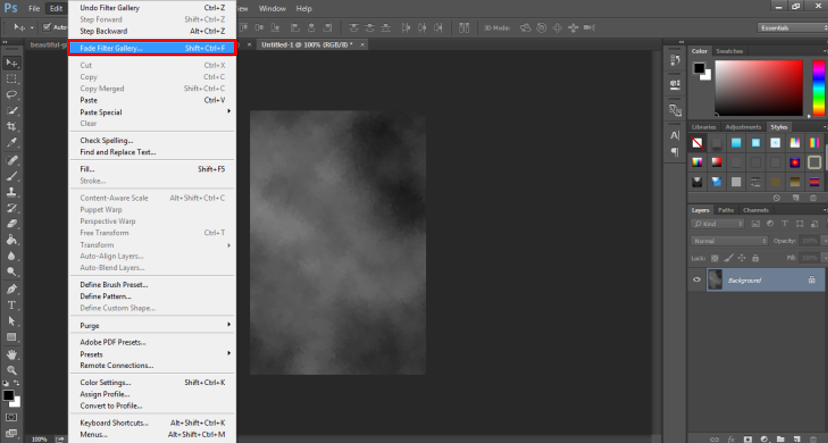
Step 11: As soon as the filter is applied, another option called Fade Spatter can lower the spatter’s opacity. The user should not click anywhere else; otherwise, this option will not be visible to the user. So, go to the edit option and use Fade Spatter.
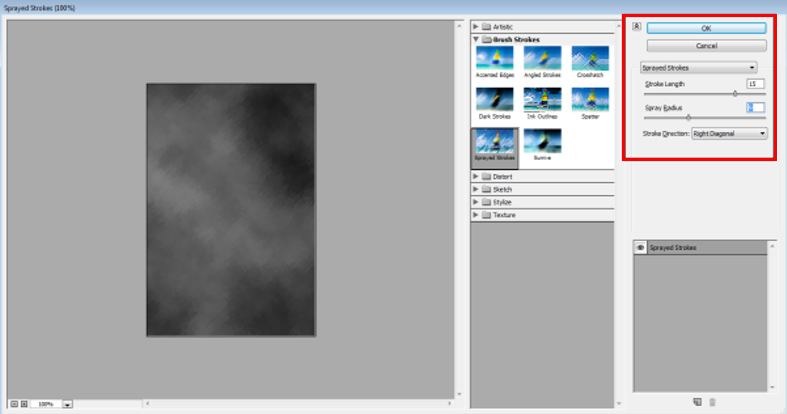
Step 12: Next, we apply another filter from the filter gallery. So, click on Filter and choose Brush Strokes from the menu.
Step 13: Use the Sprayed Strokes from the menu. A dialog box will appear. Use 15 as the stroke length, 9 as the Spray radius and in the Stroke Direction, use the Right Diagonal Option.
Step 14: Once again, go to the edit menu and use the Fade Sprayed strokes option to lower the transparency of the same.

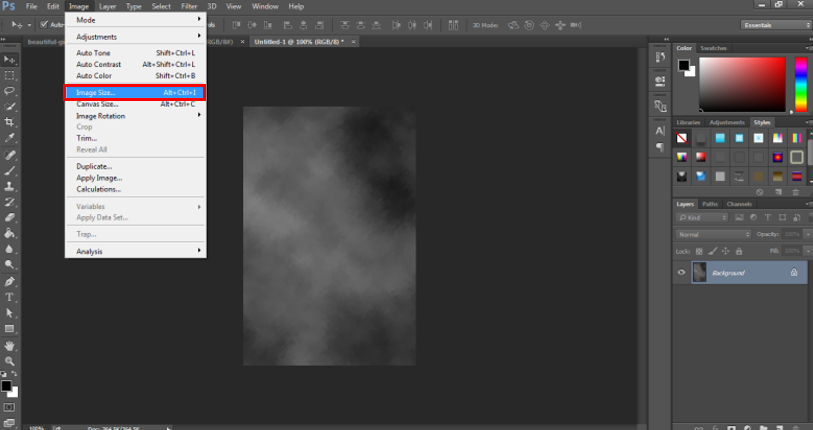
Step 15: Now, since the clouds effect is completed. We can increase the quality of the pixels of the image. So, use the image menu and go Image size as shown in the image below.
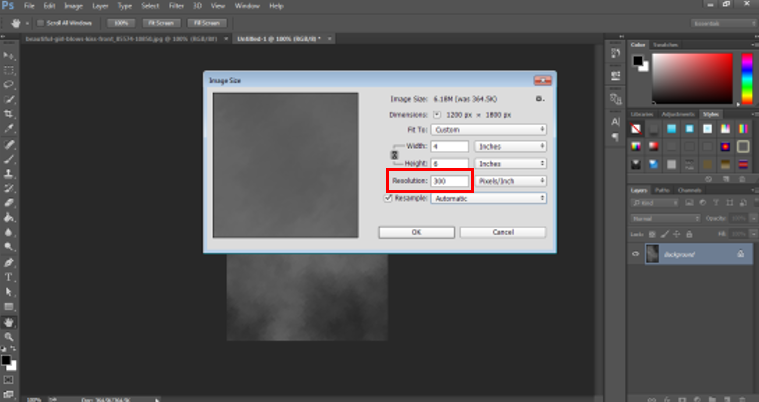
Step 16: A dialog box will appear; use 300 as the resolution of the image. And check the option for Image Resampling. The resolution of the image is directly dependent on the print quality and the image smoothness as well. So, if the user is not creating anything for printing purposes, they can use the lower resolution as well.
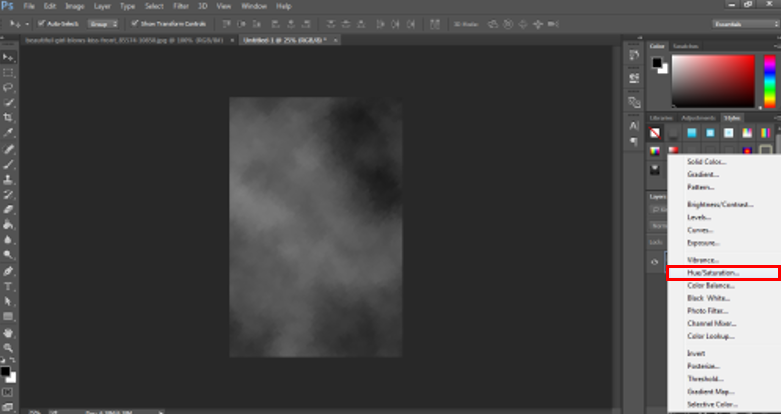
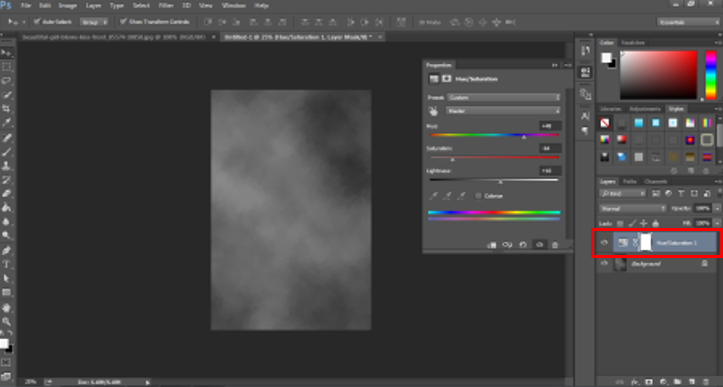
Step 17: Now, go to the layers option, and use the New Adjustment layer option to create a layer for Hue and Saturation. This effect will help in controlling the brightness and darkness of the image,
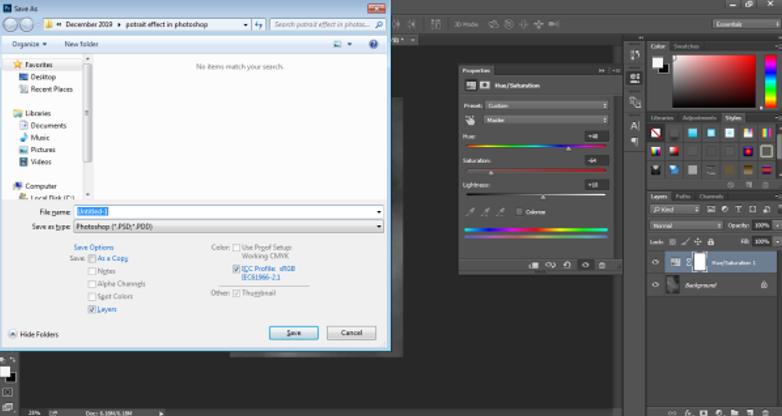
Step 18: Now, save this document as shown in the image below.
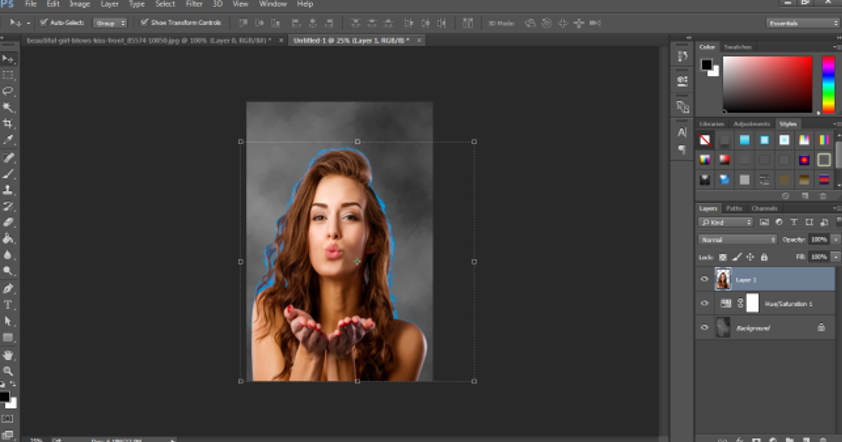
- Now, open the portrait image that needs to be placed in the newly created background.
- Use the selection tools to extract the portrait and remove the background from the image, as shown in the image below.
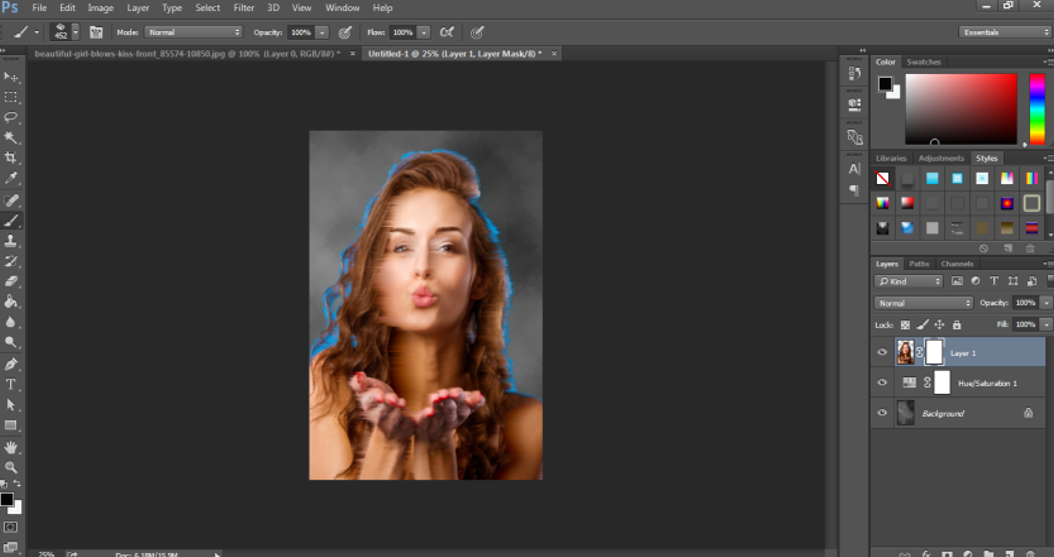
Step 19: Bring the portrait to this document and adjust the same as shown in the image below.
Step 20: You can add some more effects to the portrait, as shown in the image below. The newly created portrait looks as shown in the image below.
Conclusion
The portrait effect can be created using some amazing filters and effects. There is no direct definition associated with the portrait effect. So, we can play and add any no. of effects on the portrait created.
Recommended Articles
This is a guide to Portrait Effect in Photoshop. Here we discuss an introduction, the portrait effect, and how to create a Portrait Effect in Photoshop in a step-by-step manner. You can also go through our other related articles to learn more –
