


A learner who pauses an Excel walkthrough to read a tiny cell reference can easily lose track of the lesson, even when every on-screen step is correct. Raw recordings often contain small ribbon text, repeated explanations, and unnecessary waiting time while files load. Therefore, recording a demonstration is only the first step toward creating an effective Excel training video.
Wondershare Filmora AI video editor turns the recording into a focused lesson using zooms, step labels, and captions. Saved as an editable project, the lesson can be updated when Excel’s menus change. The editor cleans up the delivery, but every formula name and cell reference still needs your own check.
How to Create an Excel Training Video with Filmora 16?
Follow these steps to transform a raw Excel screen recording into a clear, engaging, and easy-to-follow training video using Filmora 16.
Part 1. Plan One Task and One Learning Outcome
A clear plan keeps the recording short and the edit simple. Pick one task and define what learners should accomplish after watching. For this lesson, the outcome is “Build a PivotTable that totals sales by region from the sample sheet.” The table below breaks the demo into 4 actions, with the Excel steps and one line of narration for each:
| Action | In Excel | What to Say |
| Select the Data | Highlight the sales range, then choose “Insert > PivotTable.” | “Select the data first, headers included.” |
| Place the Table | Choose “New Worksheet” and click “OK.” | “A new sheet keeps the source data untouched.” |
| Add the Fields | Select Region and Sales in the “PivotTable Fields” pane. Confirm that Region is in Rows and Sales is in Values, with the aggregation set to Sum of Sales. | “Place Region in Rows and Sales in Values.” |
| Read the Result | Check that Excel calculates the sum of Sales for each region. | “Each region now shows one total.” |
Use a clean workbook with invented names and figures, then run “File > Info > Check for Issues > Inspect Document” on a copy. Microsoft recommends using a copy because removed content cannot always be restored with Undo. Microsoft’s PivotTable guide also recommends organizing data into columns with “a single header row.”
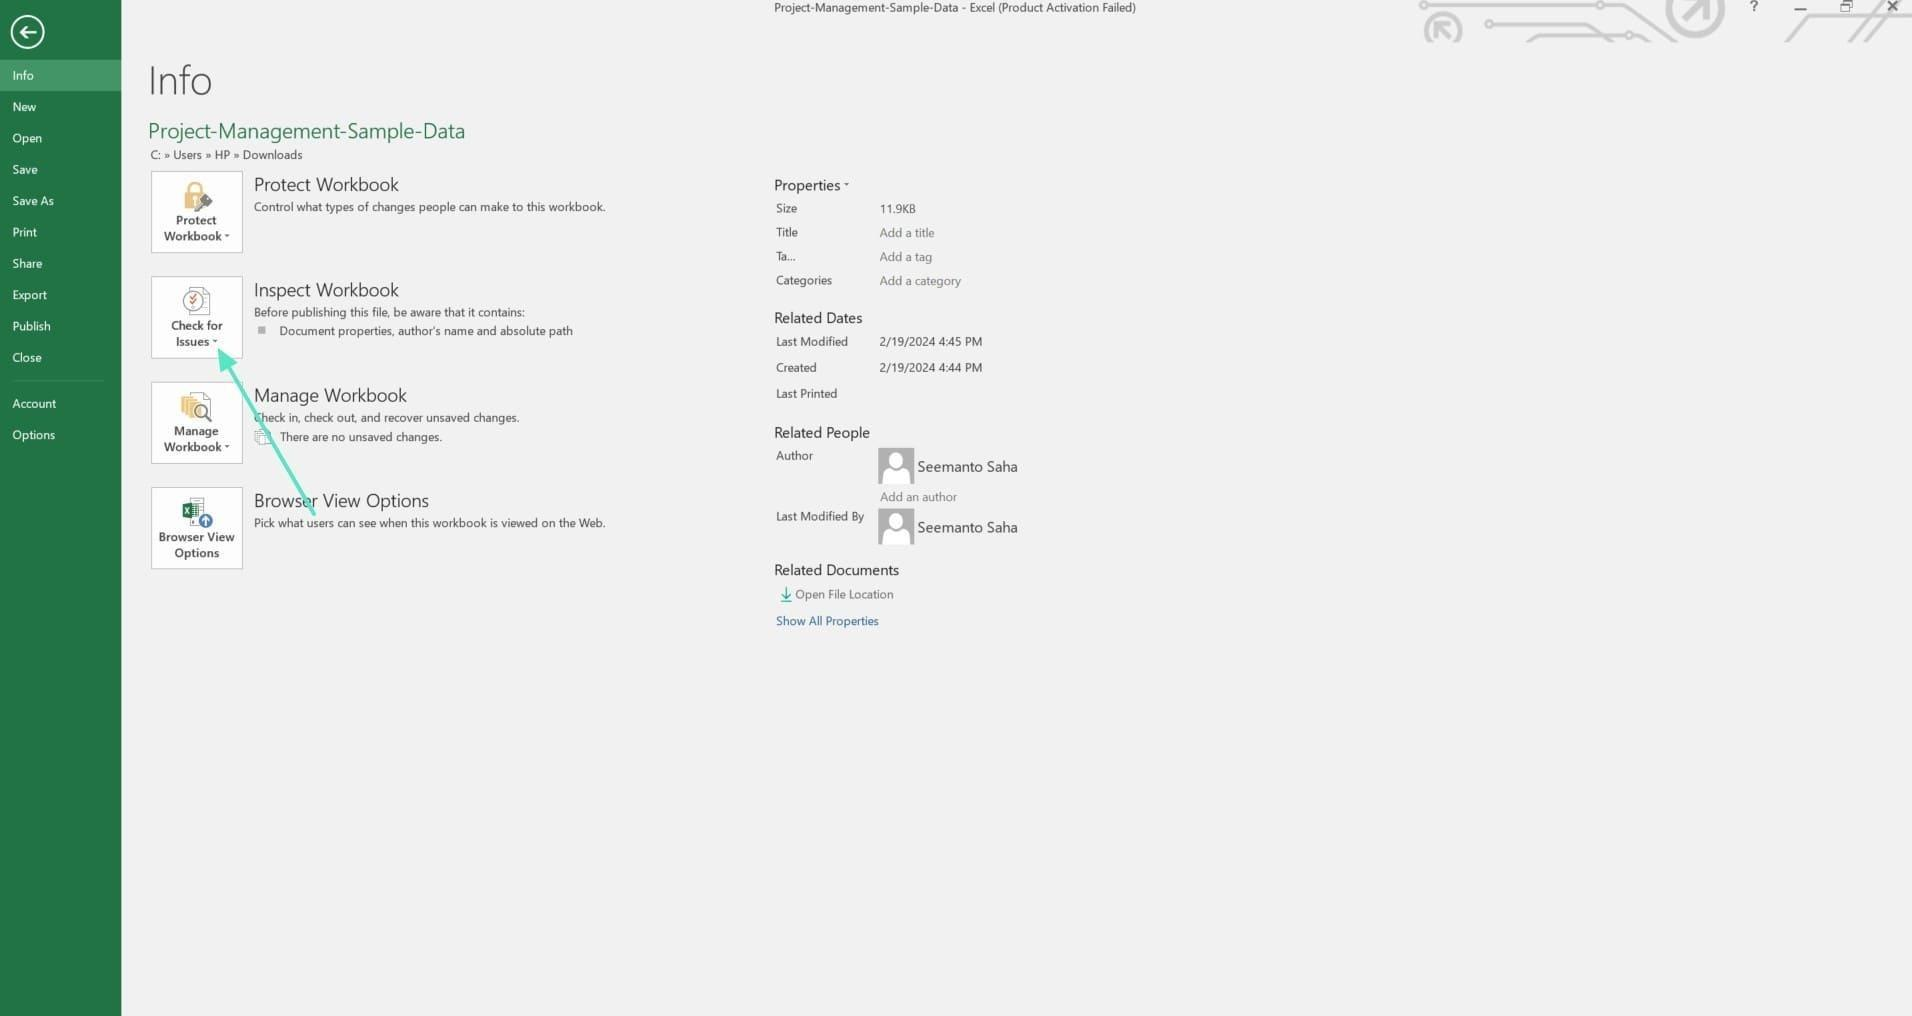
Image Source: Microsoft Excel
Part 2. Record a Demonstration Learners Can Follow
With the workbook and 4 actions ready, recording comes next. Filmora 16 handles both recording and editing, keeping the captured footage accessible within the editor. On Windows, open the screen recorder from the Media panel’s “Record” drop-down and select “Record PC Screen.” Choose “Window” to capture Excel, enable “Microphone” for narration, and turn on “Camera” only if the course needs a presenter in the corner.
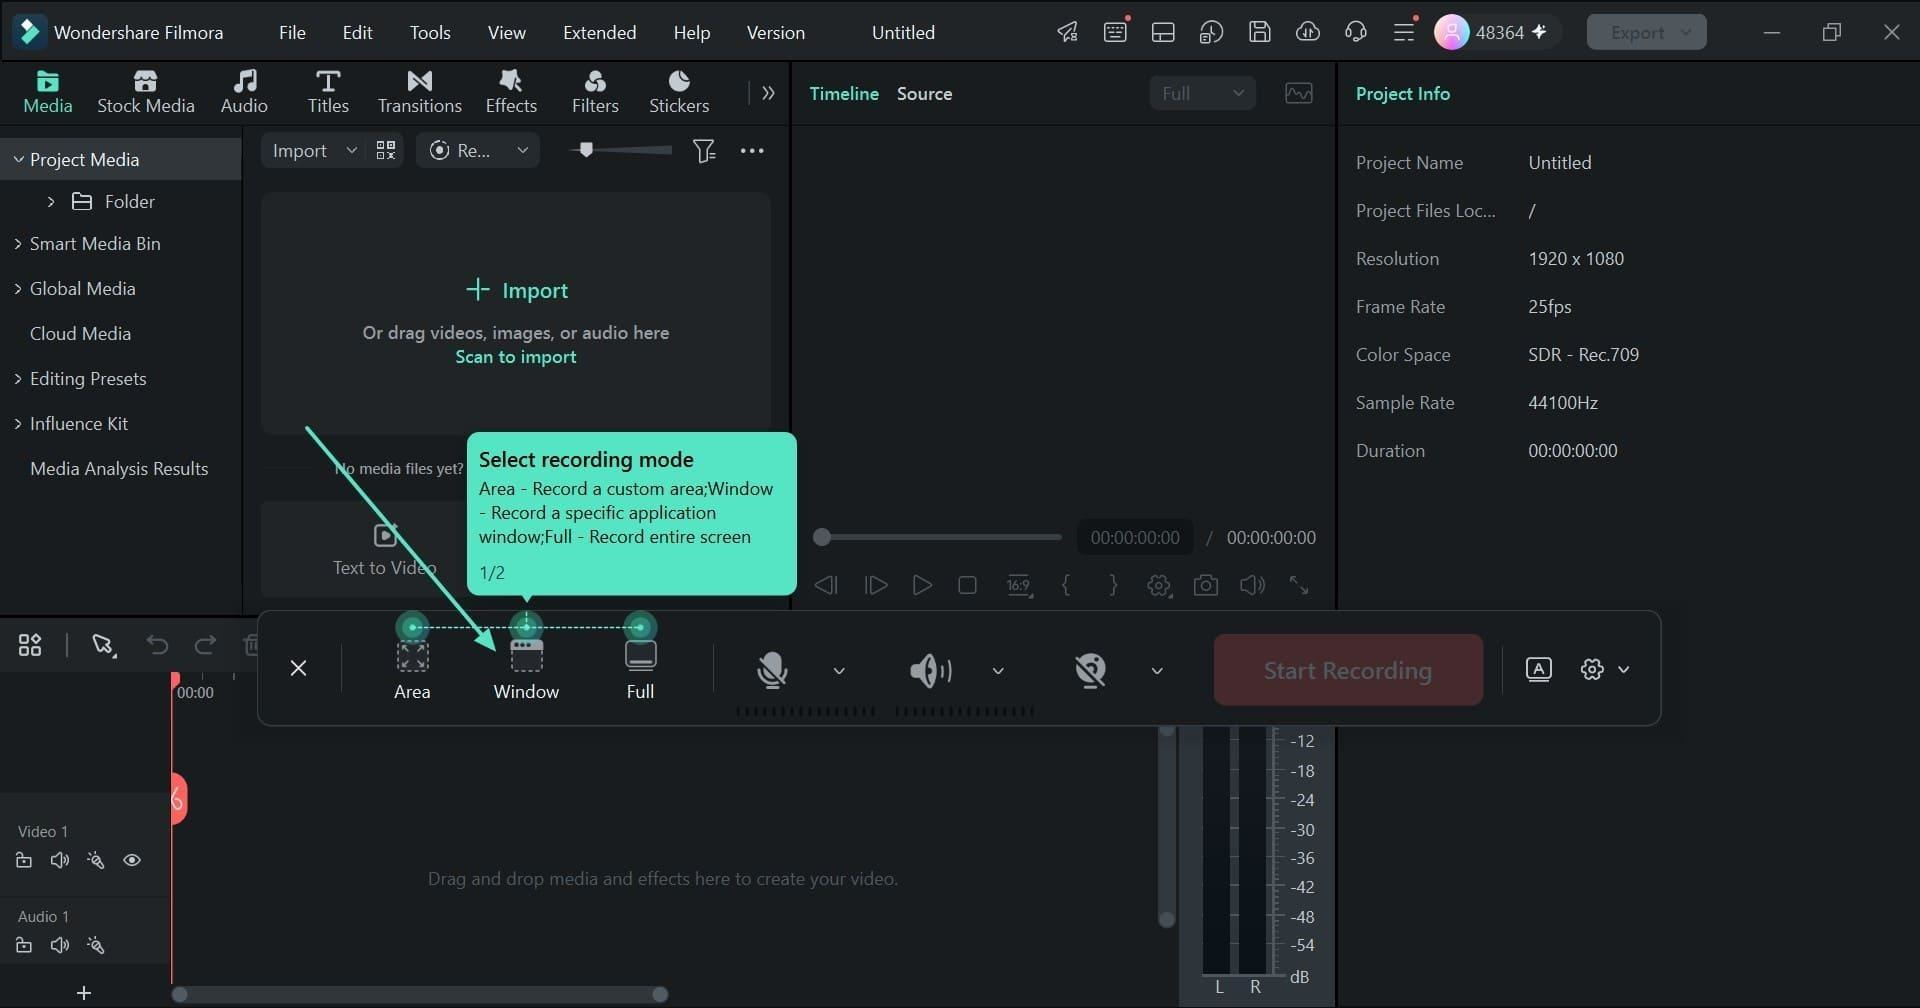
Image Source: Wondershare Filmora
Learners can only follow what they can read and track, so these 3 habits matter before the real take:
- Readable Sizing: Increase Excel’s zoom using the status bar slider or “Zoom to Selection” on the “View” tab before recording. Keep cell references readable even in a small course player.
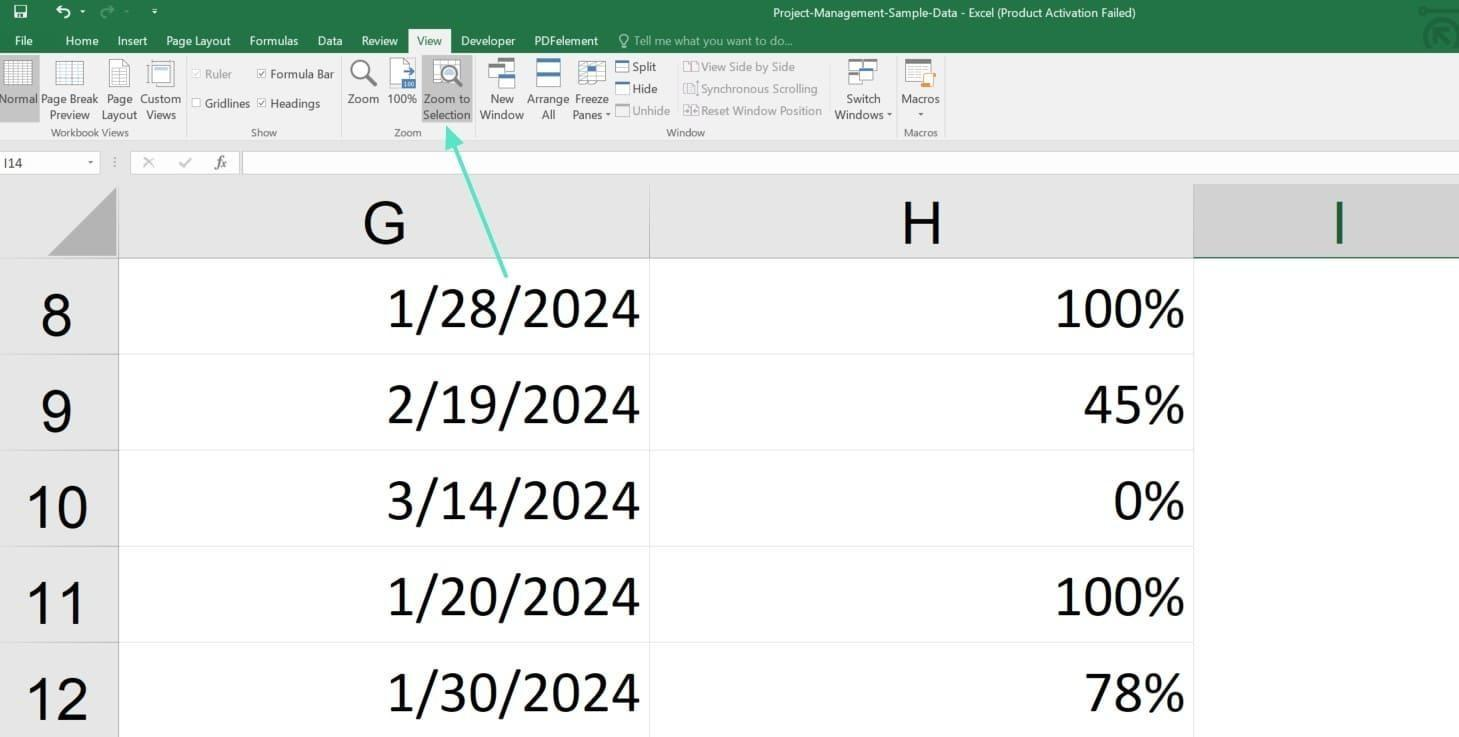
Image Source: Microsoft Excel
- Deliberate Cursor: Move the pointer slowly and pause briefly over each ribbon button before clicking.
- Short Test: Record a 20-second test with the countdown enabled, then play it back to check the narration volume and ribbon text clarity.
Part 3. Create a Cleaner Rough Cut Through the Transcript
The recording is done, but it still contains repeated sentences, a misclick, and dead air. Filmora’s AI text-based editing converts narration into a transcript, allowing you to remove matching video segments by deleting their text. The 4 steps below explain how to create a cleaner rough cut of the PivotTable recording:
- Open the Transcript: Right-click the clip, choose “Smart Edit Tool > AI Text-Based Editing,” select “Text-Based Editing,” choose English, and click “Generate.”
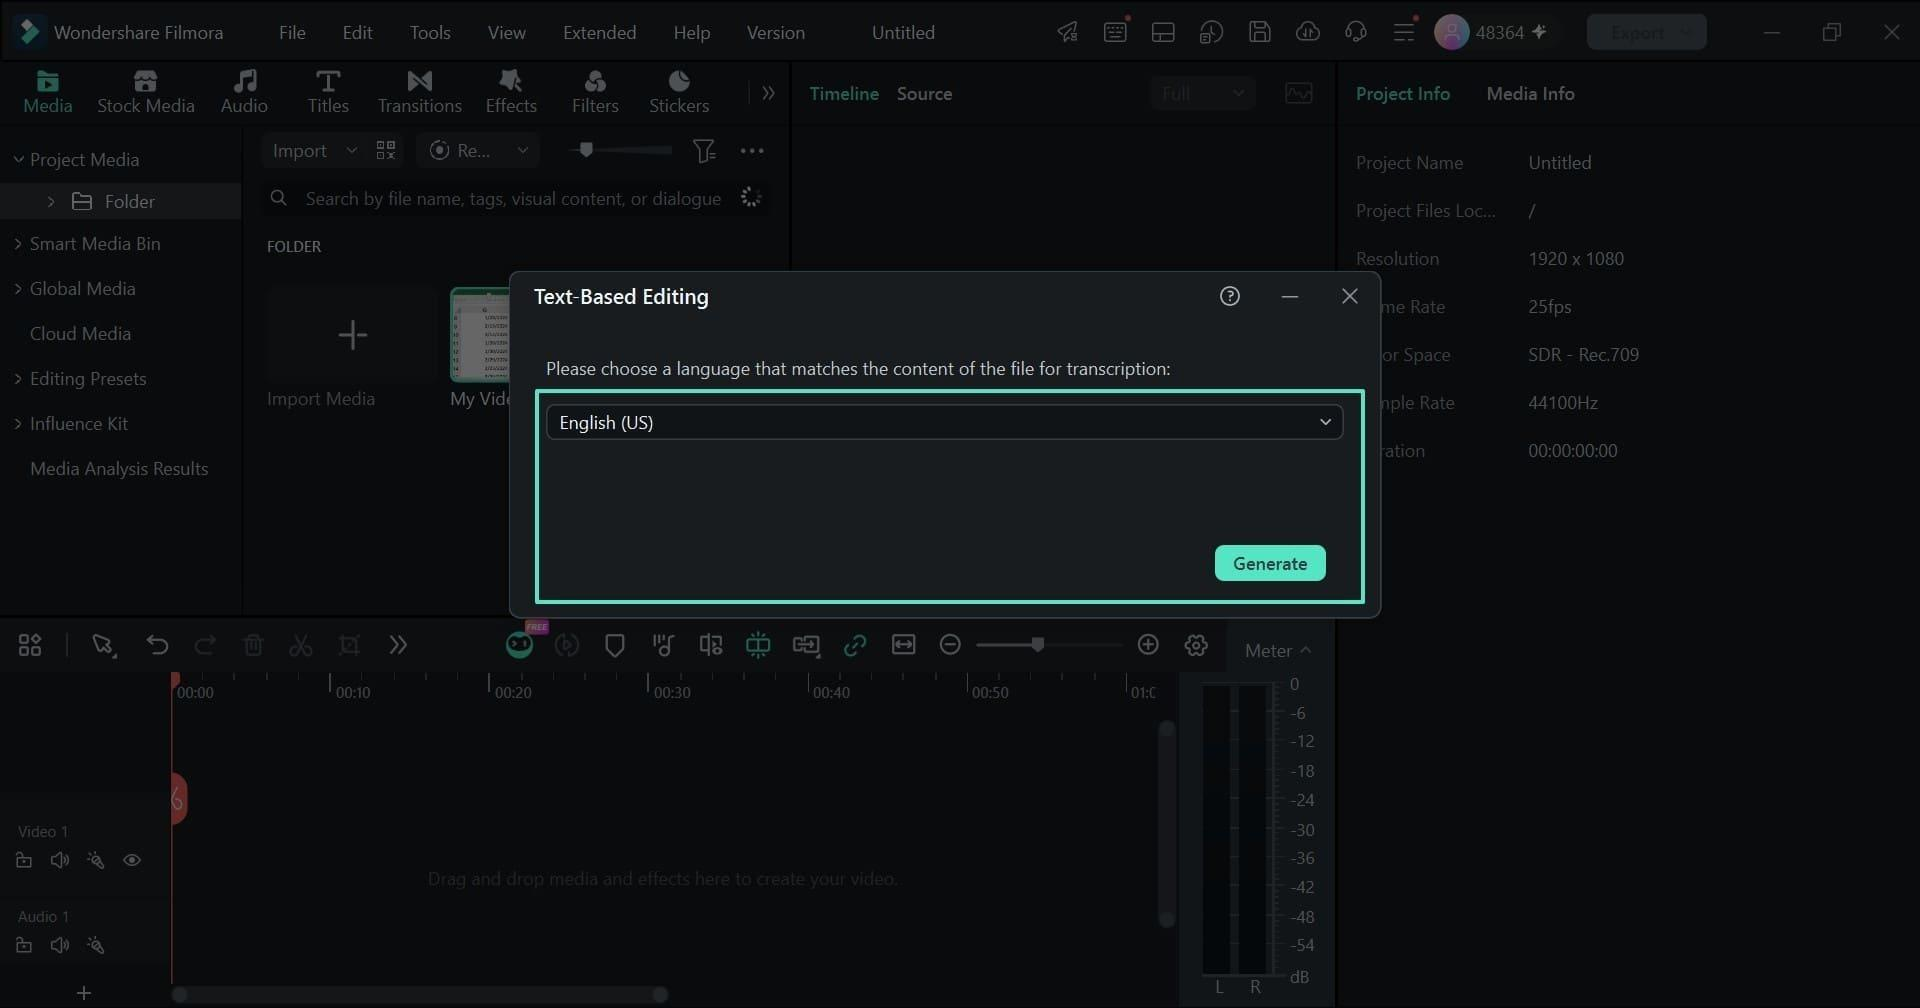
Image Source: Wondershare Filmora
- Search for Repeats: Search the transcript for repeated phrases, such as “Drag Region,” and delete the weaker take.
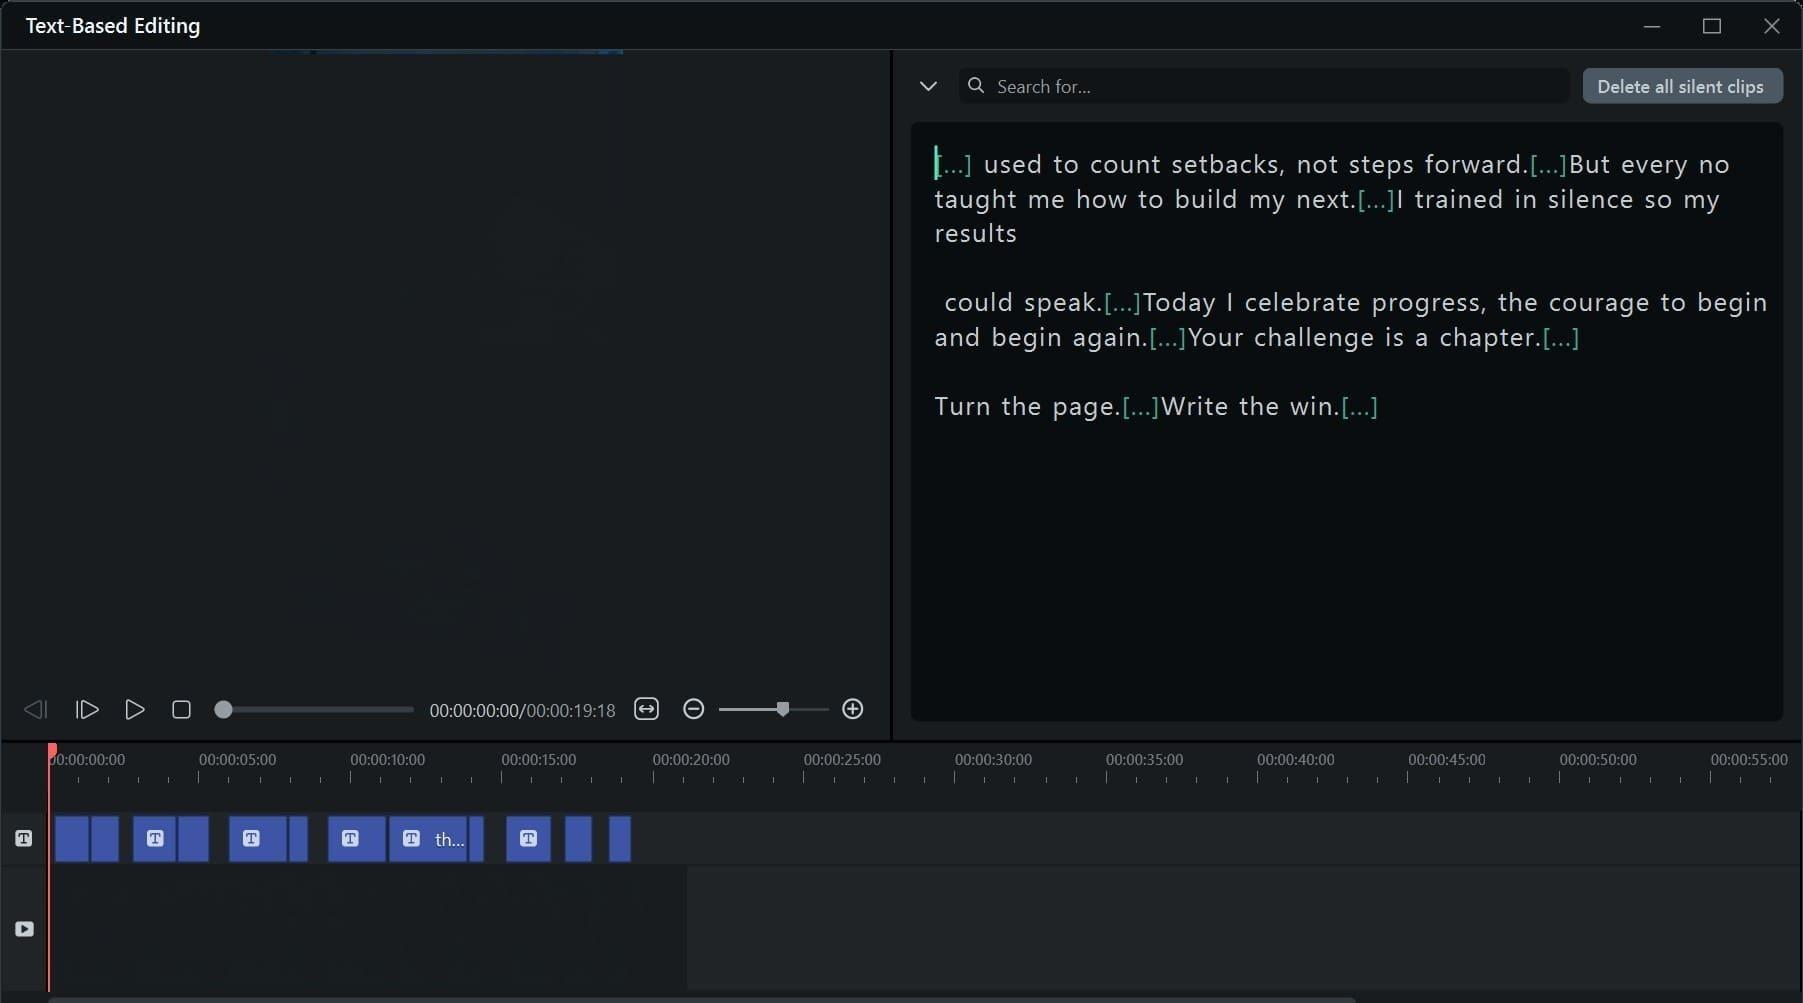
Image Source: Wondershare Filmora
- Delete Failed Takes: Remove the transcript sentences covering a failed take, then check the timeline and trim any remaining misclick footage.
- Review Silent Gaps: Use “Delete All Silent Clips” if appropriate, then review the resulting cuts to ensure learners still have time to follow important actions and read the results. Keep or restore necessary pauses before selecting “Export to Timeline”.
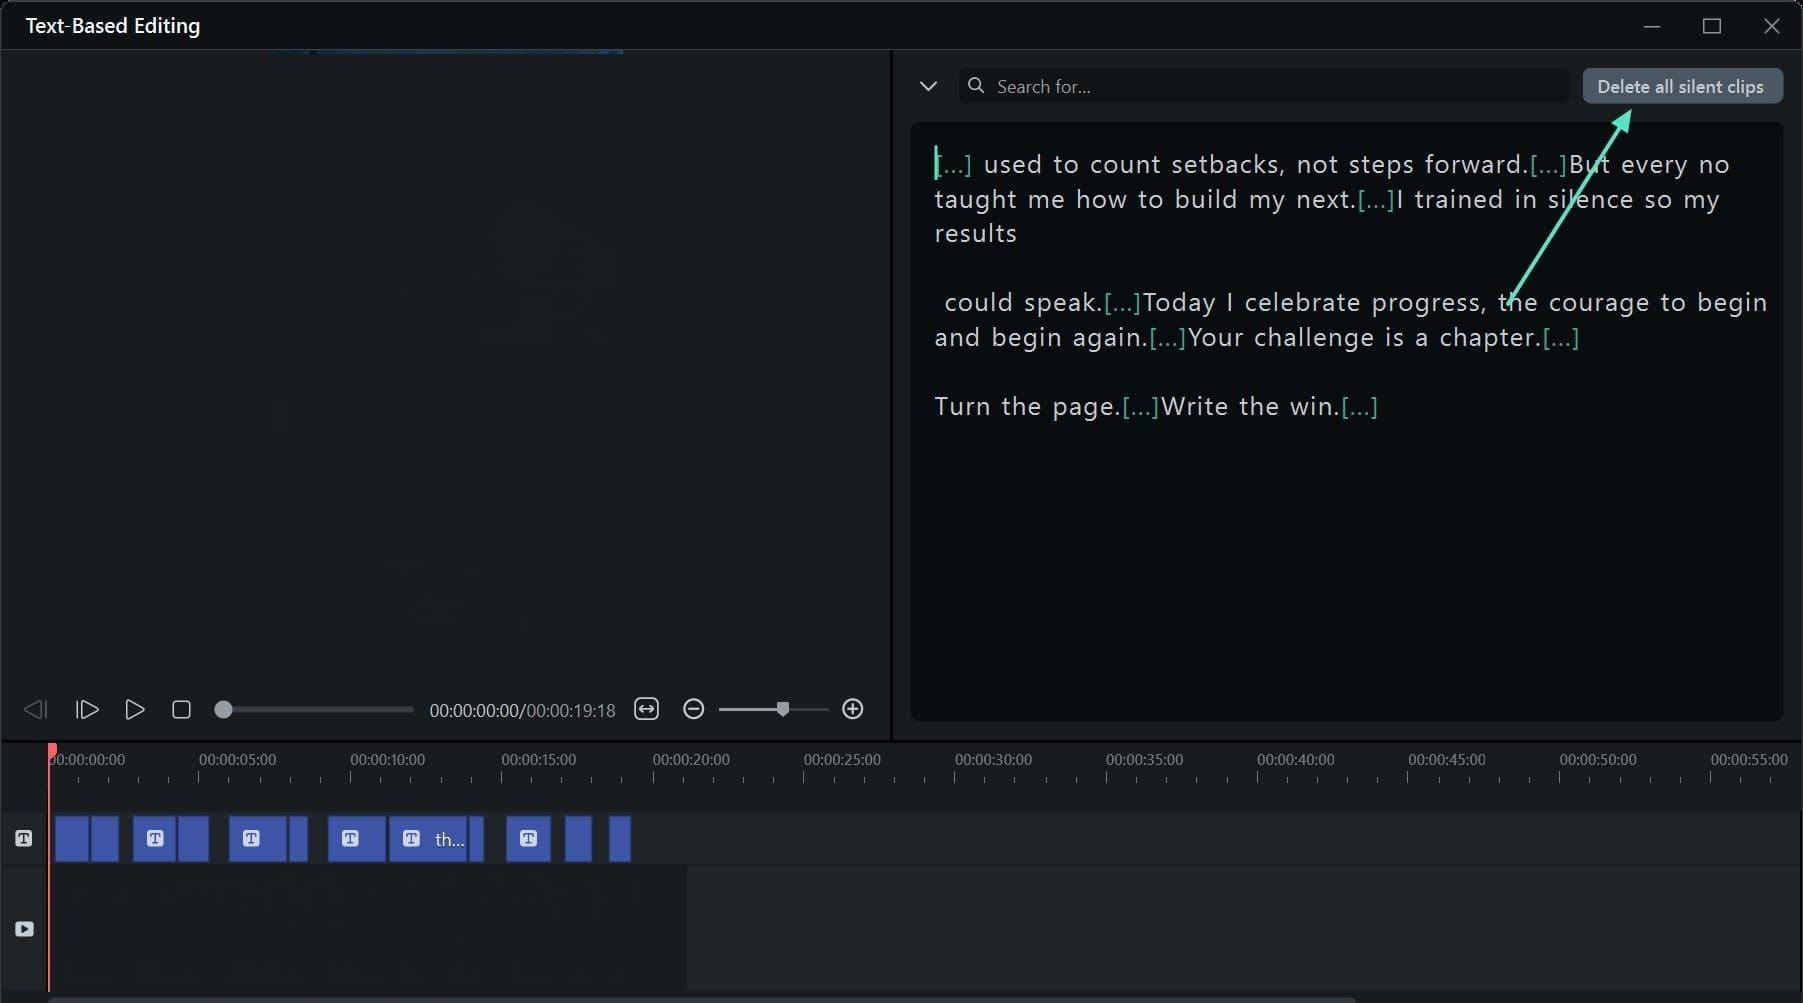
Image Source: Wondershare Filmora
Review the rough cut against the 4 planned actions before moving forward. A repeated sentence might provide the only explanation for a click, so keep it if removing it would confuse learners. The pause after the totals appear gives viewers time to read, so check that it remains after removing silent clips.
Part 4. Make the Lesson Easier to Understand
The rough cut is shorter, but the PivotTable Fields pane remains too small to read, and the steps lack clear markers. Selective zooms, step labels, and captions address these issues. The table below compares the original “Add the Fields” section with its edited version:
| Raw Section | Edited Section |
| The “PivotTable Fields” pane appears in a corner of the screen, making its text difficult to read. | A gradual zoom using “Pan and Zoom” enlarges the Fields pane as Region is placed in “Rows.” |
| Nothing indicates how far learners have progressed through the lesson. | A title reading “Step 3 of 4” remains in the top corner throughout the step. |
| Important terms are mentioned only in the narration. | Speech-to-text captions display terms such as “Sum of Sales” as they are spoken. |
| The totals appear, and the clip ends without a visual summary. | An animated bar chart displaying the same 4 regional totals closes the section. |
The closing chart visualizes the same regional totals using Filmora’s Animated Charts Maker, found under Effects > Video Effects > AI Infographic > Animated Charts. First, prepare a simple Excel or CSV summary containing the region names and their corresponding sales totals from the completed PivotTable. Import the summary through the Data tab, choose a suitable chart style, and review the animation in Preview before adding it to the lesson.
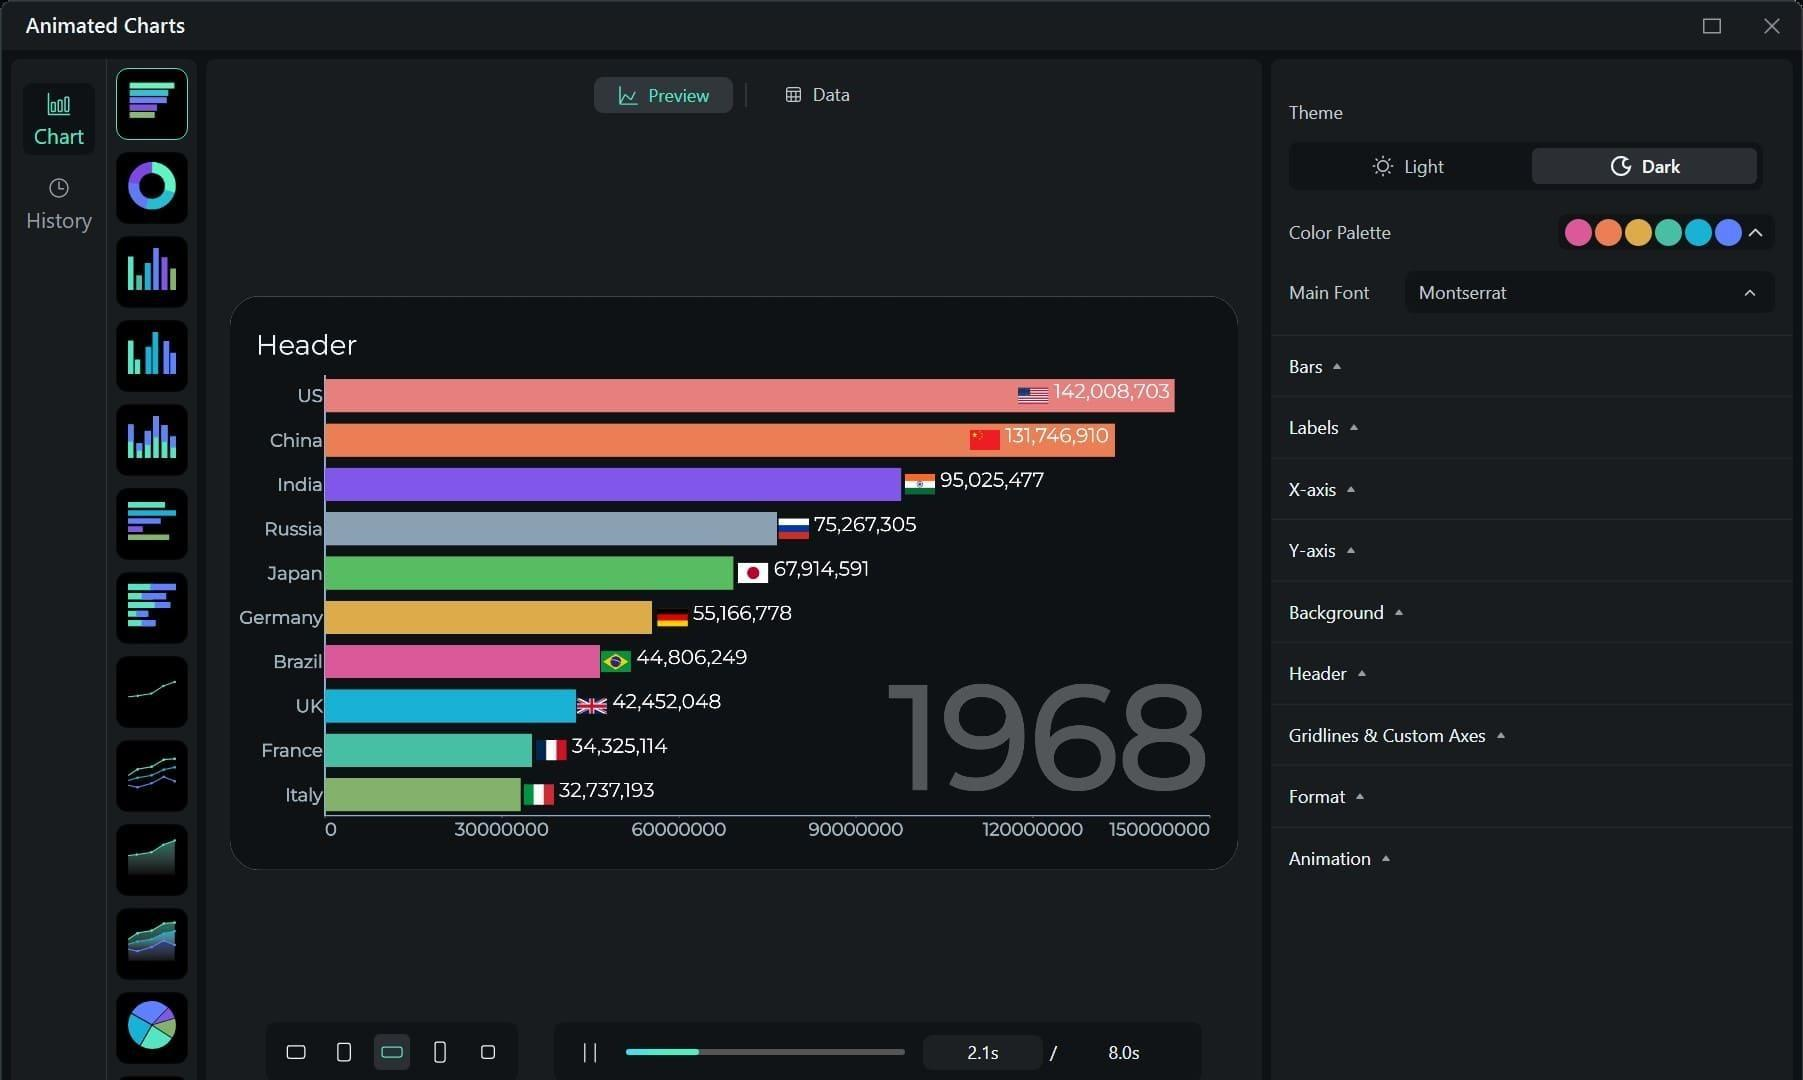
Image Source: Wondershare Filmora
Part 5. Publish a Reusable Training Resource
After editing, review the training video for clarity and accuracy before exporting. The table below outlines 4 essential checks to complete before publishing:
| Check | What to Confirm |
| Text Readability | Play the exported video in a 640-pixel-wide window and confirm that the PivotTable Fields pane and cell references remain readable. |
| Narration Level | Listen through laptop speakers and headphones to ensure consistent narration volume across all 4 steps. |
| Caption Accuracy | Compare every caption with the narration and on-screen content, especially terms such as “Sum of Sales” and the field names. |
| Learning Outcome | Confirm that the finished lesson achieves the intended outcome: “Build a PivotTable that totals sales by region.” |
Once every check passes, open the export window, select “MP4,” and review the resolution, frame rate, and duration before clicking “Export.” MP4 works with most course platforms, while available YouTube and Vimeo export options support online sharing.
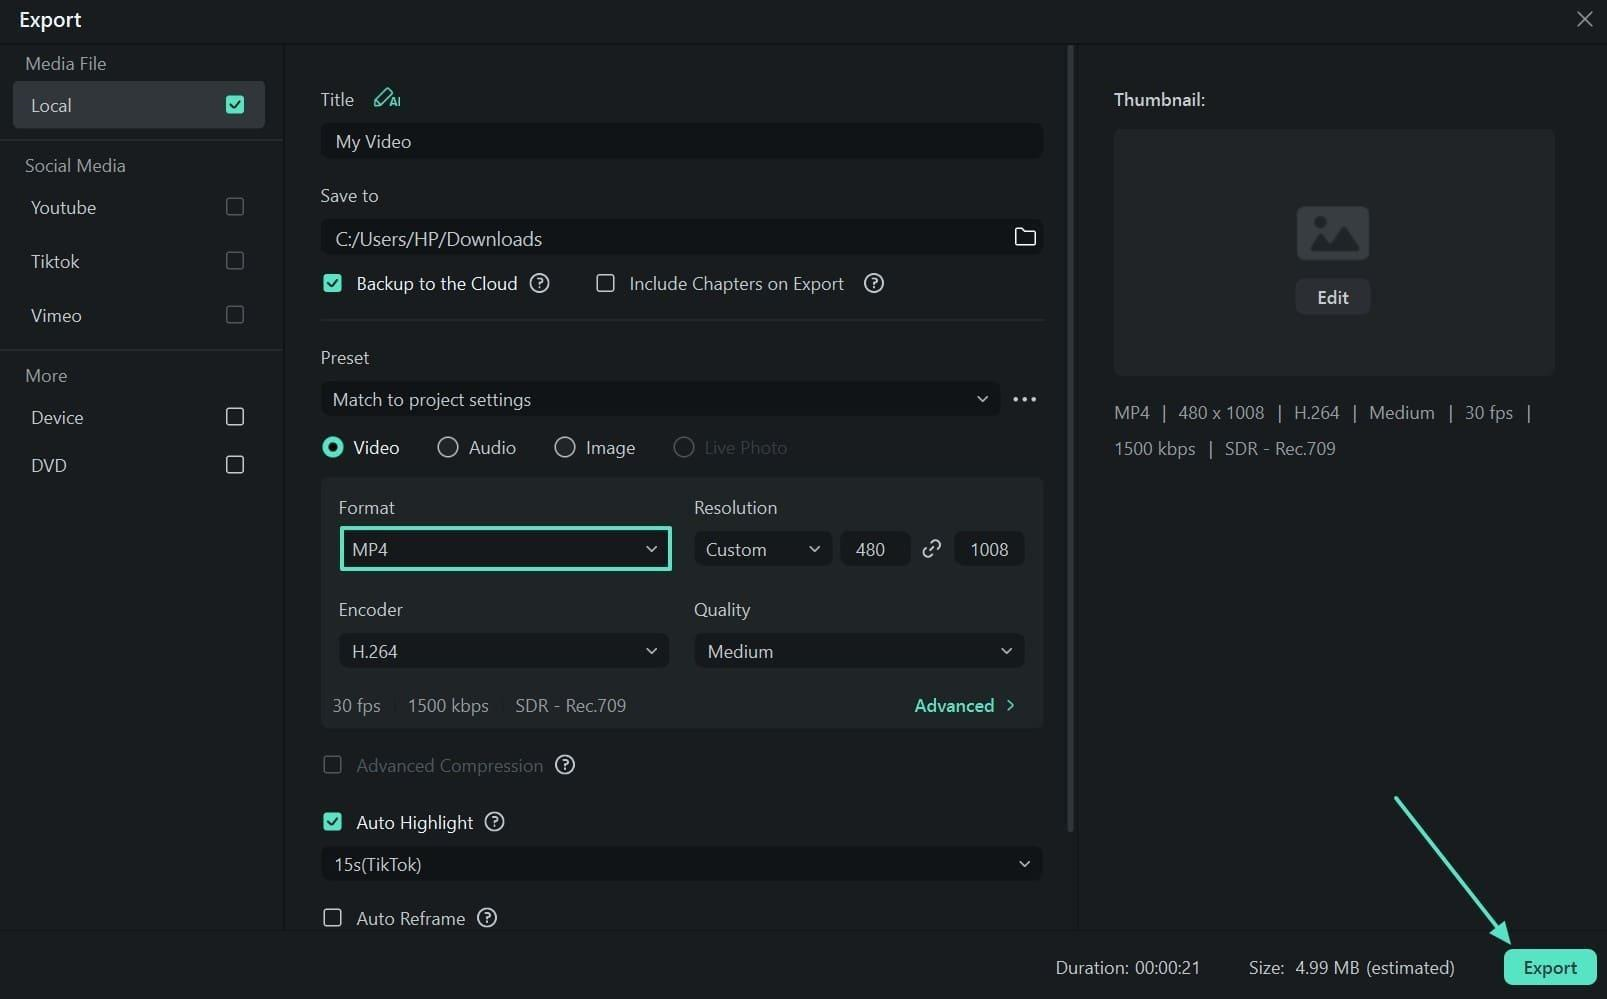
Image Source: Wondershare Filmora
Keep the editable project in the same folder as the workbook and raw recording using “File > Save Project As.” The project references these media files, so future Excel updates require replacing affected footage and reviewing related edits.
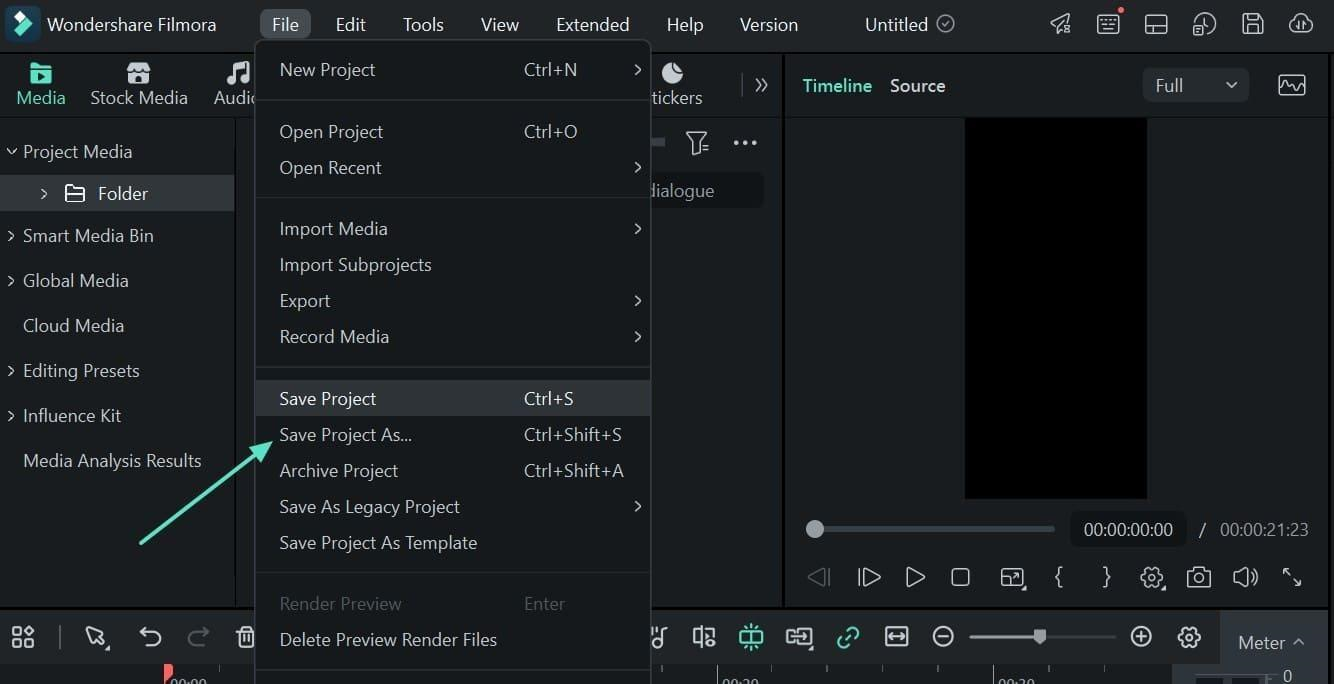
Image Source: Wondershare Filmora
Final Thoughts
A raw Excel walkthrough contains the lesson, but thoughtful editing makes it easier for learners to follow. Transcript cuts, selective zooms, step labels, and accurate captions improve clarity, while the saved Filmora project supports future updates. If your team repeatedly explains the same Excel task during onboarding, record the demonstration once and refine it into an effective Excel training video using Filmora 16. This reusable resource can simplify knowledge sharing, improve onboarding, and provide learners with a consistent reference for completing everyday Excel tasks.
Recommended Articles
We hope this comprehensive guide to creating an Excel training video with Filmora 16 helps you develop engaging and effective learning resources. Check out these recommended articles for more insights and strategies to improve your Excel skills and create impactful training content.