Updated August 21, 2023

Excel Concatenate Date (Table of Contents)
Introduction to Concatenate Date in Excel
To Concatenate Dates in Excel, first, we need to convert the cells which contain Date into Text format using the TEXT function, and there we will choose the format of the date that we want to keep in text format. Insert CONCATENATE function in a cell and right after starting the TEXT function. Select the cell that contains the date and choose the date we want to keep in inverted commas. Then after choosing the cell with which we want to concatenate. We can use blank space to separate the date and other cell values to distinguish the difference.
How to Concatenate Date in Excel?
There are various methods to Concatenate Dates in Excel, Concatenate Dates with Time, Convert Concatenated Dates into desired formats. Let’s understand How to do it with a few illustrations.
Illustration #1 – Combining Year and Month Fields to Form a Date Field
Sometimes the data we have has separate fields specifying “Month” and “Year”, and we are required to create a complete date using these two fields. This can be done by using the CONCATENATE() function or the & operator in Excel.
Follow the below steps to understand the working of Concatenating Dates in Excel.
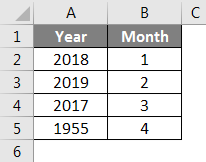
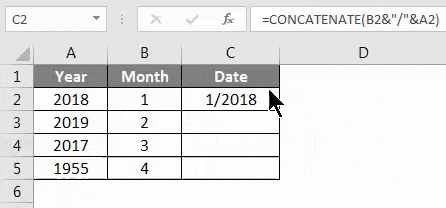
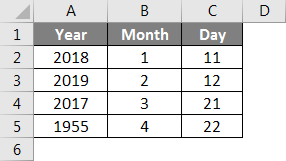
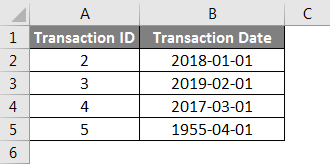
Let’s consider that we have two fields in the dataset received from the client, namely “Year” and Month, both in numeric format. Our aim is to create a third field with a date format.
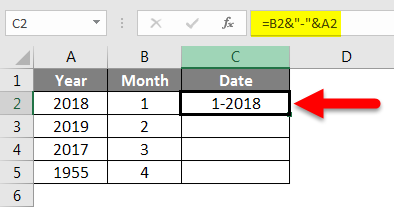
Step 1: Click on the cell where you wish to create the new date and enter the formula below in the destination cell. You can use ‘-‘or ‘/’ as separators.
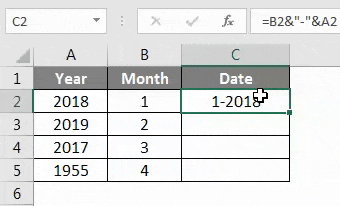
Step 2: By dragging the formula applied to cell C2 till cell C5, we will get the results for the remaining data.
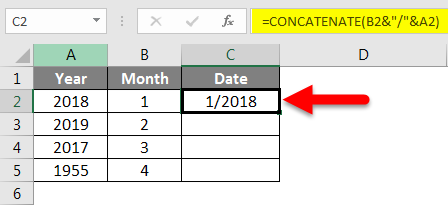
Step 3: You can also use the following alternative formula for the same result.
Step 4: By dragging the formula applied to cell C2 till cell C5, we will get the results for the remaining data.
However, there is a small caveat in the above method, i.e. it does not allow the format of the date to be changed.
Illustration #2 – Combining Year and Month/Day Fields to Form a Date Field in the desired Format
Changing the format of Concatenated Dates in Excel can be done through multiple methods :
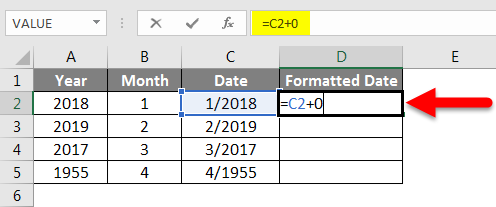
Method #1 – Adding the number 0 to the existing formula
Step 1: Click on the cell where you want to create the new date and enter the formula below in the selected cell.
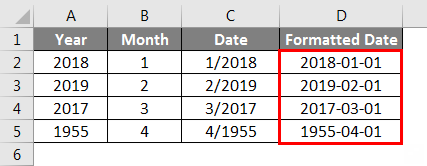
Step 2: Drag the formula applied to cell C2 till cell C5, then we will get the results for the remaining data.
Step 3: Insert 0 to the value of the new field created.
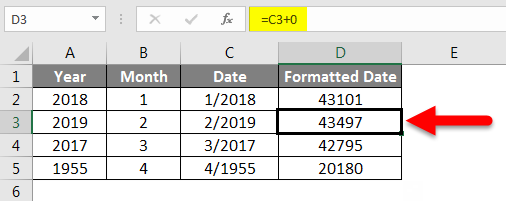
Step 4: Apply the same formula to the remaining cells. The result is shown in the below screenshot.
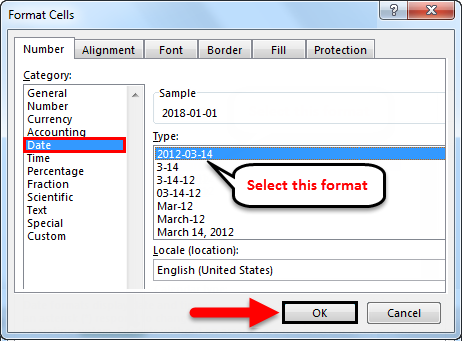
Step 5: Now go to the Number section in the Home Tab and click on the dropdown next to General to select More Number Formats.
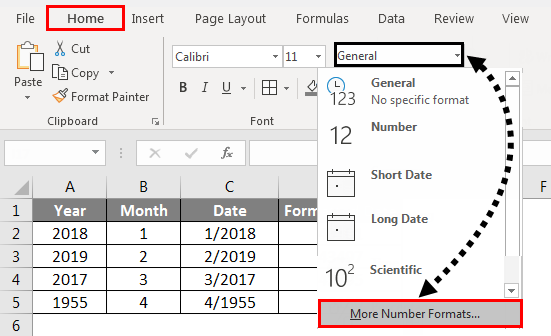
Step 6: From the dialog box, select “Date” under “Category”.

Step 7: Pick the desired date format from the “Type” section and click “OK”
Then we will get the result as follows.
Method #2 – Using the Text() function in the formula
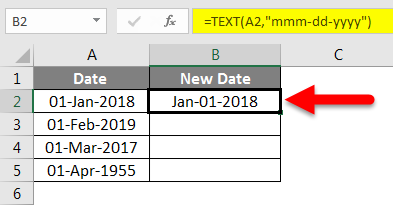
Step 1: Click on the cell where you want to create the new date and enter the formula below in the selected cell to get a date in a specified format.
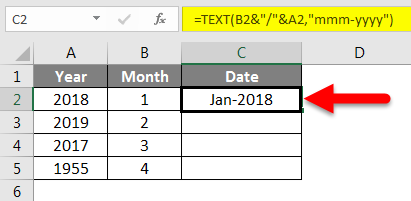
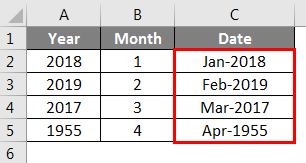
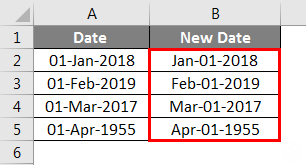
Step 2: After applying the same formula to the remaining cells, we will get the result as follows.
Note:
- By default, Excel uses the first day of the month in the date format that contains day as well.
- In case you concatenate day and month fields to get a complete date field, Excel will use the current year in the date by default.
- The order of concatenation is essential for this scenario. If you concatenate the year and month in the opposite order, i.e. Year before a month, Excel will not interpret it as a date, and you will not be able to change the format.
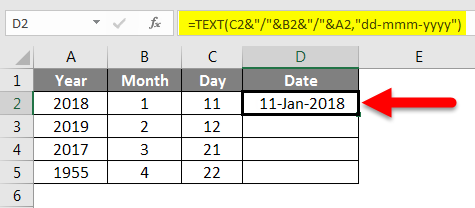
Illustration #3 – Concatenate Year, Month, and Day Fields to Form a Date Field
The data can also have separate fields specifying “Day”, “Month”, and “Year”, and we are required to create a complete date field using all three.
To achieve this goal, follow the steps below:
Step 1: Click on the cell where you wish to create the new date and enter the formula below in the selected cell.
Step 2: After applying the same formula to the remaining cells, we will get the result as follows.
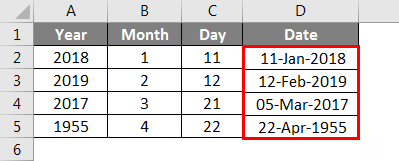
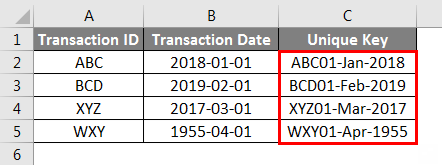
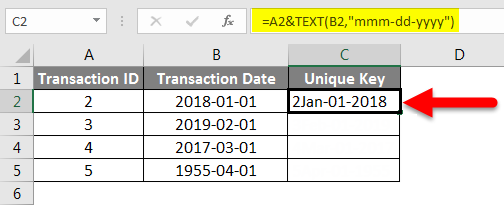
Illustration #4 – Concatenate Date Field with String Field
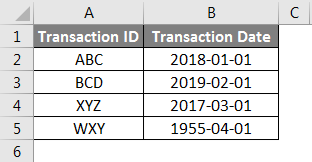
In Excel, sometimes, you will be required to concatenate date fields with string fields to create a unique key for the whole dataset. This can be achieved by following the below steps:
Step 1: Click on the cell where you wish to create the new concatenated field and enter the formula below in the selected cell.

Step 2: Apply the same formula to the remaining cells. The result is shown in the below screenshot.
Note:
- While concatenating the date and string, you must use the TEXT() function to specify the format of the date before you concatenate it with the string.
- If not, Excel will concatenate its numeric value with the string.
Illustration #5 – Concatenate Date Field with Number Field
You may also be required to concatenate the date field in excel with a numeric field. This could be tricky business, but you need to be careful while concatenating the two. Let’s see how to do it.
Step 1: Click on the cell where you wish to create the new concatenated field and enter the formula below in the selected cell.
Step 2: Apply the same formula to all the remaining cells. The result is shown in the below screenshot.

Note:
- While concatenating the date and numeric, you must use the TEXT() function to specify the format of the date before you concatenate it with the numeric.
- If not, Excel will treat the numeric value as a part of the date itself, and the result obtained will be erroneous.
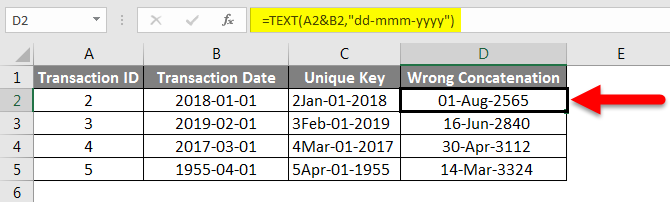
Illustration #6 – Combine Two or More Date Fields
In Excel, Concatenating more than one date can be done through multiple methods :
Method #1 – Using text function separately
For concatenating two dates, we need to ensure that we use text functions separately on both fields prior to concatenation, as shown below:

Step 1: Click on the cell where you wish to create the new concatenated field and enter the formula below in the selected cell.
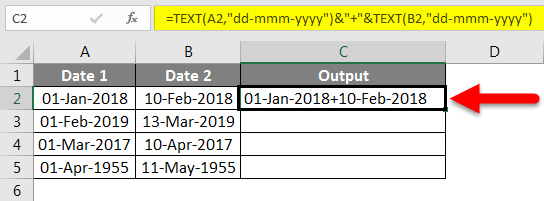
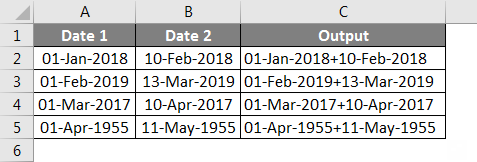
Step 2: Apply the same formula to all the remaining cells. The result is shown in the below screenshot.
Method #2 – Using the CONCAT() Function
For concatenating more than two dates in Excel, we will use the CONCAT() function as it can take a range of cells as an input, as shown below:
Step 1: Click on a new cell where you need to store the dates in text format and apply the Text function as given in the below formula.
Step 2: Apply the same formula to the remaining cells then we will get the result as follows.
Step 3: Select the cell where you wish to create the new concatenated field and enter the formula below in the selected cell.
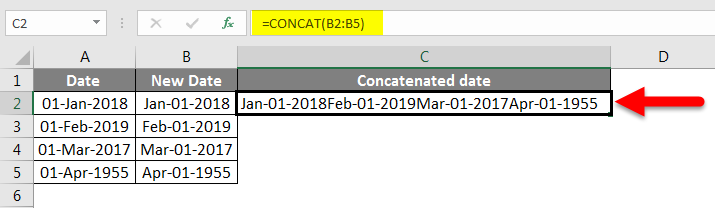
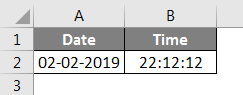
Illustration #7 – Concatenate Date and Time Fields
Concatenating Dates and Time in Excel is easy, and this can be done through multiple methods :
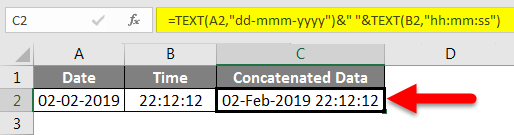
Method #1
For concatenating the date and time field in excel, we need to ensure that we use the text function separately on both fields prior to concatenation as shown in the below steps:
Click on the cell where you wish to create the new field and enter the formula below in the selected cell.
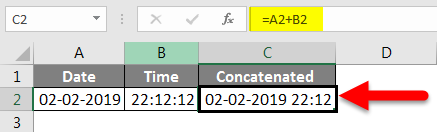
Method #2
The method given above is followed as best practice. However, there is an easier way of implementing the required results, as shown below.
Click on the cell where you wish to create the new field and enter the formula below in the selected cell.
Things to Remember About Concatenate Date in Excel
- It is very important to know how to use the TEXT() function in different scenarios because if it is not used, Excel will concatenate the numeric value of the date.
- The order of concatenation of date in excel is very important. Excel will not interpret it as a date if you concatenate the year and month in order (Year before Month).
- We should know when to use CONCAT() function and CONCATENATE() function to concatenate the date in excel, as the former can take a range while in the latter, we have to enter the values one by one.
Recommended Articles
This has been a guide to Concatenate Date in Excel. Here we discuss how to Concatenate Date in Excel along with practical examples and a downloadable excel template. You can also go through our other suggested articles –
