Updated April 12, 2023

Introduction to Docker Registry
Docker Registry is used to store Docker images i.e. read-only template. In other words, the Docker registry stores Docker repositories that hold Docker images in different tagged versions. It is an open-source, stateless, and highly scalable server-side application. It allows us to control where we want to store our Docker images, we fully own our image distribution pipeline and integrate it with in-house development workflow. Docker registry is only compatible with the Docker engine version 1.6.0 or higher. We can use default storage driver i.e. POSIX file system for development or small deployments however it is recommended to use supported cloud-based storage drivers like S3, Microsoft Azure, Openstack Swift, etc.
How does Registry work in Docker?
We can run our own registry to integrate with our CI/CD pipeline. So, if there is any commit to source code, the SCM tool would trigger a build on our CI system and if the build is successful, it would push the new image to our registry. The Registry then sends the notification that would trigger a deployment on a staging environment. We can quickly deploy a new image over a large cluster of machines using the CI/CD model. We can share Docker images inside an isolated network using the Docker registry. It supports TLS and basic authentication for securing access to our hosted images.
We can a run private registry as a container using the below command:
Code:
$docker run -d -p 5000:5000 --restart=always --name my-registry registry:2

$docker tag alpine localhost:5000/alpine

$docker push localhost:5000/alpine
Output:
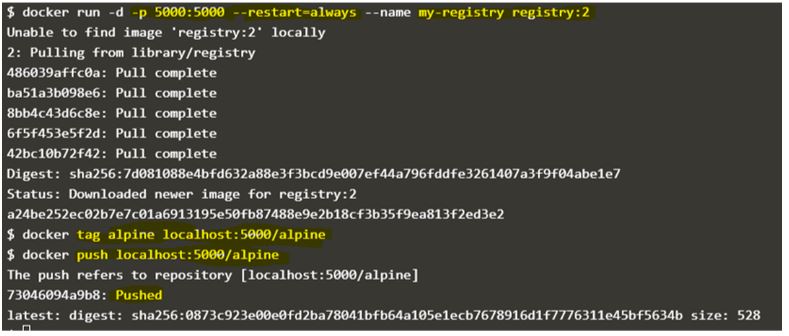
In the above example, we have started a registry container named ‘my-registry’ using ‘registry:2’ Docker image and it is listening on port 5000 and restart option is set to ‘always’ so if container stopped in any case, docker daemon will start it automatically.
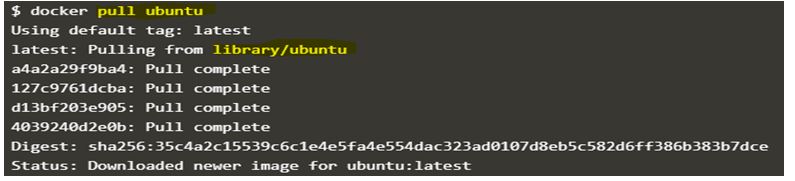
Now, If we want to push any Docker image to this private registry, we have to re-tag the existing Docker image with ‘localhost:5000/<Docker_Image_name>’ as the first part of the Docker image tells about the registry where this image should be pushed. This is applied when we pull the Docker image as well. However, if we only specify the Docker image name, Docker daemon by default adds ‘docker.io/library/’ before the Docker Image name and which directs to pull image from official Docker Hub. For example, if we want to pull the ‘ubuntu’ Docker image from official Docker Hub, we run the command as below:
Code:
$docker pull ubuntu
Output:
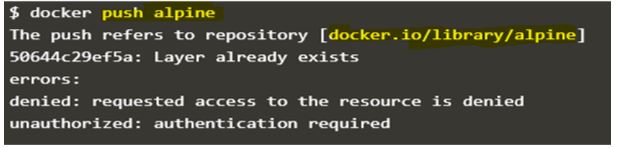
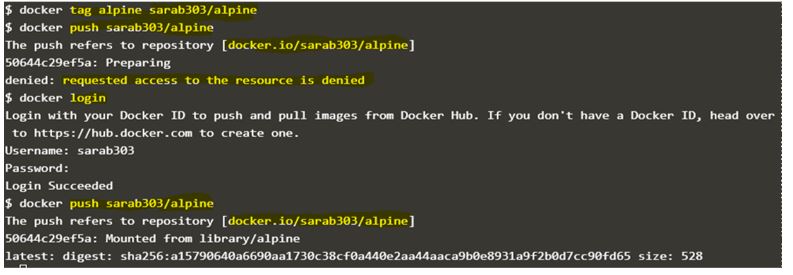
And when we try to push the ‘alpine’ Docker Image the same thing happens. Docker daemon automatically adds ‘docker.io/library/’ to the image and tries to push it to official Docker Hub however it requires authentication to push the image to official Docker Hub. We can create our Docker ID and push the Docker image to our Docker ID however we again re-tag the Docker Image with our Docker ID and Docker image name.
Code:
$docker push alpine
Output:
Code:
$docker tag alpine sarab303/alpine

$docker push sarab303/alpine
Output:
We can pass additional options or modified options to change the basic configuration of the registry. For example, changing the default listening port, customize storage location, implement TLS for securing the registry, etc.
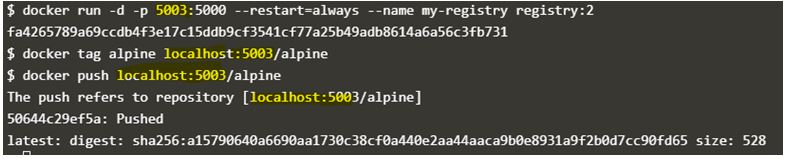
Let’s assume that we already have an application listening on port 5000 and we want to expose the registry on port 5003, we can do that as below:
Code:
$docker run -d -p 5003:5000 --restart=always --name my-registry registry:2

$docker tag alpine localhost:5003/alpine

$docker push localhost:5003/alpine
Output:
If we want to use different port other than default port on which registry listens within the container, we can change that as well by using environment variable REGISTRY_HTTP_ADDR as shown in the below command:
Code:
$docker run -d \

-e REGISTRY_HTTP_ADDR=0.0.0.0:5003 \

-p 5003:5003 \

--name my-registry \

registry:2
Output:

We can customize the storage location to store the respositories of the registry persistently, we can accomplish this by mounting host location or volume to the container. Here, we run the registry container as below to bind mount the host directory ‘/mnt/registry’ into the registry container at ‘/var/lib/registry/’.
Code:
$docker run -d \

-p 5000:5000 \

--restart=always \

--name my-registry \

-v /mnt/registry:/var/lib/registry \

registry:2

$docker tag alpine localhost:5000/alpine

$docker push localhost:5000/alpine

$docker container stop my-registry &&docker container rm my-registry

$docker image rm alpine localhost:5000/alpine

$docker run -d \

-p 5000:5000 \

--restart=always \

--name my-registry \

-v /mnt/registry:/var/lib/registry \

registry:2

$docker pull localhost:5000/alpine
Output:
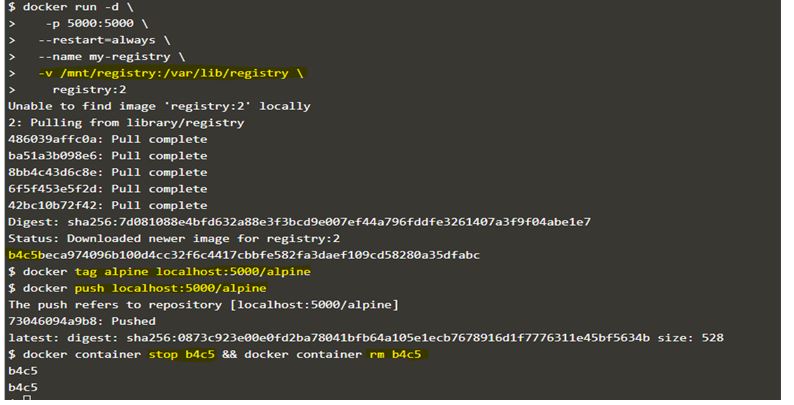
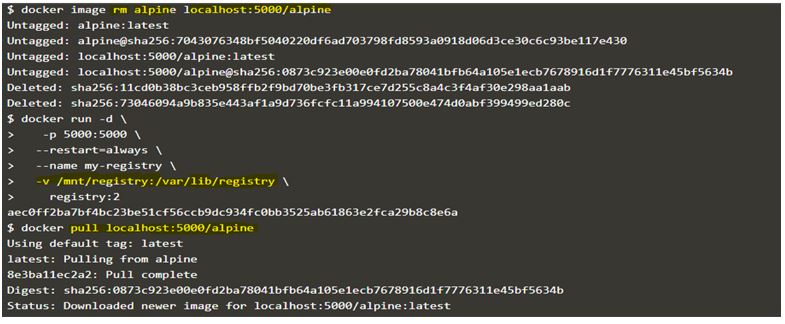
In the above example, started a new local registry named ‘my-registry’ and tagged the ‘alpine’ Docker image to ‘localhost:5000/alpine’ and pushed it to the local registry, then stopped the registry container and deleted it. Also removed locally available ‘alpine’ and ‘localhost:5000/alpine’ Docker images from the host. Now, again started a new registry container and mounted the same host directory to this container and tried to pull the earlier pushed Docker image i.e. ‘localhost:5000/alpine’ and it is successful.
However, the above implementation is only for testing purposes as there is no authentication mechanism is implemented. Let’s implement basic authentication for our private registry by generating an ‘htpasswd’ file and self-signed certificates using below commands.
Code:
$mkdirauth

$docker run --entrypointhtpasswd registry:2 -Bbn user1 P@ssw0rd>auth/htpasswd

$mkdir certs

$ opensslreq \

-newkey rsa:4096 -nodes -sha256 -keyout certs/domain.key \

-x509 -days 365 -out certs/domain.crt
Output:

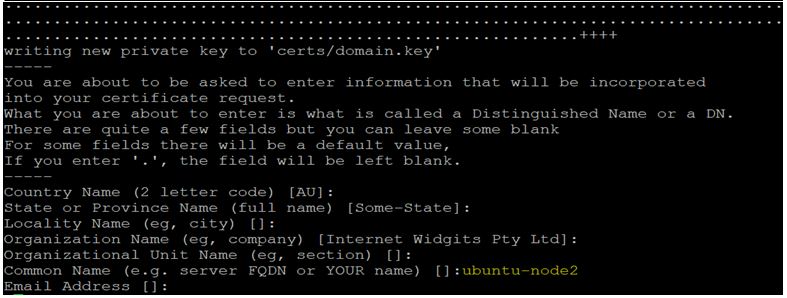
In the above example, we have created a directory called ‘auth’ and ‘certs’ to store the htpasswd credentials and self signed certificates respectively. First, we have created the user ‘user1’ with the password ‘P@ssw0rd’ and stored it in the ‘htpasswd’ file under ‘auth’ folder, then generated self signed certificates using openssl and stored the ‘domain.key’ and ‘domain.crt’ files in the ‘certs’ folder keeping all details blank except the common name of the server.
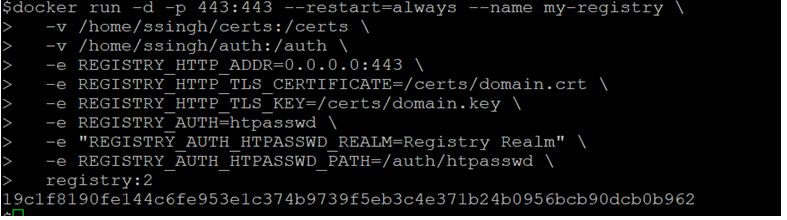
Now, we create a new container with additional options and mounting the certs and auth folders to it.
Code:
$docker run -d -p 443:443 --restart=always --name my-registry \

-v /home/ssingh/certs:/certs \

-v /home/ssingh/auth:/auth \

-e REGISTRY_HTTP_ADDR=0.0.0.0:443 \

-e REGISTRY_HTTP_TLS_CERTIFICATE=/certs/domain.crt \

-e REGISTRY_HTTP_TLS_KEY=/certs/domain.key \

-e REGISTRY_AUTH=htpasswd \

-e "REGISTRY_AUTH_HTPASSWD_REALM=Registry Realm" \

-e REGISTRY_AUTH_HTPASSWD_PATH=/auth/htpasswd \

registry:2
Output:
Code:
$docker tag nginx localhost:443/nginx

$docker push localhost:443/nginx

$docker login localhost:443

$docker push localhost:443/nginx
Output:
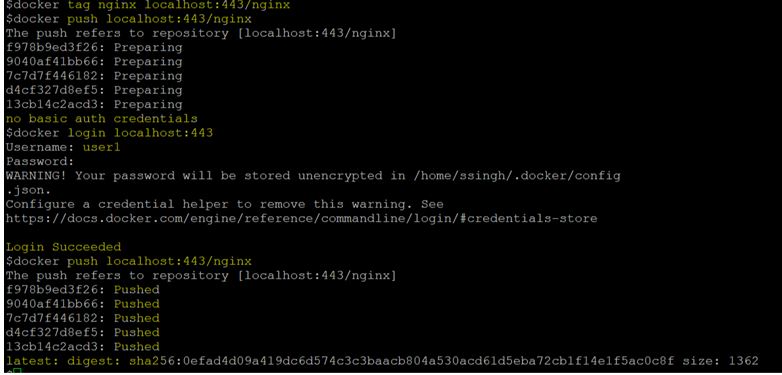
In the above snapshot, tagged the ‘nginx’ Docker image to ‘localhost:443/nginx’ and tried to push to the newly setup private registry however we can see that it is giving error that says ‘no basic auth credentials’. Logged into the private registry using the credentials of ‘user1’ and the image has been pushed to the private registry successfully.
Conclusion
Docker Registry is a great solution for hosting on-pre private registry, however, there are alternatives available for Docker Registry like Docker Hub which is free to use, hosted registry by Docker, need to pay for additional features though, and DTR i.e. Docker Trusted Registry is a commercially supported version of the registry, comes with Docker Enterprise Edition.
Recommended Articles
This is a guide to Docker Registry. Here we discuss the introduction to Docker Registry along with how registry work. You may also have a look at the following articles to learn more –

