EDUCBA

EDUCBA

MENUMENU
  • Free Tutorials
  • Free Courses
  • Certification Courses
  • 280+ Courses All in One Bundle
  • Login

Dispersion Effect in Photoshop

Home » Design » Design Tutorials » Photoshop Tutorial » Dispersion Effect in Photoshop

Dispersion Effect in Photoshop

Introduction to Dispersion Effect in Photoshop

You can use the dispersion effect in Photoshop to create mesmerizing effects that are dramatic in nature. Just select the image which you want to work on and transform them into amazing artwork. You can use various brush types to create amazing dispersion effects. Below in this tutorial, I have used the image of a car and have added the dispersion effect. Go through the steps to discover everything about adding a Dispersion effect in Photoshop.

How to Create a Dispersion Effect in Photoshop?

Following are the steps to create a dispersion effect in photoshop.

Start Your Free Design Course

3D animation, modelling, simulation, game development & others

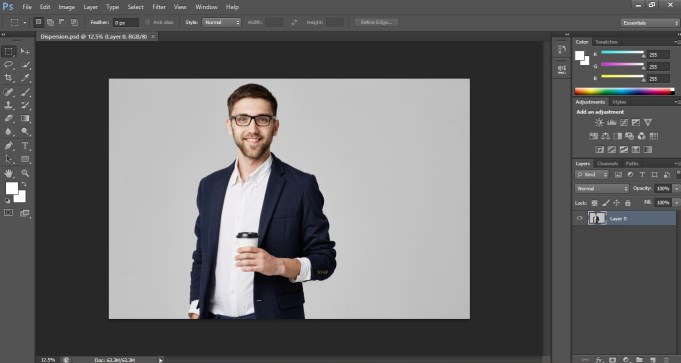
Step 1: The first step is to load the image in Photoshop. For that, you can either drag the image onto the document window or simply place the image from Photoshop.

Loading the image

Step 2: Next, duplicate the layer in the images using the shortcut key Alt+ J or Cmd + J if you use Mac.

duplicate the layers

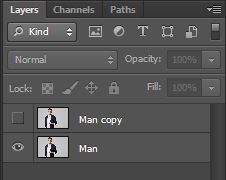
Step 3: Open your image in Photoshop and duplicate the layer (Alt + J or Command + J on Mac). Next, hide the new layer by clicking on the Eye icon.

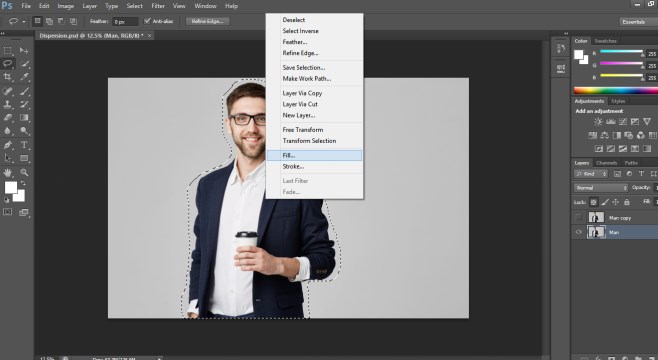
Step 4: In the 4th step, we will use the lasso tool. Draw around the subject in the image roughly. The selection needs to cover the entire subject.

Popular Course in this category
Photoshop Training (9 Courses, 12+ Projects)9 Online Courses | 12 Hands-on Projects | 78+ Hours | Verifiable Certificate of Completion | Lifetime Access
4.9 (7,079 ratings)
Course Price

View Course

Related Courses
Adobe Premiere Pro Tutorial (2 Courses, 7+ Projects)All in One Design Bundle (280+ Courses, 100+ projects)

selection

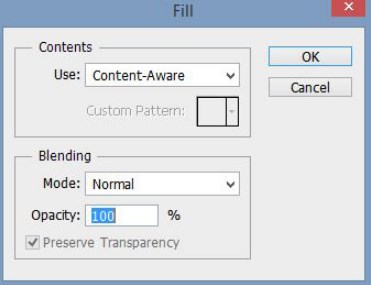
Step 5: After the selection is done, right-click on it and select fill.

Dispersion Step 5

Step 6: Select the content-aware option and click on Ok.
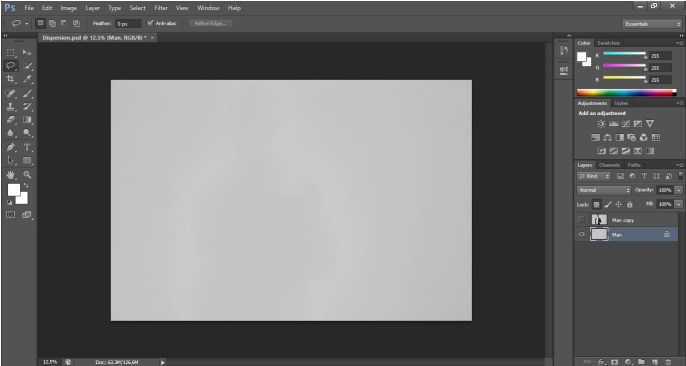
content-aware

Step 7: Now you will have just the image background. You can deactivate the last if it is still active. The shortcut for the same is Ctrl+D and for Mac CMD+D. Alternatively, there is a select menu on the top as well where you can choose the deselect option.

Dispersion Effect in Photoshop 1-3

Step 8: After that, I am going to select the new layer option from the layers panel. After that, pick the quick selection tool available in the menu on the left side. It picks the entire subject of the image.
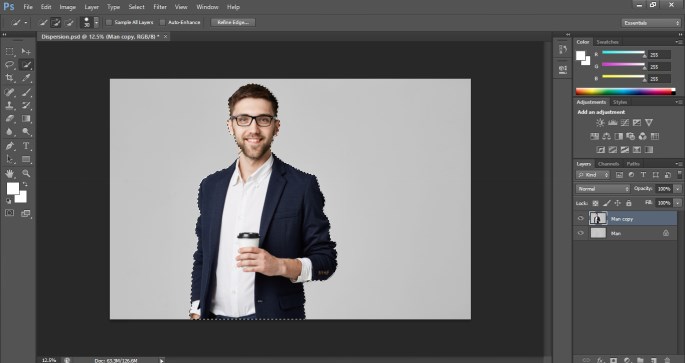
Dispersion Effect in Photoshop 1-5

Step 9: If you feel that, the selection is fine, you can choose Select and Mask on the top. In the older version of Photoshop, the option is to refine the edge instead.

refine the edge

Step 10: On the left side, you will find the Refine Edge button which can be used to mask deeper details. Now we are going to select the edges from the picture. You can give values in the Refine Edge dialog box and create an appropriate effect.

Step 11: Select the layer mask from the properties panel at the bottom. Select OK. Now the layer mask is applied. We will duplicate the masked layer.

Dispersion Effect in Photoshop 1-7

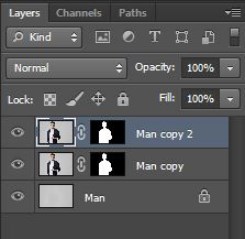
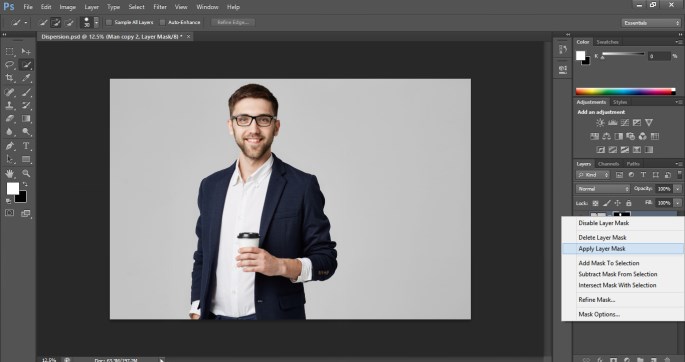
Step 12: Right-click on the duplicate layer mask and select “Apply Layer Mask”.

Apply Layer Mask

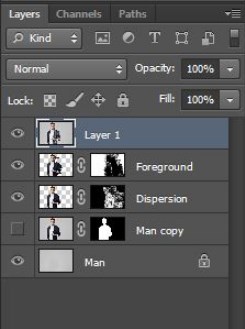
Step: 13: The top layer will have a car in isolation. It can be renamed to Dispersion for easier understanding.

Dispersion Effect in Photoshop 1-9

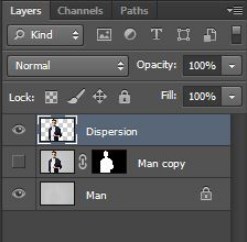
Next, switch off the visibility of the layer by selecting the eye icon.

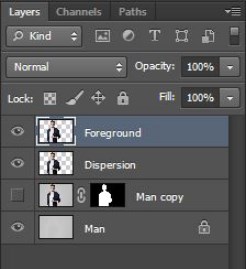
Step 14: Create a copy of the Dispersion layer and name it to the Foreground.

Dispersion Effect in Photoshop 1-10

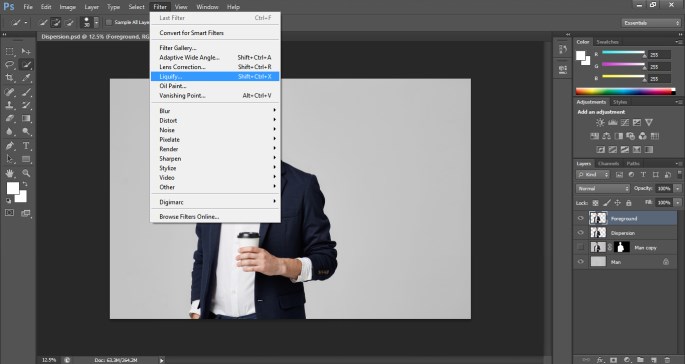
Step 15: Select the Dispersion layer and go to the top menu option. Now choose the Filter option and click on Liquify.

Dispersion Effect in Photoshop 1-11

Step 16: Select the Forward Warp tool, the first option that you find on the left. After that start dragging the image areas out for dispersed effect.

Dispersion Effect in Photoshop 1-12

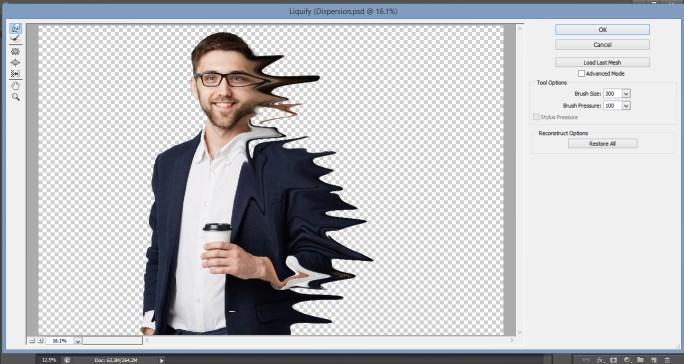
PS: You can try increasing or decreasing the brush radius. For that, use the left bracket “[“, to reduce the radius. For increasing the radius, use the right bracket “]”. Accordingly, adjust the distortion amount as much as it suits your creativity. Finally, click on OK.

Step 17: That should leave you something like the smudged image. Keeping the Dispersion layer selected, hold Alt/Option and activate the mask button.

Step 18: Now, we will select the Foreground layer and click on the Mask.

Dispersion Effect in Photoshop 1-13

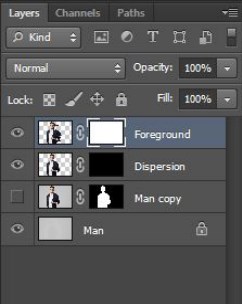
Now you will notice that the Dispersion layer has a black cover while the Foreground layer has a white cover. One hides the mask while the latter shows the mask.

Step 19: Keeping the Foreground mask active, select a brush from the tools panel. You can try installing brushes to obtain better results apart from the default Photoshop brushes.

The foreground of the brush should be black in the “Foreground” layer. This cuts out parts from the selected layer. Use the brush tool and vary the effect of dispersion.

Step 20: You can change the brush settings from the top menu. You can change the size, type, and orientation of the selected brush.
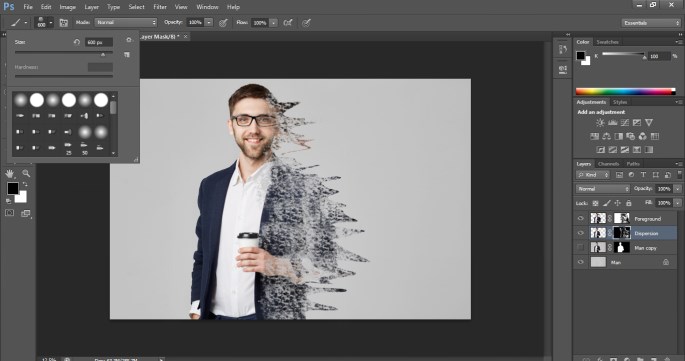
Dispersion Effect in Photoshop 1-14

Step 21: Now, we will work on creating ash like effect by uncovering the Liquify distortion which was created earlier. Here the foreground color of the brush needs to be white.

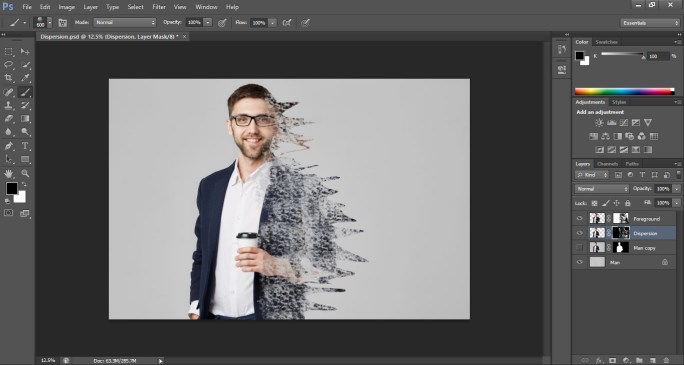
Step: 22: Select the “Dispersion” layer mask. Continue using the brush tool and add varying brush effects.

Step: 23: Toggle between both the ‘Dispersion’ and ‘Foreground’ layers to better control the range of the effect. Just be careful to change the foreground color according to the selected layer. Spend some to obtain the best results you can make.

Dispersion Effect in Photoshop 1-15

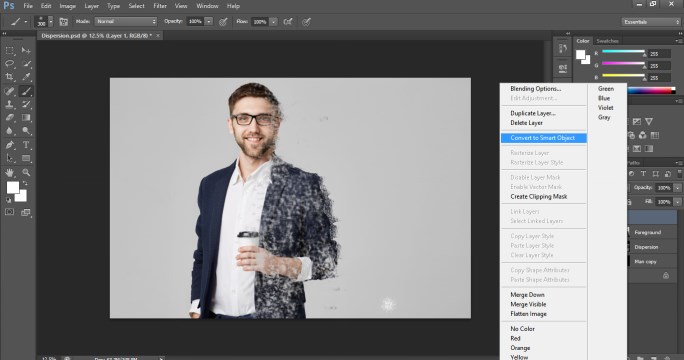
Step: 24: Next, merge all the visible layers by hitting Ctrl+Shift+Alt+E. The resulting layer is Layer 1.

Dispersion Effect in Photoshop 1-16

Next, select Layer 1 and convert it to a smart object by right-clicking it.

Dispersion Effect in Photoshop 1-17

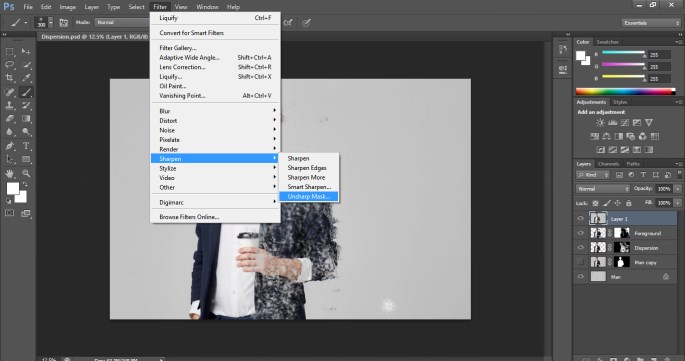
Step 25: After that, go to the Filter menu at the top and pick Sharpen and from there Unsharp mask.

Dispersion Effect in Photoshop 1-18

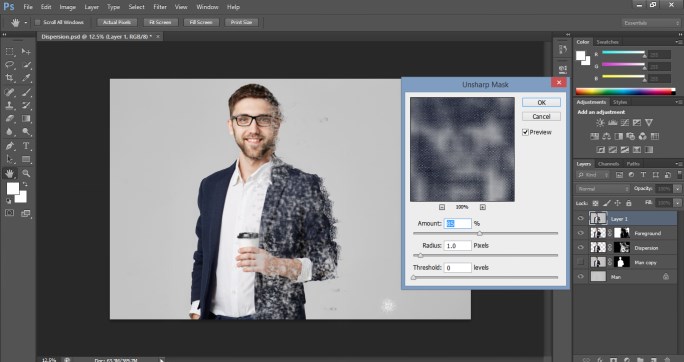
Step 26: Choose the best value for the amount you want to sharpen. In this example, I have set the amount to 85%.

Dispersion Effect in Photoshop 1-19

Conclusion

Photoshop offers numerous effects and features for transforming mere images to artforms. Dispersion is one such amazing effect. From this article, you can learn to create stunning dispersion effects to your images. Try them out today and see how you can play with this new technique in your pictures. If you want to know about more such techniques, visit our similar blogs.

Recommended Articles

This is a guide to Dispersion Effect in Photoshop. Here we discuss the Introduction and how to create a dispersion effect in photoshop along with its steps. You may also look at the following articles to learn more –

  1. How to Highlight Text in Photoshop? | 2 Methods
  2. Creating Reflection Effect in Photoshop
  3. Methods to Create Snowfall in After Effects
  4. Guide to Composition in After Effects

Photoshop Training (9 Courses, 12+ Projects)

9 Online Courses

12 Hands-on Projects

78+ Hours

Verifiable Certificate of Completion

Lifetime Access

Learn More

0 Shares
Share
Tweet
Share
Primary Sidebar
Photoshop Tutorial
  • Effects
    • Text Effects in Photoshop
    • Metal Text Effect in Photoshop
    • Reflection Effect in Photoshop
    • Snow Effect in Photoshop
    • Mirror Effect in Photoshop
    • Motion Effect in Photoshop
    • Oil Paint Filter in Photoshop
    • Plastic Effect in Photoshop
    • Rain Effect in Photoshop
    • Gold Text Effect in Photoshop
    • 3D Text in Photoshop
    • 3D Text Effect in Photoshop
    • Clipping Mask in Photoshop
    • Fill Color in Photoshop
    • Delete Background in Photoshop
    • Transparent Text in Photoshop
    • Make Logo in Photoshop
    • Blend Images in Photoshop
    • Website Layout in Photoshop
    • Change Hair Color in Photoshop
    • Change Color in Photoshop
    • Highlight Text in Photoshop
    • Change Text Color in Photoshop
    • Change Shirt Color in Photoshop
    • Filters in Photoshop
    • Portrait Effect in Photoshop
    • Fire Effect in Photoshop
    • Ice Effect in Photoshop
    • Metallic Effect Photoshop
    • Photoshop Font Effects
    • Glow Effects in Photoshop
    • Tree Brush Photoshop
    • Shiny Effect Photoshop
    • Morphing in Photoshop
    • Dispersion Effect in Photoshop
    • Photoshop Distort Effect
    • Typography in Photoshop
    • Photoshop Cinemagraph
    • Glitch Effect in Photoshop
    • Photoshop Straighten Image
    • Stamp Effect in Photoshop
    • Warp Image Photoshop
    • Fix Perspective in Photoshop
    • Vanishing Point in Photoshop
    • Fisheye Effect in Photoshop
    • Distortion Effect Photoshop
    • Resize Object in Photoshop
    • How to Paint in Photoshop?
    • How to Print in Photoshop?
    • Perspective Correction in Photoshop
    • Photoshop Sun Effect
    • Photoshop Gold Gradient
    • Night Effect in Photoshop
    • What is Masking
    • Photoshop Polaroid
    • Pixel Effect Photoshop
    • Vaporwave Photoshop
    • Vintage Effect Photoshop
    • Photoshop hologram effect
    • Templates in Photoshop
    • MP4 to GIF Photoshop
    • Photoshop Cheat Sheet
  • Basic
    • Introduction to Photoshop
    • What is Photoshop
    • Career in Photoshop
    • Install Adobe Photoshop
    • Plugins in Photoshop
    • Photoshop Versions
    • Uses Of Photoshop
    • Adobe Photoshop Shortcut Keys
    • Adobe Photoshop Commands
    • Adobe Photoshop
    • Is Photoshop Free
    • Top 10 Features in Adobe Photoshop
    • Layers in Photoshop
    • 10 Free UI Kits For to Download
    • Smart Objects in Photoshop
  • Tools
    • Adobe Photoshop Tools
    • Clone Stamp Tool in Photoshop
    • Eraser Tool in Photoshop
    • Selection Tool in Photoshop
    • Blur Tool in Photoshop
    • Eyedropper Tool in Photoshop
    • Move Tool in Photoshop
    • Paint Bucket Tool in Photoshop
    • Patch Tool in Photoshop
    • Pencil Tool in Photoshop
    • Line Tool in Photoshop
    • Color Replacement Tool in Photoshop
    • Background Eraser Tool in Photoshop
    • Burn Tool in Photoshop
    • Custom Shape Tool in Photoshop
    • Magic Wand Tool in Photoshop
    • Quick Selection Tool in Photoshop
    • Red Eye Tool in Photoshop
    • Ruler Tool in Photoshop
    • Sharpen Tool in Photoshop
    • Smudge tool in Photoshop
    • Sponge Tool in Photoshop
    • Rectangle Tool in Photoshop
    • Lasso Tool in Photoshop
    • Adobe Photoshop Elements tools
    • Photoshop Mixer Brush Tool
    • Watercolor Brushes in Photoshop
    • Artboard in Photoshop
    • Crop Tool in Photoshop
    • Healing Brush Tool in Photoshop
    • Transform Tool Photoshop
  • Interview Questions
    • Photoshop Interview Questions

Related Courses

Photoshop Training Course

Adobe Premiere Pro Training Course

Design Training Course

Footer
About Us
  • Blog
  • Who is EDUCBA?
  • Sign Up
  • Corporate Training
  • Certificate from Top Institutions
  • Contact Us
  • Verifiable Certificate
  • Reviews
  • Terms and Conditions
  • Privacy Policy
  •  
Apps
  • iPhone & iPad
  • Android
Resources
  • Free Courses
  • Photoshop Tutorial
  • 3ds Max Tutorial
  • All Tutorials
Certification Courses
  • All Courses
  • Design Course - All in One Bundle
  • Photoshop Course
  • Maya Course
  • Unreal Engine Course
  • Unity Course
  • DaVinci Resolve Course
  • Pro Tools Course

© 2020 - EDUCBA. ALL RIGHTS RESERVED. THE CERTIFICATION NAMES ARE THE TRADEMARKS OF THEIR RESPECTIVE OWNERS.

EDUCBA Login

Forgot Password?

EDUCBA
Free Design Course

3D animation, modelling, simulation, game development & others

*Please provide your correct email id. Login details for this Free course will be emailed to you
Book Your One Instructor : One Learner Free Class

Let’s Get Started

This website or its third-party tools use cookies, which are necessary to its functioning and required to achieve the purposes illustrated in the cookie policy. By closing this banner, scrolling this page, clicking a link or continuing to browse otherwise, you agree to our Privacy Policy

EDUCBA

*Please provide your correct email id. Login details for this Free course will be emailed to you
EDUCBA
Free Design Course

3D animation, modelling, simulation, game development & others

*Please provide your correct email id. Login details for this Free course will be emailed to you

Special Offer - Photoshop Training (9 Courses, 12+ Projects) Learn More