Updated May 17, 2023
Introduction to CSS Text Effects
Many properties of CSS text effects help to provide various styling in the words of a sentence on an HTML page with CSS.So, words will get the different patterns, orientations, and designs by using multiple text effects of the CSS and utilizing its various values of the parameters to get a better design of the web page, which is as per the required design in a web page development. In this article, we will demonstrate the techniques that a web page designer can apply to the text of an HTML page by using the CSS text affects property with many examples.
Examples of CSS Text Effects
Following are the examples given below:
Example #1 – Writing Mode Property
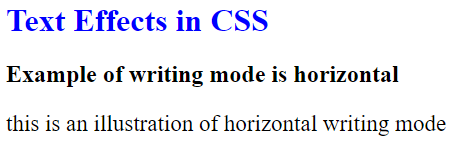
In the first example, we will demonstrate the writing-mode property. This specifies the orientation of text, whether it is vertical or horizontal. In this example, we have shown horizontal writing mode, a horizontal layout from left to right.
Code:
<!DOCTYPE html>
<html>
<head>
<style>
p.wMH {
writing-mode: horizontal-tb;
font-size: 23px;
}
</style>
</head>
<body style = "text-align: auto;">
<h1 style = "color:blue">
Text Effects in CSS
</h1>
<h2>Example of writing mode is horizontal</h2>
<p class="wMH">
this is an illustration of horizontal writing mode
</p>
</body>
</html>
Output:
Example #2 – Vertical Writing Mode
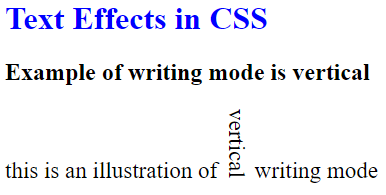
Here, we will demonstrate another writing-mode property. This specifies the orientation of text whether it is vertical or horizontal. In this example, we have demonstrated vertical writing mode. Vertical writing mode is rarely used, but still a very handy tool in case of any requirement like this.
Code:
<!DOCTYPE html>
<html>
<head>
<style>
p {
font-size: 23px;
}
span.wMH {
writing-mode: vertical-rl;
font-size: 23px;
}
</style>
</head>
<body style = "text-align: auto;">
<h1 style = "color:blue">
Text Effects in CSS
</h1>
<h2>Example of writing mode is vertical</h2>
<p>
this is an illustration of <span class="wMH">vertical </span> writing mode
</p>
</body>
</html>
Output:
Example #3 – Work Break Property
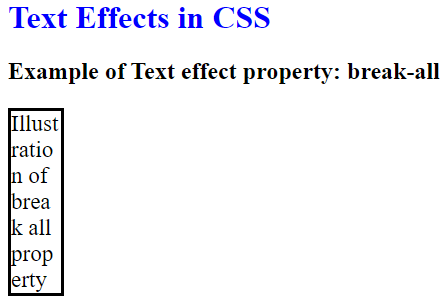
In this example, we will show you a demonstration of work break property. This property will indicate whether to break the word in a sentence to keep it within the borderline area or not. In this case, we have shown the “break all” property where the word is broken into parts to contain it within the boundary line. It is useful to keep words within the border.
Code:
<!DOCTYPE html>
<html>
<head>
<style>
p.brkAll {
width: 50px;
border: 3px solid black;
word-break: break-all;
text-align: left;
font-size: 23px;
}
</style>
</head>
<h1 style = "color:blue">
Text Effects in CSS
</h1>
<body style= "text-align: auto;">
<h2>Example of Text effect property: break-all</h2>
<p class="brkAll">
Illustration of break all property
</p>
</body>
</html>
Output:
Example #4 – Keep all Work Break Property
In this case, we will show another demonstration of work break property. This property will indicate whether to break the word in a sentence to keep it within the borderline area or not. In this case, we have shown the “keep all” property where the word is flown out of the boundary line.
Code:
<!DOCTYPE html>
<html>
<head>
<style>
p.keepAll {
width: 50px;
border: 3px solid black;
word-break: keep-all;
text-align: left;
font-size: 23px;
}
</style>
</head>
<h1 style = "color:blue">
Text Effects in CSS
</h1>
<body style= "text-align: auto;">
<h2>Example of Text effect property: keep-all</h2>
<p class="keepAll">
Illustration of keep all property
</p>
</body>
</html>
Output:

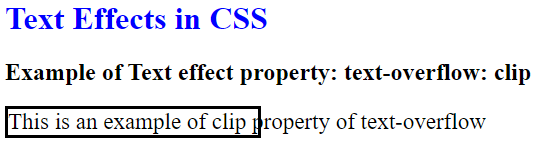
Example #5 – Clip Text Overflow Property
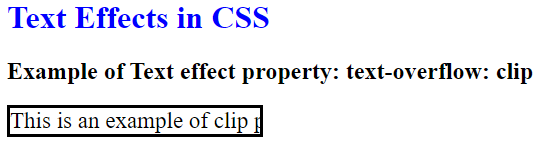
In this example, we will show you a demonstration of the text-overflow property. This property will specify whether the word will be in a limited area or not. In this case, we have shown the “clip” property where the word is cut beyond its boundary line. If we hover the mouse in the area, you will see the whole text as the code is written like this for visibility.
Code:
<!DOCTYPE html>
<html>
<head>
<style>
div.txtOf {
white-space: nowrap;
width: 250px;
overflow: hidden;
border: 3px solid black;
font-size: 23px;
text-overflow: clip;
}
div.txtOf:hover {
overflow: visible;
}
</style>
</head>
<body style = "text-align: auto">
<h1 style = "color:blue">
Text Effects in CSS
</h1>
<h2>
Example of Text effect property: text-overflow: clip
</h2>
<div class="txtOf">
This is an example of clip property of text-overflow
</div>
</body>
</html>
Output:
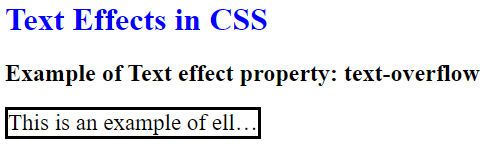
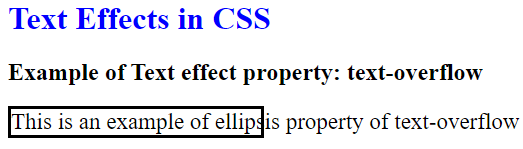
Example #6 – Ellipsis Text Overflow Property
In this example, we will show another demonstration of the text-overflow property. This property will specify whether the word will be in a limited area or not. In this case, we have shown the “ellipsis” property where the ellipsis will be present before the cut to indicate that there is a continuation of the sentence. We can see the whole text if hover the mouse on the text.
Code:
<!DOCTYPE html>
<html>
<head>
<style>
div.txtOf {
white-space: nowrap;
width: 250px;
overflow: hidden;
border: 3px solid black;
font-size: 23px;
text-overflow: ellipsis;
}
div.txtOf:hover {
overflow: visible;
}
</style>
</head>
<body style = "text-align: auto">
<h1 style = "color:blue">
Text Effects in CSS
</h1>
<h2>
Example of Text effect property: text-overflow
</h2>
<div class="txtOf">
This is an example of ellipsis property of text-overflow
</div>
</body>
</html>
Output:
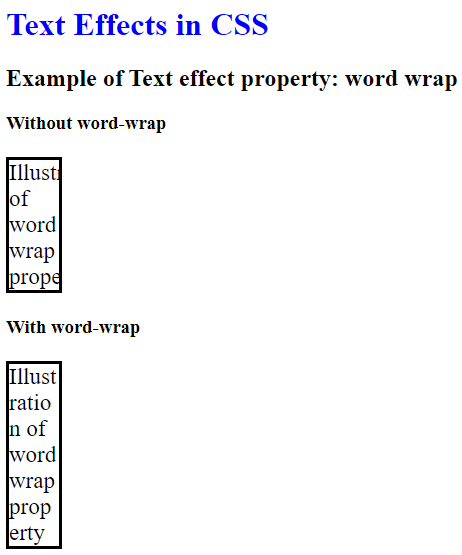
Example #7 – Word Wrap Property
In this example, we will show you a demonstration of word-wrap property. Word wrap will limit the whole text within its area to prevent overflow. If you see the output, you can understand how words will overflow if we do not put word wrap on it.
Code:
<!DOCTYPE html>
<html>
<head>
<style>
p {
width: 50px;
overflow: hidden;
border: 3px solid black;
text-align: left;
font-size: 23px;
}
p.Wrp {
word-wrap: break-word;
}
</style>
</head>
<body style = "text-align: auto;">
<h1 style = "color:blue">
Text Effects in CSS
</h1>
<h2>
Example of Text effect property: word wrap
</h2>
<h3>Without word-wrap</h3>
<p>
Illustration of word wrap property
</p>
<h3>With word-wrap</h3>
<p class="Wrp">
Illustration of word wrap property
</p>
</body>
</html>
Output:
Conclusion
Learning of “CSS Text Effects” gets a finish here. During this article, we’ve provided you with several examples of the ways you’ll follow to use the values of text effects property within the CSS code of the hypertext mark-up language page. This text is going to be very helpful for web designers who are involved in front-end development and design with hypertext mark-up language with CSS.
Recommended Articles
We hope that this EDUCBA information on “CSS Text Effects” was beneficial to you. You can view EDUCBA’s recommended articles for more information.

