EDUCBA

EDUCBA

MENUMENU
  • Free Tutorials
  • Free Courses
  • Certification Courses
  • 280+ Courses All in One Bundle
  • Login

Blur in Illustrator

Home » Design » Design Tutorials » Illustrator Tutorial » Blur in Illustrator

blur in illustrator

What is Blur in Adobe Illustrator?

Blur in Adobe Illustrator is a vector editing software that allows users to create vector artworks. It was initially released on March 19, 1987. It supports both Windows and Mac OS. The latest Illustrator version is Adobe CC 2019. Users can add various effects and properties to objects and images in Illustrator. It has options to add a blur effect in the images. You can do so by following an easy method. After learning to use blur, you can use it to give creative blur effects to your images. In this article, you will learn to apply the various blur effects in Illustrator.

Various Blur Effects in Adobe Illustrator

Below are the steps which show blur effects in illustrator:

Start Your Free Design Course

3D animation, modelling, simulation, game development & others

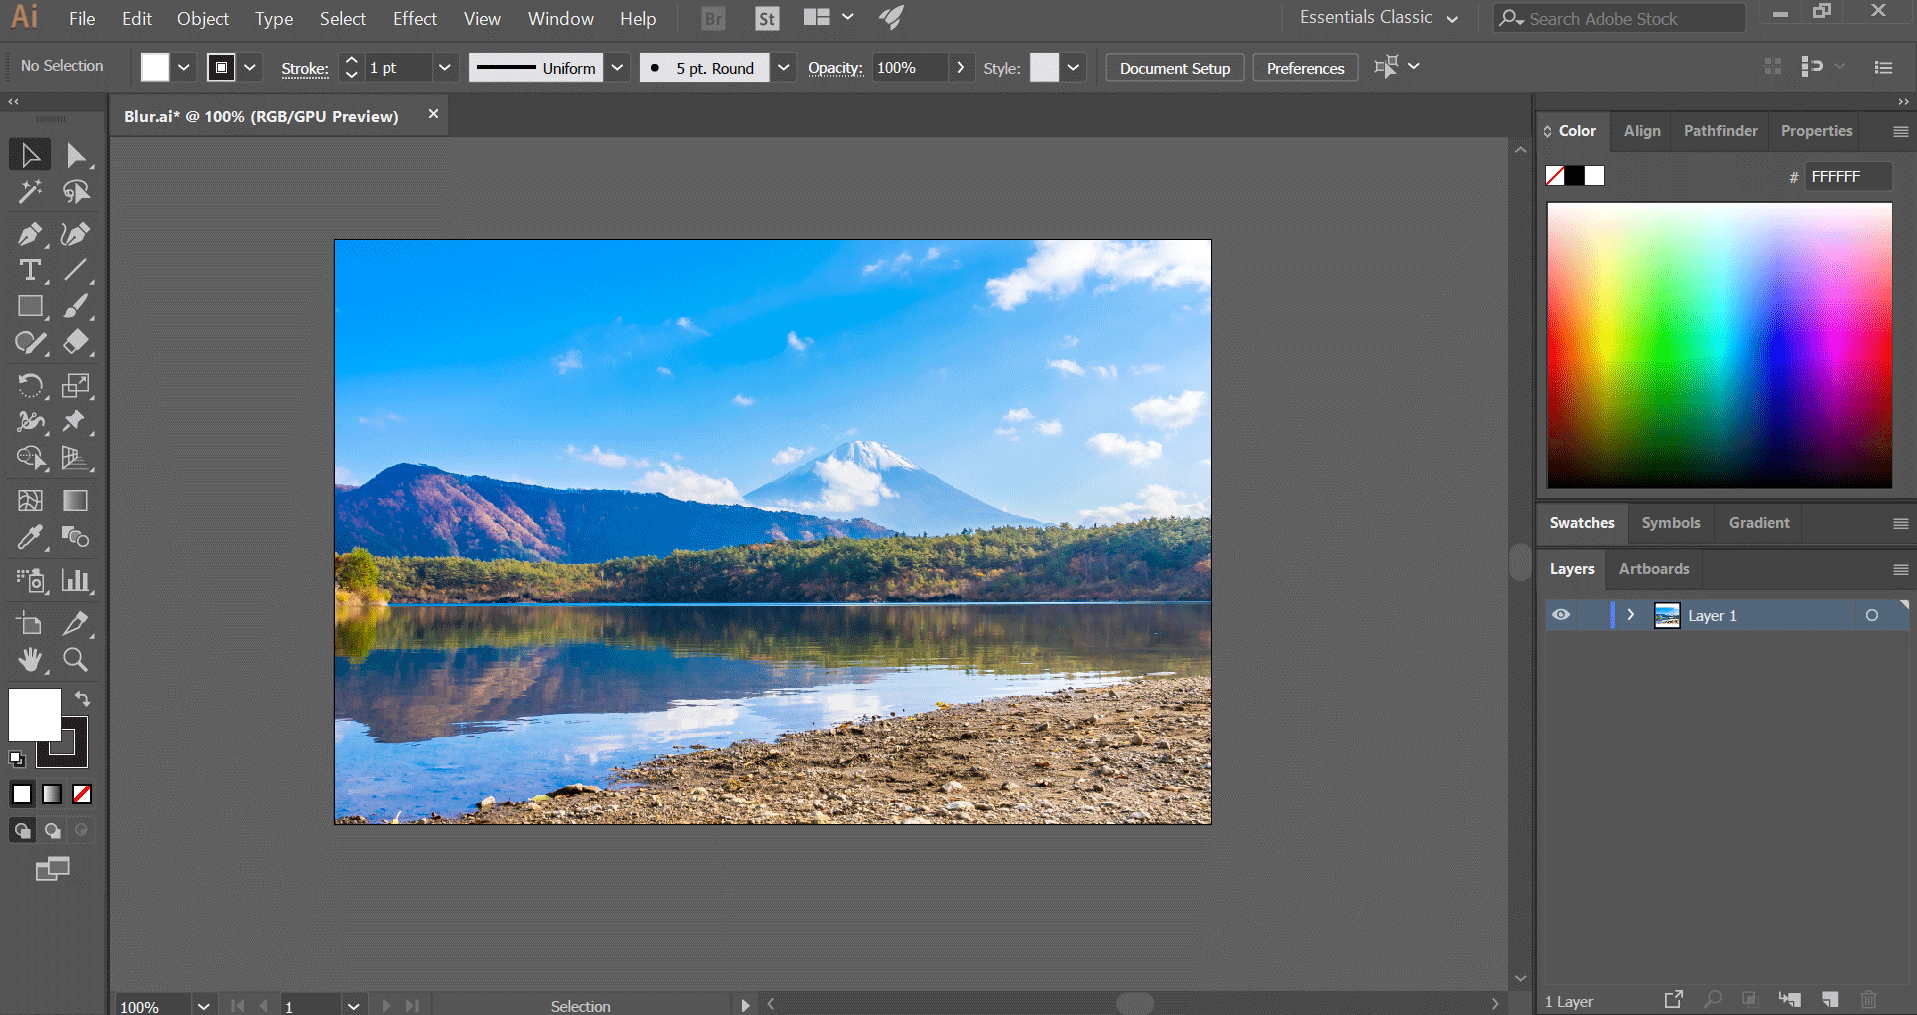
Step 1: Open Adobe Illustrator and create a document to work.

  • Below, I have used an image. Similarly, you can use one. The only thing you have to notice is that the image should be of high resolution. Add the image into the document by dragging it directly into the canvas or using File and Place.

place image

Step 2: First of all, select the object using the selection tool. You can also use the shortcut key (V) for the selection tool.

Step 3: Select the image or object you have in your document for applying the blur effect. After selecting the image, a blue box will appear with anchors. This means that the object is selected and is ready to be edited.

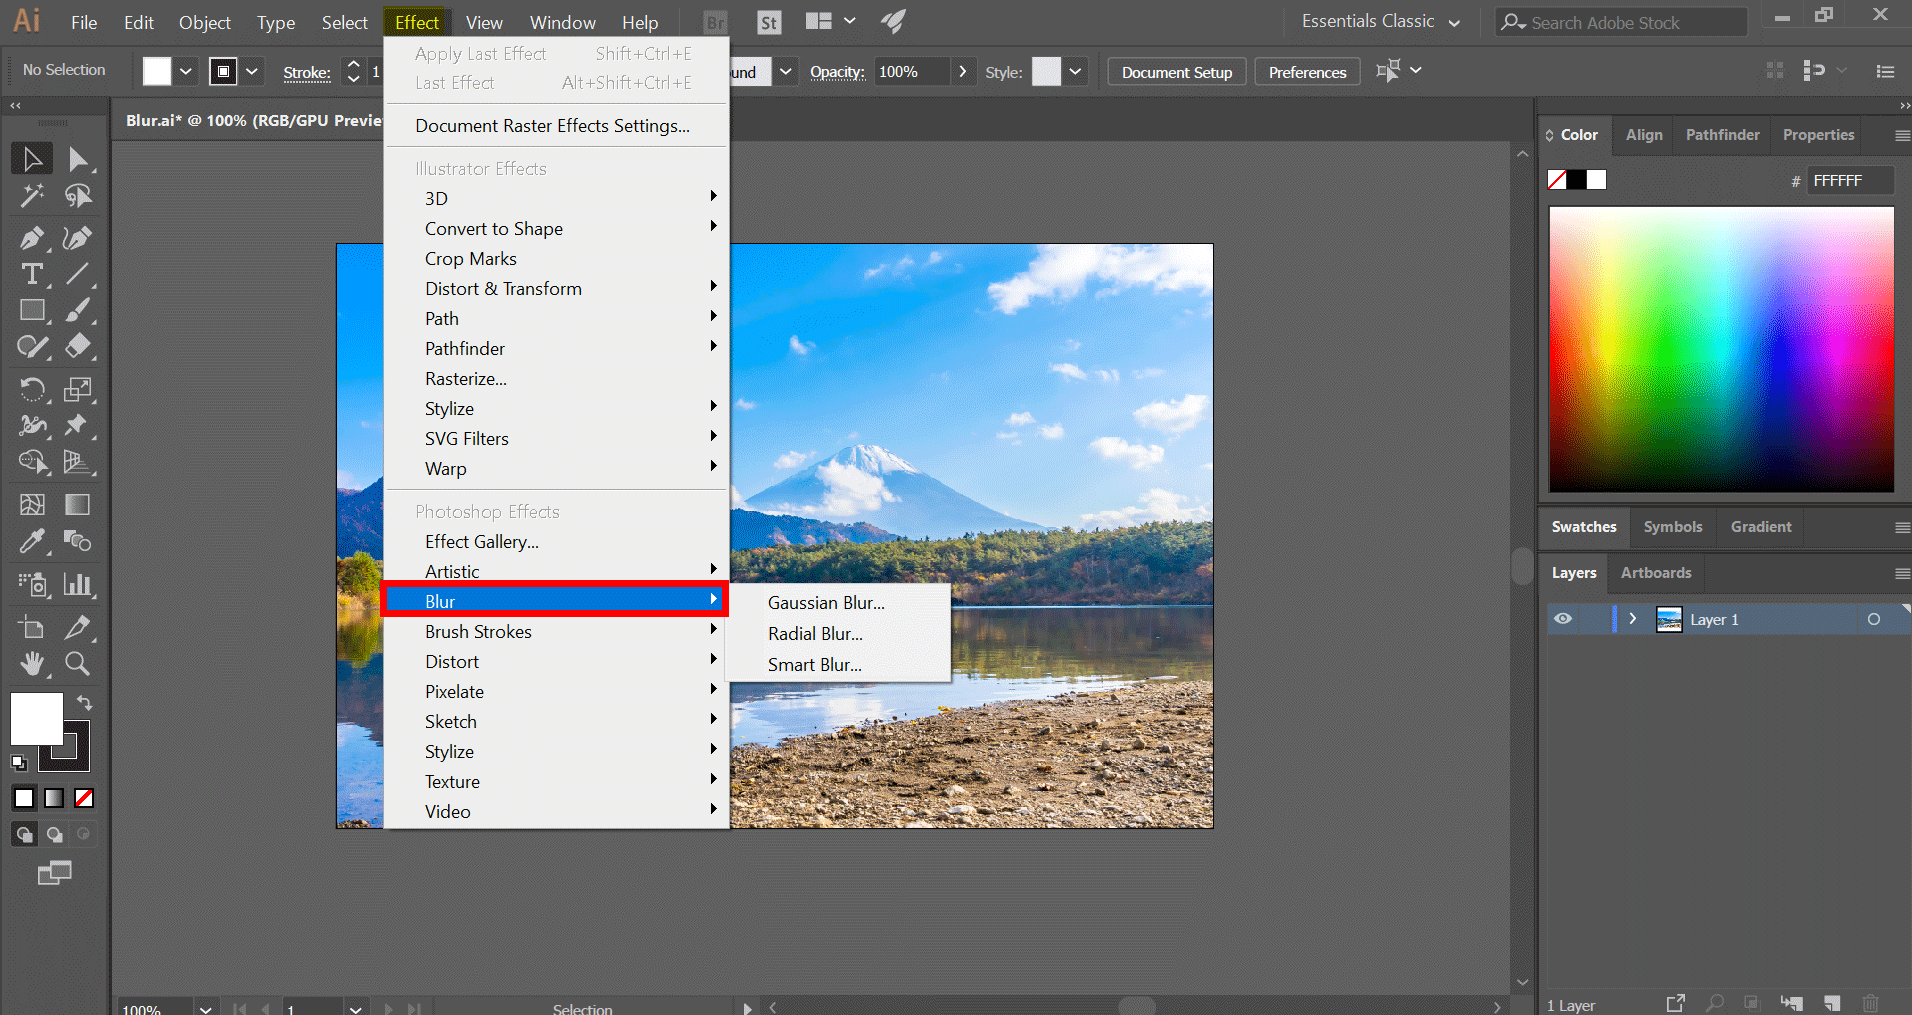
Step 4: Next, you have to scroll to the “Effect” option from the top of the window as shown below.

Popular Course in this category
Illustrator Training (1 Courses, 2+ Projects)1 Online Courses | 2 Hands-on Projects | 12+ Hours | Verifiable Certificate of Completion | Lifetime Access
4.5 (2,561 ratings)
Course Price

View Course

Related Courses
Adobe Flash Training (2 Courses, 1+ Projects)3Ds Max Modeling Training (5 Courses)

effect option tool

Step 5: Under the Photoshop section, hover the mouse cursor on the “Blur”

Step 6: Now a menu will appear displaying the various blur effects that you can choose to apply to the image. You will find blur options like Gaussian blur, Radial blur, Smart blur and so on.

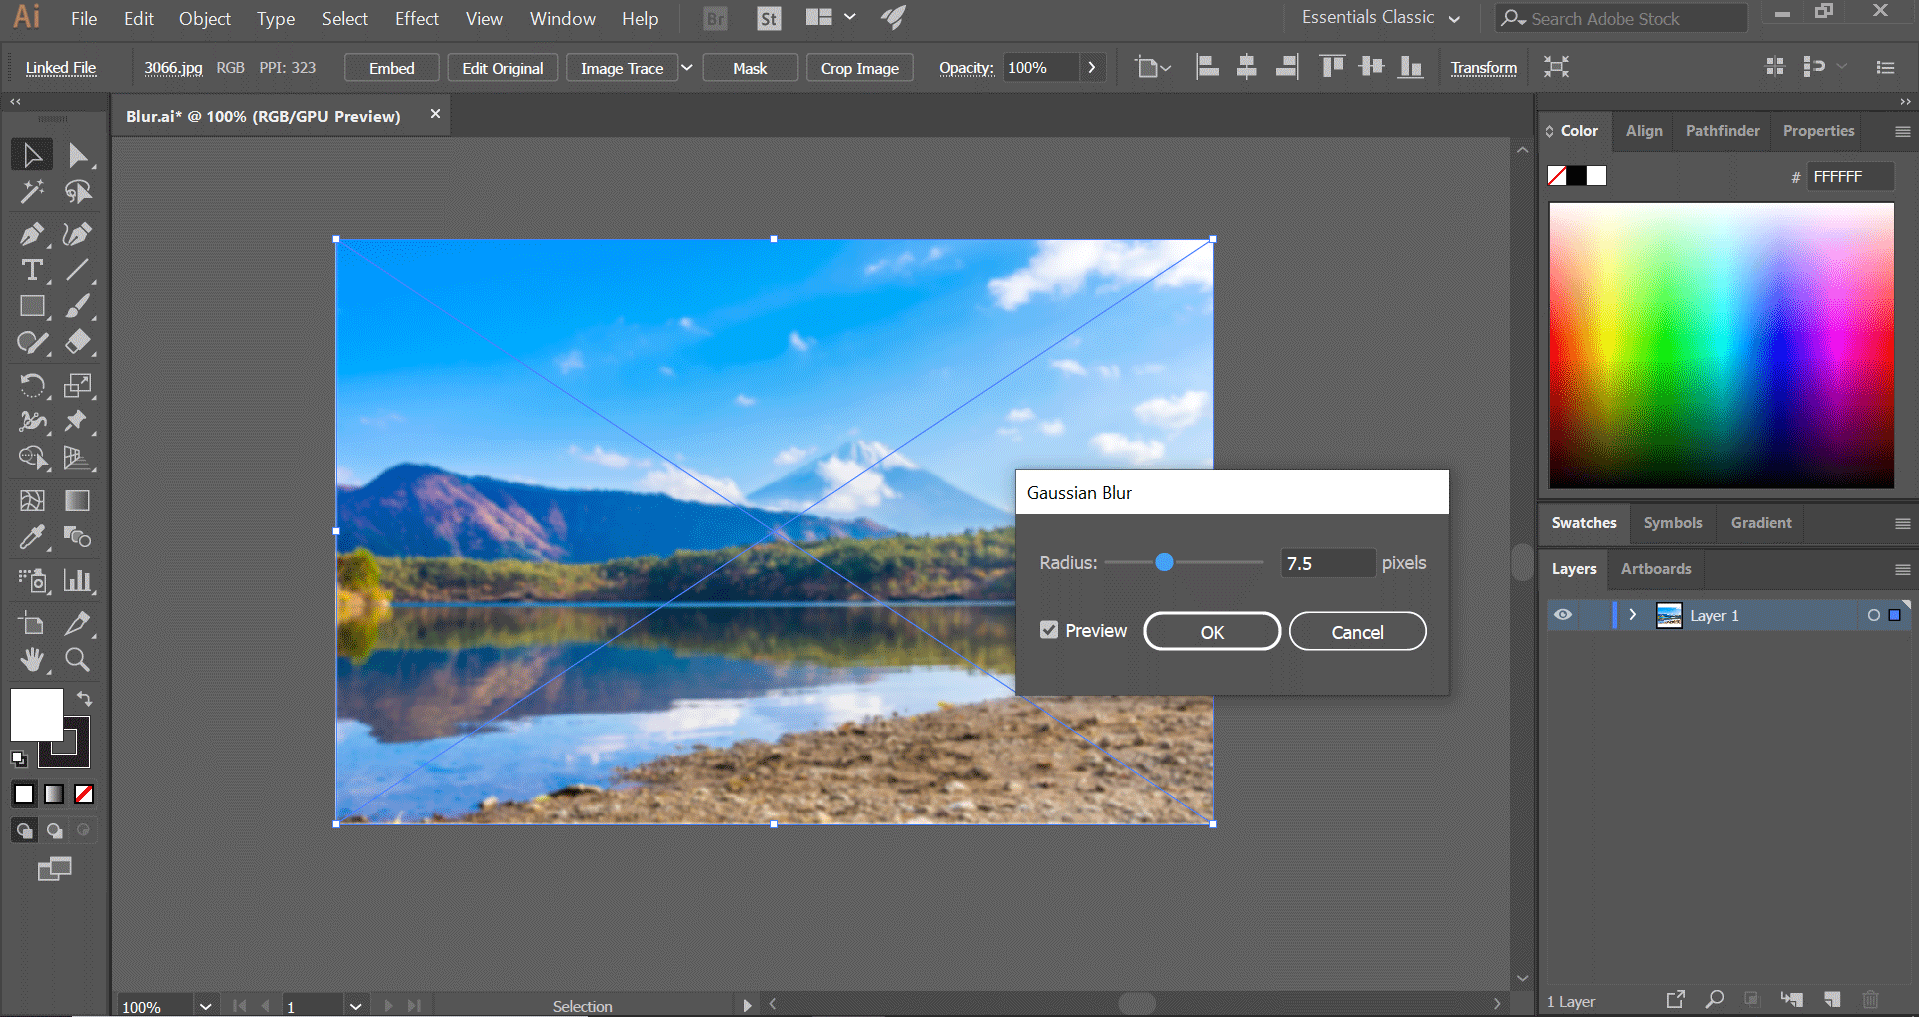
Step 7: First, I will select the Gaussian blur. Now, a small dialog box will pop up. You can click on the box and drag it to a suitable place in the document.

Gaussian blur

Step 8: You can set a blur between the radius range of 0.1 – 250. For that, you can either move the slider to the left or right or you can type in a manual number. Thus the intensity of the blur can be changed.

Step 9: Check the preview box in the bottom left corner.

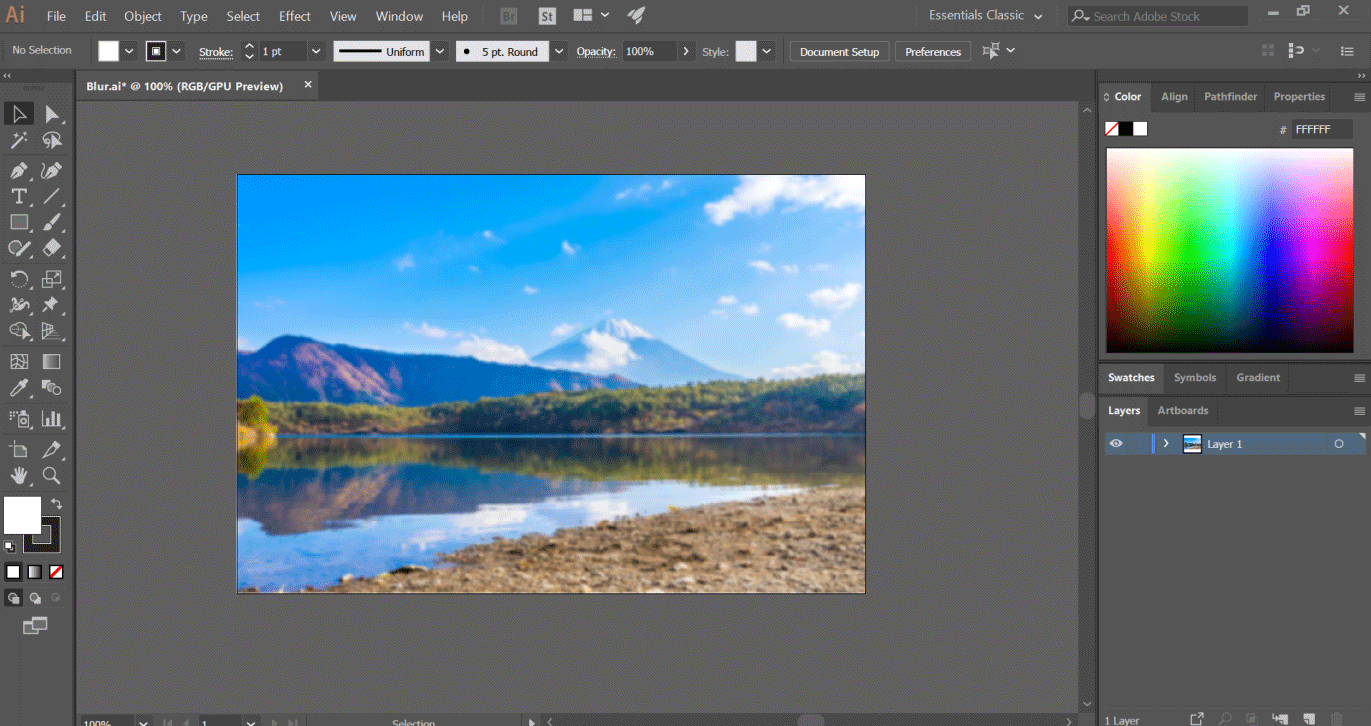
Step 10: Press “OK” to confirm the blur value after you feel it has the required effect. You can use “Gaussian Blur” for adding a normal blur effect or haze effect to your image.

blur image

Step 11: Next, we will see how “Radial Blur” works. For that, we will reverse the previous blur effect by hitting Ctrl + Z.

Step 12: Repeat the earlier step. Select the image and go to the Effect option.

Step 13: Click on Blur and select “Radial Blur”

radial blur

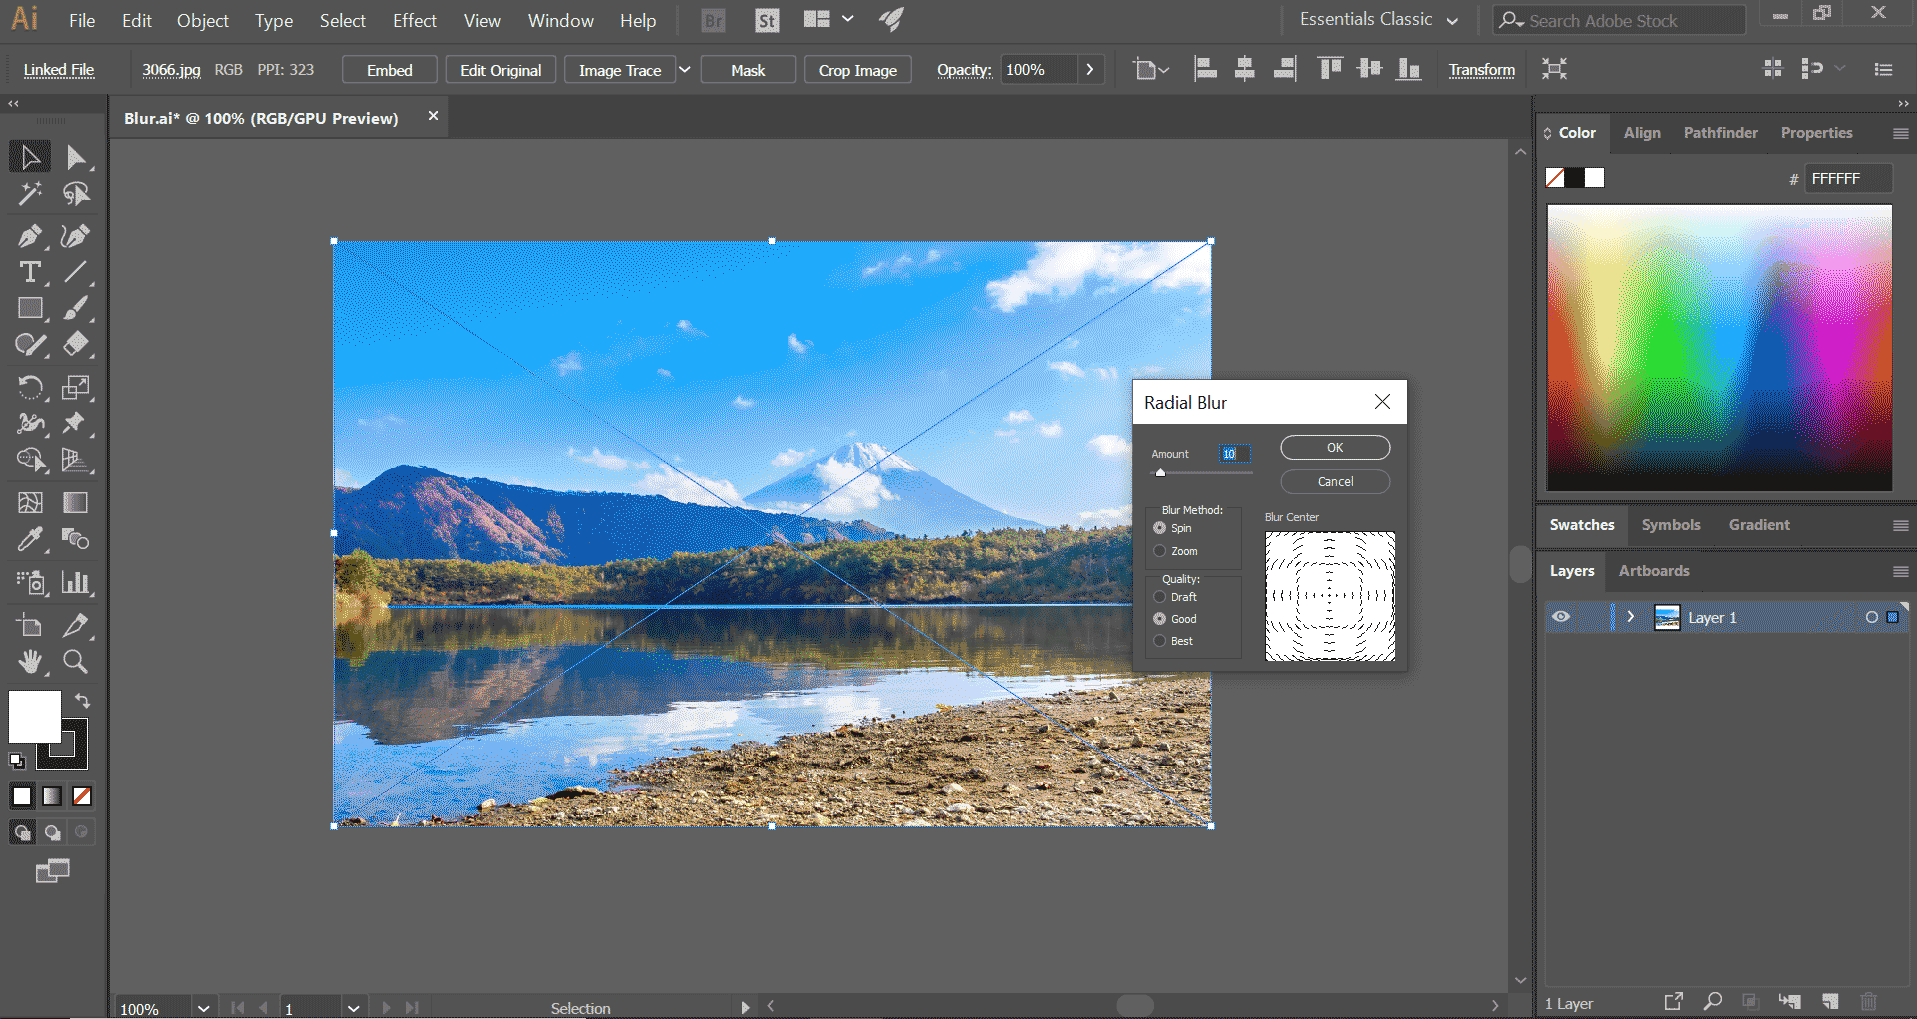
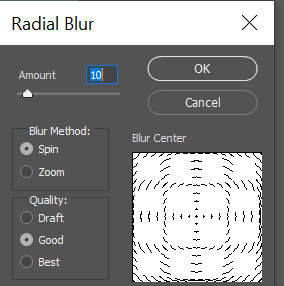
Step 14: Again a dialog box will pop up. This blur applies the effect with a radius based on the central point. You can view the preview box depicting the blur shape.

Step 15: You can enter the blur amount from the range of 1 – 100. As desired, you can drag the slider to change the value.

set radius blur

Step 16: You can select between two Blur methods: Spin and Zoom. Based on your section, your image will have a blur effect of either spin or zoom.

Step 17: In the end, you can choose the quality from Draft, Good and Best.

Step 18: If you choose Draft, it will give an output of the lower quality, but it will be quick as the size is less. “Good” will yield decent output whereas, “Best” will give the highest quality output, but will be a little time consuming based on your system.

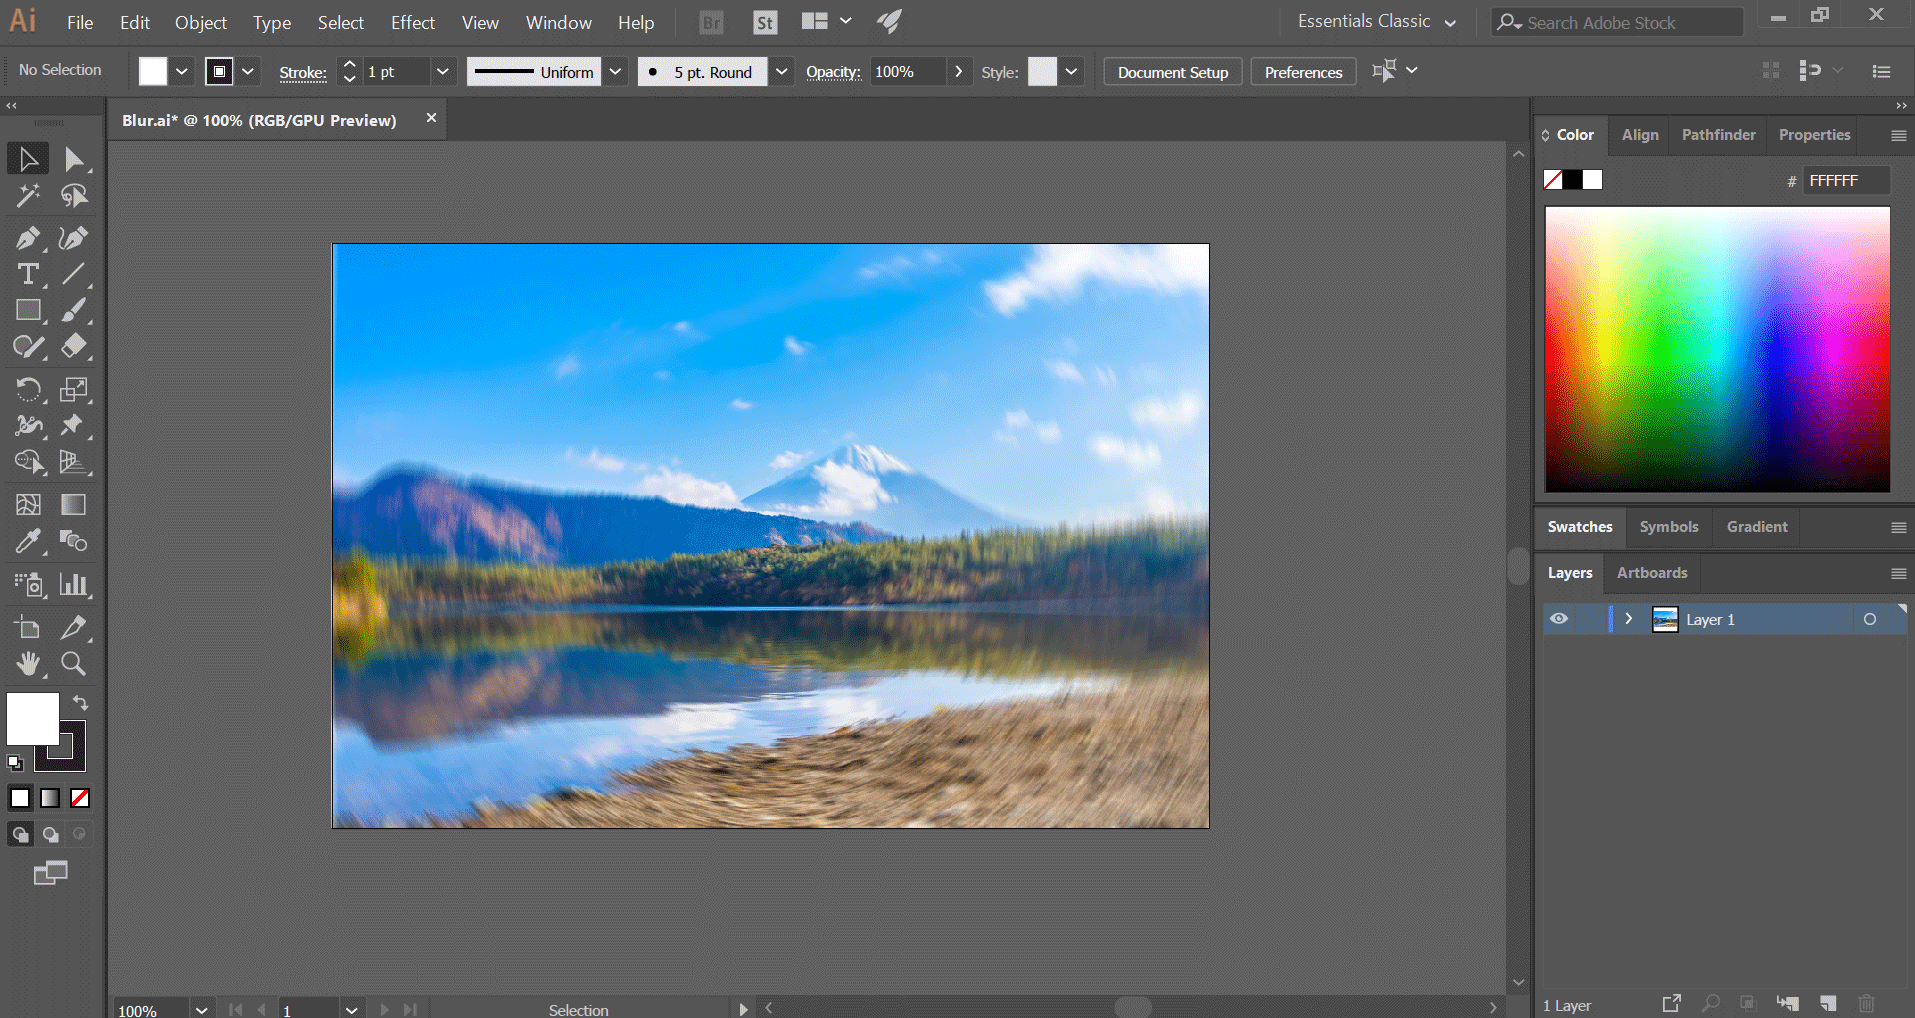
Step 19: Click on OK to apply the settings.

apply blur effects

Step 20: Hit Ctrl + Z. Repeat the earlier step. Select the image and go to the Effect option.

Step 21: Click on Blur and select “Smart Blur”

smart blur

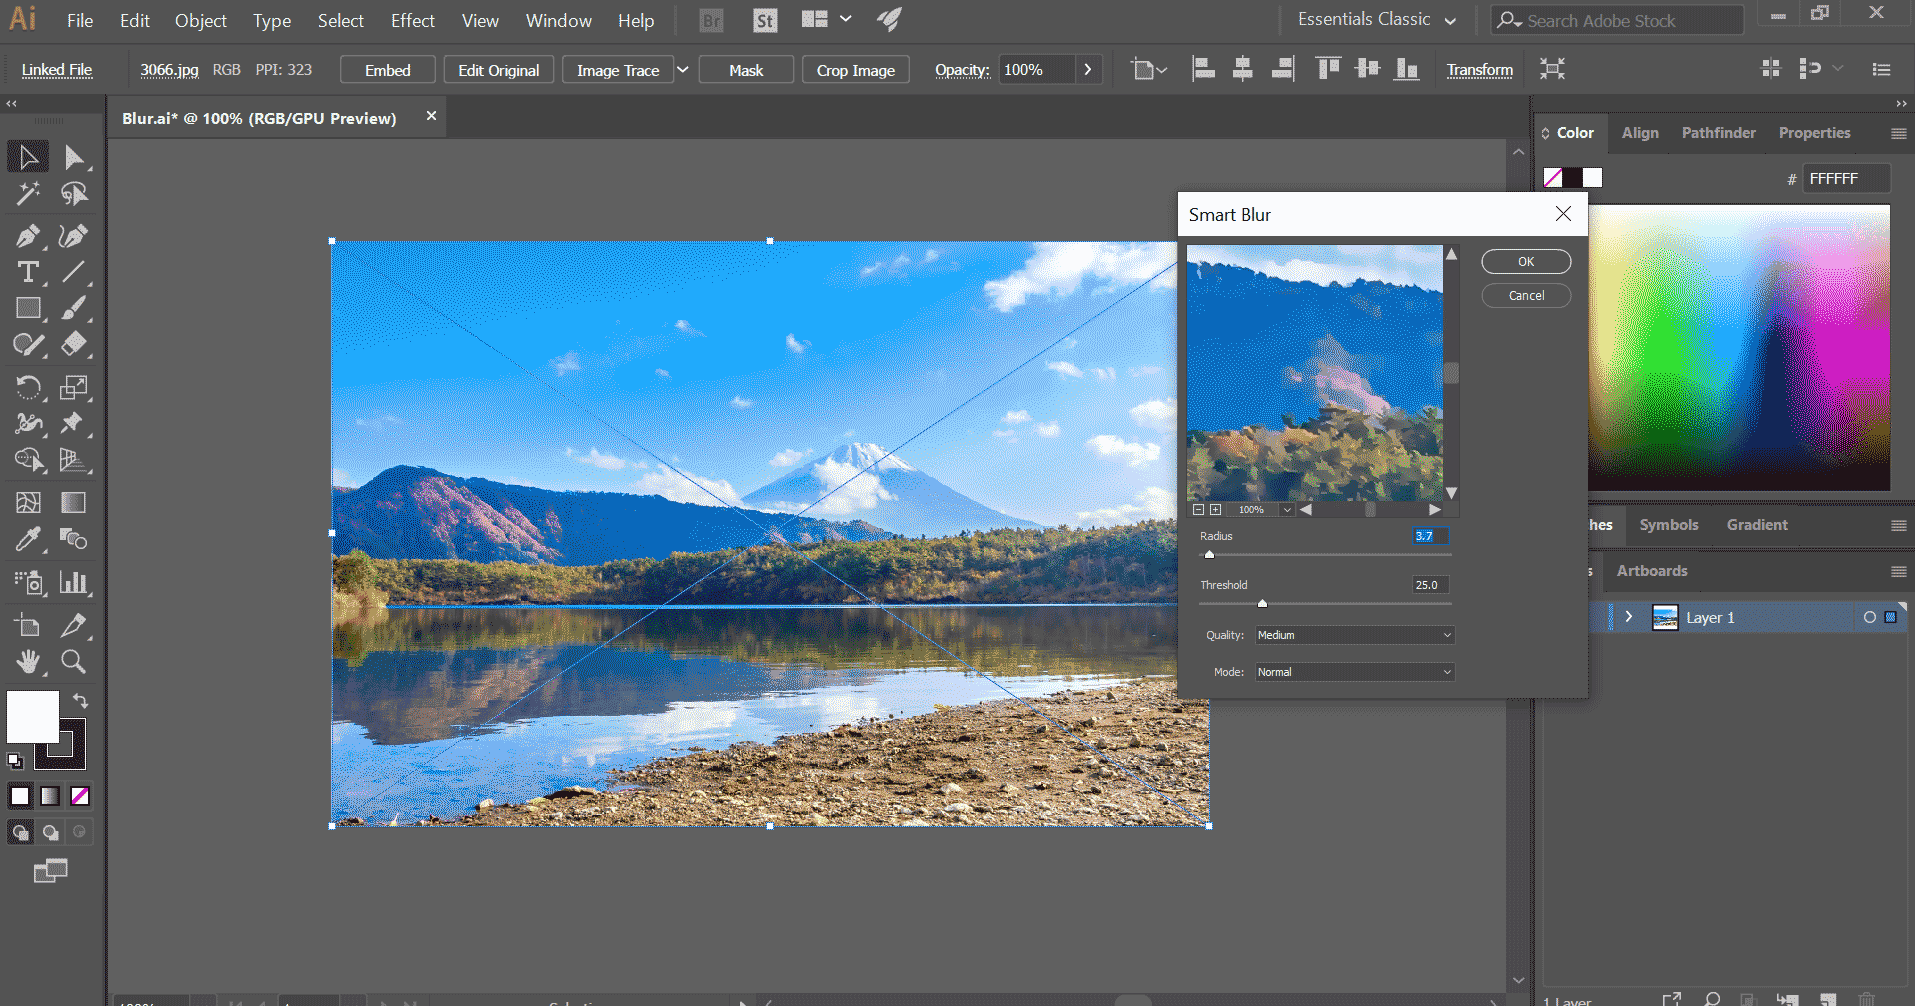
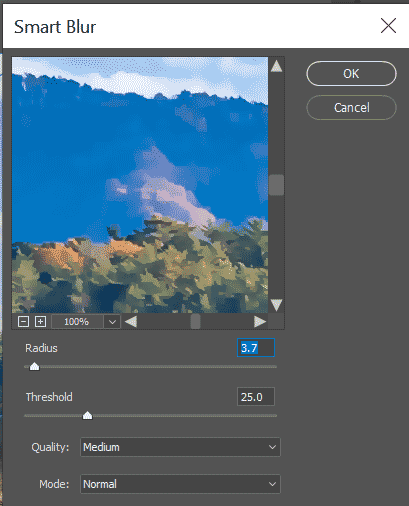
Step 22: A new pop up window will appear. A preview box is shown there. You can Zoom in or Zoom out the preview box by pressing the + and – button or choosing from the drop-down list. Refer to the below image for better understanding.

smart blur setup

Step 23: Again you have a radius slider between the values of 0.1 – 100. Below that, you have another slider for giving the threshold value.

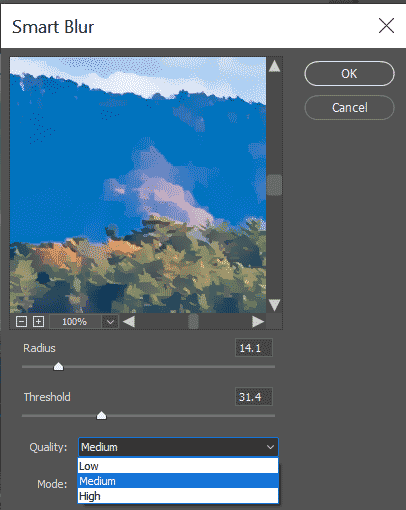
Step 24: Next, Click the Quality menu. Here you will find three standard options: Low, Medium, and High.

quality setup

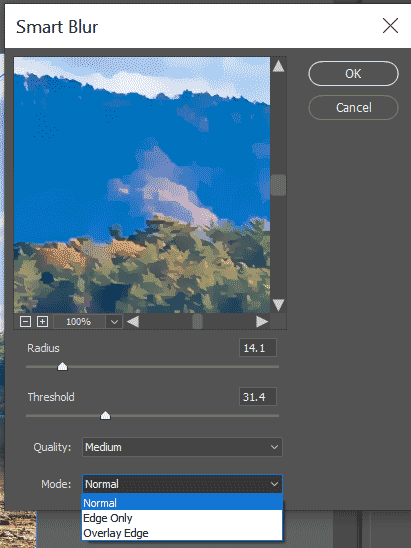
Step 25: After that, in the bottom section, choose the mode. You can choose between Normal, Edge Only and Overlay Edge.

set mode

You can try applying each of the modes and confirm by clicking OK.

Conclusion – Blur in Illustrator

In the above article, we have explained in detail the various blur options available in Adobe Illustrator. You can try to apply them to your creative work and enhance your work. Go ahead and start practicing the steps by trying out the method in images or objects. Similarly, we have mentioned other effects and options available in Illustrator. Go through them and master the software for creating amazing works.

Recommended Articles

This is a guide to Blur in Illustrator. Here we discuss various blur options available in Adobe Illustrator. You can also go through our other related articles to learn more –

  1. Insert Image in Illustrator
  2. Slice Tool in Illustrator
  3. Color Correction in After Effects
  4. Crop in Illustrator
  5. Top 4 Best Video Editing Softwares in Industry
  6. Adobe Editing Softwares
  7. Guide to Smooth Tool in Illustrator
  8. Neon Effect in Illustrator | Creating Shape and Text Effects

Illustrator Training (1 Courses, 2+ Projects)

1 Online Courses

2 Hands-on Projects

12+ Hours

Verifiable Certificate of Completion

Lifetime Access

Learn More

0 Shares
Share
Tweet
Share
Primary Sidebar
Illustrator Tutorial
  • Effects
    • Effects in Illustrator
    • Insert Image in Illustrator
    • Crop in Illustrator
    • Remove Background In Illustrator
    • Remove White Background in Illustrator
    • Shapes in Illustrator
    • Text Effects In Illustrator
    • Watercolor Brushes Illustrator
    • Blending Modes in Illustrator
    • Blur in Illustrator
    • Brushes in Illustrator
    • Change Background Color in Illustrator
    • Graphic Styles in Illustrator
    • Change Artboard Size in Illustrator
    • Logo Design in Illustrator
    • Rasterize in Illustrator
    • Resize Image in Adobe Illustrator
    • 3D Effects in Illustrator
    • 3D Text in Illustrator
    • Filters in Illustrator
    • Reflection in Illustrator
    • How to Make Logo in Illustrator?
    • Transparent in Illustrator
    • How to Add Texture in Illustrator?
    • Neon Effect in Illustrator
    • Create Table in Illustrator
    • Paper Texture in Illustrator
    • Stamp Effect in Illustrator
    • Sun in Illustrator
    • How to Warp Text in Illustrator?
    • Metal Effect in Illustrator
    • Action in Illustrator
  • Basic
    • What is Adobe Illustrator
    • Install Adobe Illustrator
    • Adobe Illustrator For Windows
    • Adobe Illustrator for Windows 8
    • How to Use Adobe Illustrator
    • Adobe Illustrator for beginners
    • Adobe Illustrator for Students
    • Illustrator Shortcut Keys
    • Illustrator Plugins
    • Layers in Illustrator
  • Tools
    • Adobe Illustrator Tools
    • Selection Tool in Illustrator
    • Width Tool in Illustrator
    • Illustrator Grid Tool
    • Pathfinder Tool in Illustrator
    • Pen Tool In Illustrator
    • Measure Tool in Illustrator
    • Mesh Tool In Illustrator
    • Blend Tool in Illustrator
    • Direct Selection Tool Illustrator
    • Illustrator Free Transform Tool
    • Shape Builder Tool in Illustrator
    • Slice Tool in Illustrator
    • Smooth Tool in Illustrator
    • Eyedropper Tool in Illustrator

Related Courses

Illustrator Training Course

Adobe Flash Training Course

3Ds Max Modeling Training Course

Footer
About Us
  • Blog
  • Who is EDUCBA?
  • Sign Up
  • Corporate Training
  • Certificate from Top Institutions
  • Contact Us
  • Verifiable Certificate
  • Reviews
  • Terms and Conditions
  • Privacy Policy
  •  
Apps
  • iPhone & iPad
  • Android
Resources
  • Free Courses
  • Photoshop Tutorial
  • 3ds Max Tutorial
  • All Tutorials
Certification Courses
  • All Courses
  • Design Course - All in One Bundle
  • Photoshop Course
  • Maya Course
  • Unreal Engine Course
  • Unity Course
  • DaVinci Resolve Course
  • Pro Tools Course

© 2020 - EDUCBA. ALL RIGHTS RESERVED. THE CERTIFICATION NAMES ARE THE TRADEMARKS OF THEIR RESPECTIVE OWNERS.

EDUCBA Login

Forgot Password?

EDUCBA
Free Design Course

3D animation, modelling, simulation, game development & others

*Please provide your correct email id. Login details for this Free course will be emailed to you
Book Your One Instructor : One Learner Free Class

Let’s Get Started

This website or its third-party tools use cookies, which are necessary to its functioning and required to achieve the purposes illustrated in the cookie policy. By closing this banner, scrolling this page, clicking a link or continuing to browse otherwise, you agree to our Privacy Policy

EDUCBA

*Please provide your correct email id. Login details for this Free course will be emailed to you
EDUCBA
Free Design Course

3D animation, modelling, simulation, game development & others

*Please provide your correct email id. Login details for this Free course will be emailed to you

Special Offer - Illustrator Training (1 Courses, 2+ Projects) Learn More