Updated June 26, 2023

Introduction to Neon Effect in Illustrator
Neon Effect provides a glowing effect to any shape or text you create in Illustrator. You must produce two definite sections to produce neon effects with stroke blends. Section one is the neon tubing, which can be considered good but does not genuinely have a neon effect. The second section is the reflection of the tubing of the background, which usually materializes as the glowing region. These two different blends provide the apparition of lit neon.
Primarily, producing a neon effect merely demands that you create two duplicates of the blended object. The duplicate in the front needs a blend where the top object has a lighter stroke weight and a brighter color to imitate the glow of a neon tube. The duplicate in the back utilizes a wider stroke and combines with the darker color of the background. Neon effects function much better when the background is very dark, though some engaging effects can also be attained with light backgrounds.
How to Create a Neon Effect in Illustrator?
Below we will create a neon effect in Illustrator in two different ways; shape effect and text effects:
Creating a Glowing Neon Effect Using Shapes
Step 1: Using a dark or black background, the neon effect can be effectively displayed. Produce a dark background by sketching a rectangle and filling it with black colour. With the pen tool (likewise, if you wish to sketch with a free hand, the brush or the pencil tool would do), produce a square shape with an outline. For this instance, we are sketching a leaf. Set the stroke to white for just now; ensure no fill.

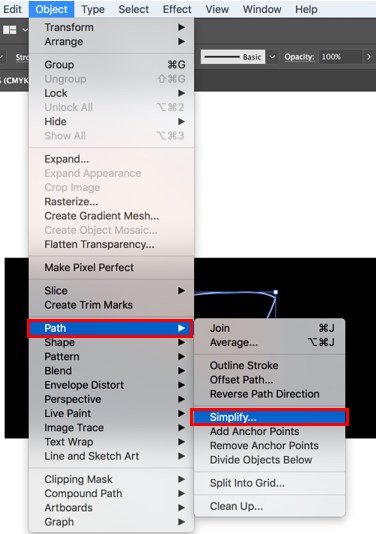
Step 2: Choose the shape you just created with the help of the selection tool. Click on object> Path > Simplify, and once the Simplify menu comes up, hit the Preview alternative present.
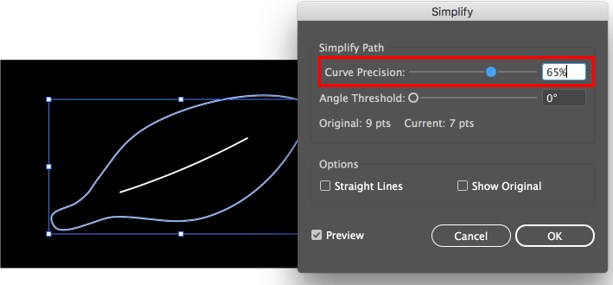
Then evaluate with the curve precision percentage until you decide whether the shape is flat or not, like the neon tubing. In this instance, we will set the precision of the curve to 65%.
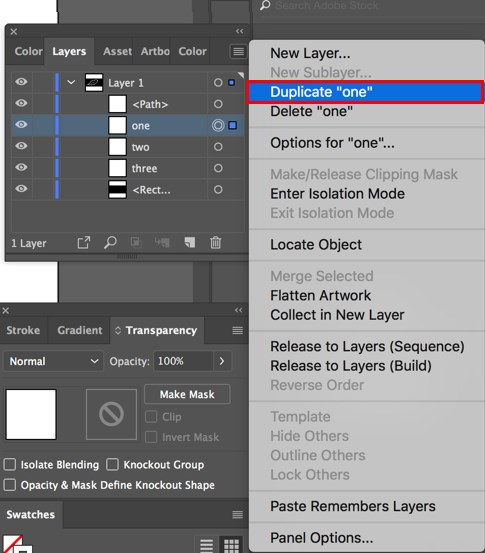
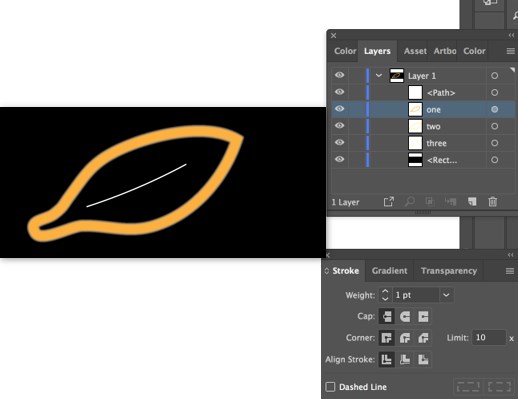
Step 3: Choose the layer in the layers window that holds the shape, and next, hit the small option in the upper right-hand corner, as shown below. You will next get a menu where you can choose the Duplicate alternative. Redo this step again so you have three distinct layers with the shape you created on each layer. Label these layers as one, two, and three, with one being the second to the layer below it, then two, then three, as shown below.
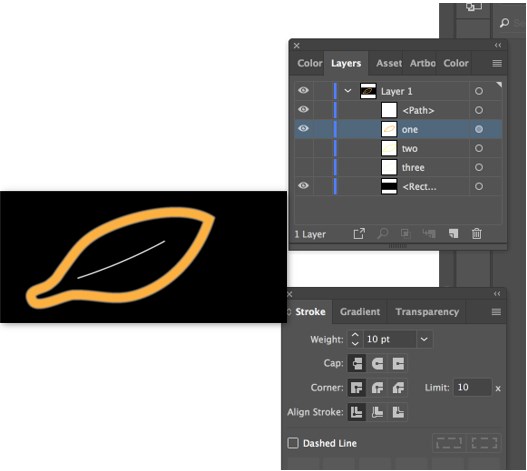
Step 4: The visibility can be switched off for layers three and two by hitting the eye icon present opposite to them in the layers window. Choose the shape present on layer one with the help of the selection tool, and modify the color of the stroke to a saturated and deep hue. In this instance, we select a dark yellow color. You can raise the width of the stroke to 10 pt present in the stroke window. You can also click on Window > Stroke to get there.
Step 5: Now, choose the shape you created.

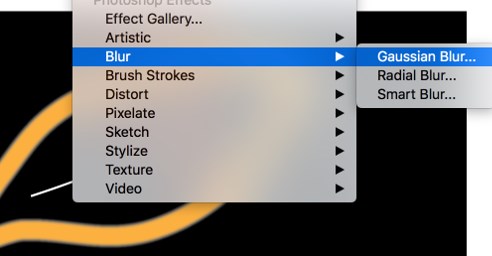
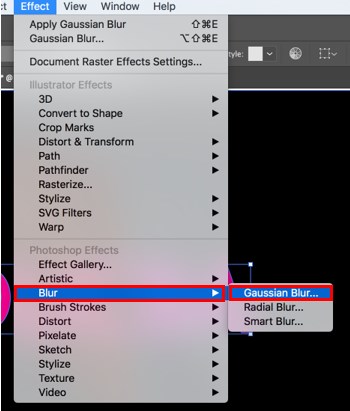
Step 6: Next, click on effect, then Blur and Gaussian Blur, as shown below.
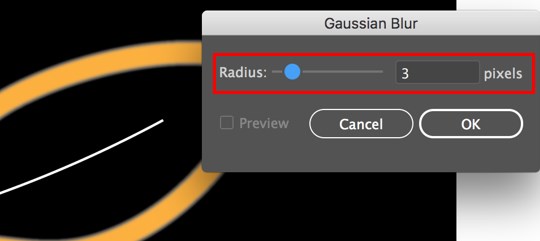
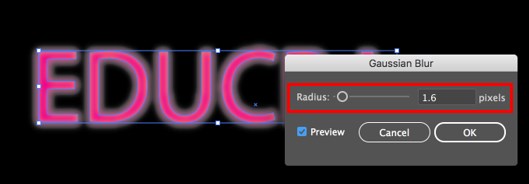
Step 7: When the Gaussian Blur window comes up, make the radius 3 pt and hit OK. This will impart the glowing neon effect for your shape.
Step 8: Now, switch on the visibility of layer two. Choose the shape on this layer, then modify the width of the stroke to 4 pt and make sure the color is a paler version of the one you chose in step 4.
Next, switch on the visibility of layer three. Choose the shape on this layer; you may need to zoom into the leaf to choose the intended line. Modify the width of the stroke to 1 pt and set the color to an even paler version of the one you chose in step 4.
This way, you can produce a neon effect on a shape in Adobe Illustrator.
Creating a Neon Effect on a Text
Step 1: Sketch a rectangle and fill it with black color. Select the text tool, write some text, and place it within the rectangle. Make sure the stroke for the text is white for now.

Step 2: Change the stroke color of the text to Magenta.

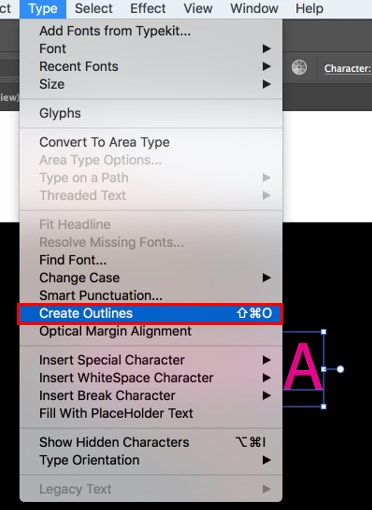
Step 3: Next, select the text and click Type and Create Outlines to transform the text into a shape.
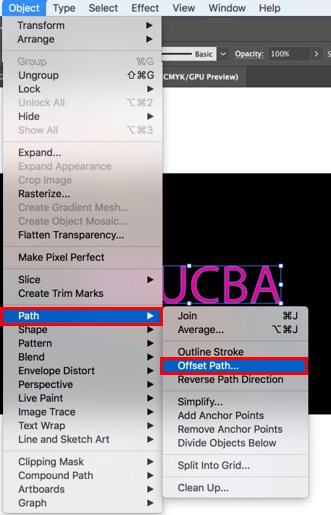
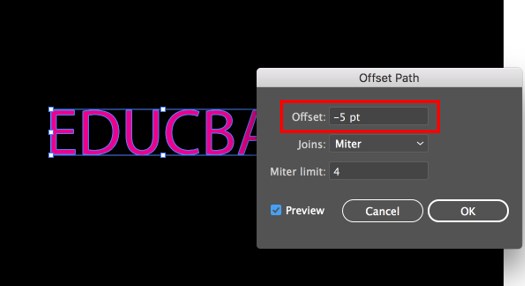
Step 4: Select the text with the help of the selection tool, then click on an object, then Path and Offset Path, set a negative offset value (-5 for this example), and hit OK. The objective here is to produce a duplicate of the text that is finer and adjusts within the original letters.
Step 5: Next, choose the darker magenta letters and click on effect, then Blur and Gaussian Blur, and define a value that gives a magenta glow around each of the letters.
Step 6: Alter the blur value per the glowing effect you want around your letters.
Step 7: Final Image.

This way, you can produce a neon effect on a text in Adobe Illustrator.
Conclusion
The neon effect was out of the market for some years but returned to popular culture acclaim just a few years ago. Neon colors take us back to the eighties, but they also have a decidedly modern edge to them. The neon effect signs can be seen at night against a dark sky, so strategic use of the black color is advised for your illustrations. Bright colors can comfortably swamp the eye, so select them with care. The neon effect requires only two to three colors. The key with the neon effect is to keep it simple, so when you work with neon effects, keep the shapes plain because of the glaze and affluence of the image.
Neon effects produce a declaration independently, so an exceedingly convoluted composition is unnecessary. Utilizing moderation regarding neon drawings also has a pragmatic intention; neon drawings normally have large file sizes, so do not burden your composition with information that is not needed.
Recommended Articles
This is a guide to Neon Effect in Illustrator. Here we discuss how to create a neon effect in an illustrator in two different ways; shape effects and text effects step by step. You can also go through our other related articles to learn more –
