Updated February 21, 2023

Introduction to Bitbucket Create Branch
Bitbucket provides different features to developers to make essay development efficient; the create branch is one of the features of Bitbucket. We create a new branch without any changes to the main codebase, or we can say that main branch. The newly created branch is nothing but the simple git or Bitbucket branch under the main branch. Here, there are three ways to create the branch: Bitbucket, Jira application, or through the terminal; we can use anyone at our convenience. In Bitbucket, when we try to push our branch at that time, we can get acknowledged with a pull request.
Bitbucket creates branch overviews.
Create branch is only a typical git or touch pail branch under your lord or parent branch. Here we will make an element branch called “test.” Here is a simple branch name. Try not to imagine that under inclusion, we will make tests. Our branch name is “test.” Git checkout works inseparably with the git branch. The git branch order can be utilized to make another branch. When you need to begin another element, you make another branch off primary utilizing git branch new_branch. When made, you can then utilize git checkout new_branch to change to that branch. Moreover, the git checkout order acknowledges a – b contention that goes about as an accommodation technique that will make the new branch promptly change. You can chip away at various highlights in a solitary archive by exchanging between them with git checkout.
The git checkout order allows you to explore between the branches made by the git branch. Looking at a branch refreshes the documents in the functioning registry to match the form put away in that branch, and it advises Git to record all new submit on that branch. So consider it a method for choosing which line of advancement you’re chipping away.
Having a devoted branch for each new element is an emotional shift from a conventional SVN work process. It makes it ludicrously simple to attempt new examinations without apprehension about annihilating existing usefulness, and it makes it conceivable to chip away at numerous random highlights simultaneously. Likewise, branches additionally work with a few cooperative work processes.
The git checkout order may incidentally be mistaken for git clone. The distinction between the two orders is that the clone attempts to bring code from a far-off store; on the other hand, checkout attempts to turn between variants of code currently on the neighborhood framework.
How to Create bitbucket create a branch?
Now let’s see how we can create a branch in Bitbucket.
When you sign in to the Bitbucket account or your association bitbucket server, we need to select the project and inside the project specified repository that we want. Once we select the repository, you will get an option to create a new branch, as shown in the following snapshot.
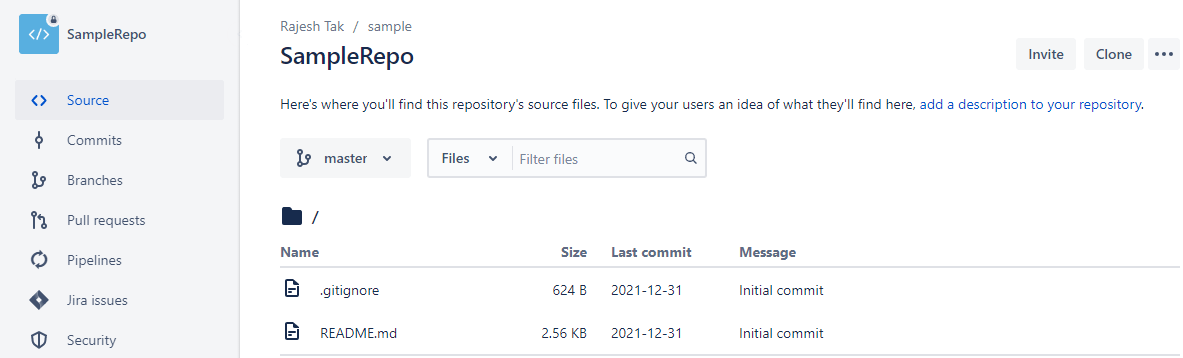
We selected the SampleRepo repository under the sample project in the above snapshot. We have a branch option on the left, so we need to click on Branch; then, we will get the following screen as shown in the following snapshot.

We need to select the create branch option and provide required details such as Type, From Branch Branch Name, etc., as shown in the following snapshot.
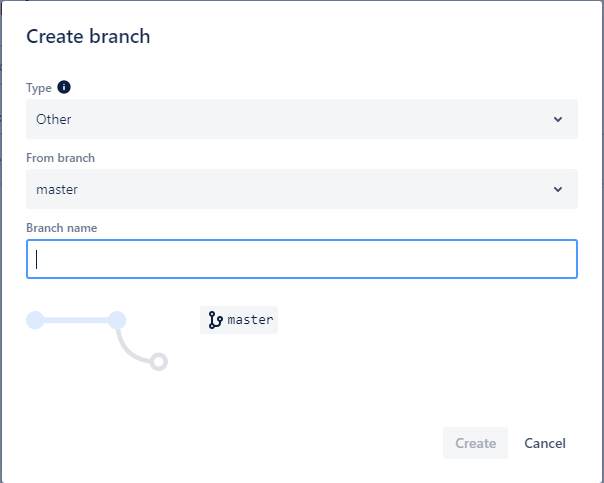
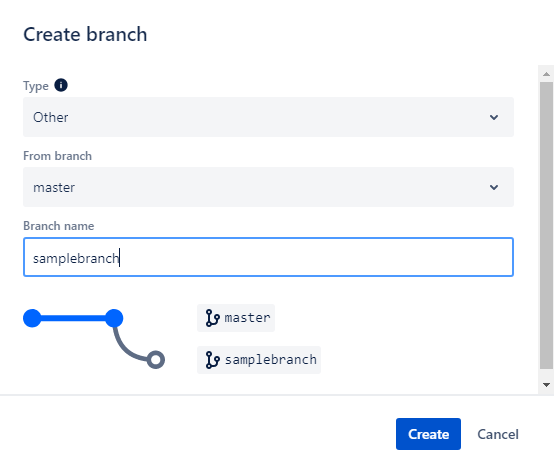
Pick type as other, select branch, and enter your branch name in the branch name field. After entering the branch name, click on the make; that is it, we have effectively made another branch structure the expert. To make a branch other than master, you can choose different branches too. Yet, when you make the storehouse interesting, just an expert branch will be accessible. So we can make a new branch from ace as it were. In the wake of making a new branch structure master, we can make different branches from recently made branches.
In git, by using the following command, we can create the branch as follows.
git checkout –b <specified branch name>
Explanation
In the above command, we simultaneously perform the two activities such as create and checkout, and here b is a flag used to run the git branch before the git checkout.
Feature bitbucket creates a branch.
Now let’s see the different features of creating a branch as follows.
A feature branch is a different branch in your Git repo used to carry out a solitary element in our specified project. For example, when utilizing highlight branches, we make another branch for each new that we create, rather than simply checking all your progressions into the expert branch.
A “feature branch” is truly anything you need to be a bug fix, new usefulness, or even more documentation. Indeed, some call these theme branches to show the overall idea of what they can contain. The overall objective is to keep them little and centered. When the component is finished, the progressions are converted into the main branch with the goal that others presently approach your new changes.
It mainly focuses on a single assignment at a time, so here git performs the monitoring task, and if we want to make any changes, we need to until the running assignment is finished. What’s more, assuming that you want to bounce off of a specific element to chip away at something different, for example, a dire bug fix, you want not to stress over pummeling your progressions or debasing your repo.
Example
Now let’s see examples for better understanding as follows.
In the above point, we already discussed how we can create a branch and what steps we need to follow. Here we directly create the branch with the name “samplebranch,” as shown in the following snapshot.
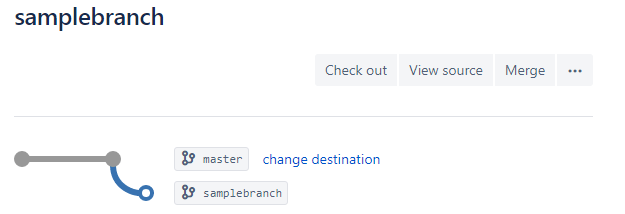
When we click on the create button, it looks like as shown in the following snapshot as follows.
Conclusion
We hope you learn more about Bitbucket to create a branch from this article. Through this article, we get a basic idea about how Bitbucket creates a branch and explore the syntax and examples of Bitbucket creating a branch. Finally, we can say that we learn how to create a branch in Bitbucket.
Recommended Articles
This is a guide to Bitbucket Create Branch. Here we discuss the Bitbucket to create a branch and try to explore the syntax and examples. You may also look at the following articles to learn more –
