Updated June 28, 2023
Introduction to ASP.NET Cookie
The following article provides an outline for ASP.NET Cookie. ASP.NET Cookies are small pieces of information stored on the client machine. It generally stores the username, telephone number, email id, etc., helpful information on the client’s machine. Cookies are mainly classified into two types Persistent cookies and Non – persistent cookies. Persistent cookies contain an expiry date for their expiration. It will remain on the client’s machine even after closing the browser. We can set the cookie’s expiry date, which determines how long it can stay. Similarly, Non-Persistent cookies don’t have an expiry date. So if we don’t set any expiry property to cookies, it is known as a Non-persistent cookie.
Syntax:
Response.Cookies Keyword is a user to create a cookie.
Response.Cookies(userinfo)= 'value'Userinfo may be the username we want to save the cookie, and value is what we want to pass or save for the userinfo.
How to Create an ASP.NET Cookie?
We can also create cookies at our convenience. For creating an asp.net cookie, we can use the “Respone.Cookies” command. This command must appear before the tag <html>.
- We must create a cookie name first and then assign it to the value.
Code:
<%
Response.Cookies("UserName")= "EduCba"
%>
Here its cookies name is “UserNme,” and it is assigned value is “EduCba.”
- We can set its expiry date by assigning properties to the cookies.
Code:
<%
Response.Cookies("UserName")= "EduCba"
Response.Cookies("UserName").Expires=#March 24,2020#
%>
This cookie will expire on 20 March 2020, as we provide the expiry date in value.
- Let us see how we can retrieve a cookie value. The “Request.Cookies” command can retrieve its value.
- We must retrieve the cookie’s value, named “UserName,” and display it on the page.
Code:
<%
Fname=Request.Cookies("UserName")
Response.write("UserName"=  & fname)
%>- It will give output as “UserName=EduCba.”
- We can also create a cookie collection instead of saving and creating a single cookie every time.it is helpful when a cookie has keys; it means it has multiple values.
Code:
<%
Response.Cookies("UserName")("firstname")="Educba"
Response.Cookies("UserName ")("lastname")="teams"
Response.Cookies("UserName ")("country")="India"
Response.Cookies("UserName ")("email_ID")="[email protected]”
%>
Therefore, in these ways, we can create cookies in ASP.NET. However, what if your browser is not supporting cookies? If your application deals with a different browser, which is not supported by the cookies, we will need to use other ways. We must pass the information from one page to another via other methods.
It can be done in 2 ways.
1. Adding Parameters to the URL
We can add parameters in the URL below.
Code:
<a href="About-EduCba.asp?fname=EduCba&lname=Teams">Go to About EduCba
Page</a>
It will retrieve the values in the file “About-EduCba.asp,” as given below.
Code:
<%
fname=Request.querystring("fname")
lname=Request.querystring("lname")
response.write("<p>Hello " & fname & " " & lname & "!</p>")
response.write("<p>Welcome to EduCba web site!</p>")
%>
2. Using a Form
We can use this method to create. When the user clicks the submit button, the form passes the user input to “About-EduCba.”
Code:
<form method="post" action="About-EduCba.asp">
First Name: <input type="text" name="fname" value="">
Last Name: <input type="text" name="lname" value="">
<input type="submit" value="Submit">
</form>
Now retrieve the values in the “About-EduCba.asp” file as given below.
Code:
<%
fname=Request.form("fname")
lname=Request.form("lname")
response.write("<p>Hello " & fname & " " & lname & "!</p>")
response.write("<p>Welcome to EduCba web site!</p>")
%>
Properties of ASP.NET Cookies
Let us discuss some of the essential properties of ASP.NET cookies in detail.
- Domain: It is used to associate the cookies to a particular domain.
- Secure: Cookies are insecure things that store the values of a user in the client machine. Therefore, we can set the secure flag to enable a particular cookie to only true that is HTTPs by this property. This property’s help will ensure the cookie has passed via a protected, secure channel only.
- Value: With the help of value, we can easily manipulate each cookie.
- Expires: Suppose we want that particular cookie or cookie need not be appearing again after some specific days; then we can set its expiry date as well. If we set the expiry, a date for the cookie will automatically expire, and the value stored in the cookies will not appear.
- Values: It is the same as the value property. However, it deals with the cookies that can be manipulated with the key or value pair.
- HasKeys: it is primarily applicable for the subkey; if it has a subkey, then it will contain True. The default value for haskey is false.
- Name: It represents the name of the key. The default value for the path is server root which is “/.”
- Path: It is a virtual path to submit it with the cookie.
Examples of ASP.NET Cookie
Let us take an example and understand how we can use it. In this example, we will create a cookie and try to retrieve it after the expiration time.
Code:
protected void btncreate_Click(object sender, EventArgs e)
{
Response.Cookies["name"].Value = txtcreatecookie.Text;
Response.Cookies["name"].Expires = DateTime.Now.AddMinutes(2);
Label1.Text = "Cookie has been Created";
txtcreatecookie.Text = "";
}
We have set the expiry time in the above code as 2 minutes. We have created a cookie and assigned textbox values to the name cookie.
Retrieve Cookie Code:
protected void btnretrieve_Click(object sender, EventArgs e)
{
if (Request.Cookies["name"] == null)
{
txtretrieve.Text = "We don’t found any Cookie";
}
else
{
txtretrieve.Text = Request.Cookies["name"].Value;
}
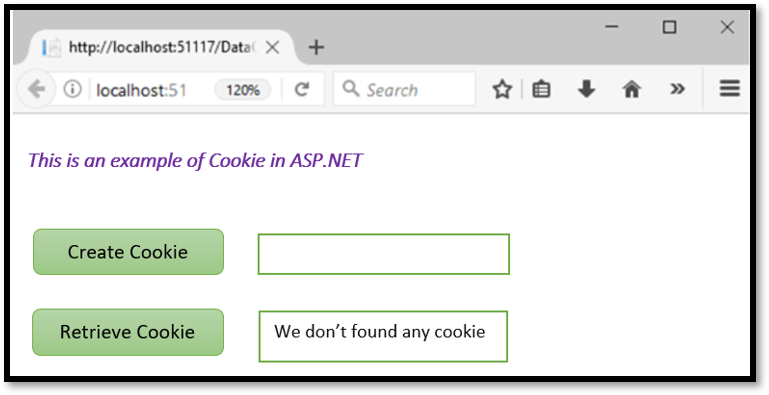
}When we try to retrieve it, the cookie button will check the value is not null. If the value is not null, it will display the cookie value in the result. As we have set the expiry time as 2 minutes, after 2 minutes cookie will expire, and its value will be null. Therefore, after 2 minutes, it will show us the output: “We don’t found any Cookie.”
Output:
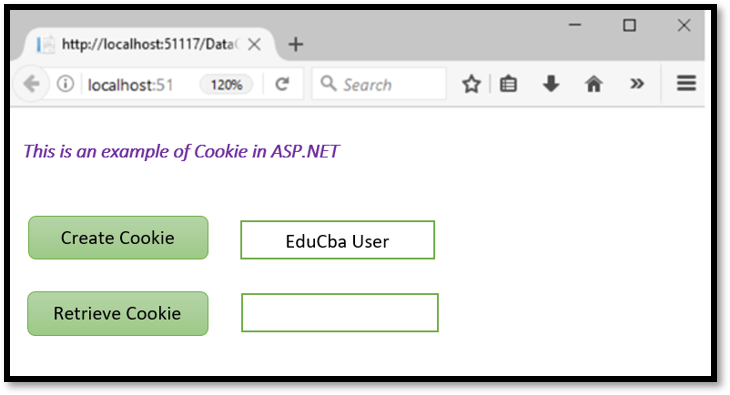
When we write it as EduCba User in the text box, it will look like the below snippet.
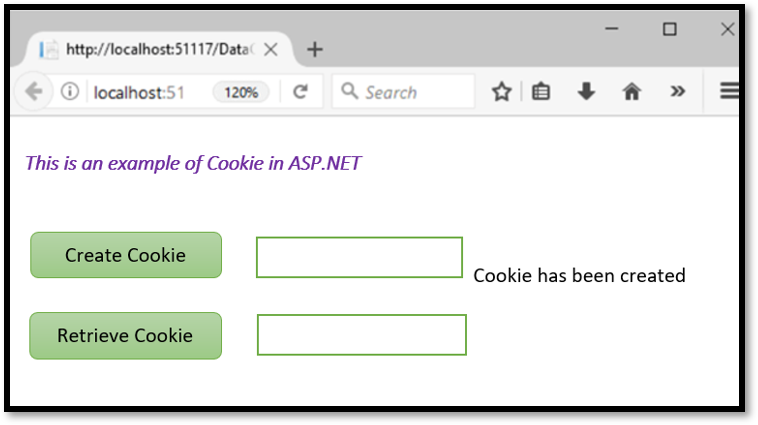
Now we click on Create Cookie button to create a cookie. Then, it will show us a message as below.
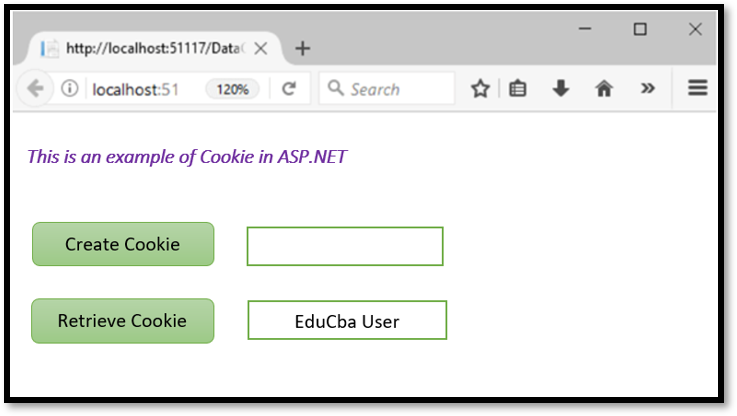
Now try to retrieve it within two minutes of expiry and click the retrieve cookie button.
Try retrieving it again after 2 minutes; it will give us a message in the box, such as “We don’t found any Cookie.”
Conclusion
We can conclude this article by saying that ASP.NET cookies are essential in our daily work. It saves our efforts of reentering the data, which has already been filled up once in the browser by the user. However, ensure you will only send cookies over a secure channel to protect them from being passed via unencrypted requests.
Recommended Articles
We hope that this EDUCBA information on “ASP.NET Cookie” was beneficial to you. You can view EDUCBA’s recommended articles for more information.

