Updated August 25, 2023

Change the Color of the Text
To create a creative text, we need to add some beautiful colors to the text, and changing the text color is easy and interesting because we need to determine the perfect color of the text. We have different color changing options; photoshop is one of the best in creating vector and pixel-based text. In photoshop, we can easily change the color of the text because we can change the vector into a pixel in Photoshop.
Changing Text Color in Photoshop
Selecting an appropriate color for your text will make a significant difference to your graphic. Here I will show the steps on how to change the text color in photoshop.
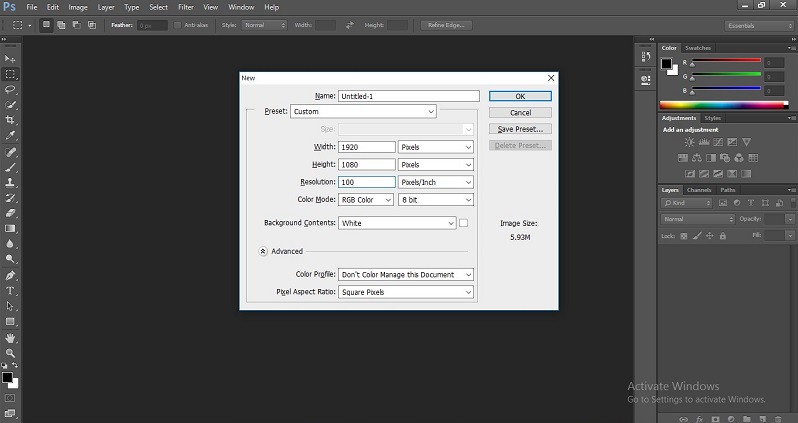
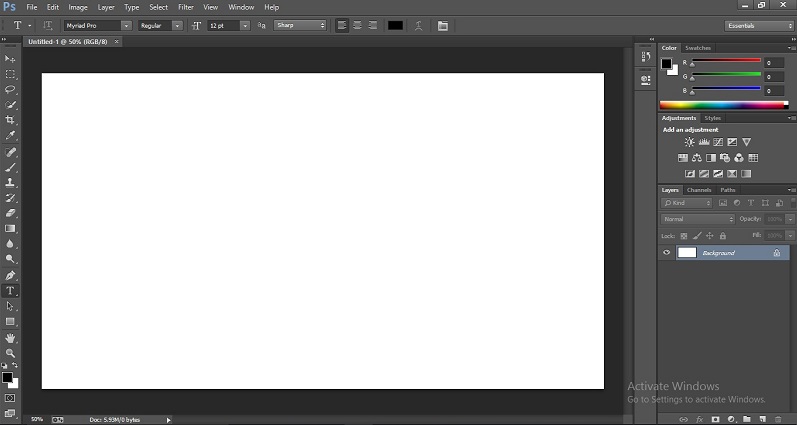
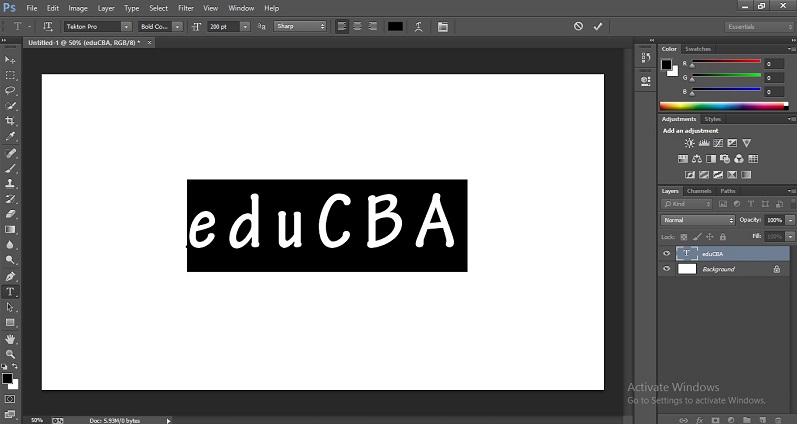
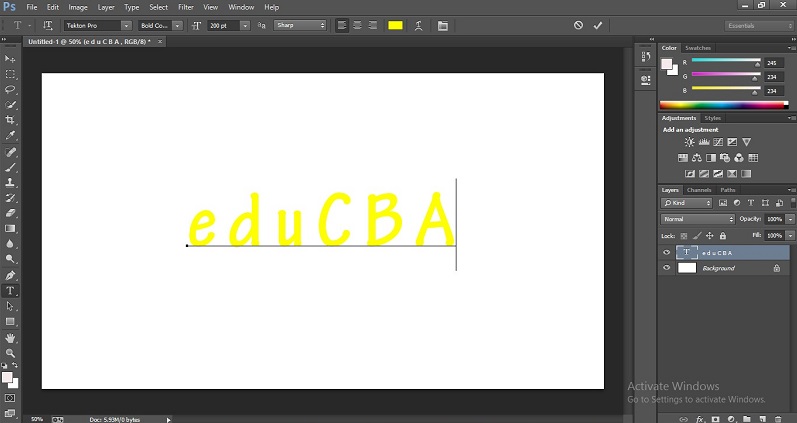
Step 1: Open a new document. I am taking an HD document to create text.
Step 2: Select the Text tool from the toolbar, and we can use ‘T’ as a text tool shortcut.
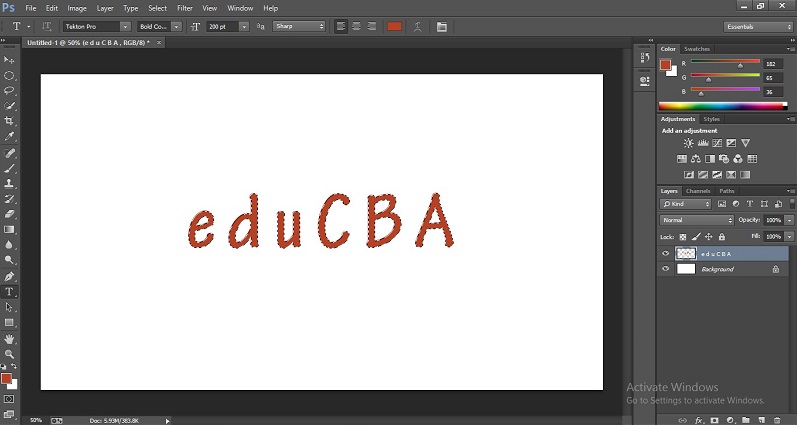
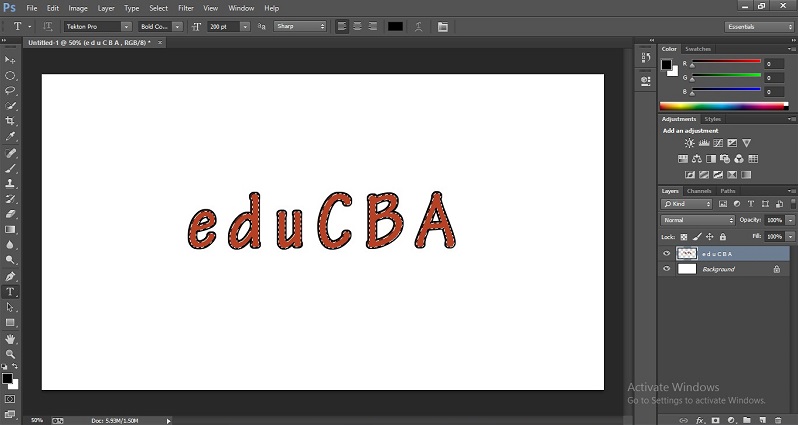
Step 3: Type your own text.
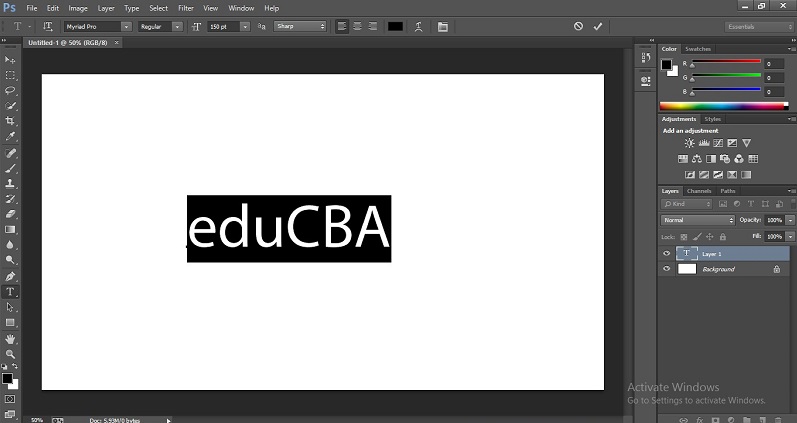
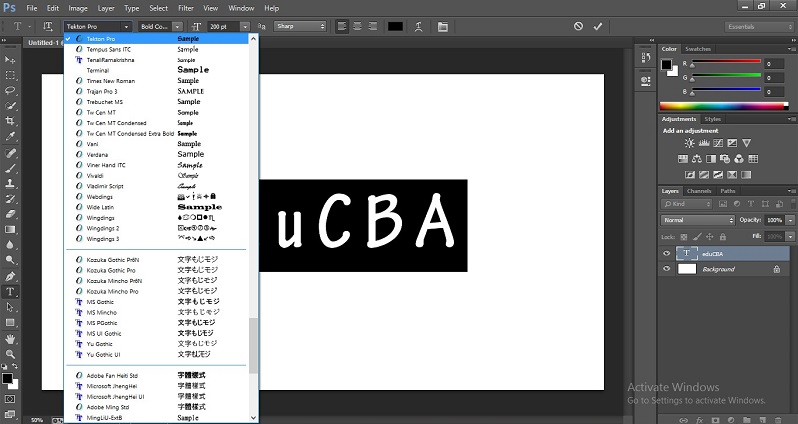
Step 4: Change the size and style of the fonts to make them more effective.
We can see the changes on the screen below.
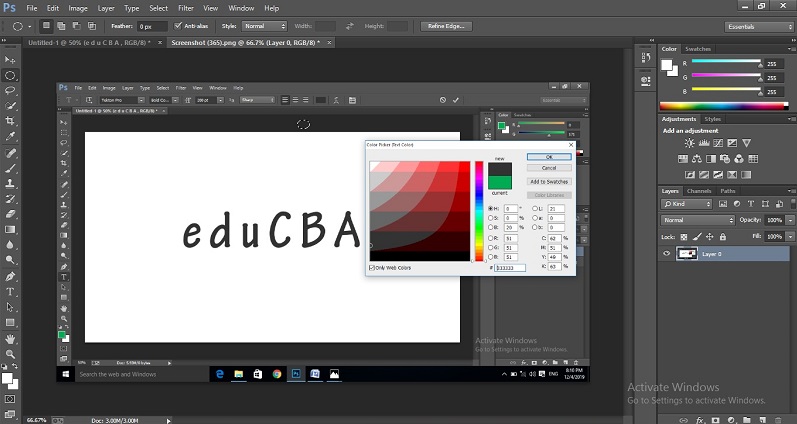
Step 5: Now, let’s jump to our topic on how to change the text color. When we select a text tool, we will get a text toolbar at the top of the Photoshop application.
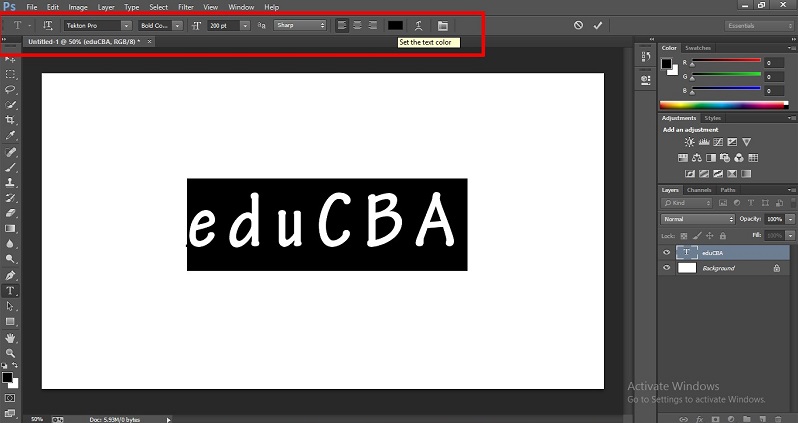
Step 6: Here, we have a color option that allows us to set the text color.

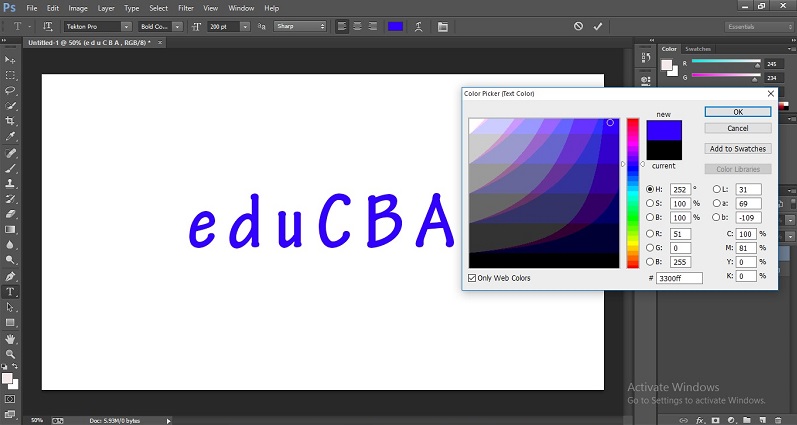
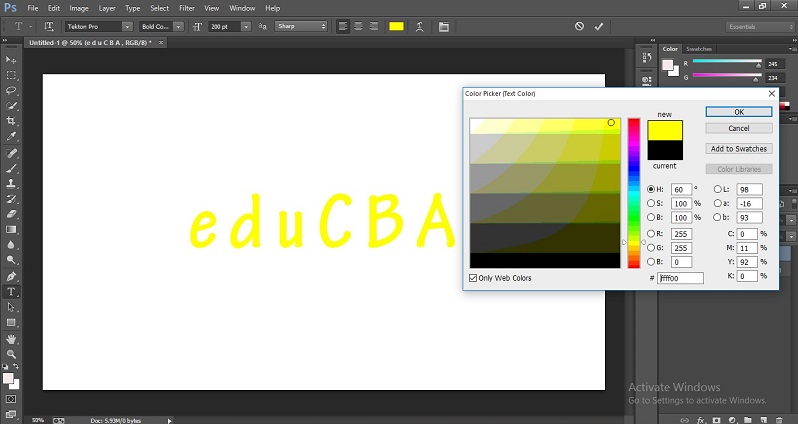
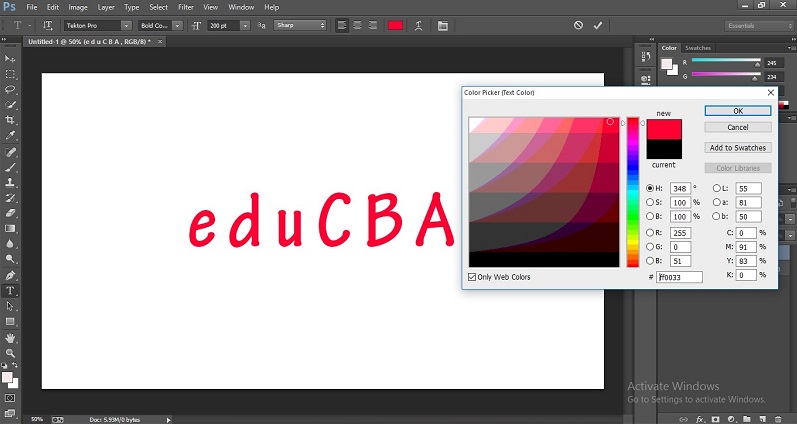
Step 7: By clicking on the color option, we will get a color picker option that lets you set the text color.
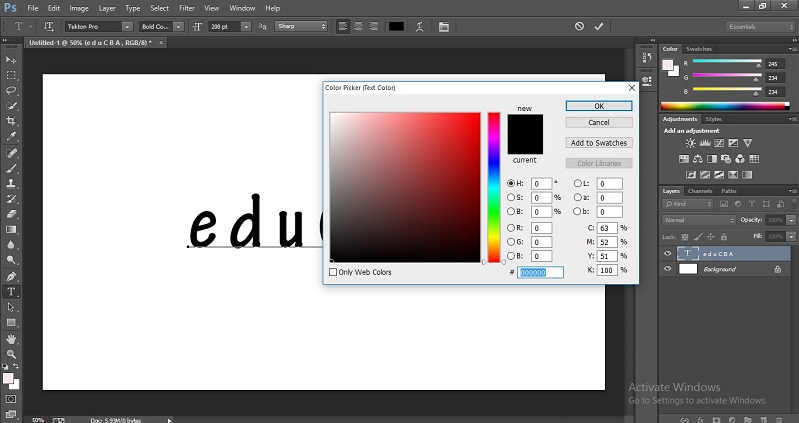
From this, we can select the color that we like; we only have Web Color options; if we select that option, we can get another color menu. We can select web colors from this option.
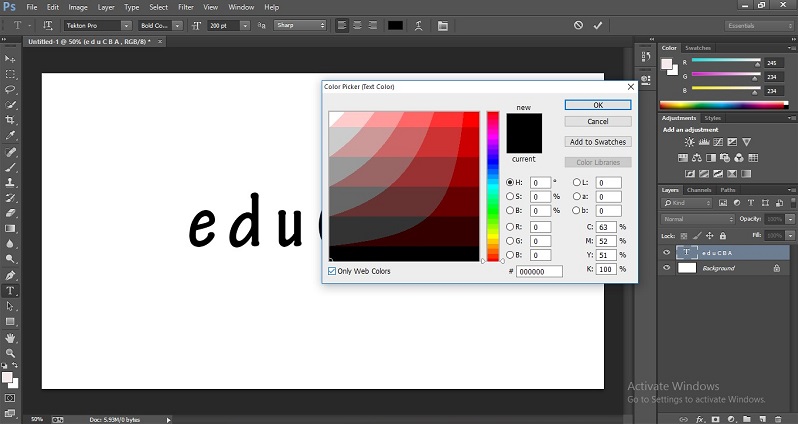
Step 8: Whatever color we select on the menu will be applied to the text; we can see whether the color fits to our text or not; if the color is not good, we can change it at the same time.
Color #1:
Color #2:
Color #3:
Color #4:
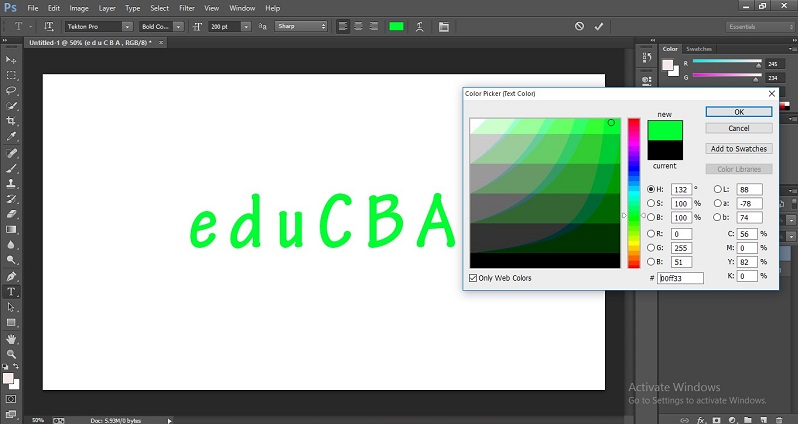
In the above images, we can see how to apply color to the text; when we find the color is fit for our text, just click OK then particular color will be applied to the text.
Step 9: Here is another option: we can pick a color from anywhere in the window by clicking on the ink Pillar, where we will ever take the cursor that color will be applied to the text.
This option will help us to maintain the same color for multi-text, and if we need to fix the same color to any object to the text in that situation, we can use this option.
Step 10: We have a color menu on the right side above the layers. We can fix the color from this menu, and we have color adjustments also in the same menu.

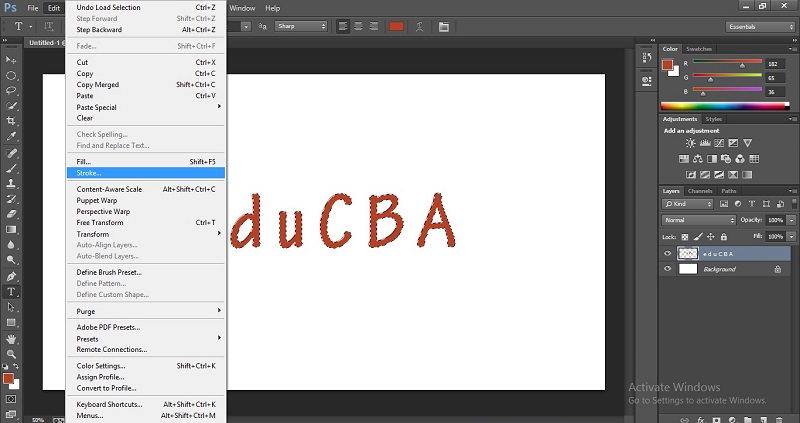
Step 11: However, we fix a color; if we add some stroke, it will look more effective. We have a stroke option in the Photoshop edit menu.
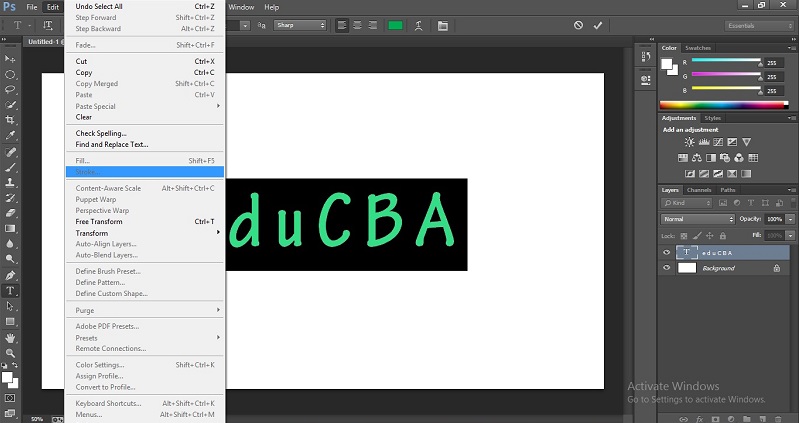
As we see in the above image, the stroke option is disabled; because the text is vector-based for vector, we can’t give the stroke; if we need to give a stroke to the text, we have two options.
- We need to change the text layer into rasterize.
- We can give a stroke from Blending options.
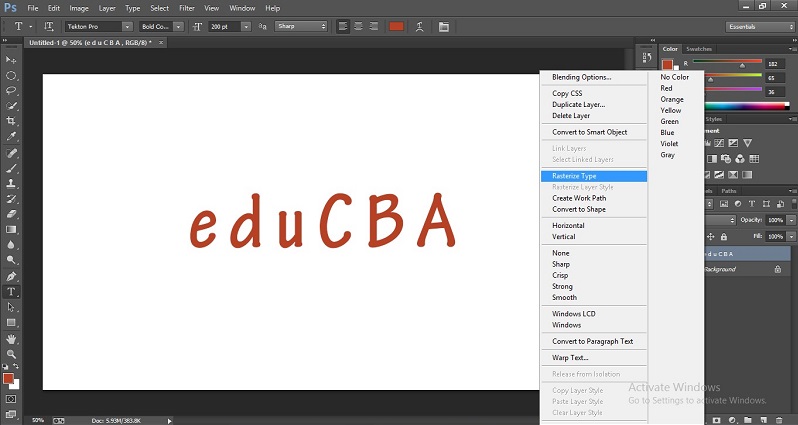
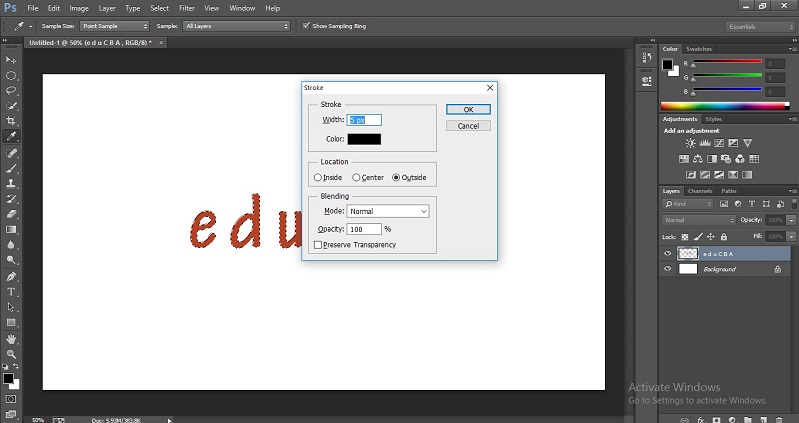
Step 12: Right-click on the text layer and select Rasterize Type option, then the layer change from vector to pixel base.
Step 13: Hold Ctrl and click on the text.
When we click on the text layer, text borders are selected, then go to edit and select the stroke.
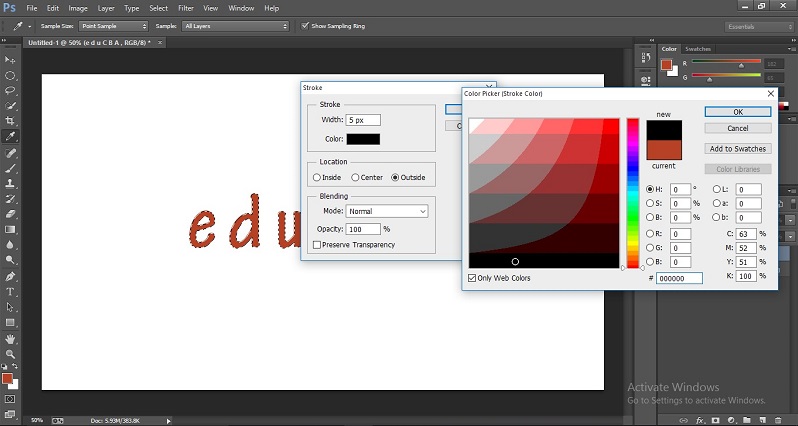
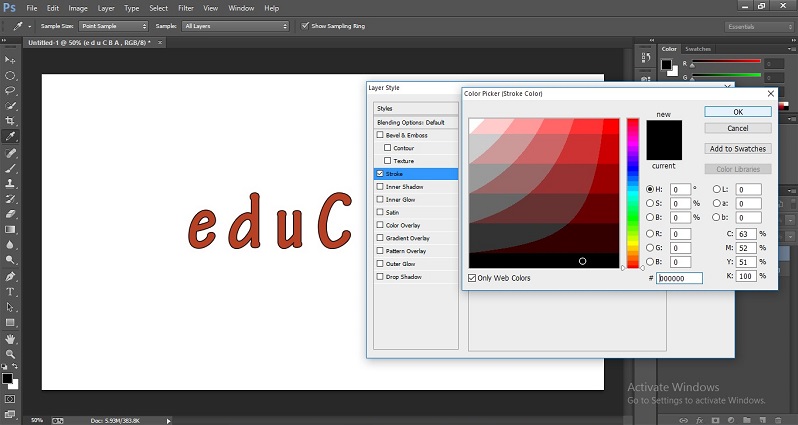
When we click on the stroke, we get a dialog box with options.
We need to click on the color option then we get a color menu.
Step 14: We can see stroke color to text now.
Step 15: If we don’t think we need to change the layer style as Resterize, we have another option that we can give stroke with blending option. Right-click on the text layer and select the Blending option.
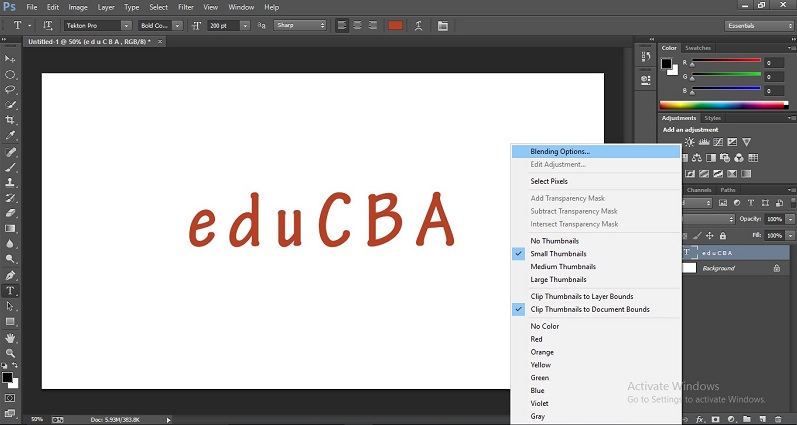
Step 16: Once we click on the Blending option, we get a dialog box.
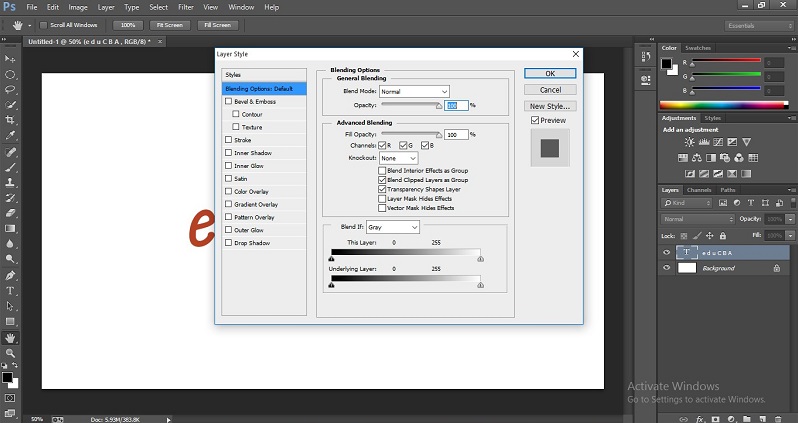
In those options, we need to select the stroke option.
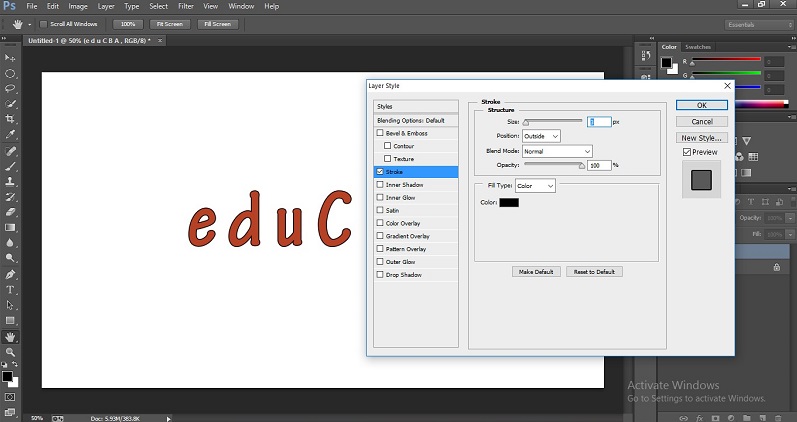
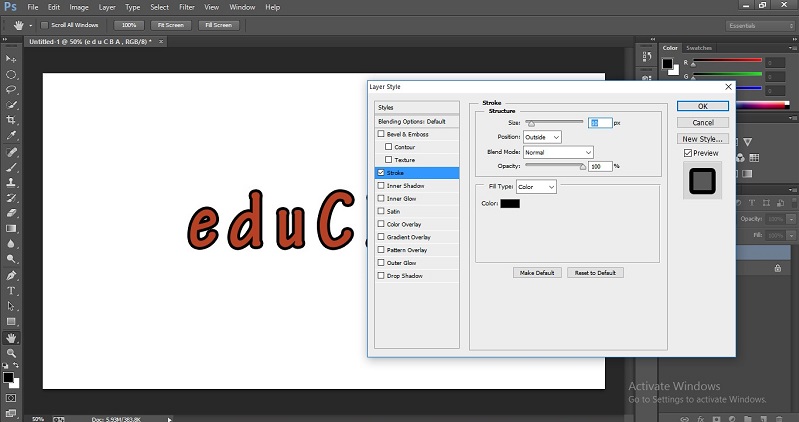
Once we select the stroke option, we get a sub-menu with color, size, opacity, etc., options; we need to select the color option and get a color menu.
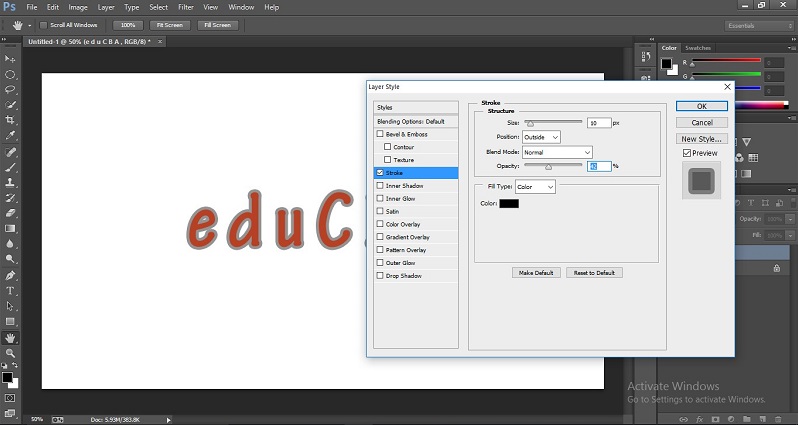
From this menu, we can fix the stroke color, size, and opacity. Here we changed the Size value.
Opacity values are changed.
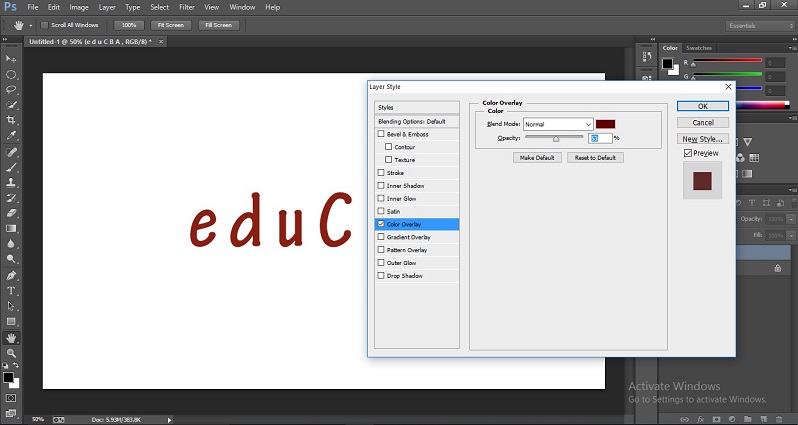
Step 17: Now, let’s see how we can change the text color using the color overlay option by selecting the Blending option.
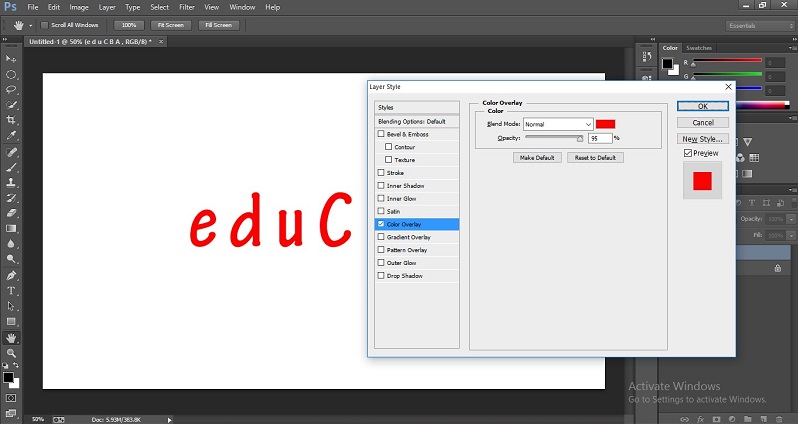
Once we click on this option, we will get a sub-menu, and whatever color we have, it will change; in the sub-menu, we have the color option, blend mode and opacity.
Step 18: Click on the color option, and we will get a color menu; from that, we can change the text color and adjust the opacity.
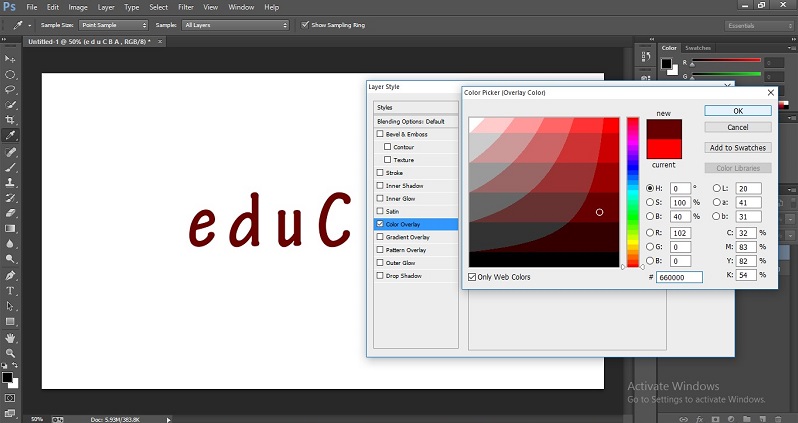
Here the advantage is that we can see whatever changes we make in changing color and opacity so that we can judge our output.
Step 19: If we like to add multi colors to the text, we have an option called Gradient overlay in the Blending option.
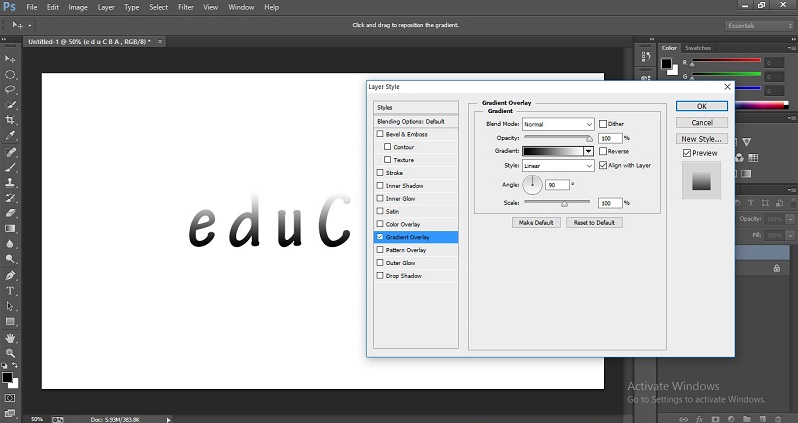
Once we click on the gradient option, we get a sub-menu with more color options.
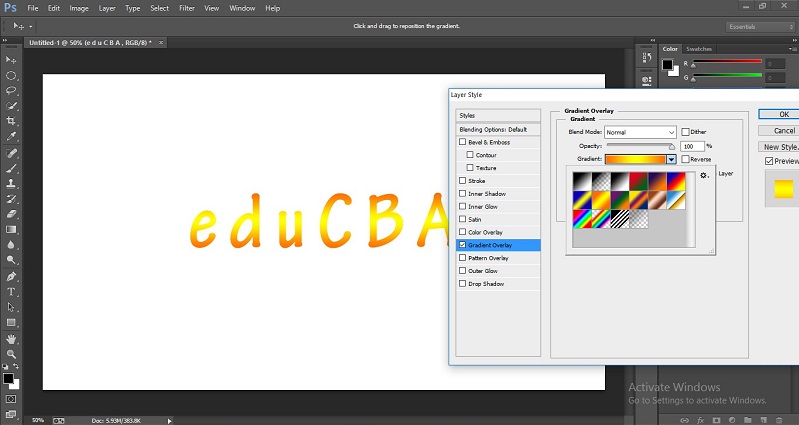
We can select colors as we like.
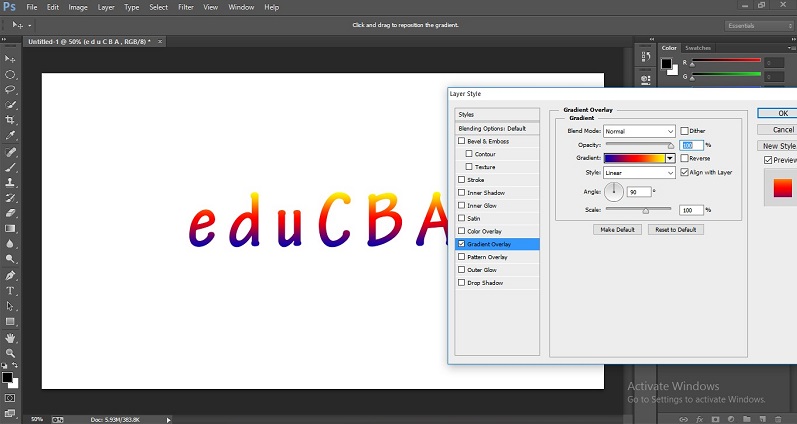
We have some more options to adjust the gradient. We can change the angle and scale as we like.
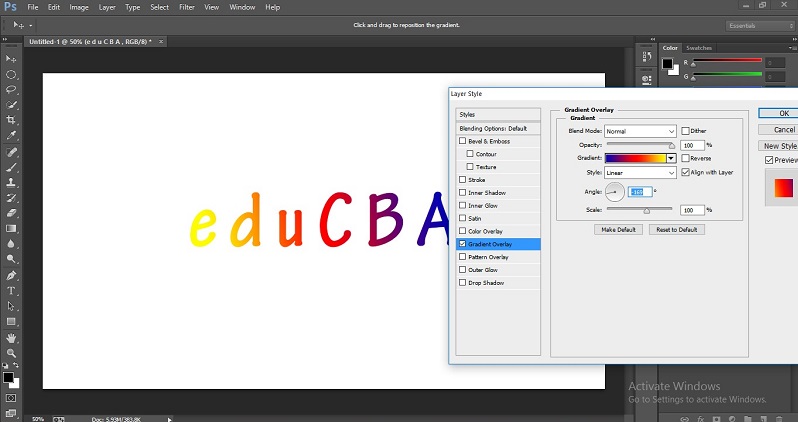
Once we change the angle, we can get the colors vertically.
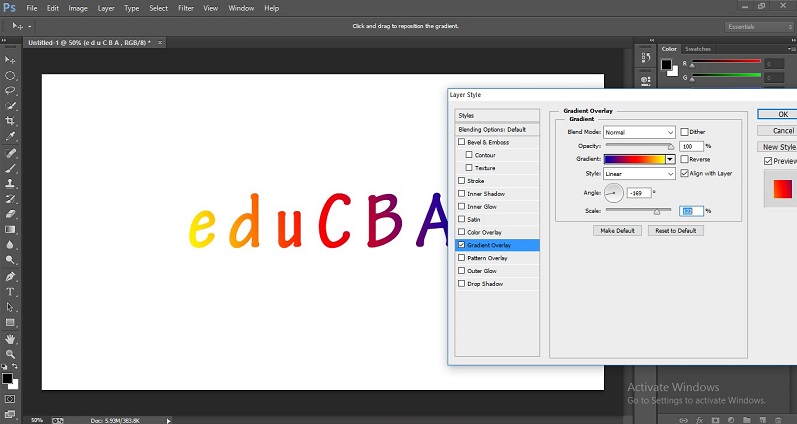
We can also change the scaling of the colors; if we change the scaling values, the length of the color will also be changed.
Step 20: Let’s see how to change the color to each letter. Select a letter from the text.
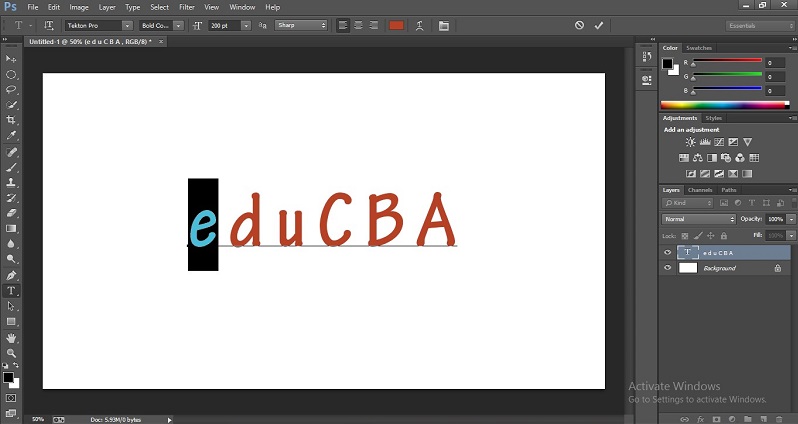
Step 21: Select the color option and change the color.

Step 22: Like ways select each letter and change different colors.
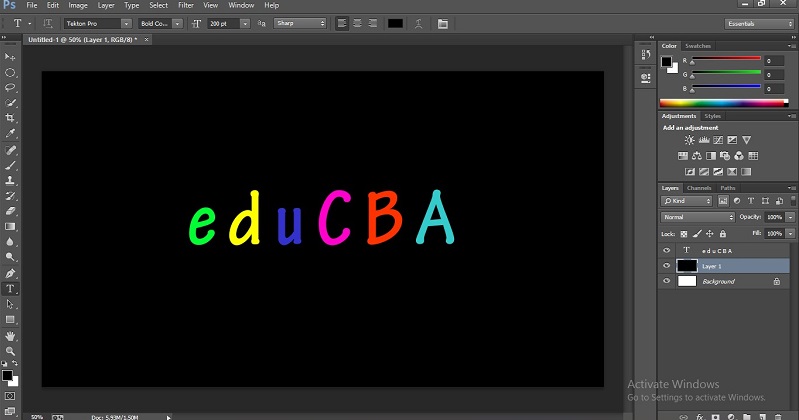
It’s looking so good in this method of changing colors to text.
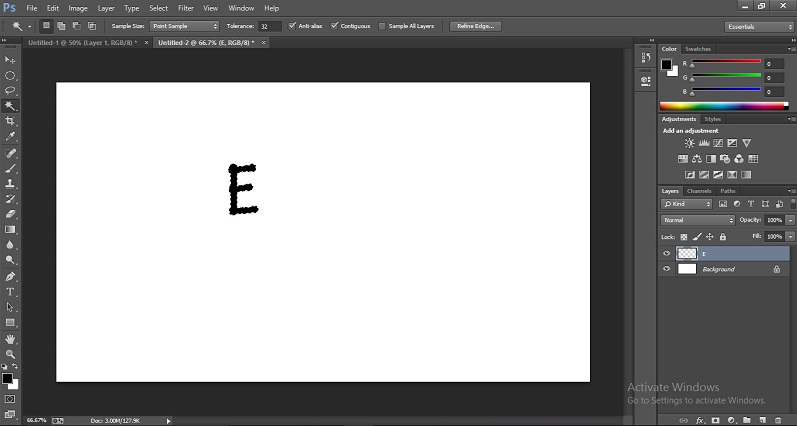
Step 23: If we have a text as an image file, then how do we change its color? It’s become so easy by using the magic wand tool.
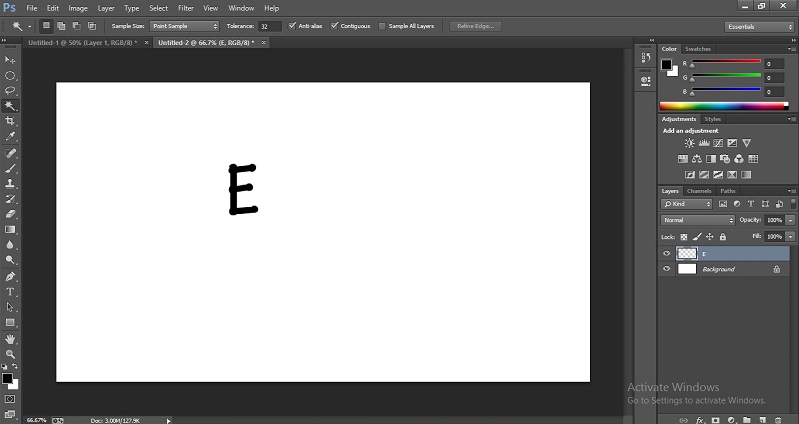
Step 24: Click on the font with the magic wand tool; I hope that you all have learned how the magic wand tool works once we click on a particular color.
Step 25: After selecting, we can apply Foreground color to the selected with shortcut ALT+Backspace or use the paint bucket tool.
In this process, we have taken a text, and we change colors with multi-options, and we fix stroke to the text. Here we learn how to change the color to the text and how to change text vector to pixel and how to color an image file text.
Recommended Articles
This is a guide to How to Change Text Color in Photoshop? Here we discuss the Introduction and Steps to change text color in Photoshop. You may also look at the following articles to learn more –
