Introduction to After Effects GIF
Adobe After Effects is an animation and video editing software and, in this article, we are going to learn how to create GIFs from an animated composition. In this article, we will look at different methods of how to export the GIF or create a GIF from an exported video along with how to optimize the GIF for the web.
Steps to Create After Effects GIF
Here are the following steps mention below:
Step #1
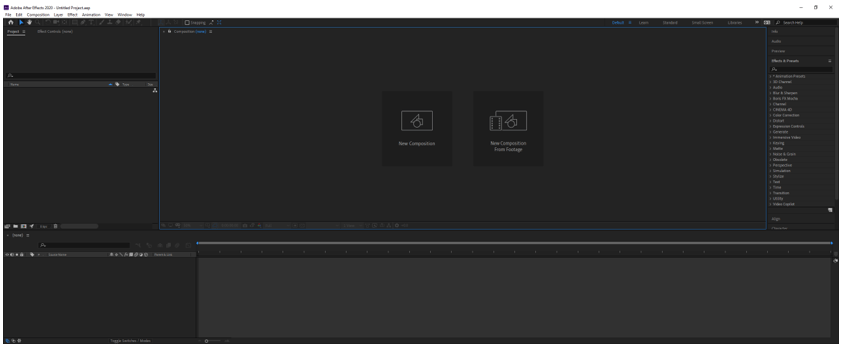
In the interface at the top is the menu bar like File, Edit, etc. and each has its submenu. On the left side, there is a project panel that consists of the project files and an effects control panel which shows the effects applied on a particular layer. Then there is the composition panel which shows the preview of the animation or video. At the top right, we have various layout presets which will arrange according to the type of work. We can even create our custom layout. At the right, there are various sections used to edit the video. At the bottom, there is layers and a timeline panel which is used to add media and add animation keyframes.
Step #2
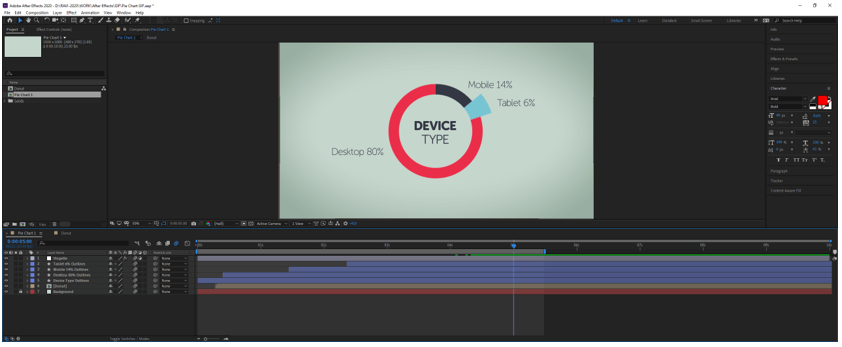
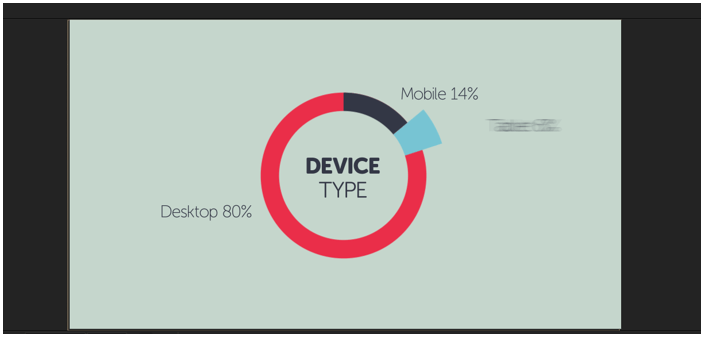
We will start with a finished animation which is a simple pie chart showing various device types according to the usage. We have also made sure that our workspace is around 5 seconds as GIF is generally a short time format that generally loops except for kinds of stuff like the text on the website.
Step #3
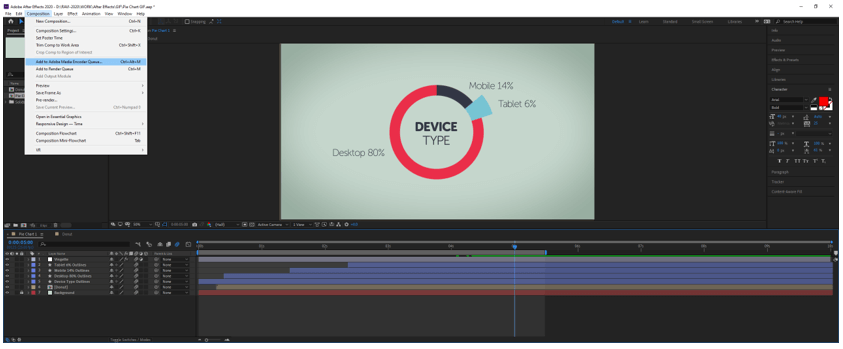
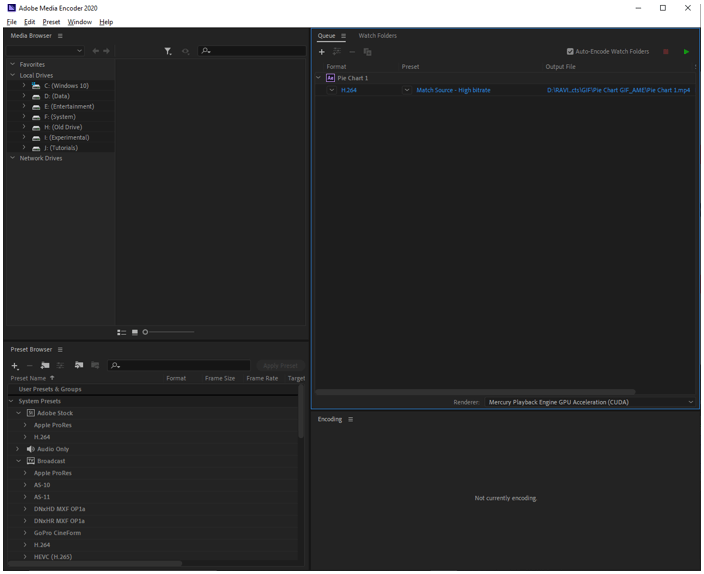
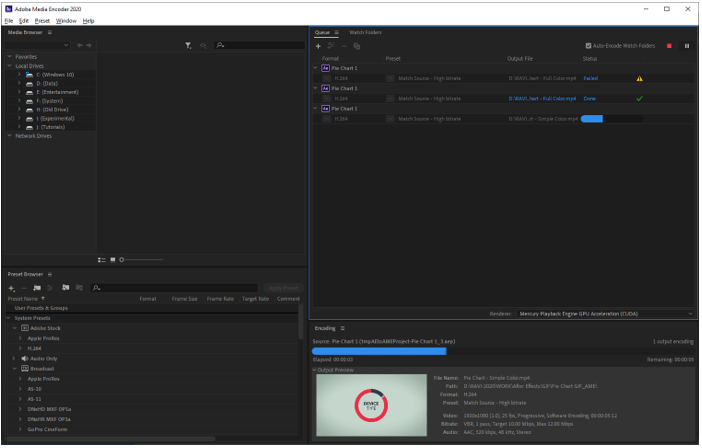
First, we will export the composition for this we will use Adobe Media Encoder or press Ctrl + Alt + M. You can also render in After effects but it will block your current work until the comp renders.
Step #4
So, the after-effects file is added in the queue. Adobe media encoder is compatible with other Adobe products such as a premier pro. Those files will also be listed here if added.
Step #5
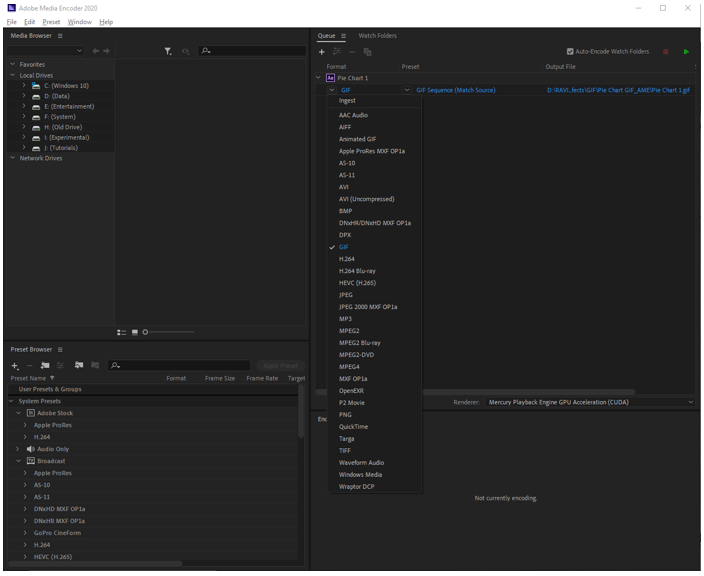
Let us first start with the new methods which is gif rather than the traditional method to export to H.264 and then convert in photoshop to GIF. In the Format dropdown select GIF. You can also change the location of the output file.
Step #6
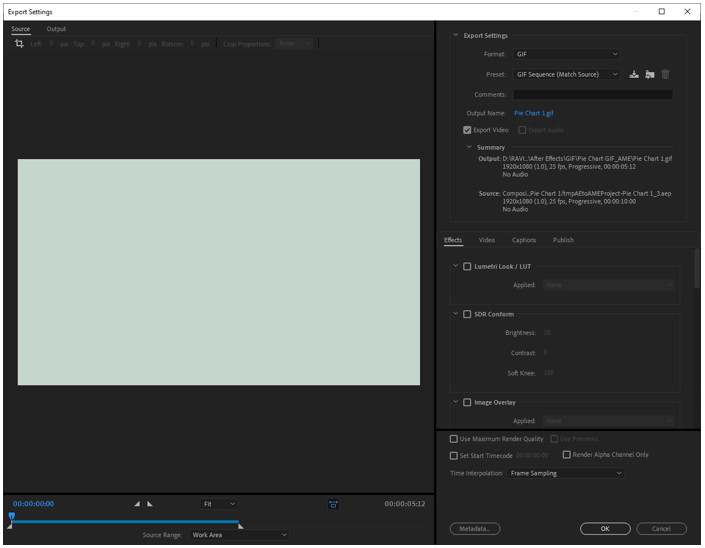
Click on GIF and you will be greeted with Export Settings where there is Source and the Output as well as the settings to tweak. The source range is to the work area instead of the entire composition. We can manipulate in and out marker at the bottom for custom selection. On the right side various tabs can be manipulated but for now, keep it as it is and click OK.
Step #7
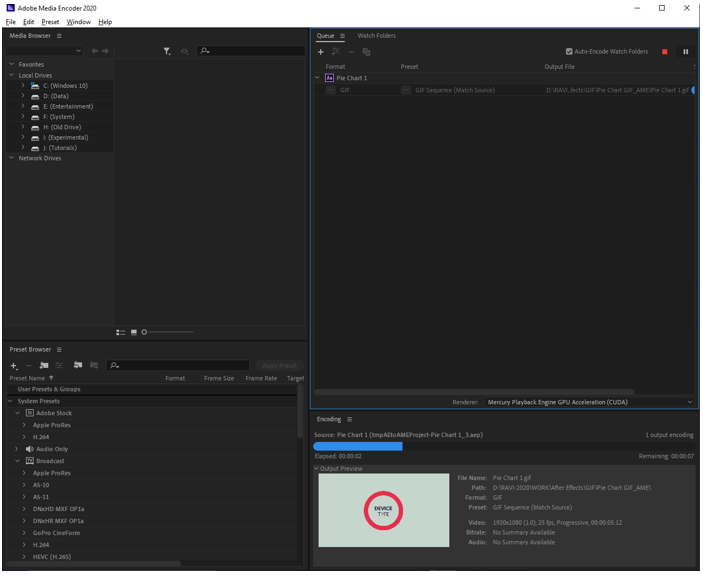
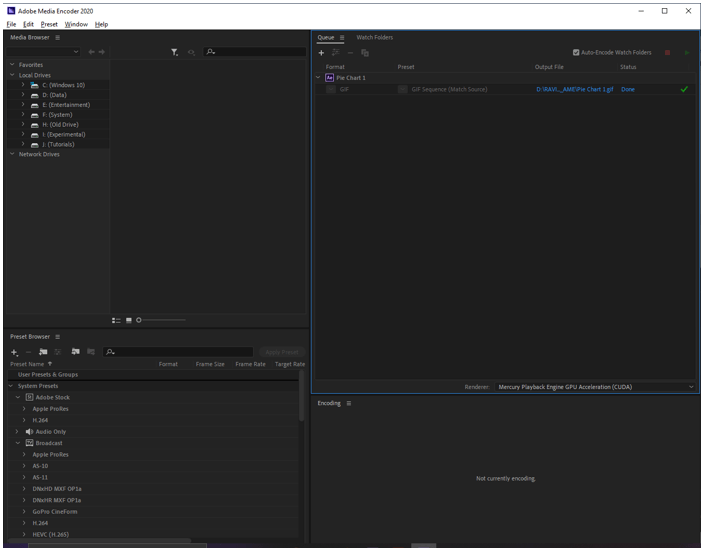
Now press the green play button to start the queue of rendering. In the encoding window, you can get the status of the render. The elapsed time and remaining time is also displayed.
Step #8
Once the render is completed the status will be done and there will be a green tick on the right to indicate the files are generated. So we got the sequence of images 25 fps in gif format.
Step #9
Now let us look at how we use photoshop to generate GIF files. Again, add the comp to media encoder render queue and select H.264 as the preset.
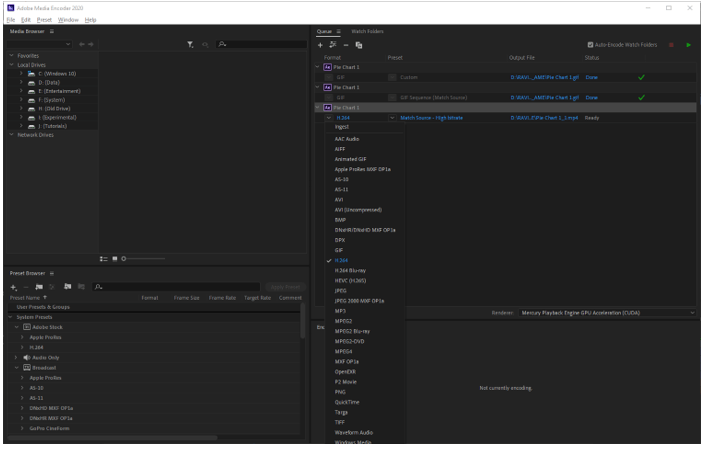
Step #10
Export this file by starting the rendering and an mp4 file will be exported. Call it a full-color version.
Step #11
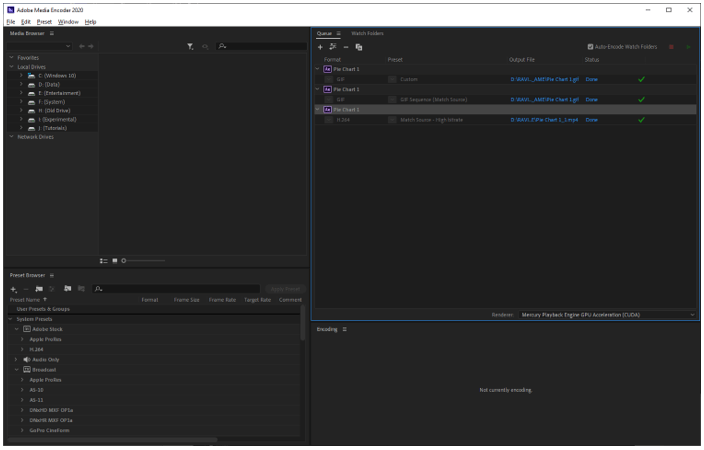
Now we will turn off the vignette layer and motion blur and again export the video to H.264. This will reduce the render time as well as the file size will also be reduced.

Step #12
Render this file also and give it another name. Call it a simple color version.
Step #13
Open the full-color version video file in photoshop with vignette layer and motion blur.
Step #14
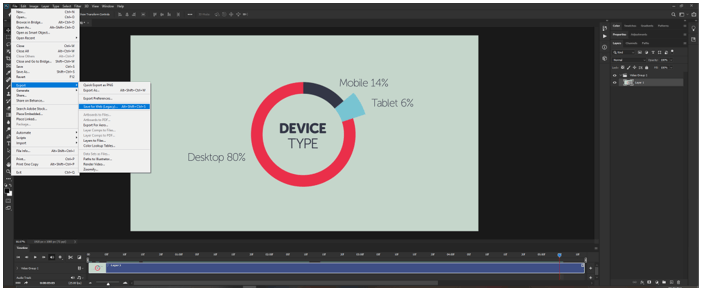
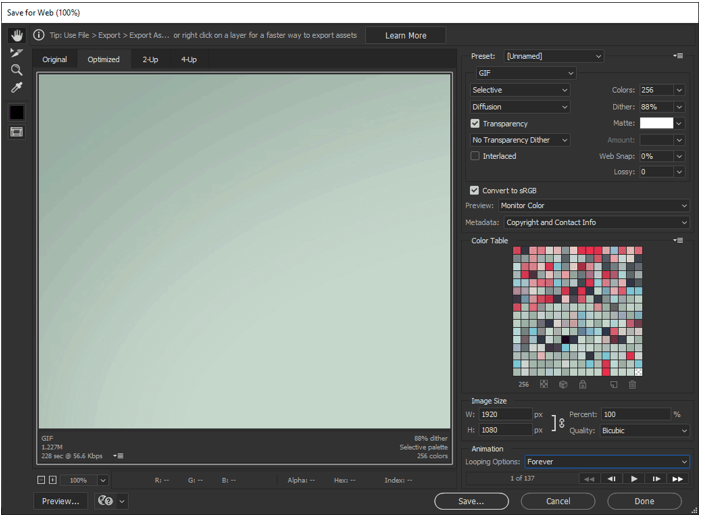
Go to File -> Export -> Save for Web (Legacy) or press Alt + Shift + Ctrl + S
Step #15
A dialog will be open from which we can select a preset if we are not sure of the exact option to choose. We selected GIF 128 Dithered and then changed the colors to 256 so the preset became Unnamed.
Step #16
Now open the simple color version and similarly export to save for the web. The settings will be the same as for the previous file. Then save the file.
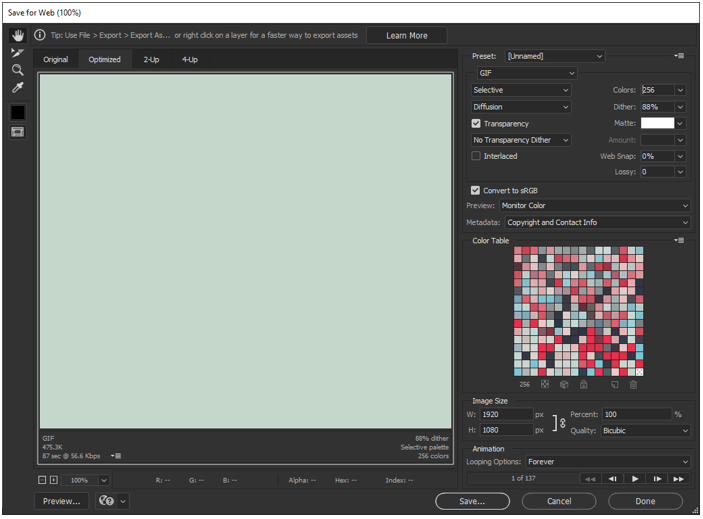
Step #17
Let’s compare the file size and the one without effects is smaller. In the web world always remember one thing that the smaller the better.

Step #18
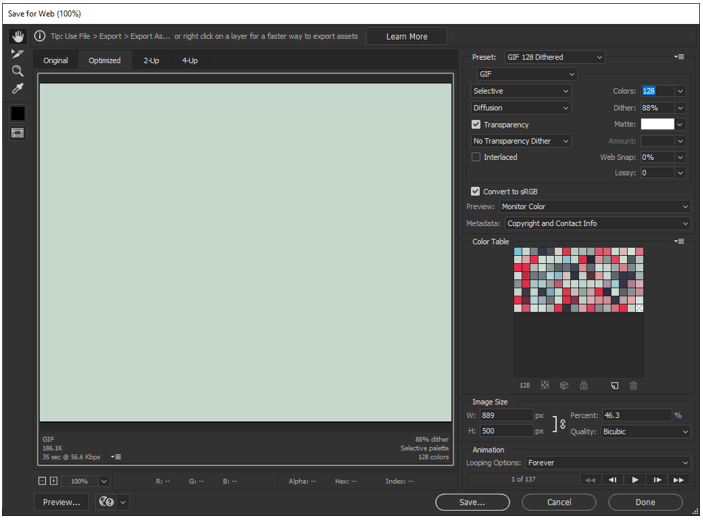
We can do further optimization by doing some tweaks and for this, we will look at the simple color video. So, save for the web and we will reduce the resolution as GIFs are not viewed on high resolutions and also, they are square shapes for social media hence there is a need to change the size. We have changed colors to 128 and height to 500 px and the width is adjusted automatically as the link is on to keep the original proportions. You can resize in percentage if you want. In the bottom left corner of the preview, you can see the estimated file size and how much time it will take to download the file. After doing the adjustments save the file.
Step #19
Again, we can compare the size of the simple color version and the more optimized version with 128 colors and the file size is reduced to more than half.

Step #20
GIF is very good for the web in a short format but if there is live video footage and even if it is a couple of seconds then the file size will be huge like greater than 15 mb which is not ideal for mobile browsing.
Step #21
Another option for GIF export is using a script like gifGUN or using an application like GIFRocket for MAC. And then there are websites like giphy.com and many others which will export a GIF but photoshop provides the most extensive options.
Conclusion
In this article, we have learned not only how to use an export GIF from after effects but also learned the techniques of using photoshop to get the most optimized result possible which will make their loading times lightning fast on the web and especially on mobile browsing.
Recommended Articles
This is a guide to After Effects GIF. Here we discuss the appropriate Steps to Create an After Effects GIF along with how to optimize the GIF for the web. You may also have a look at the following articles to learn more –
