


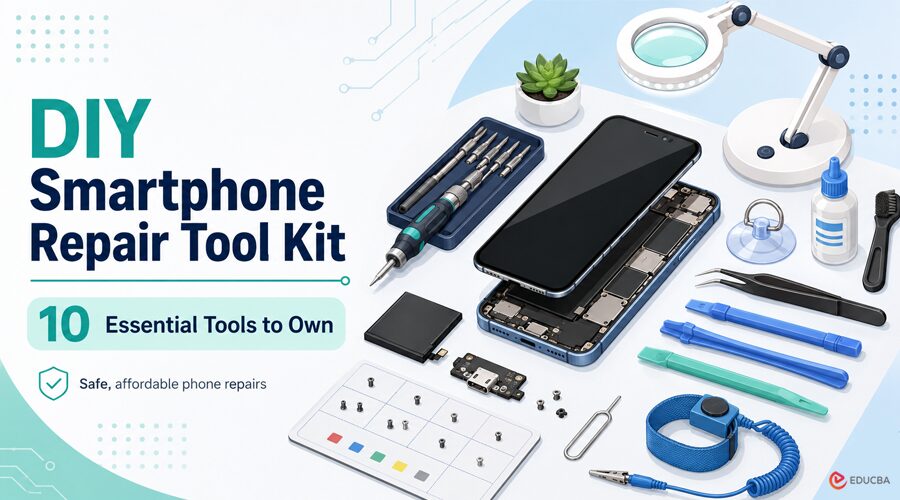
Nowadays, many people want to repair their cell phones by themselves. However, before you start any repairs, ensure you have all the essential tools you may need for the phone repair process. Whether it is replacing a broken screen, installing a new battery, or replacing a charging port, having the right DIY smartphone repair tool kit makes the entire process easier and safer.
The good news is that you do not need to spend hundreds of dollars on professional equipment to get started. In this article, we will explore the best toolkit for DIY Smartphone Repair. We will explore every essential tool you need for DIY mobile repair, and together, all these tools make up a budget-friendly mobile repair toolkit.
Why Having the Right DIY Smartphone Repair Tool Kit Matters?
Smartphones have tiny screws, sensitive cables, and adhesive-backed batteries. If you try to use household knives or any other tool not meant for mobiles, it can damage your device.
A proper DIY smartphone repair tool kit offers several benefits:
- Prevents damage
- Makes repairs easier
- Improves repair accuracy
- Extends the lifespan of repair tools
- Saves money on repeated repairs.
It is better and safer to use a proper toolkit than to damage your device with mismatched tools.
1. Precision Screwdriver Set
A screwdriver set is the foundation of every DIY smartphone repair tool kit. Every phone manufacturer has different screw types. Using the right screwdriver allows you to repair your smartphone safely and professionally.
A professional screwdriver kit should include:
- Phillips (PH000, PH00)
- Pentalobe (P2)
- Torx (T2–T6)
- Tri-Point (Y000)
- Flathead bits.
2. Plastic Pry Tools and Spudgers
Metal tools can sometimes scratch your phone or even cause serious damage to internal components. You can use plastic pry tools and nylon spudgers to safely separate the back cover, battery, screen, and other connectors without causing damage.
Useful pry tools include:
- Plastic Pry Tool
- Nylon Spudger
- Opening Pick
- Plastic Opening Card
- Plastic Wedge.
3. Suction Cup Tool
Removing a smartphone screen is a really difficult part of the repair work. A suction cup helps lift the screen gently while creating enough space to insert opening picks.
This tool is especially useful for:
- Screen replacement
- Battery replacement
- Opening glued devices
- Separating display assemblies.
4. Precision Tweezers
Some tiny screws and connectors are impossible to handle with fingers. You need precision tweezers to handle it.
Precision tweezers make it easy to:
- Hold ribbon cables
- Remove tiny screws
- Position internal components
- Pick up adhesive strips.
Choose anti-static (ESD-safe) tweezers for added protection against electrostatic discharge.
Common types include:
- Straight Tweezers
- Curved Tweezers
- Fine Tip Tweezers
- Flat Tip Tweezers.
5. Magnetic Screw Mat
The worst frustrations during DIY repairs are losing tiny screws. You need a magnetic screw mat that keeps all screws safely arranged in their original positions.
Benefits include:
- Prevents lost screws
- Organizes different screw sizes
- Speeds up reassembly
- Reduces repair mistakes.
6. Heat Gun or Hair Dryer
Applying gentle heat softens the adhesive, making components easy to remove. You can use a household hair dryer in this process. Avoid excessive heat, as it can damage OLED displays or internal components.
7. SIM Card Eject Tool
Although it looks simple, it is the first step to repairing any smartphone.
A SIM eject tool allows you to remove the SIM safely:
- SIM card trays
- Hybrid SIM slots
- Memory card trays.
8. Cleaning Brush and Isopropyl Alcohol
Dust and debris can badly affect your phone’s speaker performance.
A soft anti-static cleaning brush combined with high-purity isopropyl alcohol helps clean:
- Charging ports
- Speaker grills
- Logic boards
- Battery contacts
- Camera modules.
Do not use water or any household cleaning products inside electronic devices.
9. Anti-Static Wrist Strap
Static electricity is invisible, but it can damage sensitive electronic components. An anti-static wrist strap helps prevent static electricity from damaging your phone’s internal components during repairs.
This inexpensive accessory is especially recommended when working on:
- Motherboards
- Charging ICs
- Memory chips
- Display connectors.
10. LED Work Light or Magnifying Lamp
Smartphones have small components, and some of them you cannot see with the naked eye. Good lighting improves visibility and helps prevent repair mistakes.
A magnifying lamp combines bright LED lighting with magnification, making it easier to inspect:
- Tiny screws
- Flex cables
- Charging ports
- Connector pins
- PCB components.
Bonus Tools to Upgrade Your DIY Smartphone Repair Tool Kit
As you gain experience, you can upgrade your DIY smartphone repair tool kit with more advanced equipment.
- Digital Multimeter
- LCD Screen Tester
- Battery Activation Board
- Hot Air Rework Station
- Soldering Station
- Digital Microscope
- DC Power Supply.
These are tools used by professionals for advanced repairs.
Tips for Building a Budget DIY Smartphone Repair Tool Kit
You do not need to buy expensive tools all at once.
Instead:
- Essential hand tools
- Buy quality screwdrivers
- Replace worn tools
- Store everything in a dedicated repair case
- Keep screws organized.
Common Mistakes DIY Beginners Should Avoid
At first, every new person makes mistakes during repair work.
Here are a few to watch out for:
- Do not use the wrong screwdriver size
- Do not pull ribbon cables too hard
- Do not forget screw locations
- Do not apply too much heat
- Do not use metal tools to open the phone
- Do not touch internal components without ESD protection.
How Much Does a DIY Smartphone Repair Tool Kit Cost?
If you think a mobile repair tool kit is very expensive, you may be wrong. It can be very affordable. A basic mobile repair kit can cost around 20$ to 50$. The price of the toolkit depends on the quality of the tools. Always invest in a high-quality repair toolkit rather than a cheap tool kit, which can wear out quickly.
Final Thoughts
Learning DIY smartphone repair is a great way to save money and reduce electronic waste. The key is not buying the most expensive tools, but choosing the right DIY smartphone repair tool kit and using it correctly. A DIY smartphone repair tool kit that includes precision screwdrivers, pry tools, tweezers, a magnetic screw mat, and proper lighting is more than enough for beginners. As your skills improve, you can gradually add advanced equipment to handle more complex smartphone repairs.
Recommended Articles
We hope this guide on DIY smartphone repair tool kit helps you choose the right tools for safe, affordable, and successful smartphone repairs at home. Explore these recommended articles for more insights into smartphone maintenance, mobile repair techniques, repair tools, device troubleshooting, and DIY electronics repair.