VBA Delete Row
In Excel, to delete any row, we have a shortcut of using CTRL + – or select the row, right-click on it, and delete it. But in VBA, we have done it by writing a code for it. Therefore, the method of deleting a row in VBA is first we need to identify which row to delete, and then we can delete it. In this article, we will learn about different illustrations on how to delete a row in VBA.
In VBA, the Delete row is used to delete either a set of rows or a single row depending upon the situation. Similar to an excel worksheet, we can use macros or VBA to delete the rows in an excel worksheet. This helps when lots of data have with us, and we cannot do it manually.
Syntax to Delete Row in Excel VBA
The syntax to delete a row in excel is as below.
Worksheets.Rows(Row#).Delete
There are also other methods to delete rows by using VBA such as follows.
Range(“Cell”).EntireRow.Delete
What the above statement will do that is it will delete the row for the given row. For example, if we write Range(“A1”).EntireRow.Delete then the first row will be deleted as cell A1 belongs to the first row.
Also, we can use Rows(row_num).delete to delete a row.
How to Delete Row in Excel Using VBA?
Below are some examples of how to delete a row in excel using VBA.
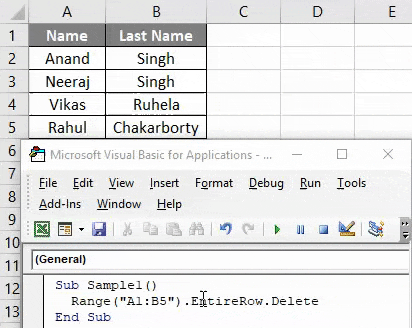
VBA Delete Row – Example #1
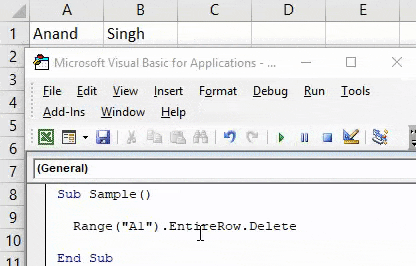
Let use the first simple method to delete rows. For demonstration purpose, I will enter a random value in cell A1 and B1. Have a look at it below.

What I want to see is if I use the code written above the entire row will be deleted or a single cell will be deleted.
Follow the below steps to delete row in excel using VBA.
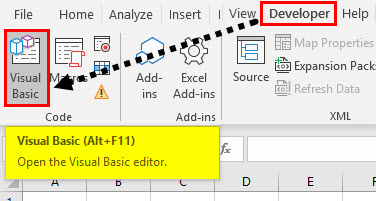
Step 1: Go to the developer’s Tab click on Visual Basic to open VBA Editor.
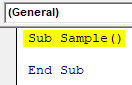
Step 2: In the code segment declare a sub-function to start writing the code.
Code:
Sub Sample()

End Sub
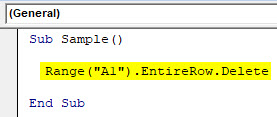
Step 3: Now write the following code to delete the row.
Code:
Sub Sample()

  Range("A1").EntireRow.Delete

End Sub
Step 4: Run this code by hitting F5 or Run button and see the output.
Once we run the code we can see that the values from both cell A1 and B1 are removed as the entire first row has been deleted.
VBA Delete Row – Example #2
Earlier in the first example, I have deleted only a single row. But what about if we have to delete multiple rows. For demonstration purpose, I have the following data as shown below,
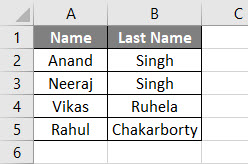
I want to delete all the first five rows. Follow below steps to delete row in excel using VBA.
Step 1: In the developer’s tab click on Visual Basic to open VBA Editor.
Step 2: In the code declare a sub-function to start writing the code,
Code:
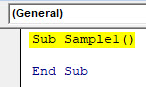
Sub Sample1()

End Sub
Step 3: Write the following code shown below to delete the entire five rows.
Code:
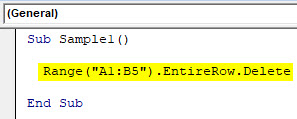
Sub Sample1()

  Range("A1:B5").EntireRow.Delete

End Sub
Step 4: Run this code by hitting F5 or Run button and see the output.
Once we run the code we see the following result, The entire data has been deleted means the first five rows have been deleted as we had data in the first five rows.
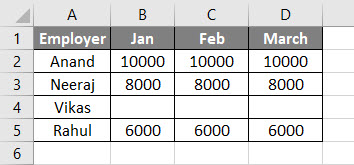
VBA Delete Row – Example #3
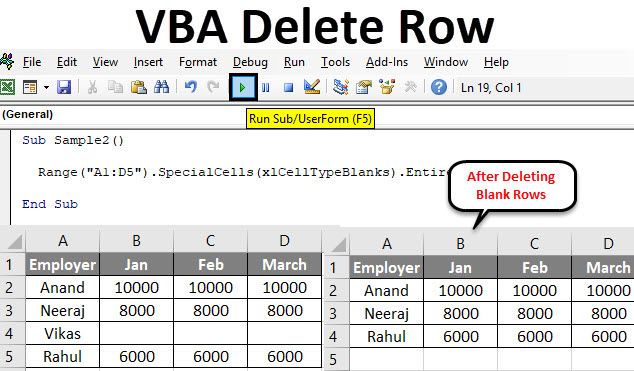
Now we have data for employees and their sales are done in three months Jan, Feb, and March. One of the employees was on leave and couldn’t do sales for three months so the cells are empty for him. Our goal is to find that blank row and delete it from the data.
Have a look at the data below,
Follow below steps to delete row in excel using VBA.
Step 1: From the developer’s Tab click on Visual Basic to open a visual basic editor.
Step 2: Declare the subfunction in the code window to start writing the code,
Code:
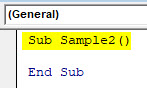
Sub Sample2()

End Sub
Step 3: Write the following code to delete the rows which have blank cells.
Code:
Sub Sample2()

  Range("A1:D5").SpecialCells(xlCellTypeBlanks).EntireRow.Delete

End Sub
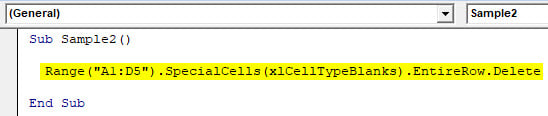
SpecialCells is a function in VBA which returns us all the cells which match our conditions and our condition was the blank cells in that range so we used an xlCellTypeBlanks function.
Step 4: Run this code by hitting F5 or Run button and see the output.

Once we run the code we can see that the row which had the blank cells has been deleted.
VBA Delete Row – Example #4
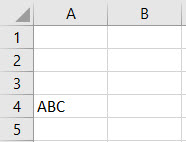
There are some other similar methods to delete the rows such as using the rows and delete function. For example, we have data in row 4 and I want to delete row 4. We can give a command to excel to delete 4th row in the data. Have a look at the screenshot below I have a random data at row 4 in the first cell.
Follow below steps to delete row in excel using VBA.
Step 1: Open VBA Editor by clicking on Visual Basic from the Developer’s Tab,
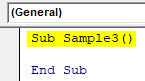
Step 2: Declare the subfunction to start writing the code.
Code:
Sub Sample3()

End Sub
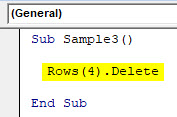
Step 3: Write the following code to delete the 4th row.
Code:
Sub Sample3()

  Rows(4).Delete

End Sub
Step 4: Run this code by hitting F5 or Run button and see the output.
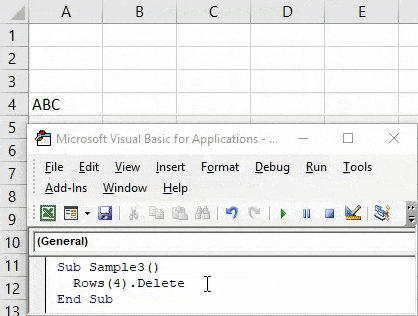
Data has been deleted as the 4th row has been deleted itself.
VBA Delete Row – Example #5
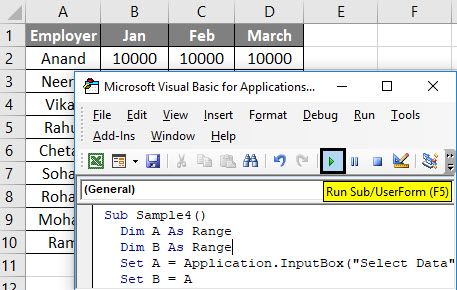
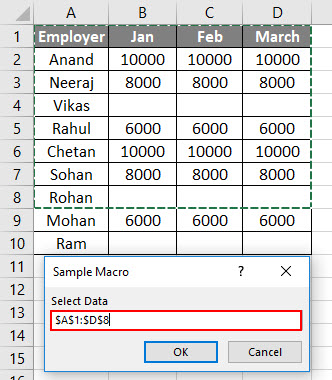
In the above code, we have given the range or row to delete in the code itself. Now let us take input from the user and he can delete the row from a given data. For example, I have data of employees and sales did as below and I want a user to select the range from how much data the user wants to delete the rows with blank cells. Have a look at the below data,
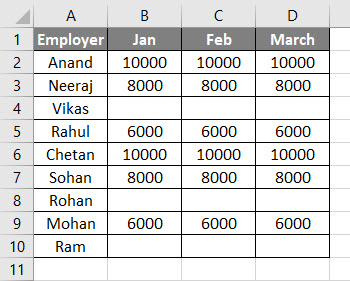
Follow below steps to delete row in excel using VBA.
Step 1: Open VB Editor by clicking on Visual Basic from the developer’s tab,
Step 2: Declare a sub-function to start writing the code.
Code:
Sub Sample4()

End Sub
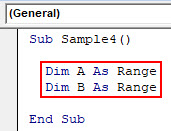
Step 2: Declare two variables as range, A and B.
Code:
Sub Sample4()

  Dim A As Range
  Dim B As Range

End Sub
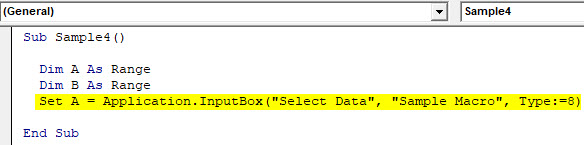
Step 3: To take input from the user for a selection of range to delete we will use input box function and we will save that input in a variable defined above.
Code:
Sub Sample4()

  Dim A As Range
  Dim B As Range
  Set A = Application.InputBox("Select Data", "Sample Macro", Type:=8)

End Sub
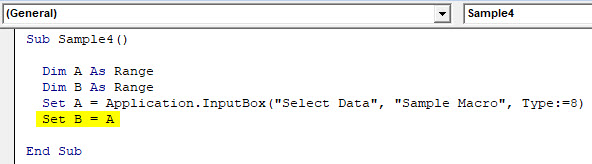
Step 4: Set B = A so that the input from the user can be stored in range B.
Code:
Sub Sample4()

  Dim A As Range
  Dim B As Range
  Set A = Application.InputBox("Select Data", "Sample Macro", Type:=8)
  Set B = A

End Sub
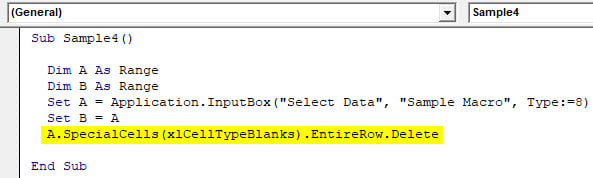
Step 5: Now we will delete the data which has blank cells from the range chosen by the user.
Code:
Sub Sample4()

  Dim A As Range
  Dim B As Range
  Set A = Application.InputBox("Select Data", "Sample Macro", Type:=8)
  Set B = A
  A.SpecialCells(xlCellTypeBlanks).EntireRow.Delete

End Sub
Step 6: Now run the code from the run button provided.
Step 6: An input box appears.
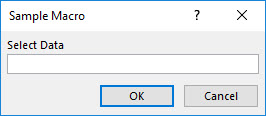
Step 7: Select the range from A1:D8 in this example. Press OK to see the result.
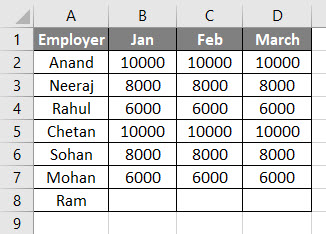
The data which had blank cells have been deleted.
Things to Remember
There are a few things we need to remember about Delete Row in Excel VBA:
- We can delete the row based on a single cell.
- We can delete multiple rows by giving a range of cells.
- We can also delete rows by taking inputs from the user.
Recommended Articles
This has been a guide to VBA Delete Row. Here we discussed how to Delete Row in Excel VBA along with practical examples and downloadable excel template. You can also go through our other suggested articles –
