Updated August 25, 2023
Introduction to Vaporwave Photoshop
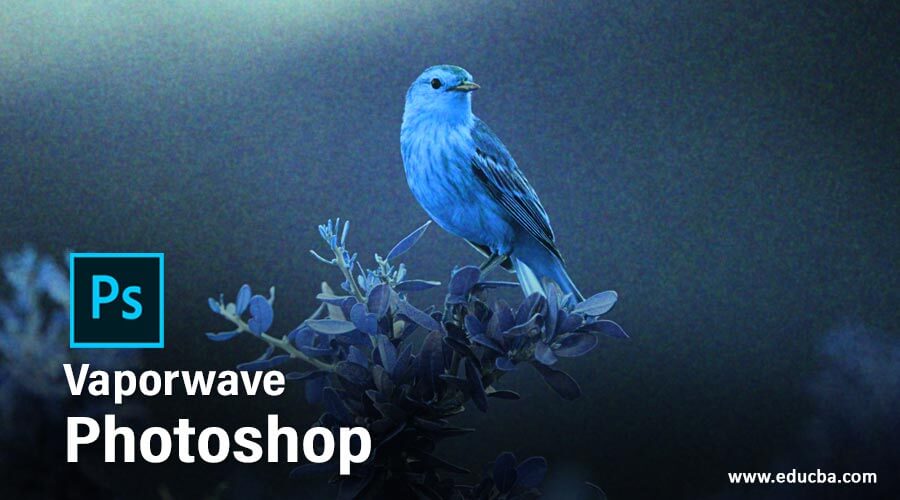
Photoshop is raster image editing software which has different technique through which we can make some old visual effects. Vaporwave is a late 1990s visual effect which was inporatated with glitch art, music videos, and different type of artwork. We can create this effect in present on our image with the help of different features of Photoshop software. In this article, we will learn how we can create vaporwave in this software by using its features and also analyze different parameters of these features. So let us start our discussion about the Vaporwave Photoshop topic in this software.
How to Create Vaporwave in Photoshop?
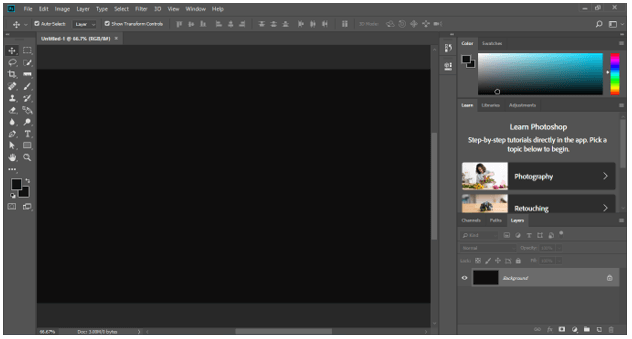
We should follow some simple steps for applying this effect on our image but I think before starting our learning about this topic we should have look at the working screen of this software so that we can better understand this topic throughout this article.
At the top, we have a Menu bar that has different menus such as File, Edit, Image, and some others. These menus helps us in the management of different parameters of this software during our working in this software. Below this menu bar, we have a bar of Properties of active tool or image through which we can manage parameters of those tools or images. Below this bar, we have tool panel a left side which has a different type of tool for making our work easy in this software, at the center we have display window in which we can see our work, at the right side we have some panels which helps in the management of different features of this software. You can reset all the sections at a different place as per your choice.
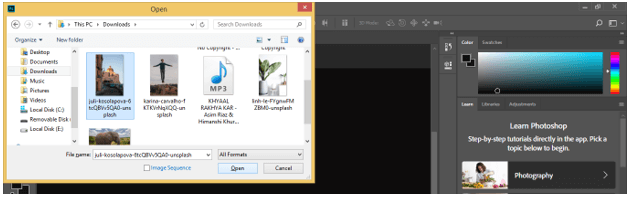
Now let us have an image on which we will apply the vaporwave effect. For having an image, go to the File menu of the menu bar and click on it. Once you click on it a drop-down list will be open, click on the ‘Open’ option of the drop-down list.

Once you click on Open a box of placing images in this software will be open. Go to the desired folder of your personal computer and choose your desired image by click on it. Once you have chosen press Open button of this dialog box.
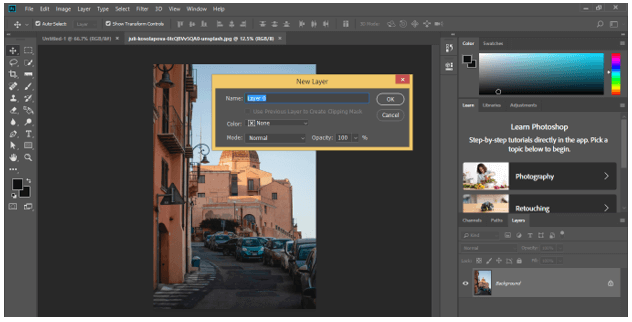
Once you make click your image will open as background layer so for making it editable go-to layer panel and make double click on this layer. Once you make double click a ‘New layer’ box will be open. Name this layer according to you and press the Ok button of this box.
Now press Ctrl + J button for making a copy of this layer.
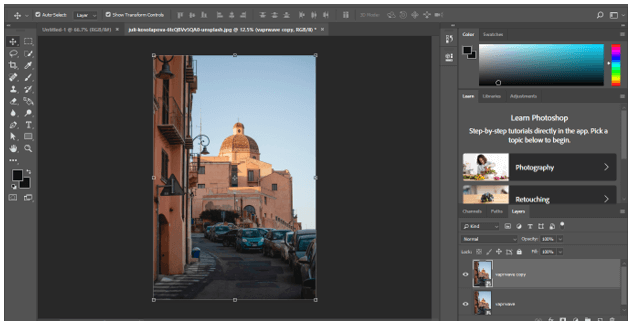
Now select the copy layer by click on it and press Ctrl + I button for this type of effect on your image.
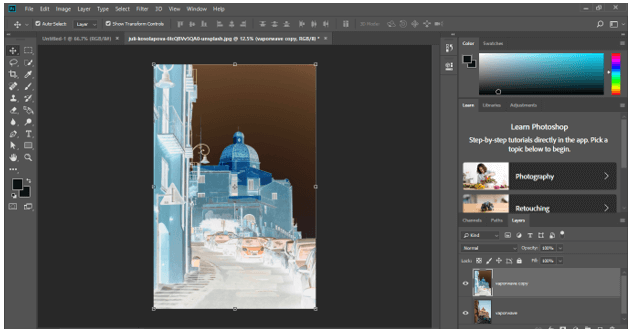
Now click on the drop-down arrow of the Mode option of this layer. Choose a Color option from the list by click on it.
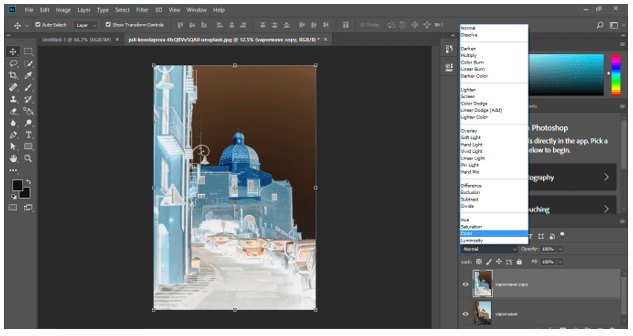
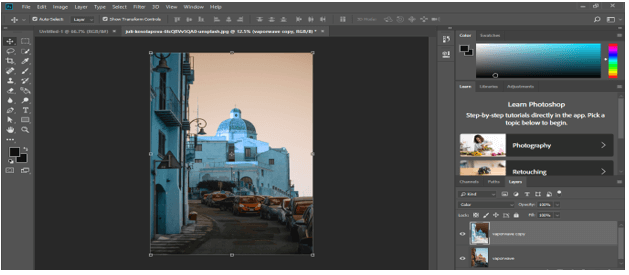
Now it will look like this.
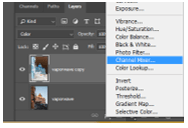
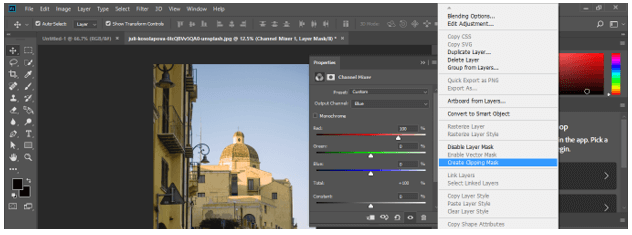
Now go to the bottom of the layer panel and click on the Adjustment layer button. A drop-down list will be open to choosing the ‘Channel Mixture’ option from here.
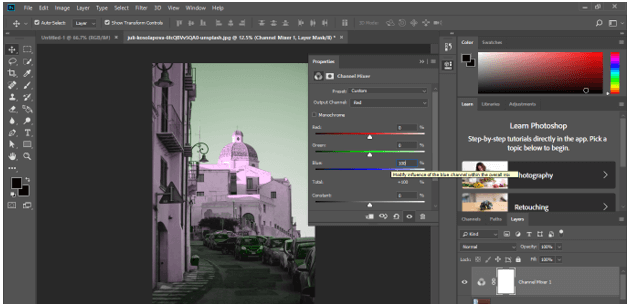
Choose Red in the Output Channel option of the opened box and make the red value as 0 and blue value as 100.
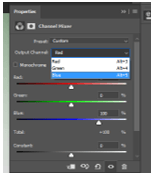
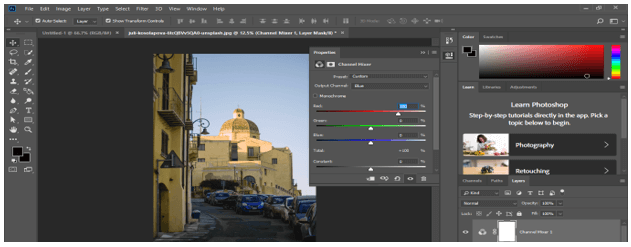
Choose Blue in the Output Channel option of the opened box.
And make the red value as 100 and blue value as 0.
Now make right click on the Channel Mixer layer in the layer panel and choose the ‘Create Clipping Mask’ option from the drop-down list.
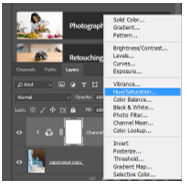
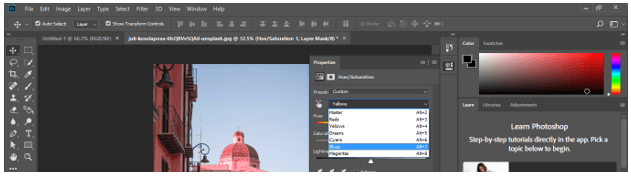
Now again click on the adjustment layer button of the layer panel and choose Hue/Saturation option from the list.
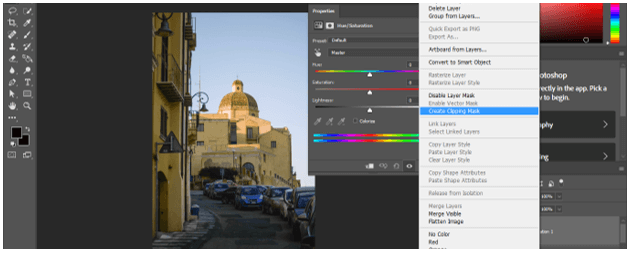
Make a right click on the Hue/saturation layer and again click on the ‘Create Clipping Mask’ option of the list.
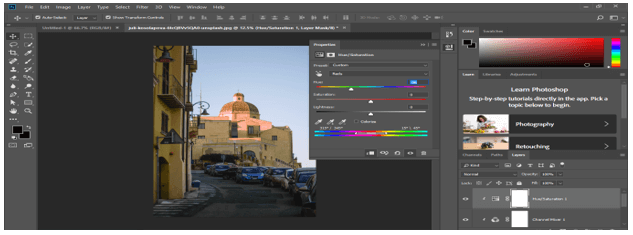
Now choose the Reds option from the list in Hue/Saturation box.

Decrease the value of Hue of Reds up to -40. You can see the effect on your image.
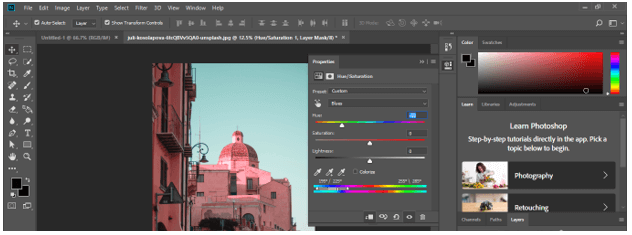
Now choose Yellows to option from the list in Hue/Saturation box.

Decrease the value of Hue of Yellows up to -45. You can see the effect on your image.

Now choose Blues option from the list in Hue/Saturation box.
Decrease the value of Hue of Blues up to -60. You can see the effect on your image.
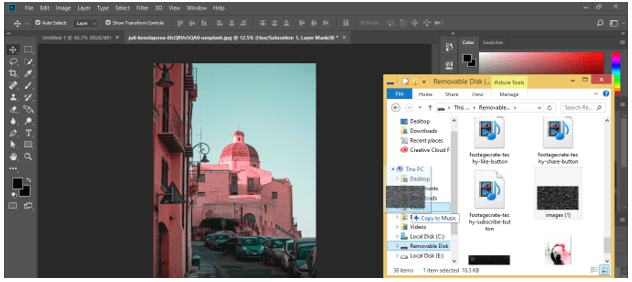
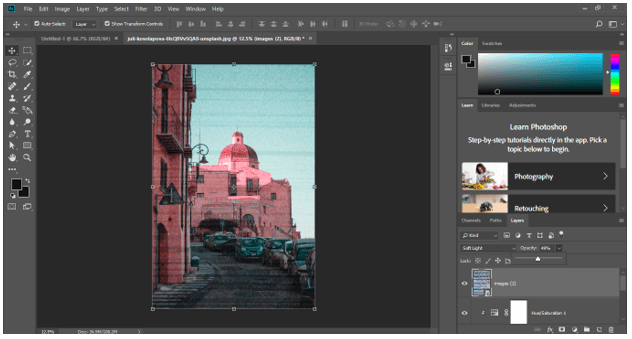
Now place an image of old television effect in this software. I have downloaded it from the internet.
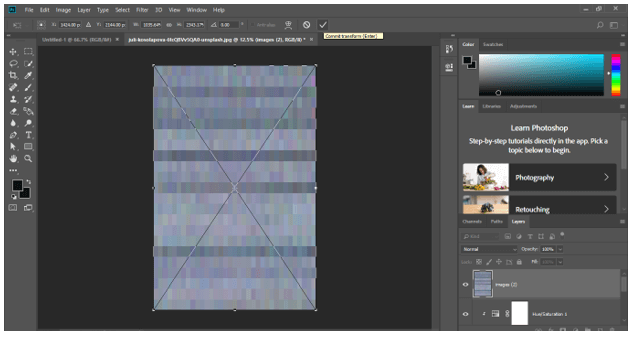
Adjust the size of this image as it covers your background image like this and press Enter button.
Now click on the drop-down arrow of Mode option and choose Soft light option from here.
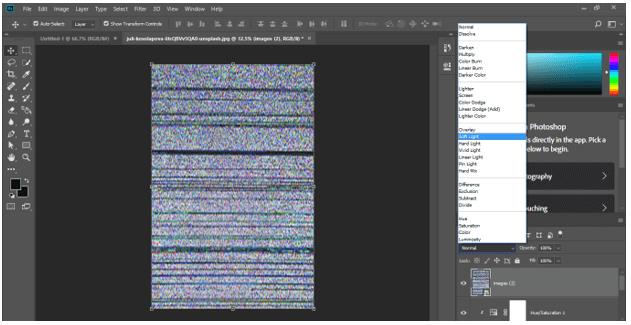
Decrease the opacity of this layer up to 45 %.
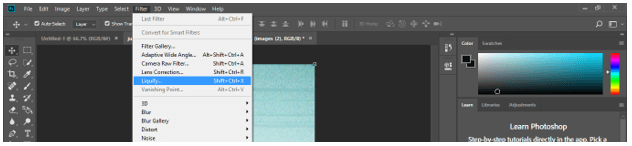
Now go to Filter Menu of the menu bar and click on it. Choose the Liquify option from the list.
Now a dialog box of liquify option will be open. Adjust the size of the brush according to you.
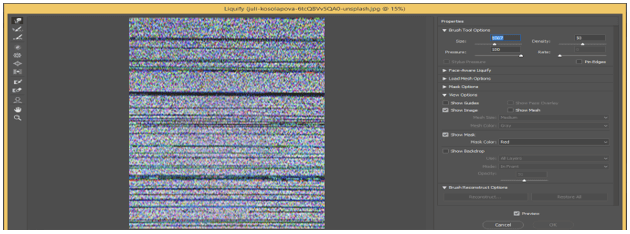
Distort this image with the help of a brush like this then press the Ok button of this dialog box.
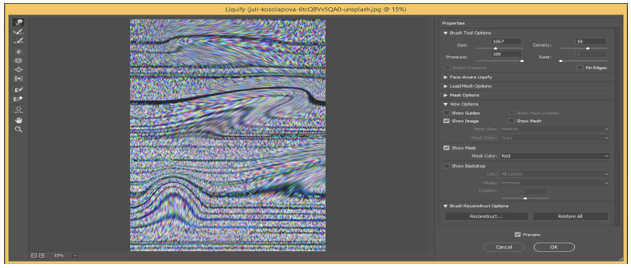
Once you press the Ok button you will see the effect of this distortion on your image. Now click on Create New layer option which is at the button of the layer panel.
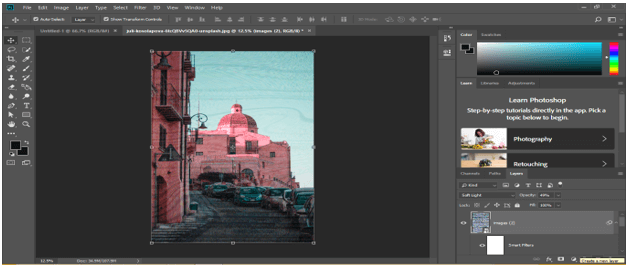
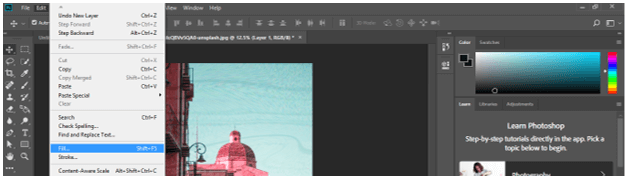
Go to the Edit menu and click on it. Choose the Fill option from the drop-down list.
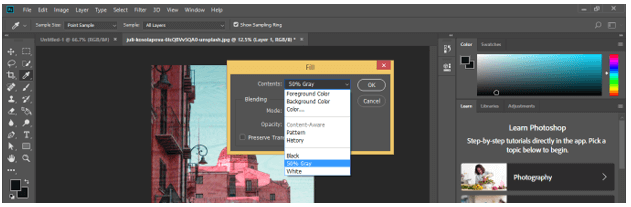
Now choose 50 % Gray option from the list of Fill box and press Ok button of this dialog box.
Again go to the Filter menu of the menu bar and click on it. Go to the Noise option of the drop-down list and choose to Add Noise option from the new drop-down list.
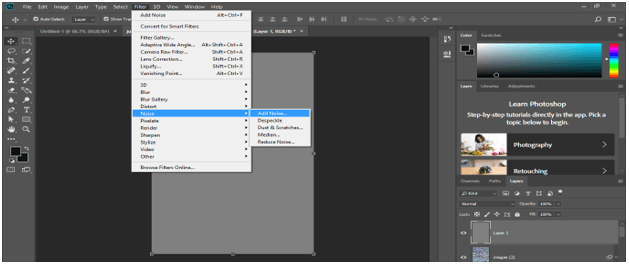
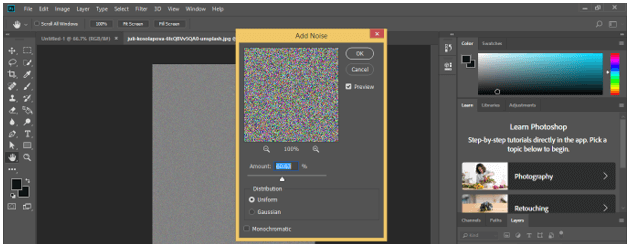
Set the value of noise up to 70 % in the Add Noise box and press the Ok button of this box.
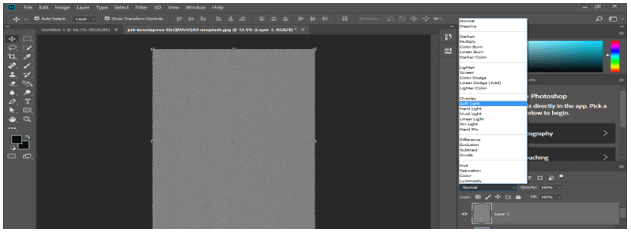
Choose the Soft Light option from the mode option of this layer.
Decrease the opacity of this layer up to 53 %.
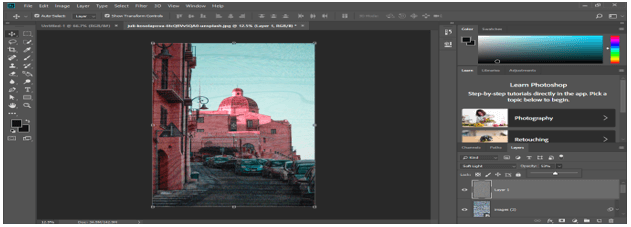
This is the final result of your Vaporwave effect.

Conclusion
Now you can understand the Vaporwave effect in Photoshop after this article and can easily use this effect on your image for getting an old visual effect of the 1990s. You can have a good command of it by spending more and more time practicing this feature.
Recommended Articles
This is a guide to Vaporwave Photoshop. Here we discuss how to create Vaporwave in Photoshop by using its features and also analyze different parameters of these features. You may also have a look at the following articles to learn more –
