Updated June 8, 2023
Excel Unprotect Workbook (Table of Contents)
Introduction to Unprotect Excel Workbook
When we unprotect a workbook, we allow access to edit and modify an Excel workbook. The workbook is protected before; that is why we are unprotecting it for sharing it with other users or employees of an organization. Depending on your requirement, you can protect an Excel workbook for all users or specific users. You can protect a workbook at both the file and workbook levels. The two ways of protecting and unprotecting a workbook are as follows.
Protecting an Excel Workbook
- Protecting a workbook requires a password so no one can tamper with the data. But if we want to unprotect it for someone, we can enter or clear the password.
- While opening, it will ask for the password. If we have the password, we can enter and view the data. But what if we want to share the file with someone who is part of our team and doesn’t need a password, as it kills time, then we can unprotect the workbook.
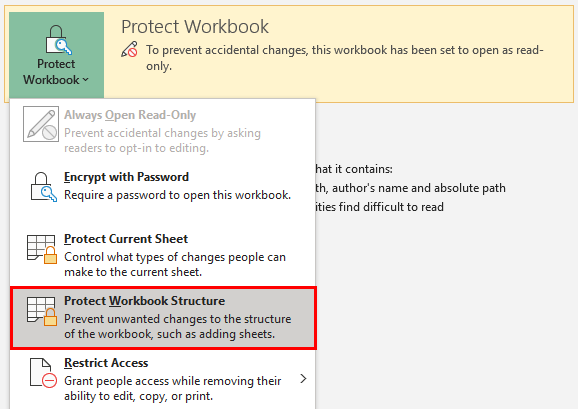
- Unprotecting a workbook can be done in another way. If users want to share, delete, or hide a sheet from the workbook, we can just go to Review > Protect Workbook and enter a password to unprotect the workbook structure.
There are some ways to protect a workbook, as mentioned below.
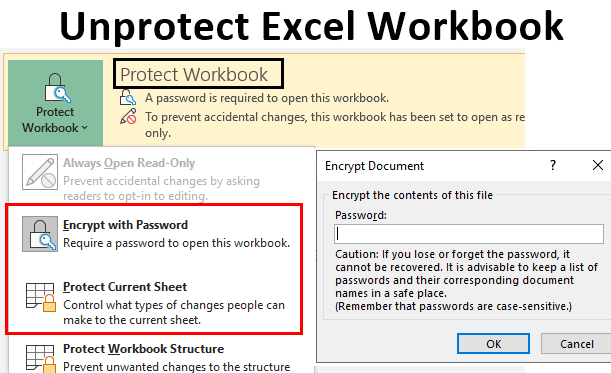
1. Encrypting Entire Workbook with a Password
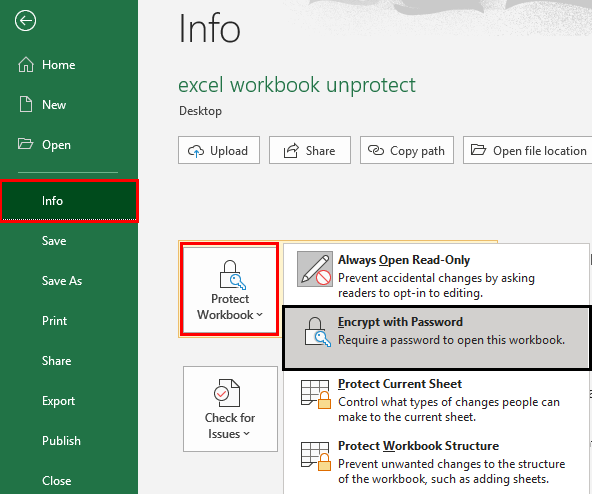
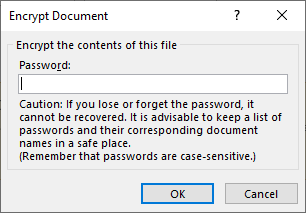
We can encrypt it with a password to restrict users to open it. This is the best protection, as Excel always prompts a password when someone tries to open the workbook. We’ll go to File > Info > Protect Workbook > Encrypt with a password, as shown below.
Now, it will ask to input a password. Enter a password and then press the Ok key.
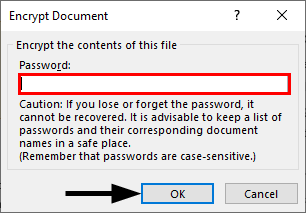
Every time a user tries to open it, it will ask for a password to view the file’s contents.

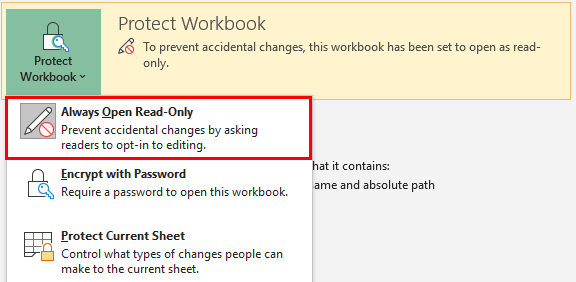
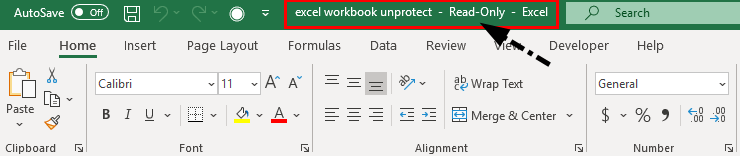
2. Read-Only Access to a Workbook
We can give only read-only access to the workbook for viewing the contents of the workbook. Then users can’t edit it. For the same, we can go to File > Info > Protect Workbook > Always open read-only, as shown below.
Now, anytime a user tries to open the file, he will get a warning that the author would like to open the file in read-only mode unless any edit is required.

When the user press on Ok, the workbook loads in read-only mode, as shown below.
3. Protecting Workbook Structure
We can protect the workbook structure, allowing users to open the file and prevent them from rearranging, renaming, updating, deleting, or creating new worksheets without a password. For the same, we’ll go to File > Info > Protect Workbook > Protect workbook structure, as shown below.
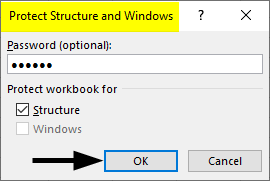
As shown below, we must set a password to protect it and press the Ok key afterward.
A user can open the workbook but can’t have structural command access like hide, unhide, delete, rename, etc. These commands appear light, which shows we can’t click on them.
Unprotecting an Excel Workbook
If we need to unprotect the workbook and allow users to edit and modify it, there are a few steps to unprotect it from different protection modes.
1. If a Workbook is Password Protected
When a workbook is encrypted with a password, we have to go to File > Info > Protect Workbook > Encrypt with password; then, it will ask to enter the password in the dialogue box. As shown below, we’ll just have to clear the password and press the OK key.
Our sheet is unprotected, and we can edit it like before.
2. If a Workbook is in Read-Only Mode
Earlier, we saw how to protect a workbook to read-only mode. If we want edit access to the workbook, we can do the same by going again to File > Info > Protect Workbook > and clicking on read-only mode again, as shown below. Now, we can edit the workbook as before.
3. Removing Workbook Structure Protection
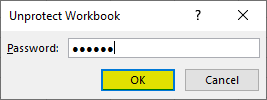
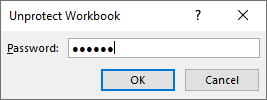
The only way to remove workbook structure protection is to type in a password by switching to Review > Protect Workbook > and entering the password in the dialog box as shown below.

Now, we can delete, insert, hide, unhide, select, move or copy, etc., on the sheet. This action only removes the workbook structure protection from the workbook and allows people to delete, rename, insert, hide, etc., at the workbook level, i.e., it works on all the workbook sheets, as shown below.
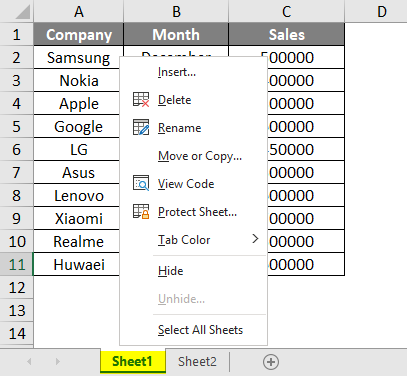
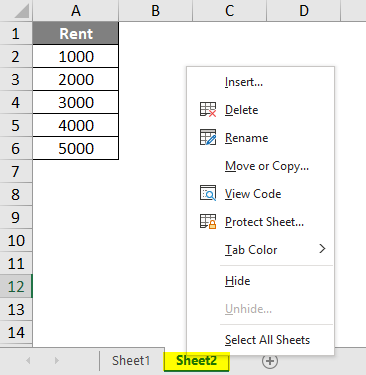
The above image shows all the commands are back after doing a right-click on sheet names.
Things to Remember
- A password is required to protect the workbook.
- The workbook can fully protect from access or be given read-only mode.
- While unprotecting a workbook, a password is not mandatory. We can clear the password and then access the workbook.
- A password is required to open the workbook if it is fully protected.
- Protecting a workbook and a worksheet are different from each other. A worksheet is a particular sheet of the Excel workbook.
Recommended Articles
This is a guide to Unprotect Excel Workbook. Here we discuss How to Protect & Unprotect Excel Workbook and practical examples. You can also go through our other suggested articles –
