Updated August 25, 2023

Introduction to Tree Brush Photoshop
Tree brush has unique properties that can be used to paint summer and winter trees. The idea is that the brushes are of equal length and are formed in a circular shape so that the paint pigment can be used as a dry brush technique or used with rather a wet pigment washes to paint the summer tree. Whether in architectural layout or ad flyers, trees or a hint of trees create a significant impact. Let’s dive in!
How to Create a Tree Brush?
Today we will show you how to make our tree brush first. Then let’s look at an example where this is commonly used and becomes useful.
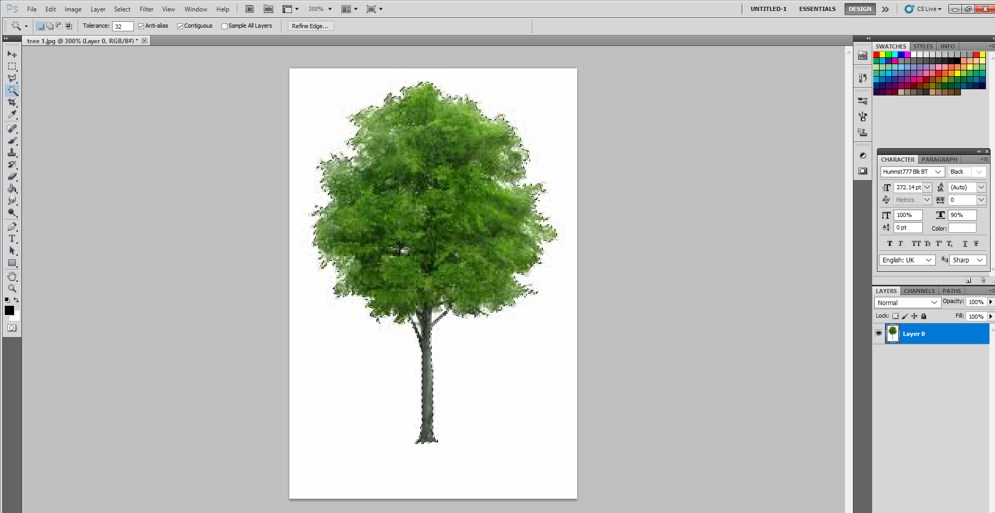
Step 1: Try to locate and download some good-quality HD pics of trees from the Internet. Also, make sure there are no copyright issues in those too.
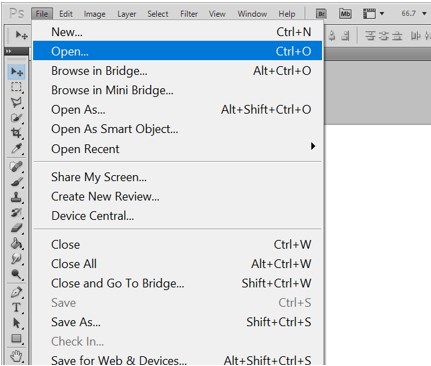
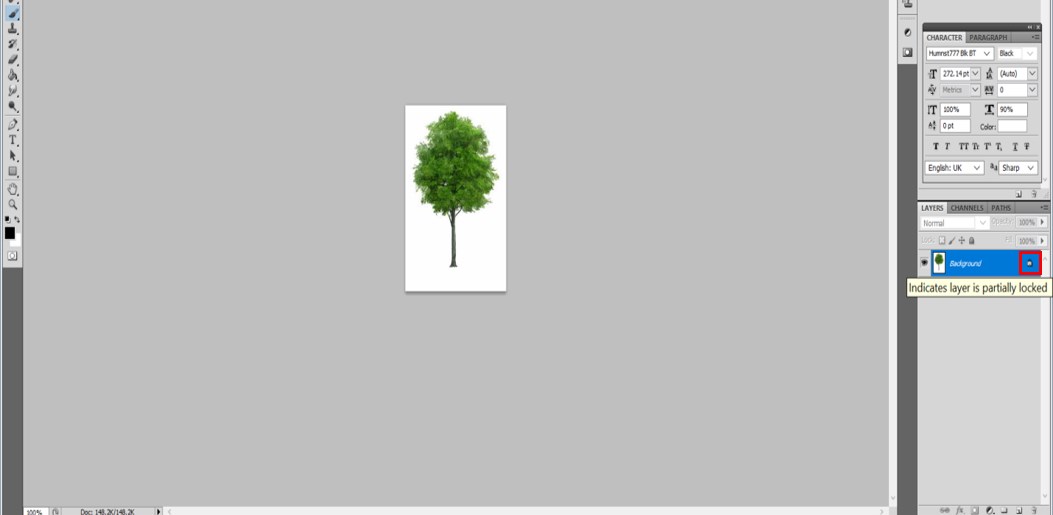
Step 2: After opening Photoshop, Go to File and Open and open the picture of the tree in the working space whose brush design will be created. Right-click on the Background Layer and convert it into a normal layer so you can change it without worry.
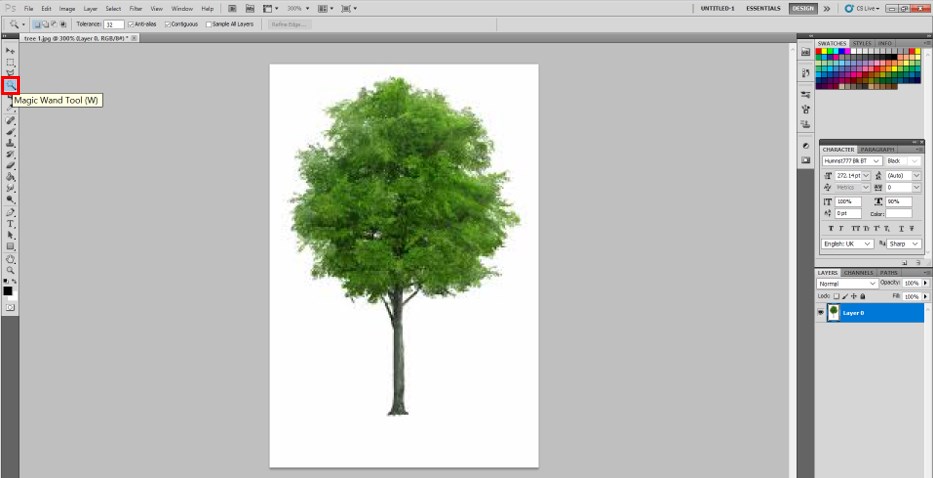
Step 3: Select the Magic Wand Tool, as shown in the picture below. This will select all the white portions in the picture.
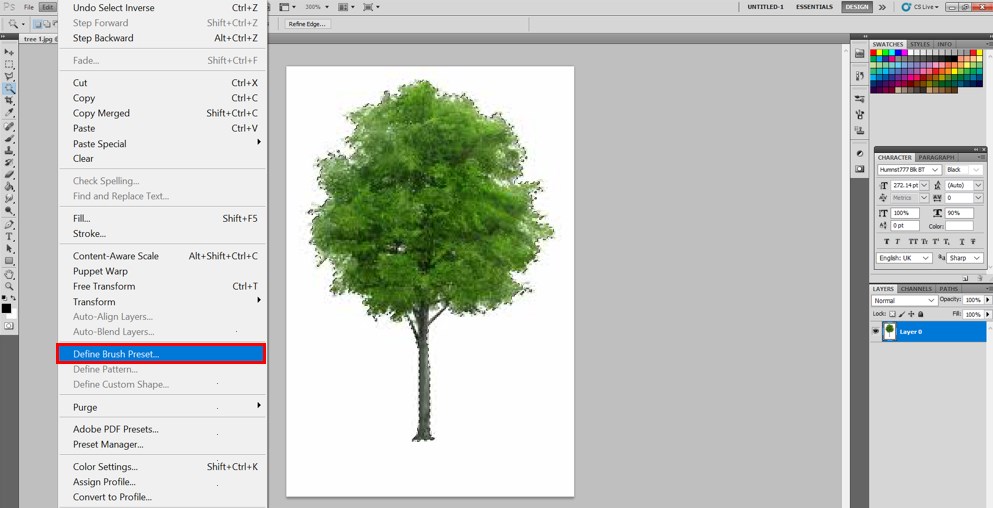
Step 4: Time to select the tree. While keeping this selection, Go to Select and Inverse Selection.
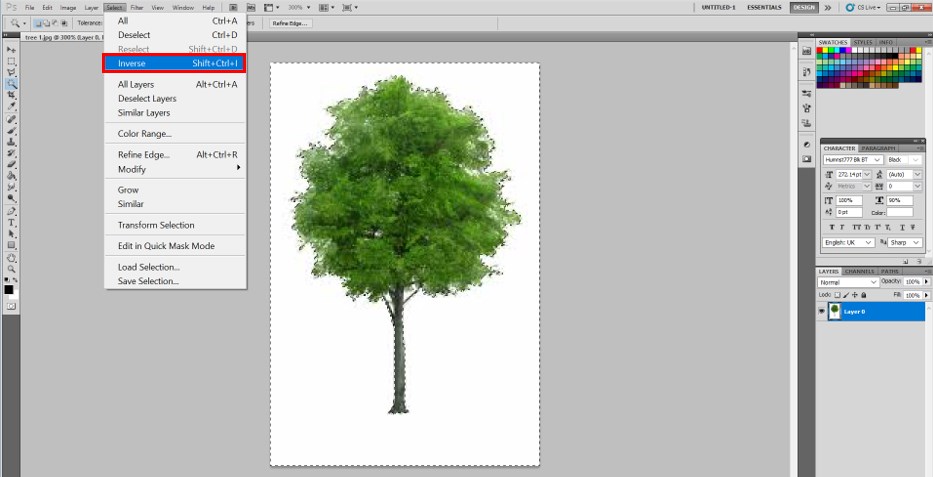
Step 5: After clicking it, you will see that only the tree is selected.
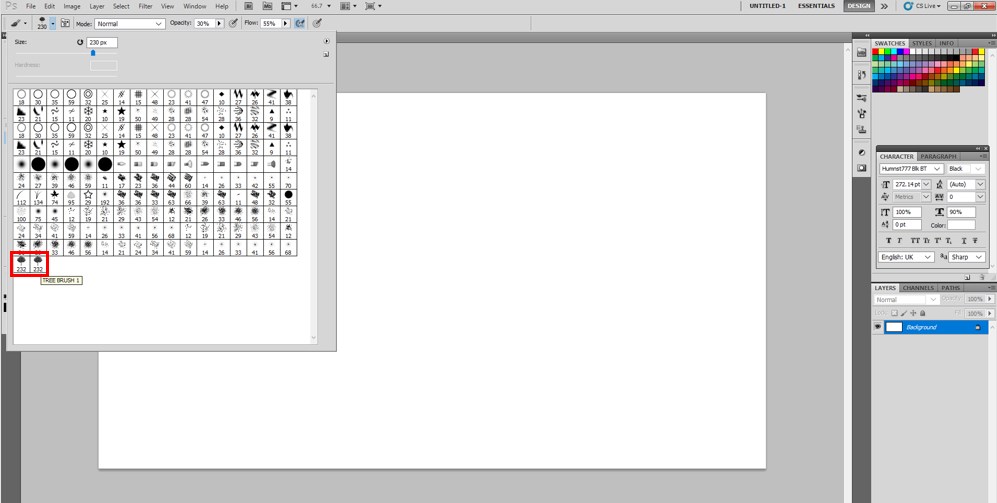
Step 6: Now, let’s make our brush. Go to Edit and Define Brush Preset.
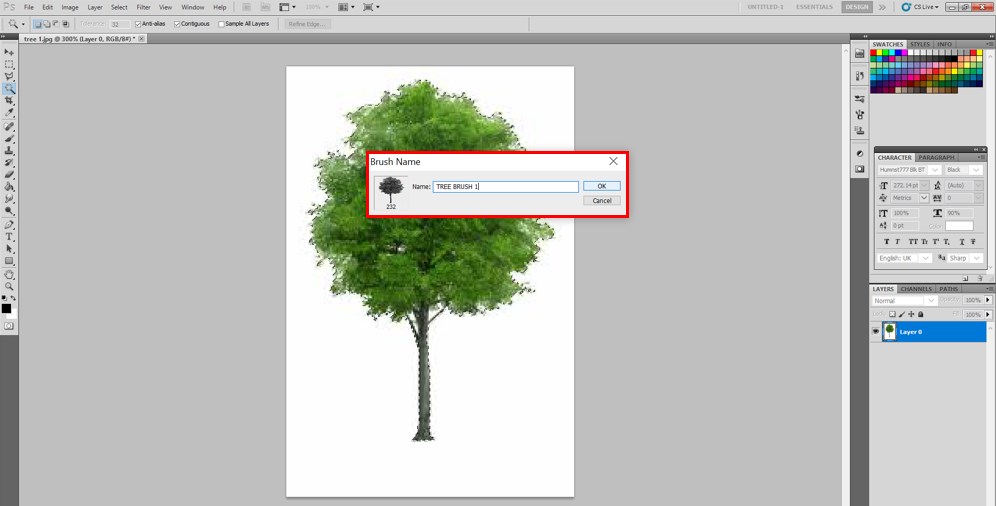
Step 7: Once you see a dialog box, rename this brush shape as Tree Brush 1. Hit OK. Viola, our brush is created. Let’s test it.
Step 8: Go to Brush Tool.
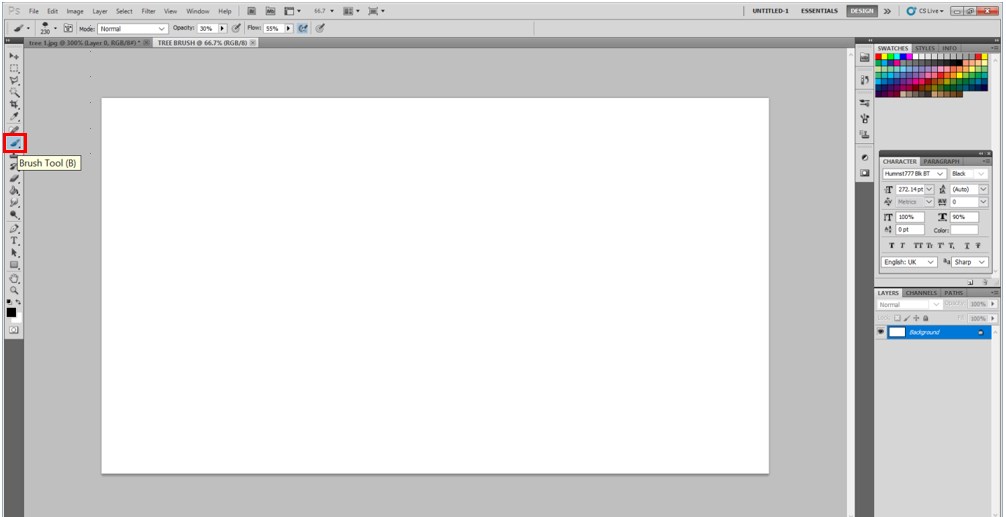
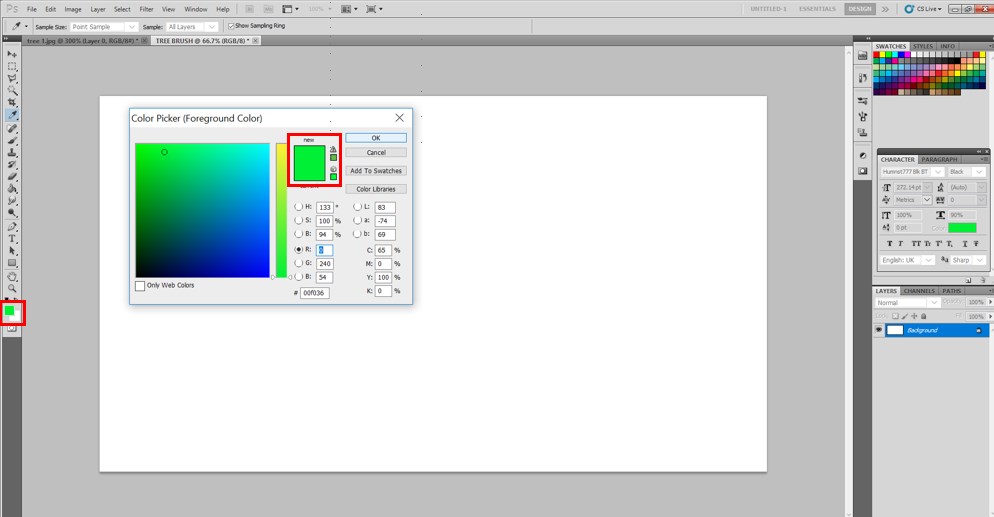
Step 9: In the shape dialog box, you can see the latest shape of the created tree. Select that brush shape.
Step 10: Select the desired color from the color picker. I have selected green. In the properties bar, select opacity to 60% for now. You can change the brush’s size too and flow type, but let’s test this for now.
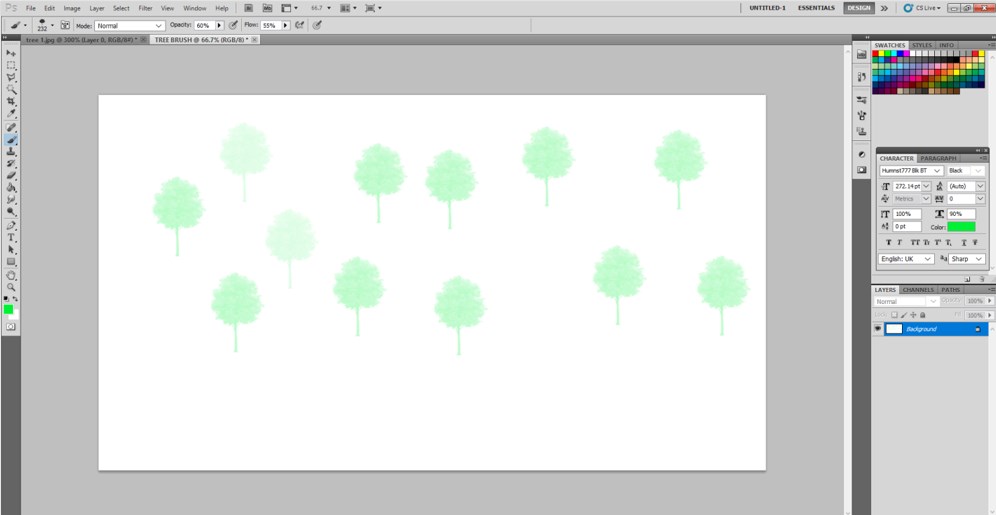
Step 11: Click wherever you wish on the canvas, and you will see that the brush is sprayed in the shape of the edited tree.
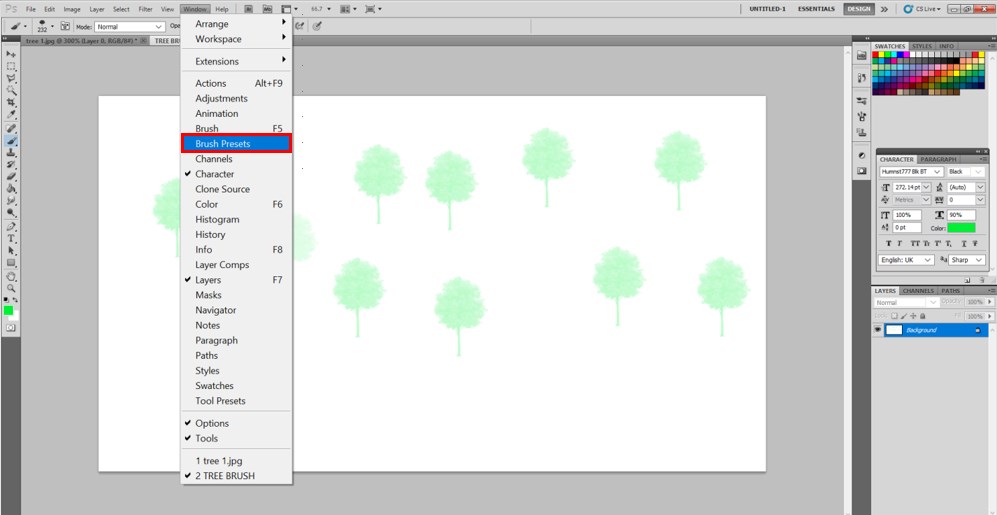
Step 12: Many times, manual scattering of the tree shapes in architectural layouts or jungle creation designing can be tricky or even look haywire. We can even adjust the number of trees, the spacing between them, the angle at which they will scatter, shape in which they will be scattered all in one command by using the brush preset in the Window menu. Go to Window, then Brush Preset.
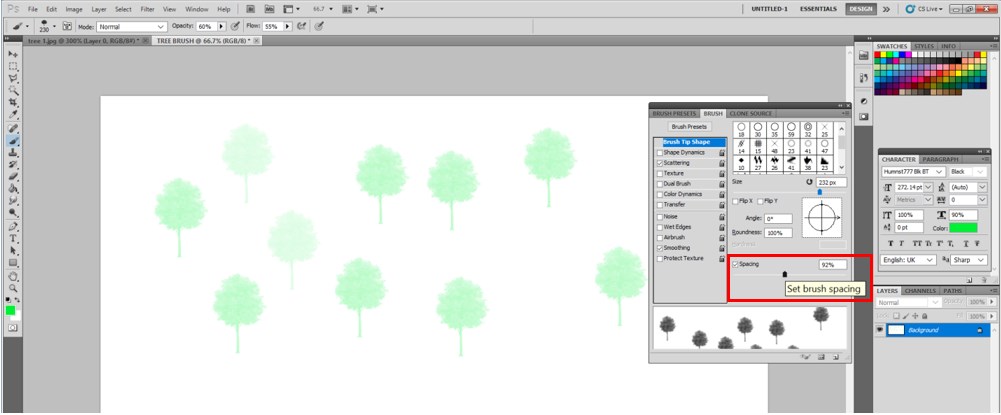
Step 13: Select the Brush column in the menu to see all the properties we just discussed. I have just randomly played with the values for you to understand.
Step 14: For example, I tried Scattering values, then I changed the angle value, etc.
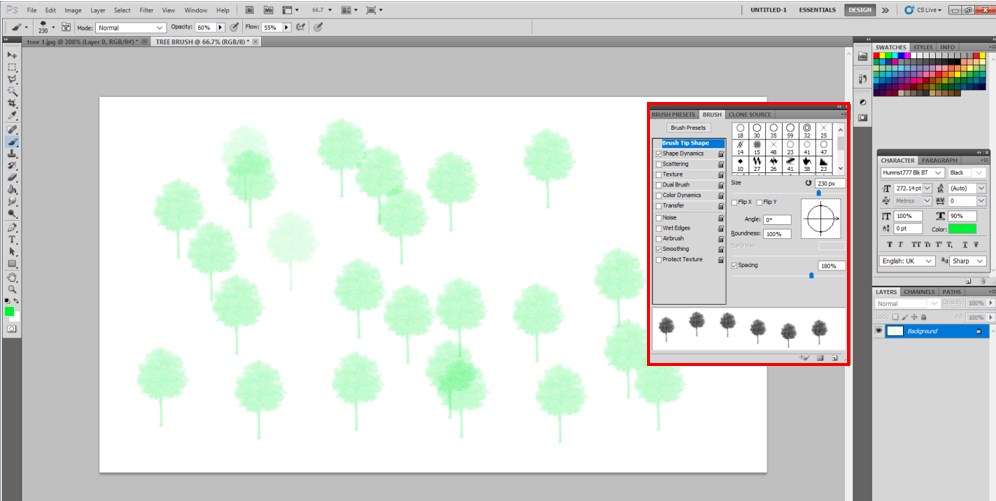
- You can also experiment and practice as per your liking. Once comfortable with values and editing, drag the brush into the canvas to see the effects.
Examples to Use Tree Brush Photoshop
This first example is a straightforward one where I will try to show a collection of trees trying to depict a silhouette image of a cottage house in the sunset. This is a sample of how the trees are used in the art form. It is a very amateur design tutorial, but it will make clear the use of brushes in various ways, including trees.
Step 1: Open a new canvas with File, then New. Unlock the Background layer. (See step 1 of making a tree brush)
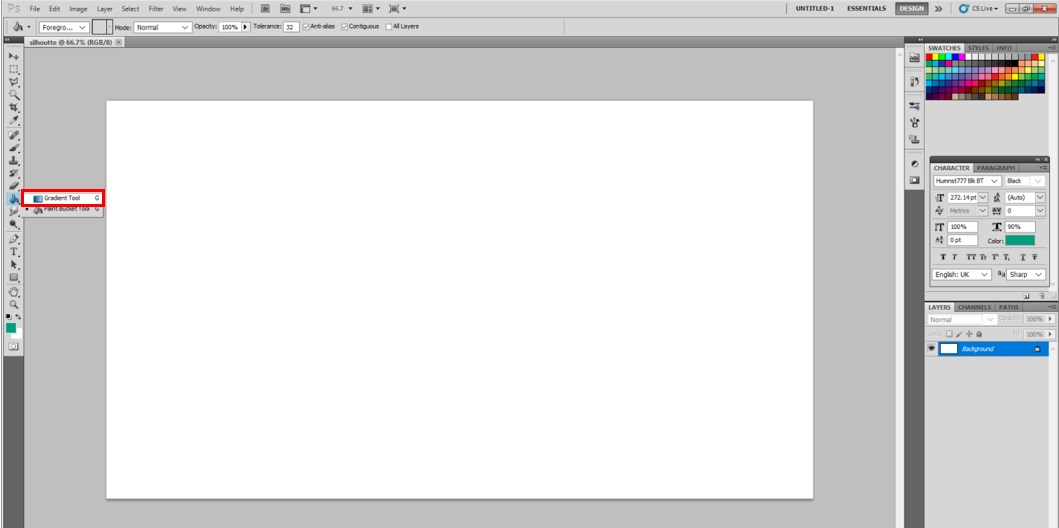
Step 2: Select the Gradient Tool.
Step 3: Double-click the gradient color in the properties bar to set the foreground color.
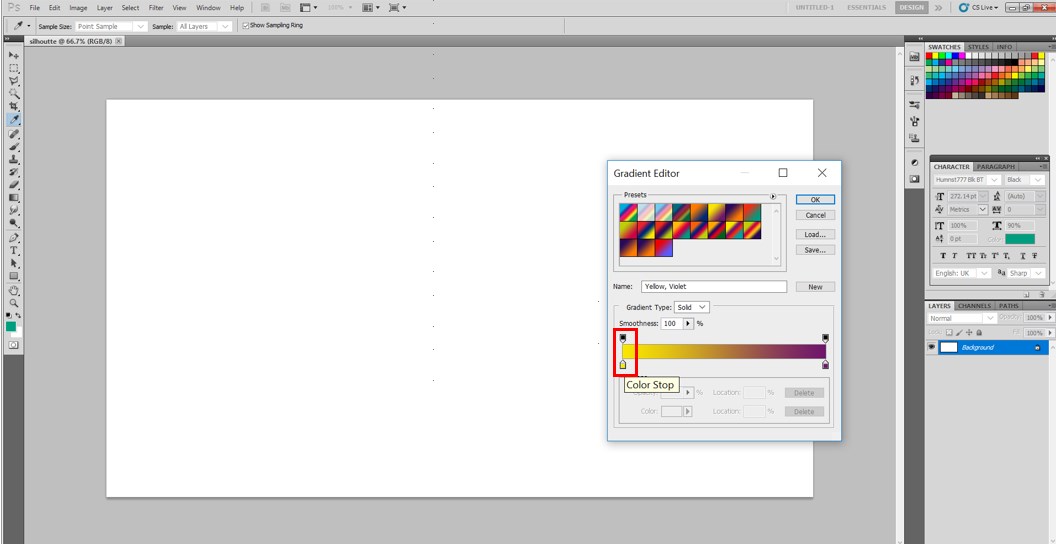
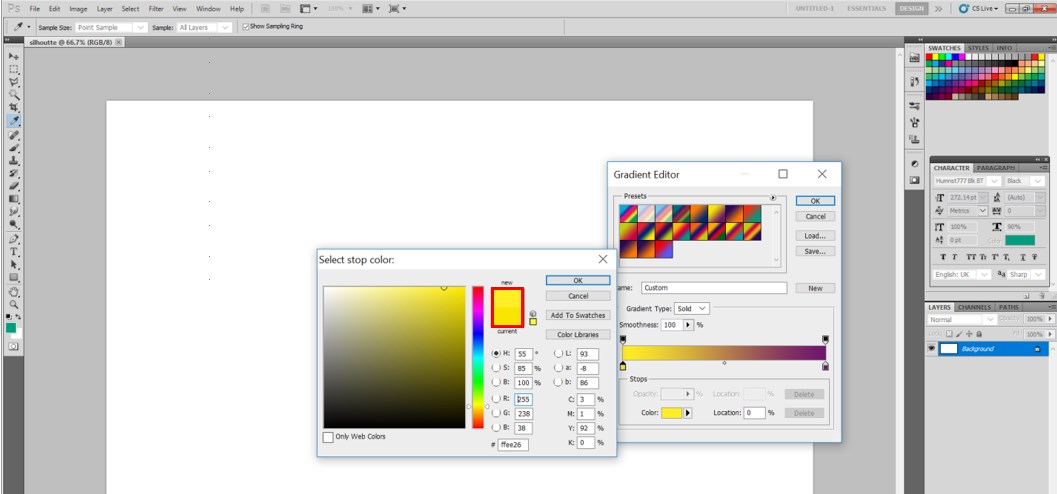
Step 4: And the background color of the gradient using the Gradient Editor. Kindly see the following steps.
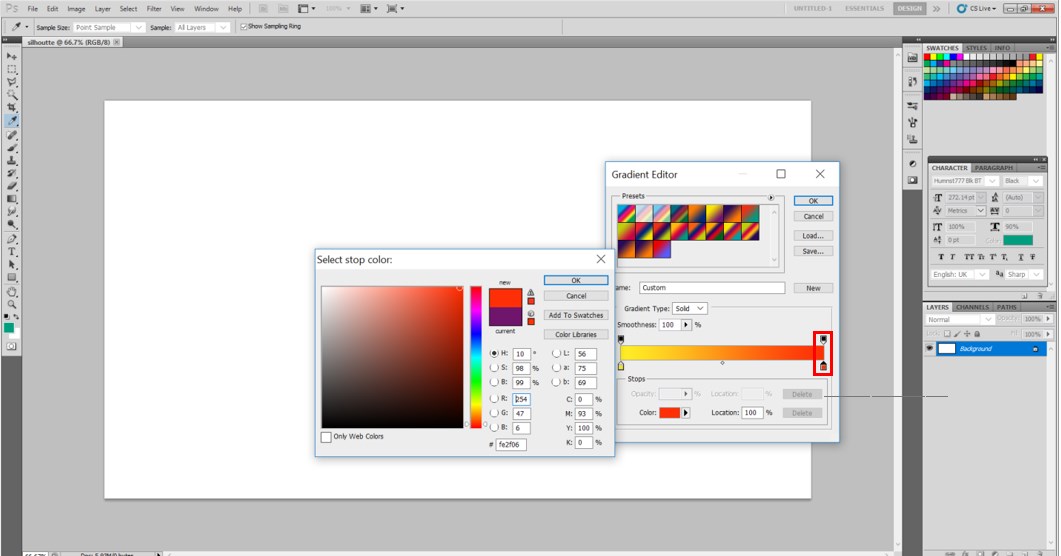
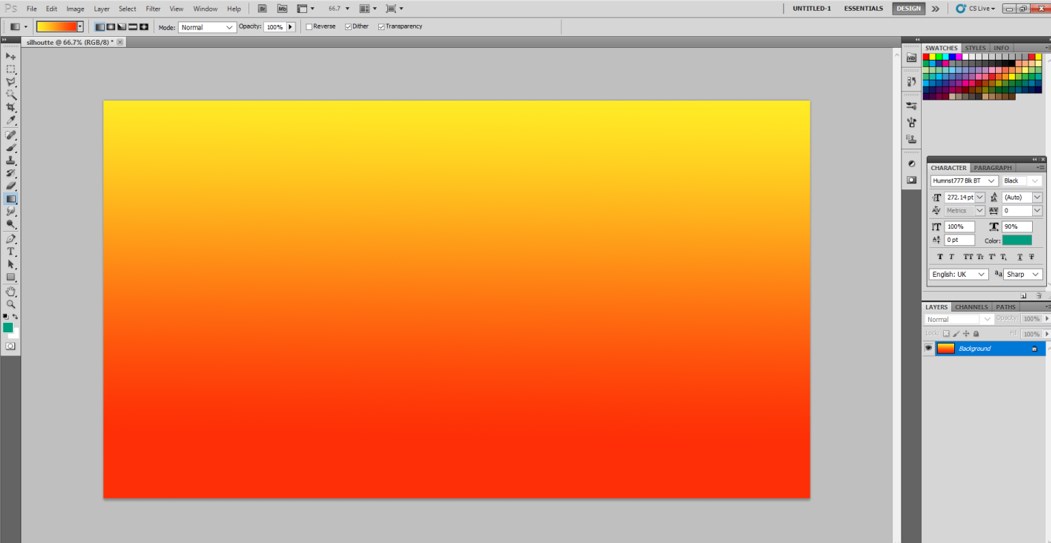
Step 5: Please drag the mouse in a vertical stroke after selecting the gradient shades, as depicted in the image.
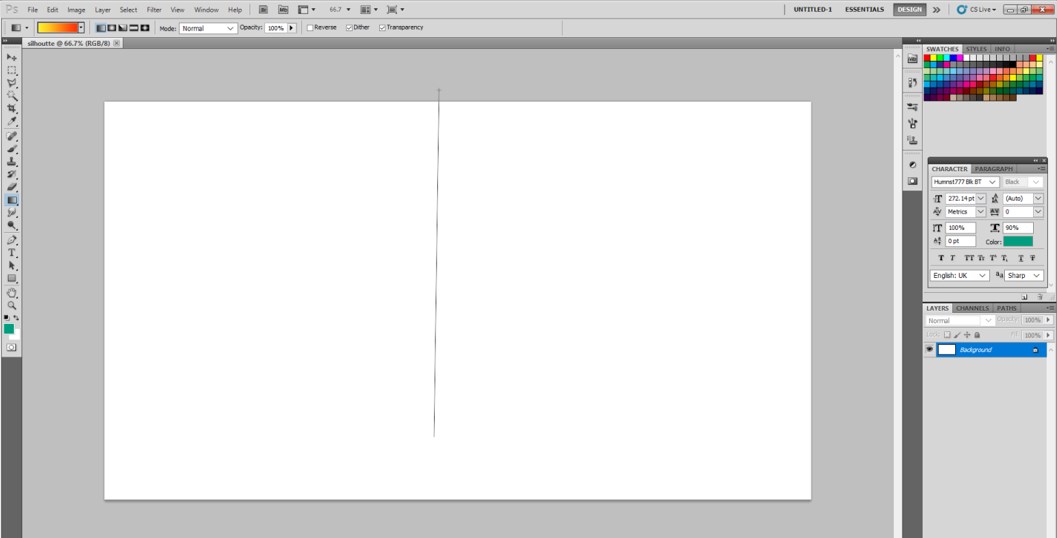
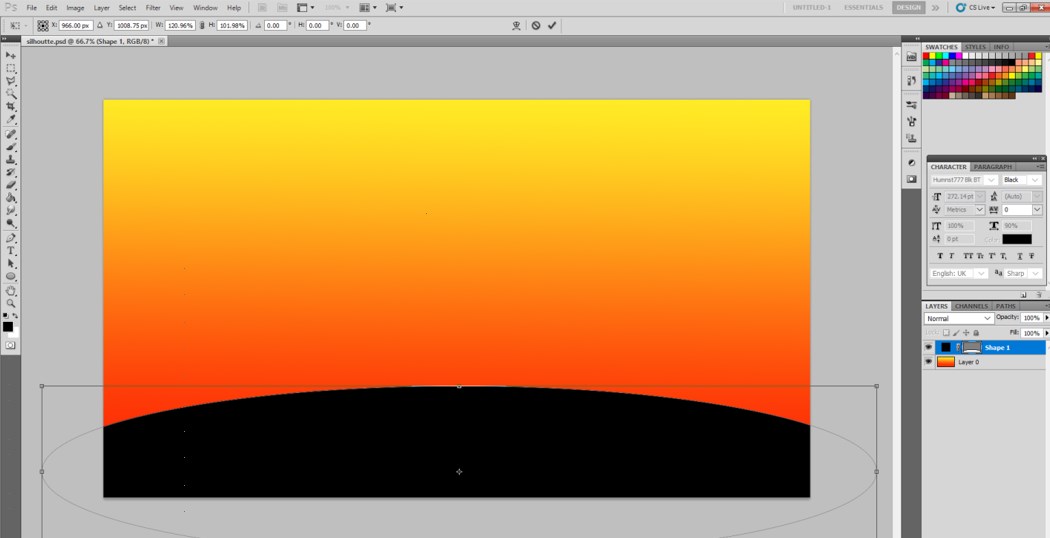
Step 6: Here, Linear Gradient is selected. There, a sunset scene is created.
Step 7: Go to the Rectangle tool and select the Ellipse tool. Keeping the color of the ellipse black, draw the ellipse as shown in the image below.
Step 8: Select the Brush tool. Now all the fun begins. I have not played with many ideas here, but one can get as creative as possible. To create a cottage house scene, I created a House shaped brush in the same manner as we created the tree brush. Once you go to the properties bar for a selection of the type of brush you need to work with, you will notice the tiny house brush below. Kindly select it.
- Adjust the values of size, opacity, color, and flow.
- Size: 300, Opacity: 100 %, and Flow: 55 %.
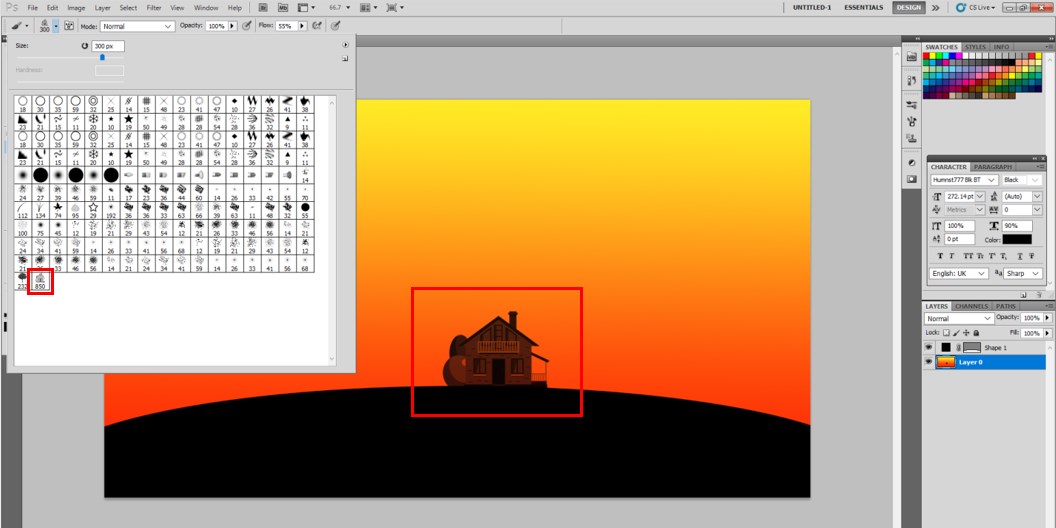
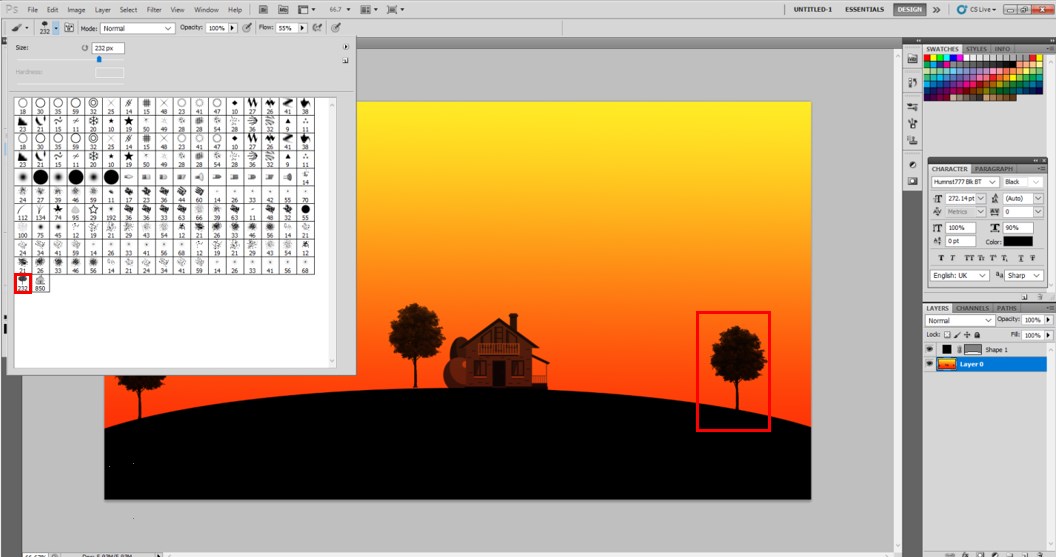
Step 9: Now, brush the house wherever you want on the black platform we created. Time to use the tree brush we are discussing so much. Just select the tree-shaped brush. Set the values of opacity, flow, and size of the brush as you like, and click on the painting at any spot where you wish to have trees. I have selected 3 spots like this.
Step 10: I also selected the normal round brush to create a small sun. The Colour of the sun was selected as shown below. I even used a faded round brush to create the fences shown in the image below.
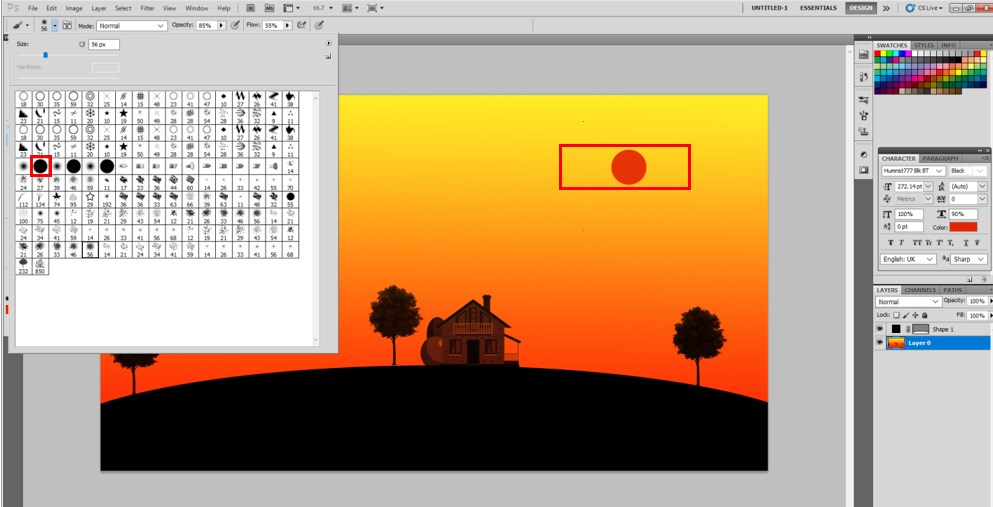
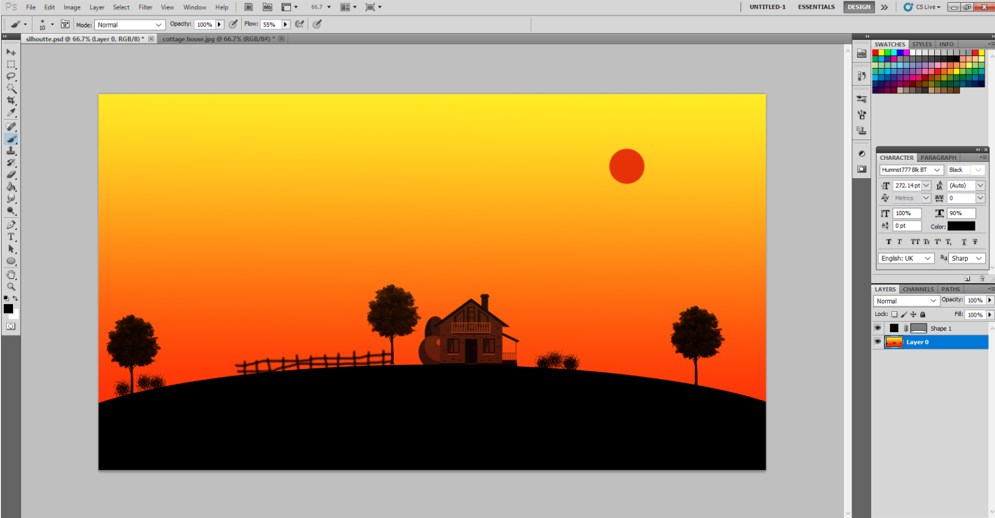
- The image finally looks like this. It’s a simple attempt, but we can go bonkers for sure.
Conclusion
There are various websites, ad flyers, artistic drawings even movie posters where creatives use the brushes a lot to give it a natural look, but I feel that for interior designers and architects, this brush is a boon.
Recommended Articles
This is a guide to Tree Brush Photoshop. Here we discuss how to create a tree brush in Photoshop and examples to apply the effects of Tree Brush. You can also go through our other related articles to learn more –
