Updated August 25, 2023
Introduction to Plastic Effect in Photoshop
In Photoshop, the Plastic Effect is where our text or image can be made to look like it’s made of plastic or a plastic sheet has been put above it to give it a plastic-like effect. We can add this effect to a lot of images and texts, most of which you might have seen already in advertisements and social media. Now this effect can be put to use in a few different ways. So the first method would be the classic using Layer Styles and Toolbox. And the second is with the use of Artistic Filters. So what are Artistic Filters? Photoshop comes with a wide range of ready to use editing effects that can be easily applied to our image or text so as to give it the desired makeover. Plastic Wrap Effect is one such kind. Today we will see examples of both for clear understanding.
Applying Plastic Effect in Photoshop
We will apply the Plastic Effect in two different methods, one in the image and the second in layer:
Method #1 – Plastic Effect on an Image
I would say that this effect can be used very commonly everywhere around us. We will pick two images for us to have a clear idea.
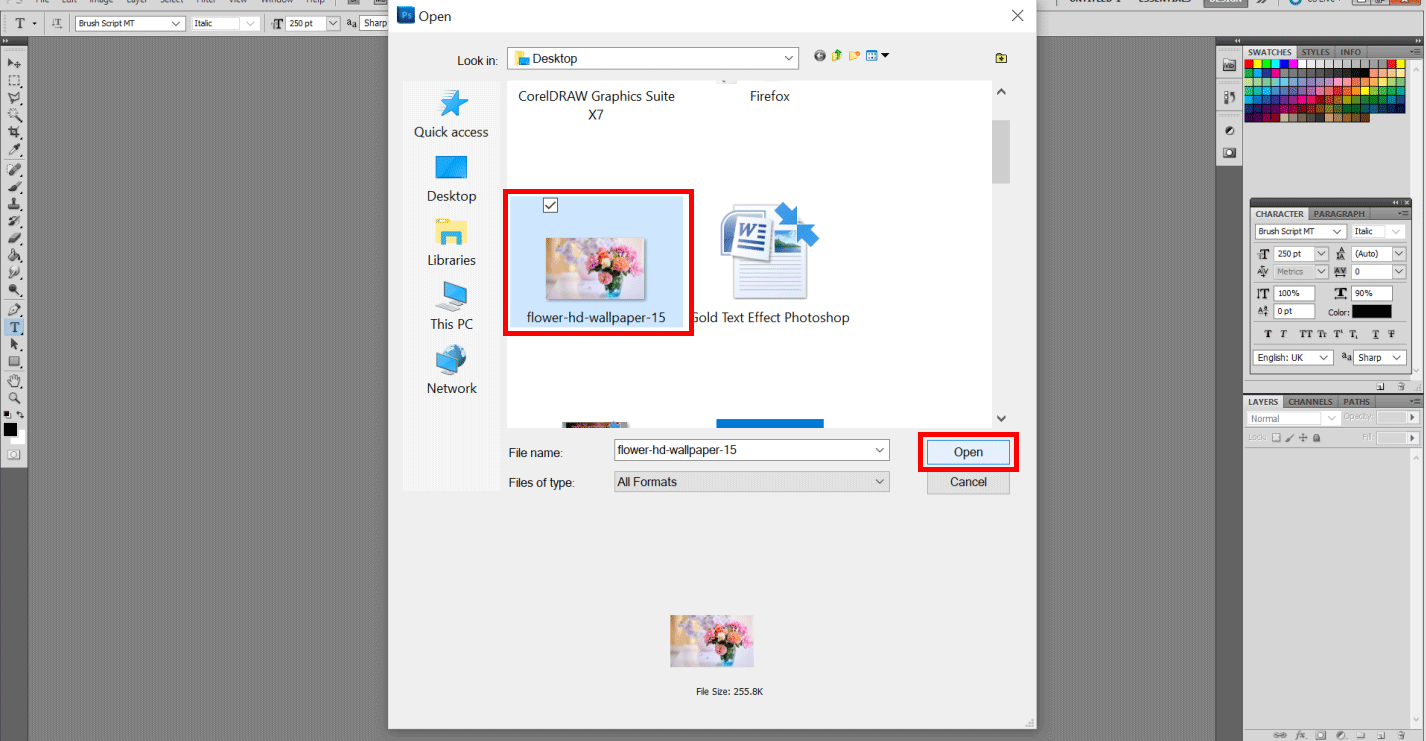
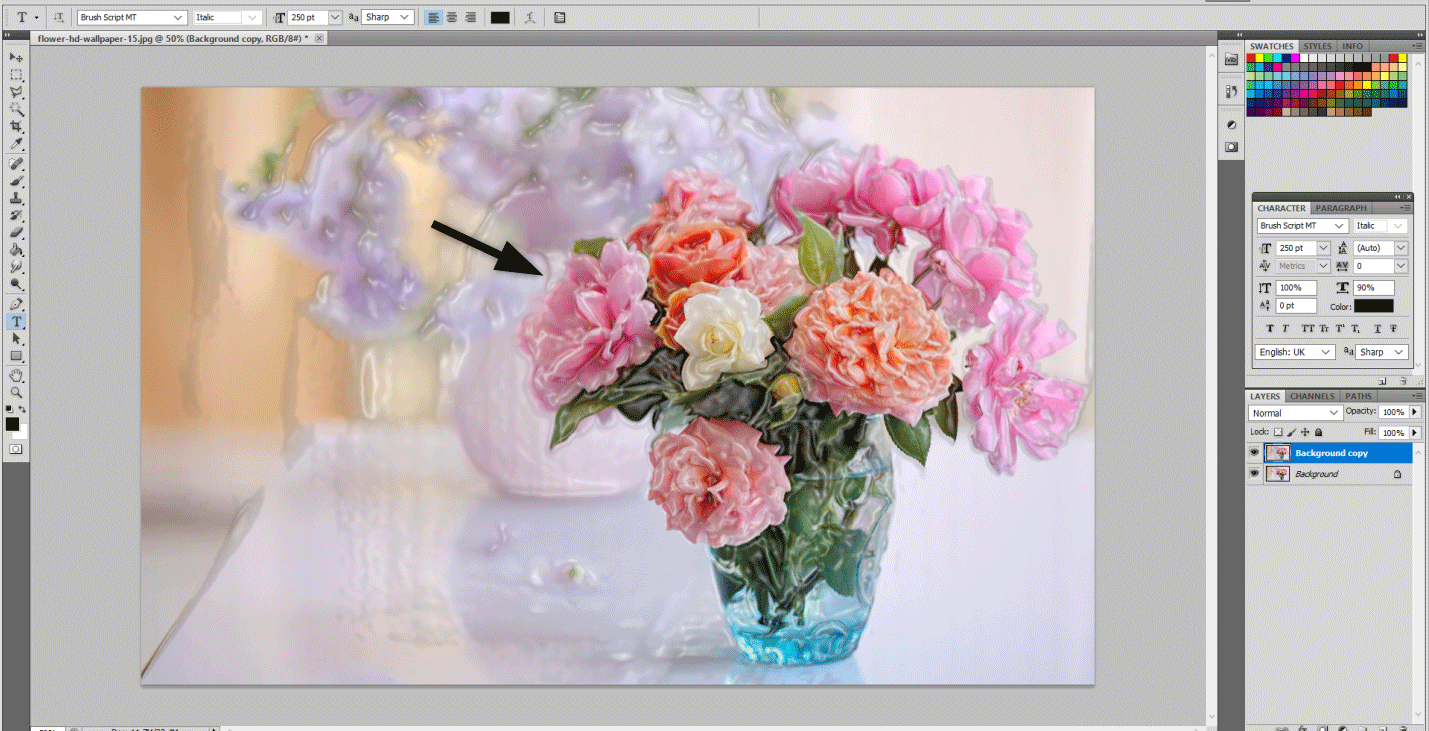
Step 1: With the first image!. I have selected a scenic image of flowers because flowers show volume easily. Hence do the following. File > Open. Now select the desired image and let it open in the workspace.
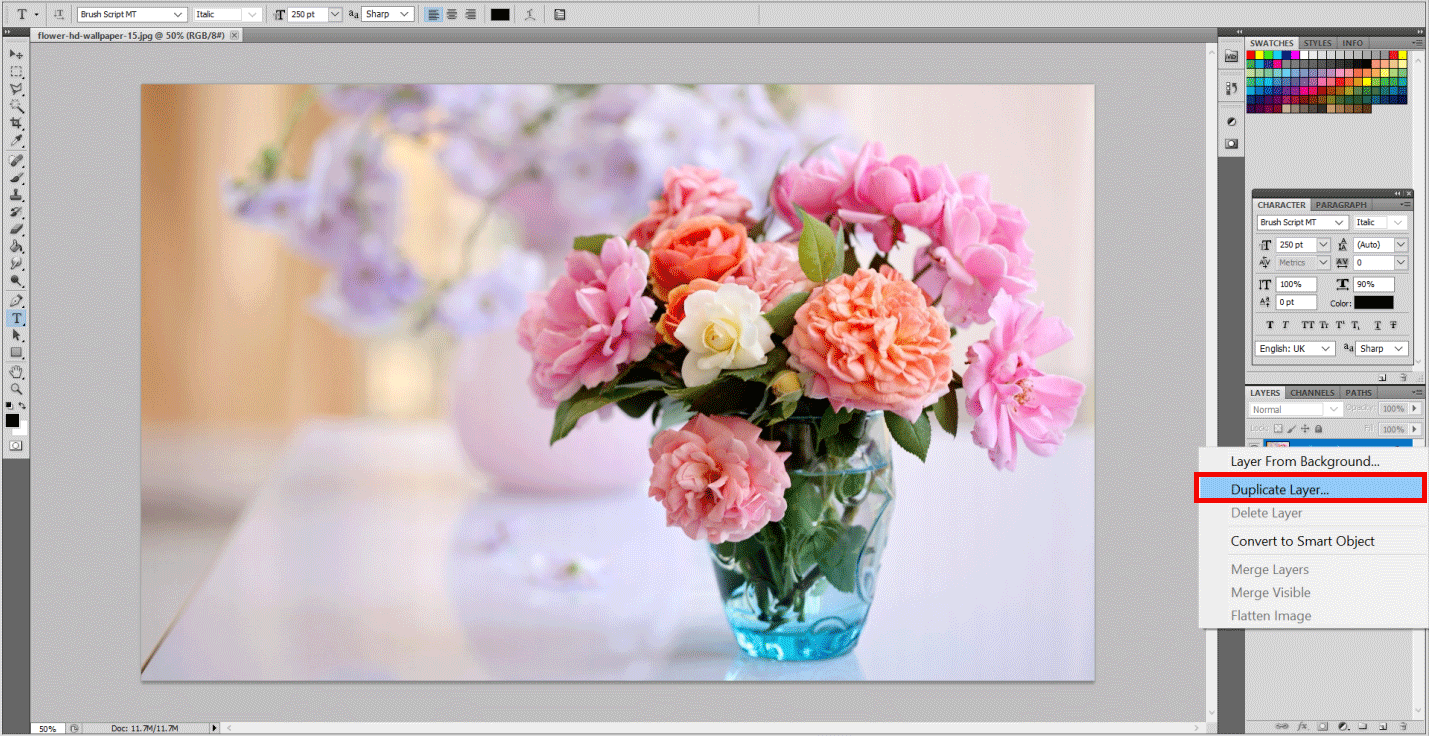
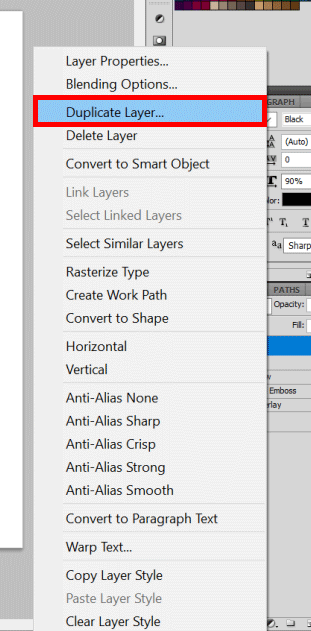
Step 2: I would suggest creating a copy of the following layer. Hence Right-click on the background layer and select Duplicate Layer.
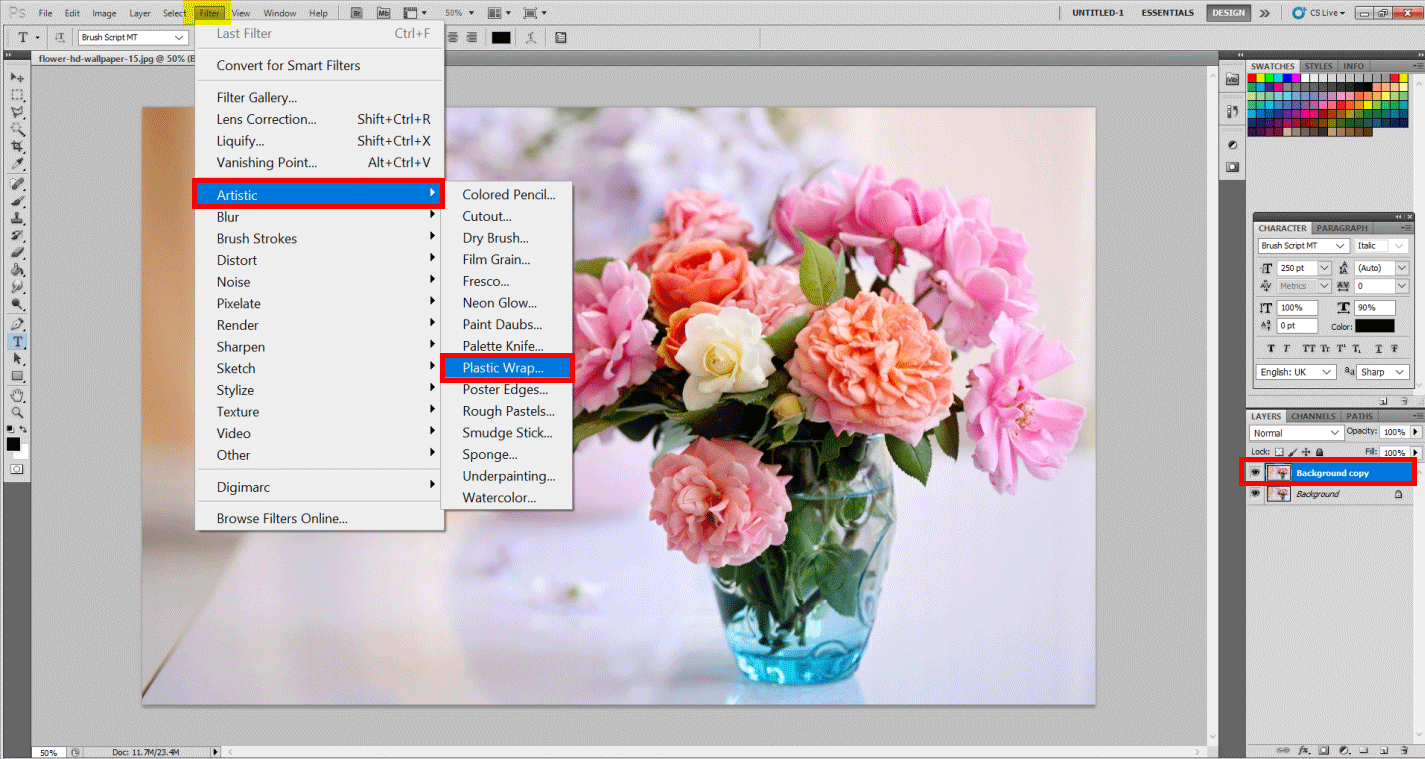
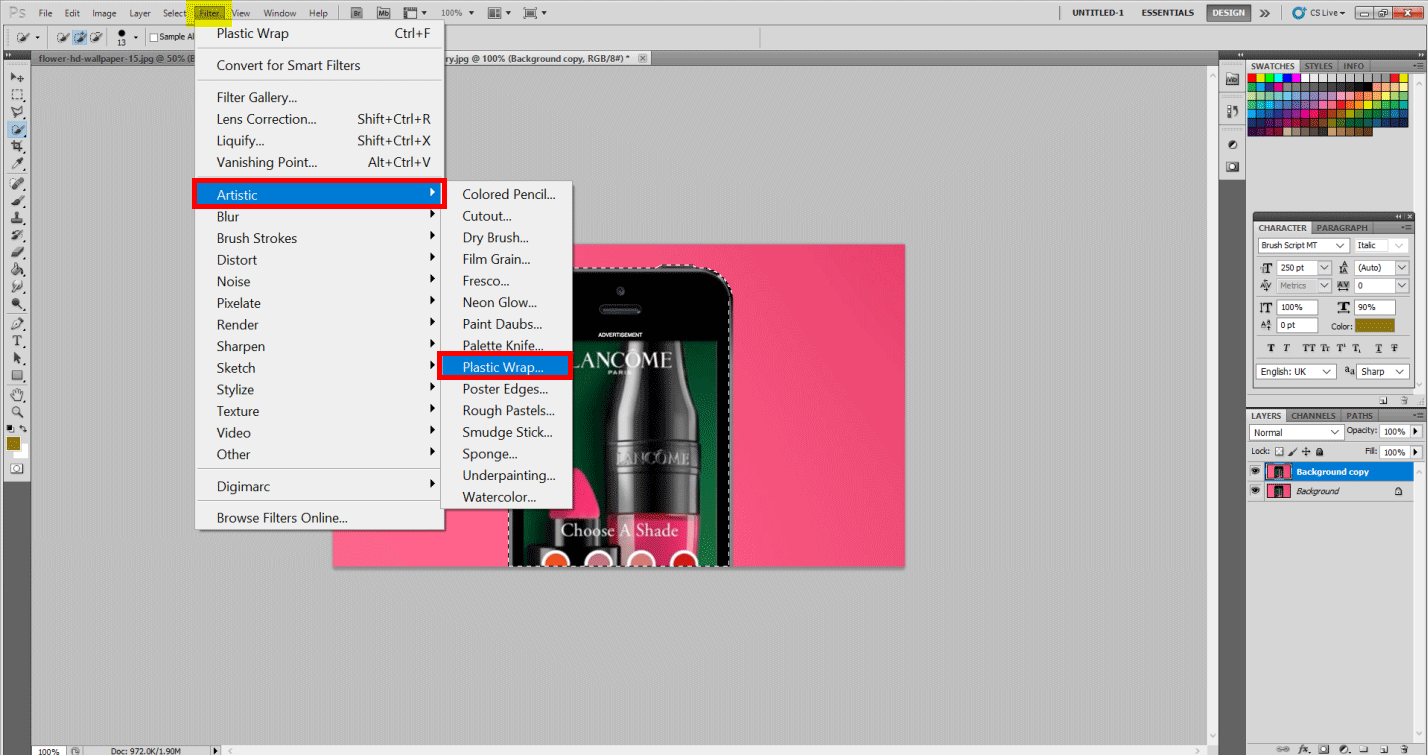
- Now it is easy to make changes in the duplicate layer so that the original image isn’t affected. While selecting the Background Copy Layer, go to Filter then Artistic at last Plastic Wrap.
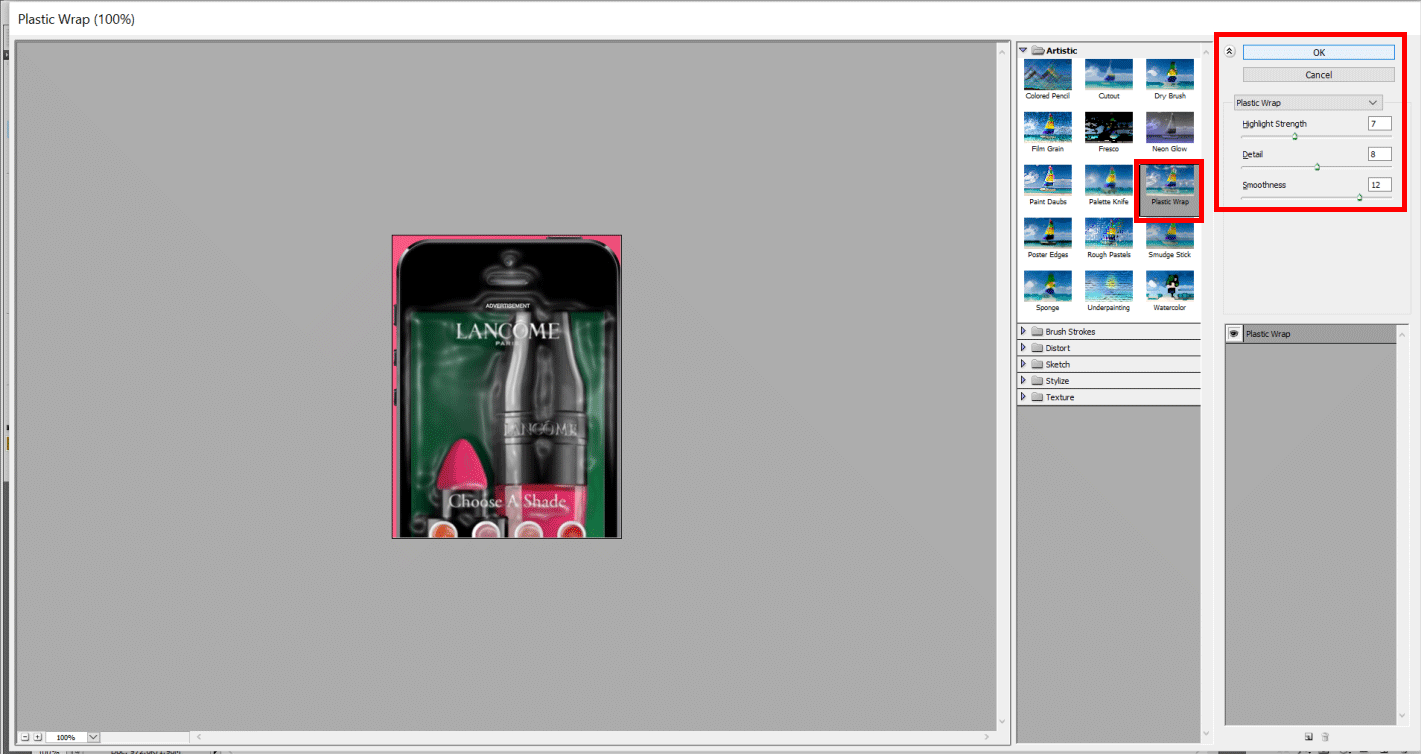
Step 3: You will see a window that opens and shows the preview so that one can make changes. You can adjust the values as per your liking and preference. I used the following. Highlight Strength: 10, Detail: 12, Smoothness: 15. Hit OK.
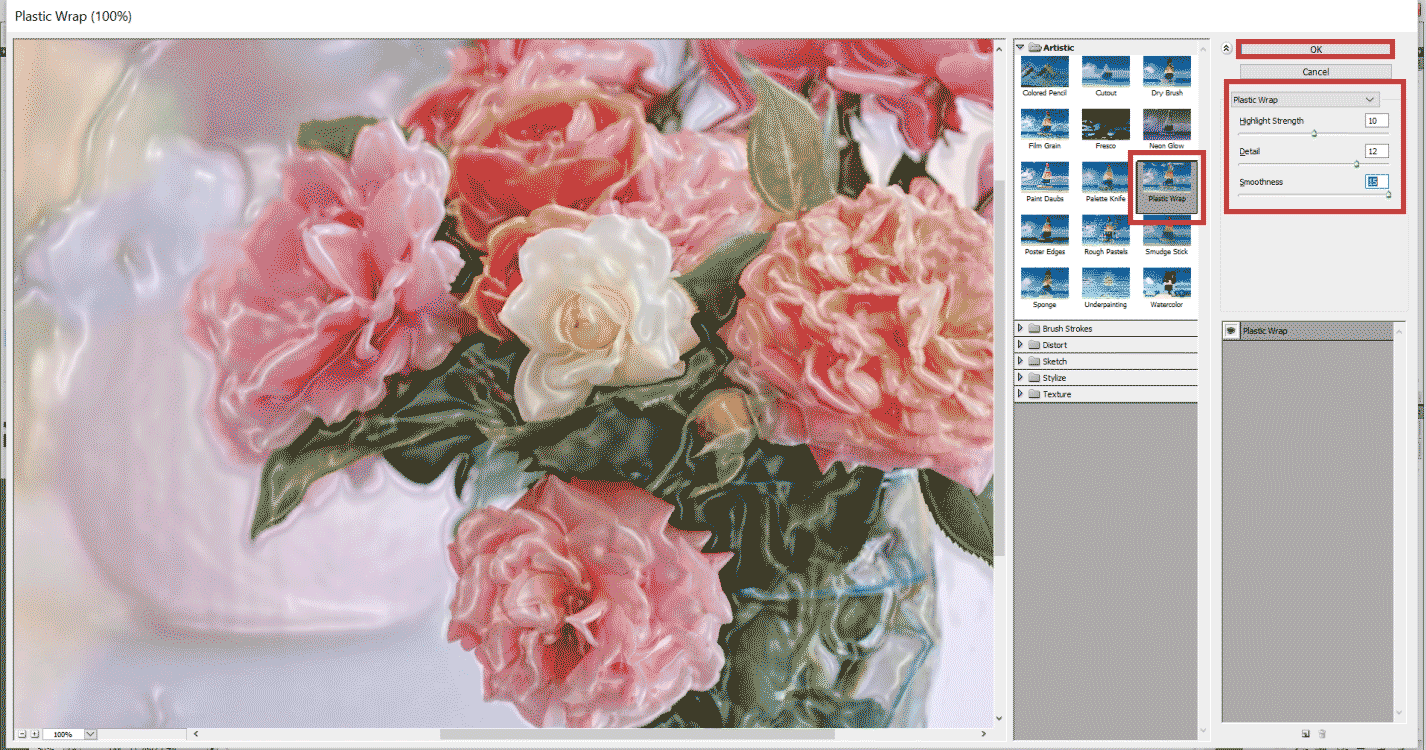
- You will see a plastic-like sheet has covered our original image. We usually see this in ready to buy frames or shops.
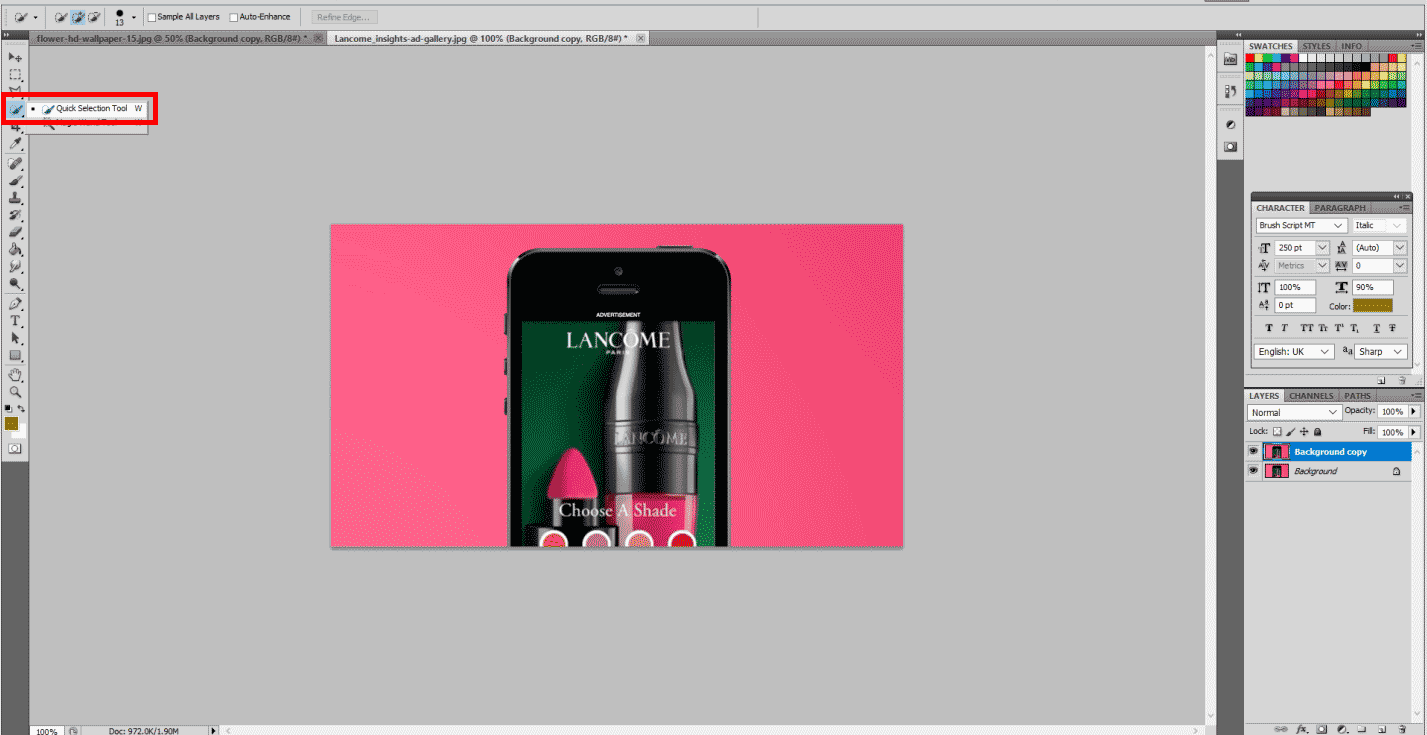
Step 4: (With the next image!) Let’s open the following image. Go to File and Open, select the image and hit Open.

- Again, create a Duplicate of the following layer and keep that layer selected.

Step 5: Select the Quick Selection Tool from the left. Just drag the area in pink in the background except for the phone part.
- Now go to Select > Inverse Selection. You will see that the phone is selected instead.
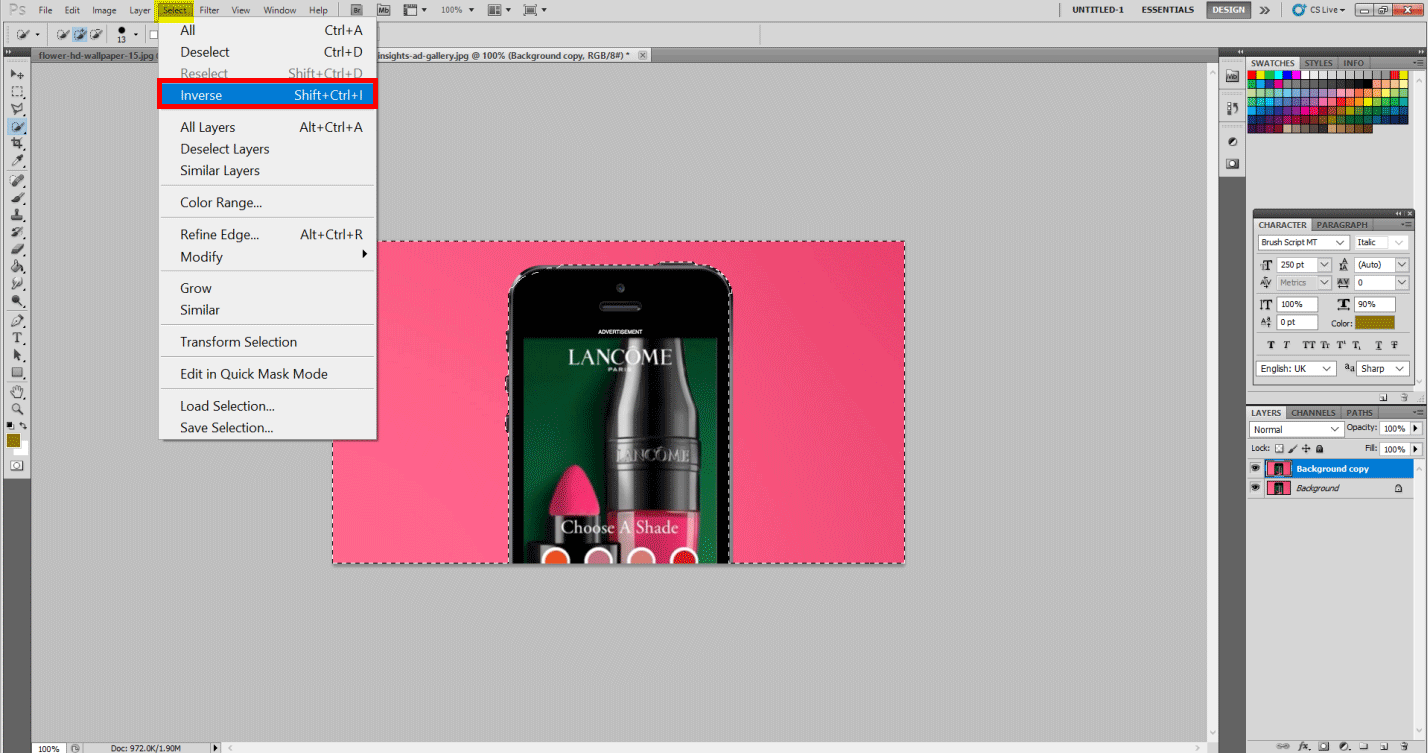
Step 6: Now go to Filter > Artistic > Plastic Wrap. Since we have already used the plastic wrap just before, a quick tip is a shortcutting key Ctrl+F key from the keyboard. You will see the preview box again. Change the following values as shown below. Hardness: 7, Detail: 8, Smoothness: 12. Hit OK.
Step 7: You will see a plastic-like embossed effect on the phone that makes it look like it’s wrapped up in plastic.
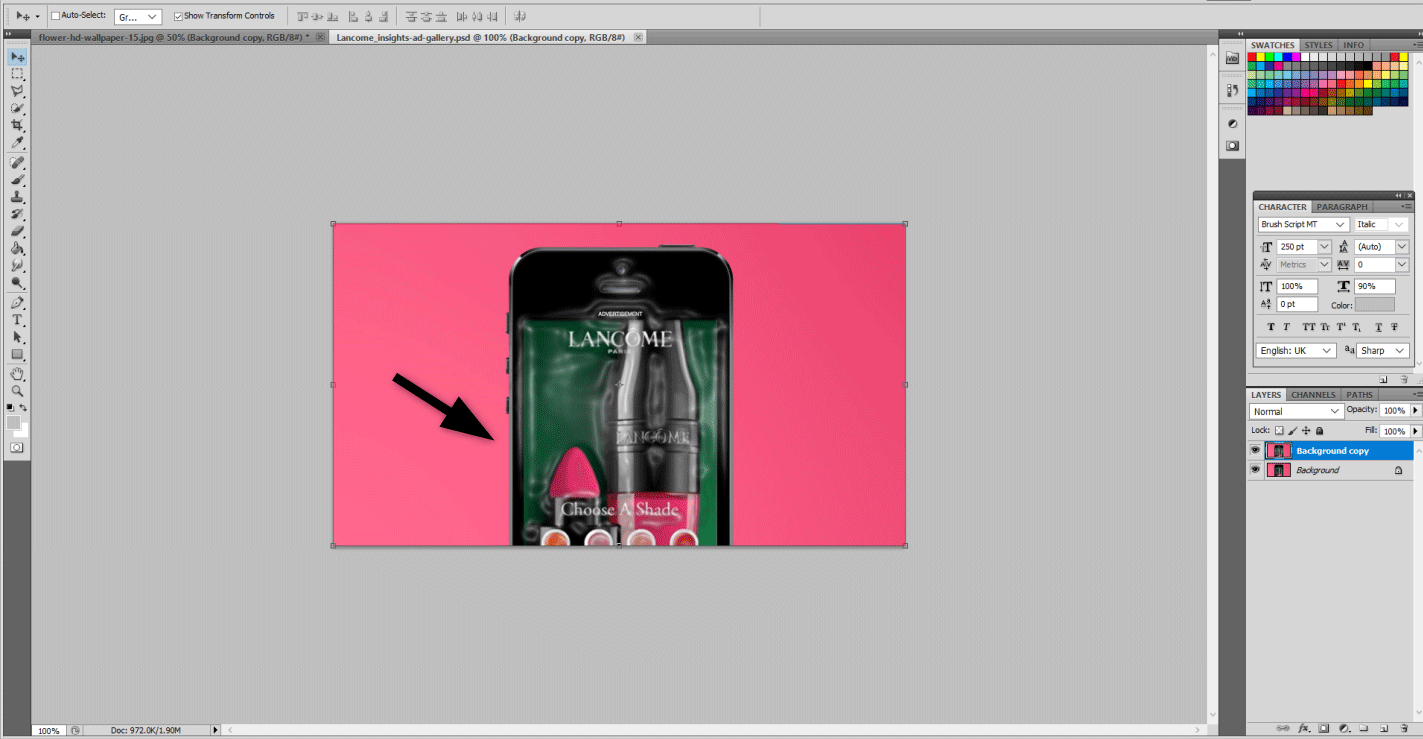
- Hence we can use the plastic effect in the images as per our liking and need. We may also make use of the Masking option and do the following steps.
Method #2 – On the Text Layer
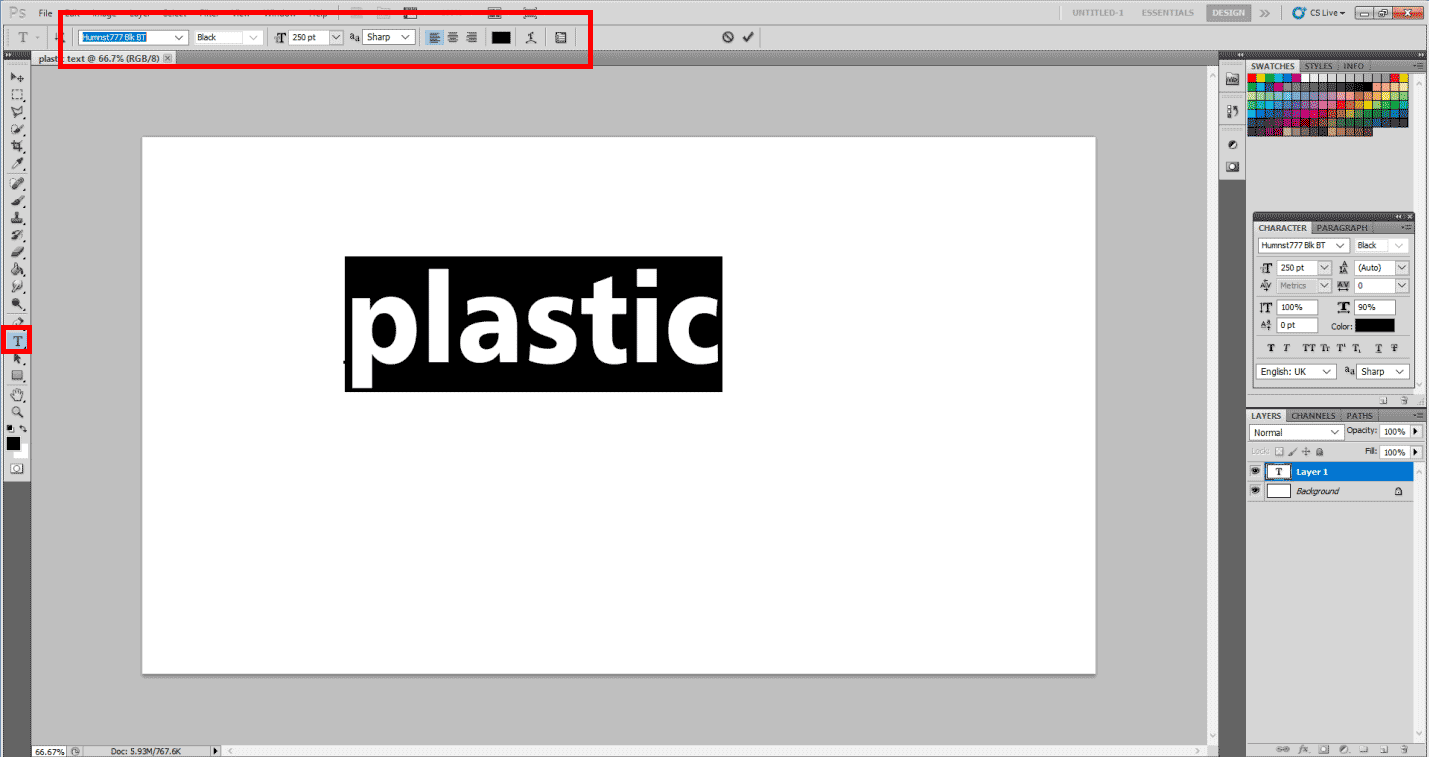
Step 1: Let’s start with a fresh Photoshop Document.
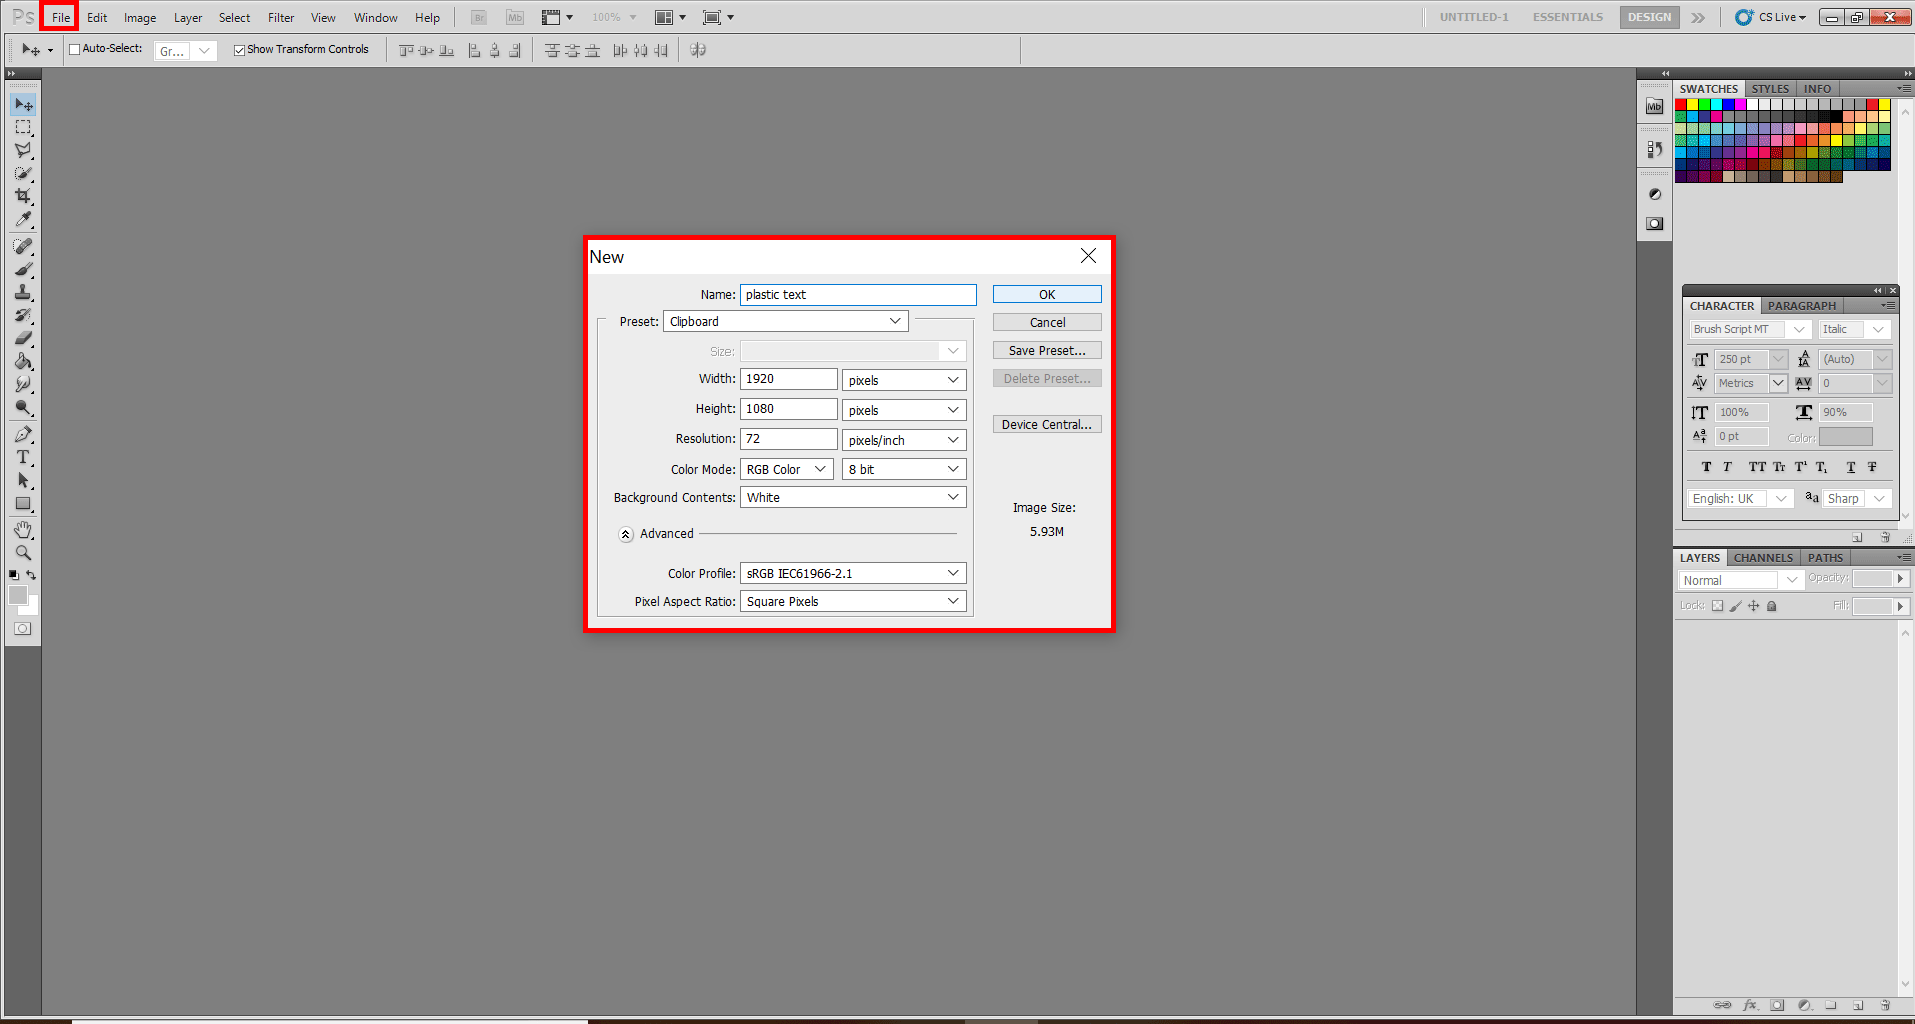
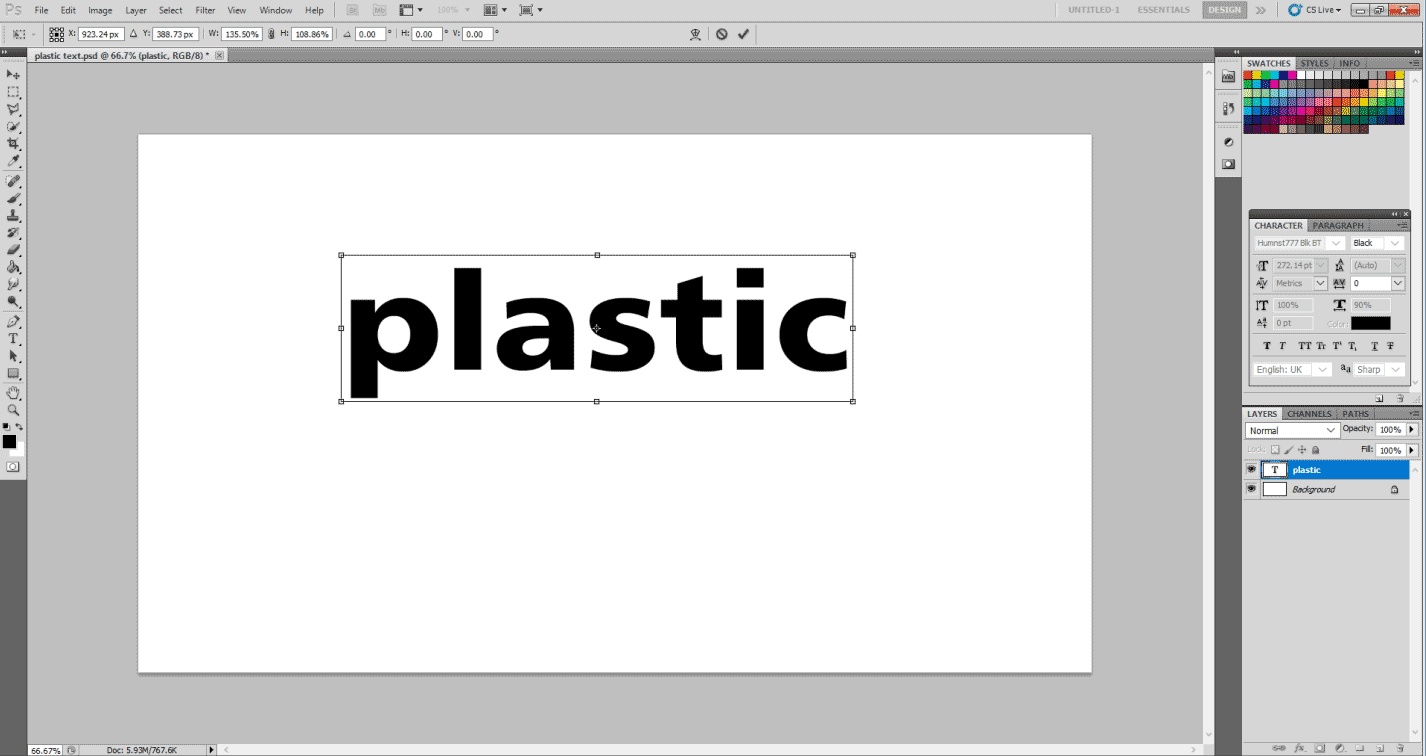
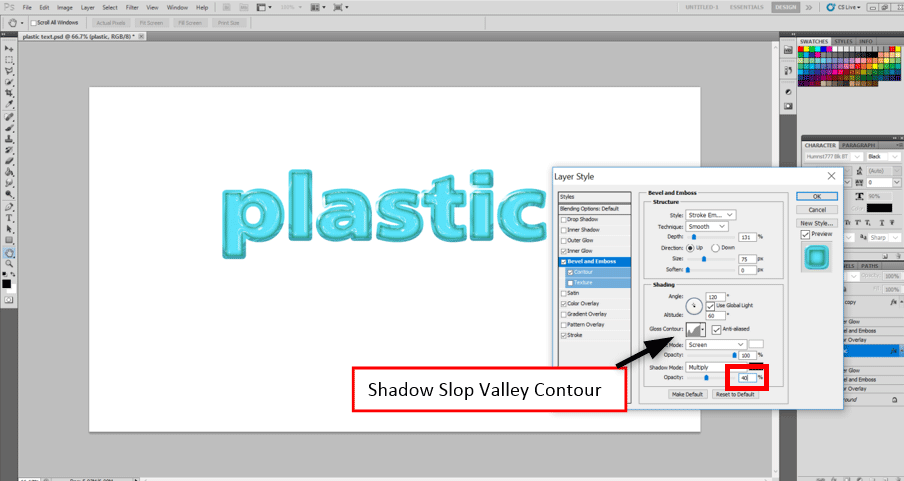
- Now using the Type tool, type Plastic. Now, select the Font style and size of your choice. I chose Humnst777 Blk BT. Select the Plastic Layer to resize the word “plastic” using the Move tool. Or do it using the Free Transform Option in Edit Menu.
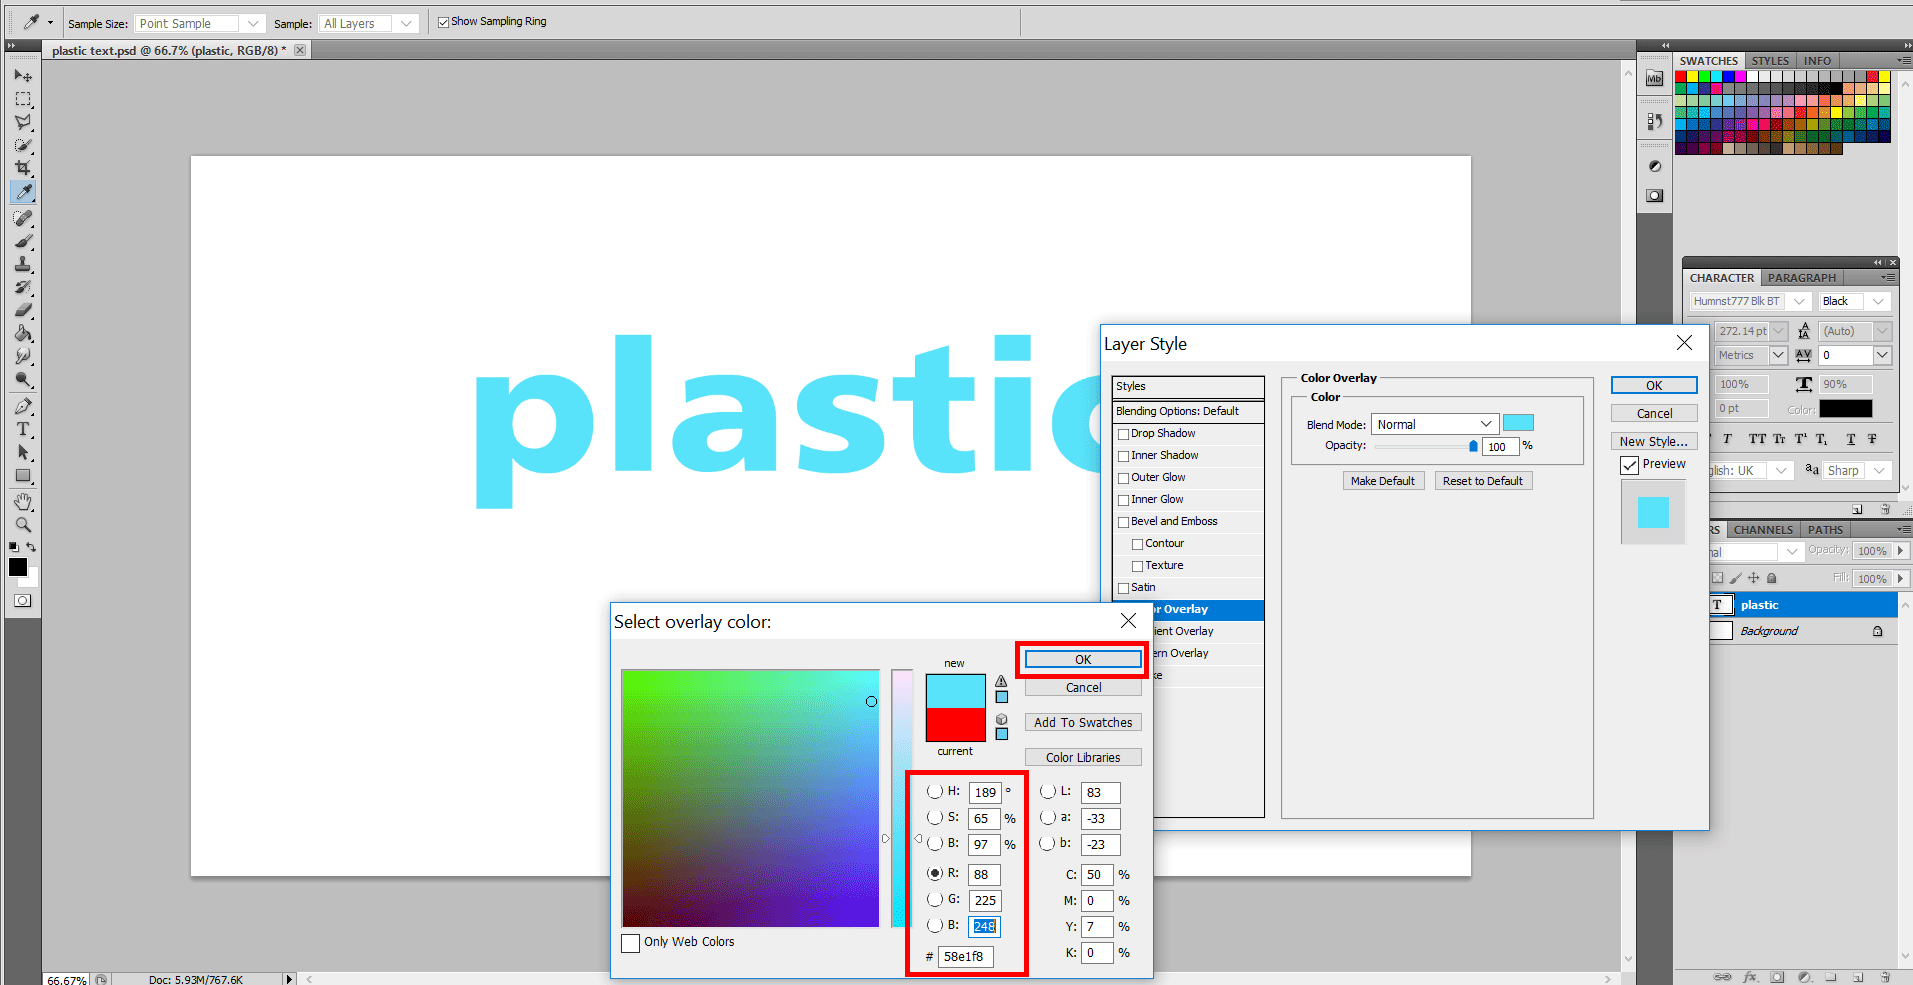
Step 2: Now, let’s start with Layer styles. Right-click on the layer named Plastic and select Blending Options. Select Color Overlay. Next to the Blend Mode option, please select the Colour Picker. Now, change the following values R: 88, G: 211, B: 252.
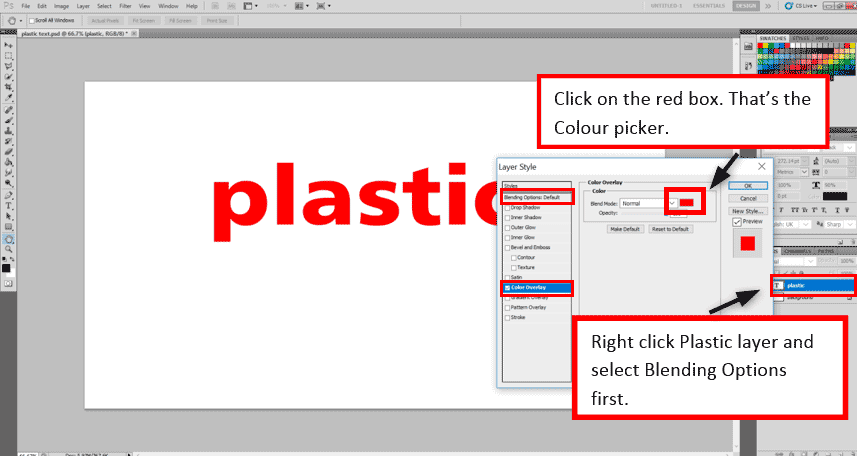
- You can make variations if you like a darker or a lighter version.
Step 3: Now hit the Inner Glow option from the left and change the following values. Blend mode: Multiply, Opacity: 50 %, Size: 13 px.
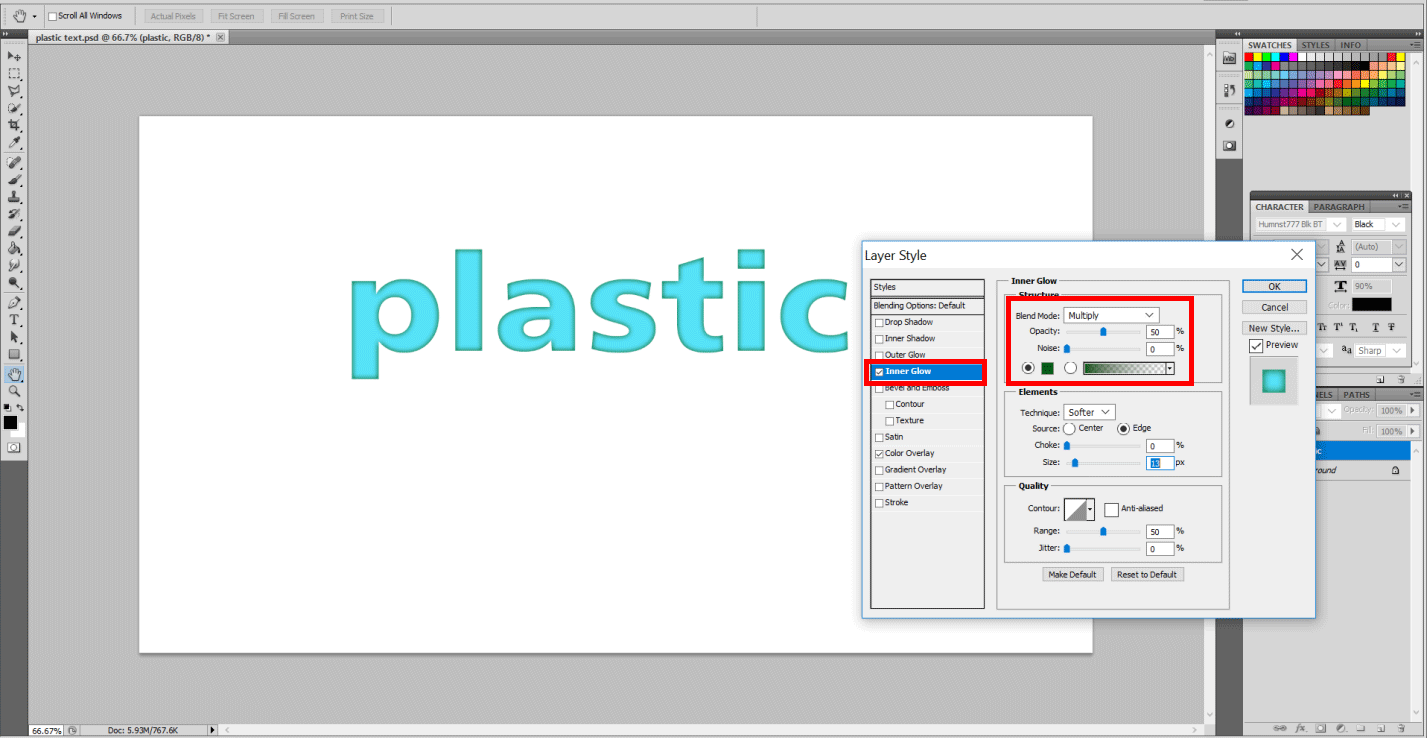
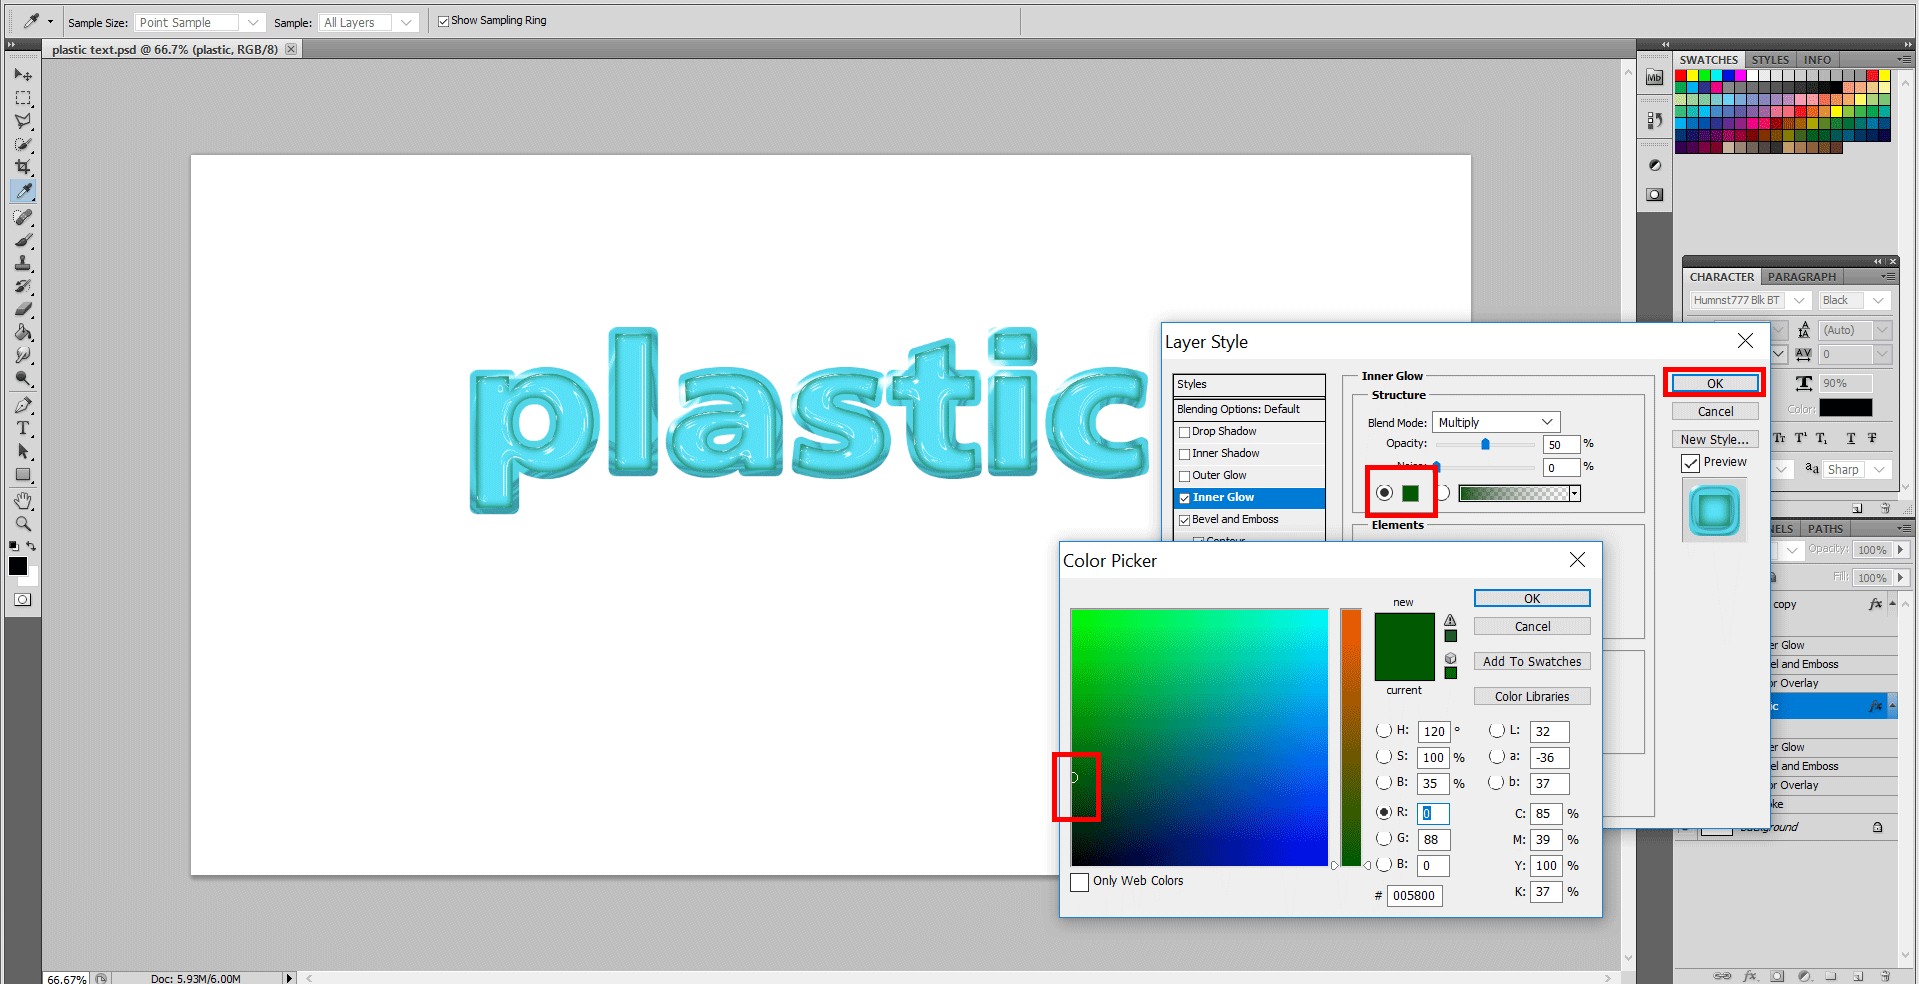
- Now in the color picker option right below the Noise option, you can select a dark green shade to give it a darker glow inside, as shown below.
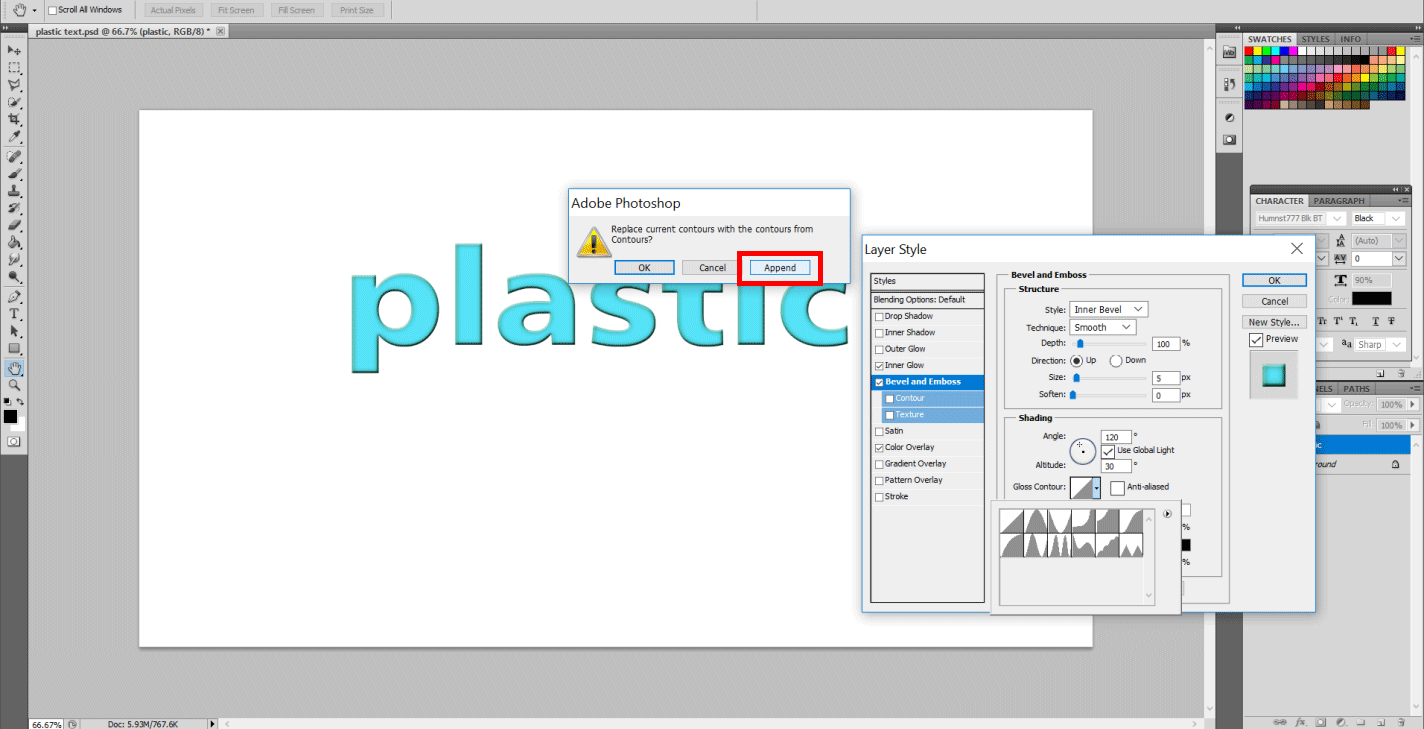
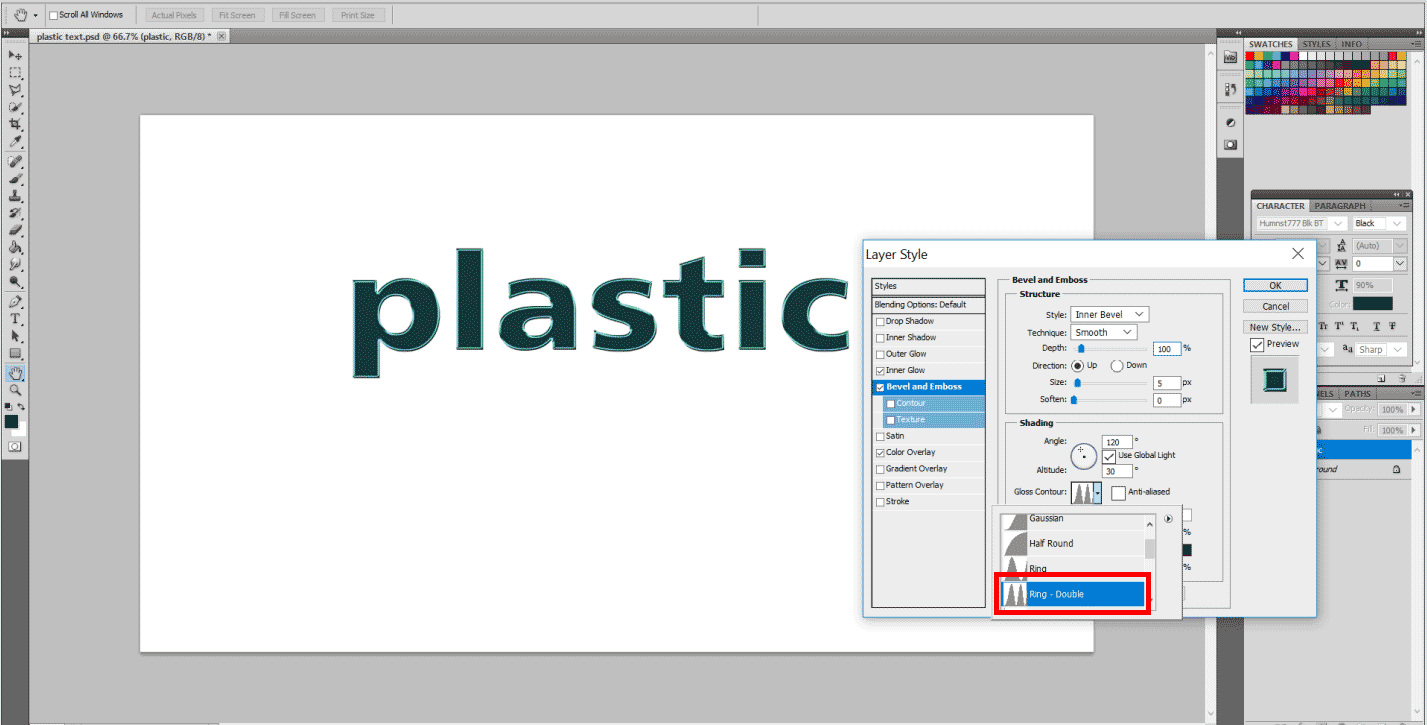
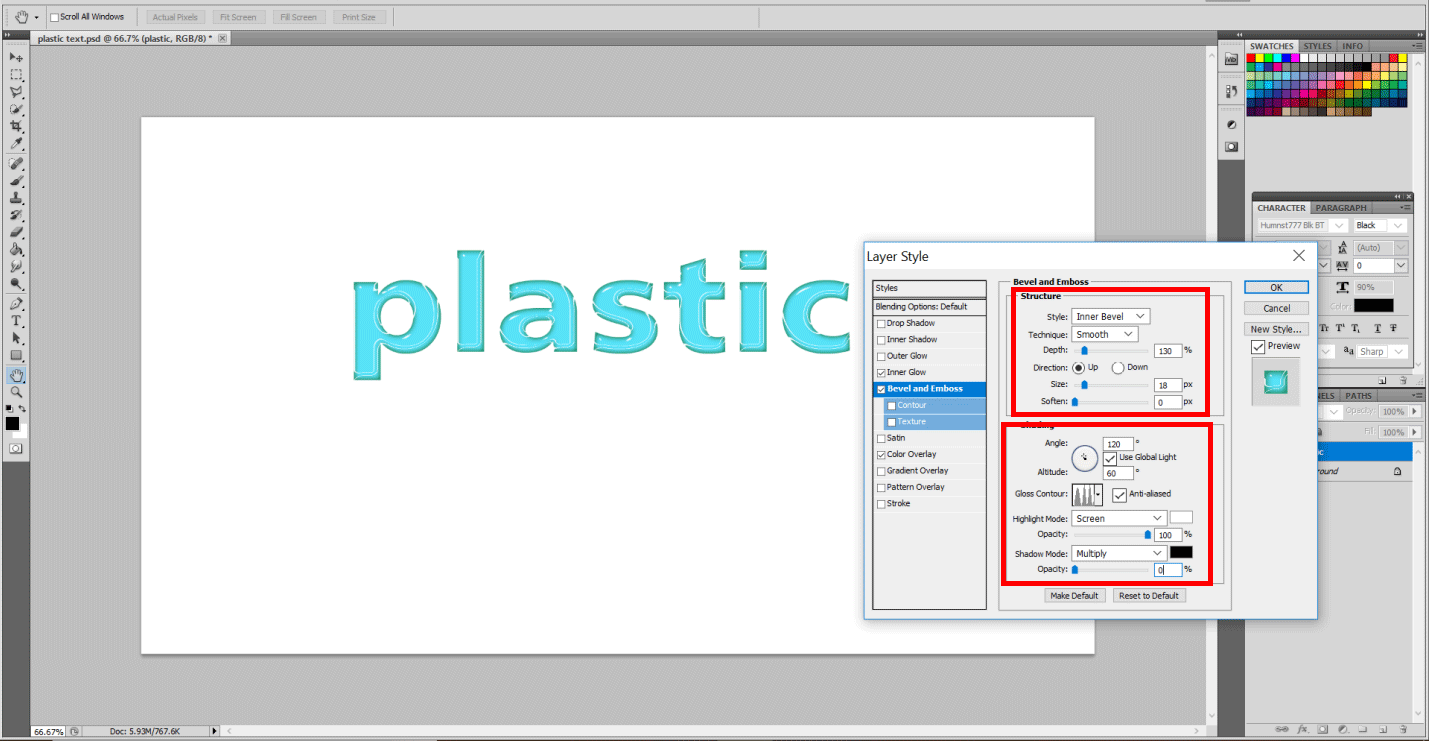
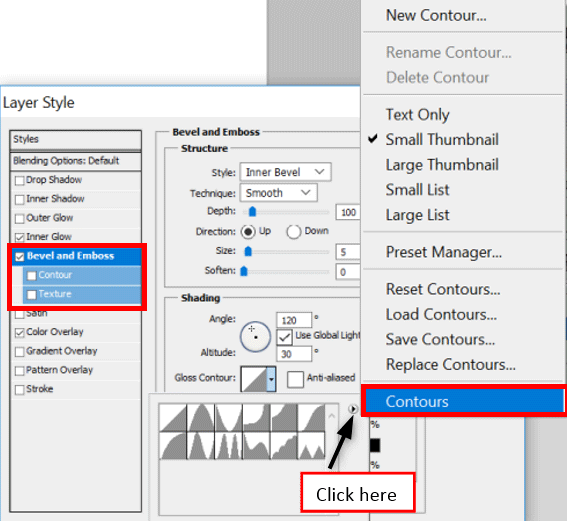
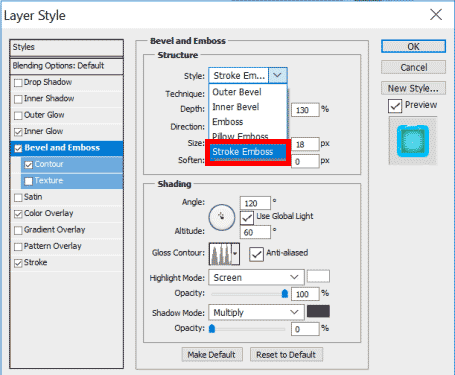
Step 4: Hit the option Bevel and Emboss and select Glass Contour. In this dialog box, you will see a tiny arrow. Please click the arrow, and you will see a drop-down menu. Select the option Contours. In the dialog box, accept the action by clicking Append. Here you will see that the contours will get their own names and shapes. Select option Ring Double.

Step 5: Let’s change the parameters in Bevel & Emboss. Again these values are subject to change according to requirement. It’s more important to remember is that the basic concept and method of creating the effect of plastic remains the same. Therefore, Depth: 130, Size: 18 px, Altitude: 60 degrees, Highlight mode Opacity: 100 % and Shadow mode Opacity: 0 %.
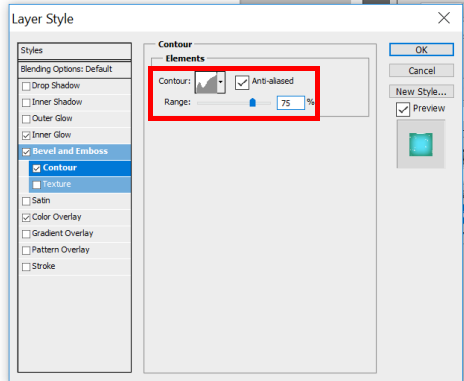
Step 6: Now select the Contour Layer Style and select the option Shallow Slope Valley in the Dropdown menu. Check on the Anti-Aliased and make the Range to 75%. You see the following effect.
Step 7: Now, this effect till here looks nice but let’s make it more plastic. Make a copy of the layer of Plastic. Right-click on it and select Duplicate layer, name it Plastic Copy.
Step 8: Now select the original Plastic Layer and double click on it to make changes. Select the Stroke Layer style and make Size: 10 px. In the color swatch, select the blue color of plastic with the help of an Eyedropper, as shown below.

Step 9: Now again, go to Bevel and Emboss Layer Style and select the Stroke Emboss option as shown and change the following: Glass Contour: Shallow Slope Valley and Opacity as 40%.
Hence, the plastic effect is done by using two different options, both totally different yet fun.
Recommended Articles
This is a guide to Plastic Effect in Photoshop. Here we discuss how to apply the plastic effect in Photoshop in two different methods. You can also go through our other related articles to learn more –
