EDUCBA

EDUCBA

MENUMENU
  • Free Tutorials
  • Free Courses
  • Certification Courses
  • 280+ Courses All in One Bundle
  • Login
Home Design Design Tutorials Illustrator Tutorial Transparent in Illustrator
Secondary Sidebar
Illustrator Tutorial
  • Effects
    • Effects in Illustrator
    • Insert Image in Illustrator
    • Crop in Illustrator
    • Remove Background In Illustrator
    • Remove White Background in Illustrator
    • Shapes in Illustrator
    • Text Effects In Illustrator
    • Watercolor Brushes Illustrator
    • Blending Modes in Illustrator
    • Blur in Illustrator
    • Brushes in Illustrator
    • Change Background Color in Illustrator
    • Graphic Styles in Illustrator
    • Change Artboard Size in Illustrator
    • Logo Design in Illustrator
    • Rasterize in Illustrator
    • Resize Image in Adobe Illustrator
    • 3D Effects in Illustrator
    • 3D Text in Illustrator
    • Filters in Illustrator
    • Reflection in Illustrator
    • How to Make Logo in Illustrator?
    • Transparent in Illustrator
    • How to Add Texture in Illustrator?
    • Neon Effect in Illustrator
    • Create Table in Illustrator
    • Paper Texture in Illustrator
    • Stamp Effect in Illustrator
    • Sun in Illustrator
    • How to Warp Text in Illustrator?
    • Metal Effect in Illustrator
    • Action in Illustrator
    • Illustrator Gold Gradient
  • Basic
    • What is Adobe Illustrator
    • Install Adobe Illustrator
    • Adobe Illustrator For Windows
    • Adobe Illustrator for Windows 8
    • How to Use Adobe Illustrator
    • Adobe Illustrator for beginners
    • Adobe Illustrator for Students
    • Illustrator Shortcut Keys
    • Illustrator Plugins
    • Illustrator Repeat Action
    • Illustrator auto trace
    • Layers in Illustrator
    • Moon in Illustrator
  • Tools
    • Adobe Illustrator Tools
    • Selection Tool in Illustrator
    • Width Tool in Illustrator
    • Illustrator Grid Tool
    • Pathfinder Tool in Illustrator
    • Pen Tool In Illustrator
    • Measure Tool in Illustrator
    • Mesh Tool In Illustrator
    • Blend Tool in Illustrator
    • Direct Selection Tool Illustrator
    • Illustrator Free Transform Tool
    • Shape Builder Tool in Illustrator
    • Slice Tool in Illustrator
    • Smooth Tool in Illustrator
    • Eyedropper Tool in Illustrator

Related Courses

Illustrator Training Course

Adobe Flash Training Course

3Ds Max Modeling Training Course

Transparent in Illustrator

Transparent in Illustrator

Introduction to Transparent in Illustrator

Transparent in Illustrator is the most basic and essential part of Adobe Illustrator, with the possibility of adding transparency to your artwork without noticing it. You can append transparency to artwork by performing any of the below points:

  • Reducing the opacity of objects so that the artwork lying under the object becomes perceptible.
  • Making use of the opacity masks to produce disparity in transparency.
  • Making use of the blending mode to alter how colors connect among objects that overlap.
  • Registering meshes and gradients that incorporate transparency.
  • Registering graphic or effects styles that incorporate transparency, like a drop shadow.
  • Importing Adobe Photoshop files that incorporate transparency.

Inspite of the fact that registering transparent effects to your artwork is simple, it is essential that you interpret how transparency functions.

Start Your Free Design Course

3D animation, modelling, simulation, game development & others

How to Create a Transparent Effect in Illustrator?

Transparency defines the blending mode and opacity of objects to produce opacity masks or to knock out a part of one object with the overlying part of a transparent object. Let us apply the transparency effect with a few illustrations.

Basic Transparency

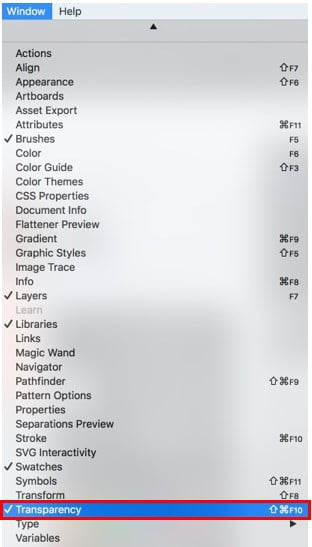
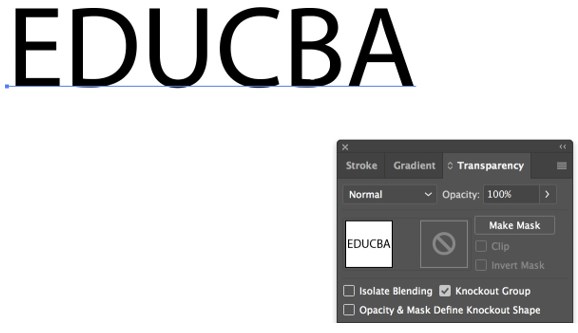
Step 1: Open Adobe Illustrator and draw or write a text on the artboard. Then click on Window and select Transparency.

Transparency option

Step 2: You will get a dialog box.
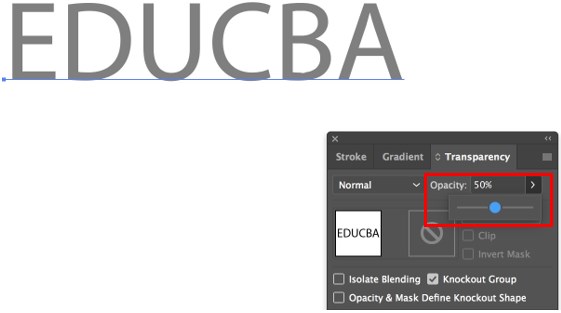
dialog box

Step 3: Regulate the opacity in order to provide some transparency to the text. Here we are keeping it like 50%

Transparency in Illustrator - Opacity

Transparency Using Blending Mode

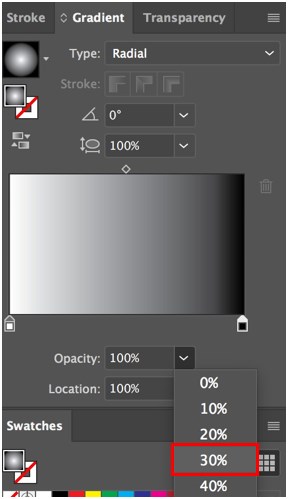
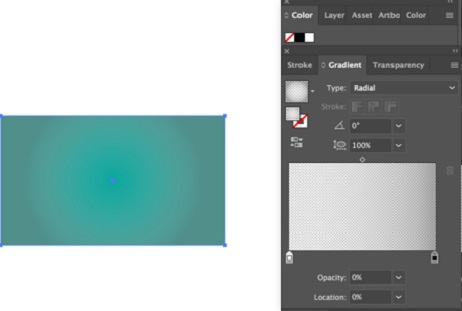
Step 1: Draw a rectangle on your artboard and fill it with a solid color.

Rectangle

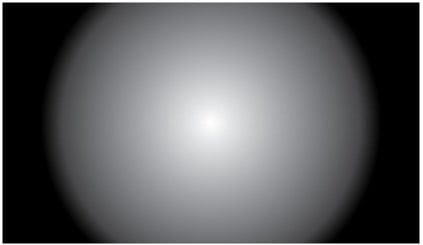
Step 2: Now duplicate the rectangle you created, place it over the original and fill it with a black and white radial gradient.

Transparency in Illustrator - Duplication

Step 3: The gradient is solid right now. Reduce the transparency of the black bar to 30%.

Transparency in Illustrator - 6

Step 4: And white bar to 10%.
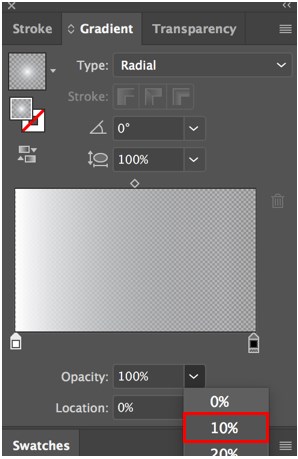
Transparency in Illustrator - 7

Step 5: When we reduce the transparency, the object that is behind becomes visible, and both the objects seem to blend in well, as shown below.

Transparency in Illustrator -11

  • The word transparency points out to any alterations in opacity and blending modes.
  • Blending modes manage how the colors of the groups, objects, or layers communicate with each other. They are defined as color mode-specific and achieve distinct outcomes in CMYK and RGB formats. To observe the result of blending modes, you require to append a white or multi-colored element behind your artwork.
  • Opacity masks permit the light and dark regions in a single object to be utilized as a mask for supplementary objects. The dark(black) inside the mask specifies regions of the masked art that will be totally transparent. The light(White) inside the mask specifies regions of the masked art that will be completely visible and hazy. Grays permit a scale of transparency.

Transparency Opacity Mask

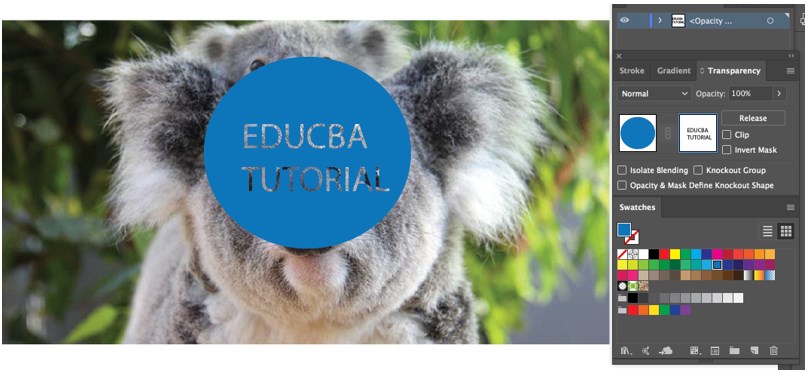
Step 1: Select any image you wish to use and paste or open it on the artwork.
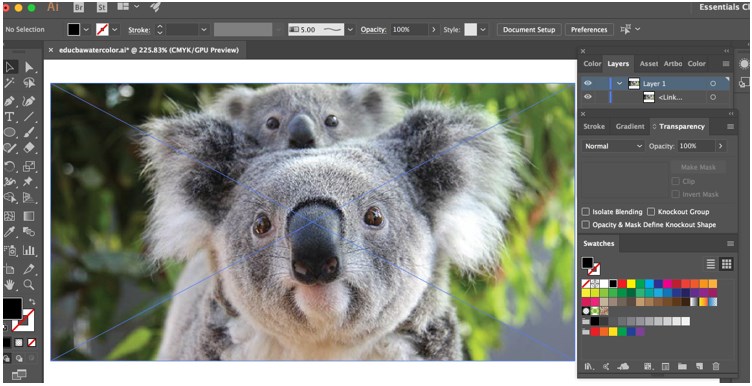
Transparency in Illustrator - 8

Step 2: Now, create any shape that you would like over the image. Fill the shape with any color you wish. Next, click on the type tool and insert a text on the shape you created.

Transparency in Illustrator - 9

Step 3: Now select your text and cut it by pressing Command+X in Mac and Ctrl+X in Windows. Now choose your shape object and bring up the transparency panel. Once it opens, you can see two previews. The one on the left-hand side is the shape object that you have selected. The one on the right-hand side is the mask where you will paste your text object by pressing Command+F in Mac and Ctrl+F in Windows. Be certain that the clip option and invert mask option is unchecked. Now you can see that some of the portions of the image are visible through the text. In this way, you can achieve transparency through opacity masks.

Final Transparency

  • You will also observe that when the mask is being edited, all the other objects are locked, indicating that you are in the opacity mask mode. If you need to make changes to other elements of the artwork, open the transparency panel and click the portion that represents the masked object.
  • A masking object and an opacity mask can be used to modify the transparency of artwork. The opacity mask gives the form through which other objects display. The masking object determines which regions are transparent and the level of transparency. You can utilize any object that is colored or raster picture as the masking object.

Transparency can be Used to Shape a Knockout: Utilize the Opacity & Mask Define Knockout Shape alternative to create a knockout effect corresponding to the object’s opacity. In the regions of the mask that are near to 100% opacity, the knockout effect will be sturdy; in regions with smaller opacity, the knockout effect will be less sturdy. For instance, if you utilize an object that is gradient-masked as a knockout, the elemental object will be removed successively. You can produce knockout forms with both raster and vector objects. This method is very functional for objects that utilize a blending mode other than normal, which is the default selection.

Conclusion

Adobe Illustrator’s advanced utilization of transparency is laced throughout the software; you utilize transparency not only when you register a blending mode, and opacity percentage or an opacity mask from the transparency panel, but also when you register specific types of effects such as feathers, glows and shadows or styles that incorporate those characteristics. So Adobe Illustrator provides you with useful latest tools to enhance your command over how you supply and print artwork that incorporates transparency and permits you to preserve your transparency flattening settings as time preserving presets.

Recommended Articles

This is a guide to Transparent in Illustrator. Here we discuss Transparency in basic, blending mode, opacity percentage, and an opacity mask with a few illustrations. You can also go through our other related articles to learn more –

  1. Applying Watercolor Brushes Effects in Illustrator
  2. Overview of Smooth Tool in Illustrator
  3. How to Use Selection Tool in Illustrator?
  4. Eyedropper Tool in Illustrator
Popular Course in this category
Illustrator Courses (1 Courses, 2+ Projects)
  1 Online Courses |  2 Hands-on Projects |  12+ Hours |  Verifiable Certificate of Completion
4.5
Price

View Course

Related Courses

All in One Design Bundle(280+ Courses, 100+ projects)
AutoCADHoudiniAdobe Premiere ProPhotoshop
SolidworksVFX Visual EffectsCorelDrawUnreal Engine
Price
View Courses
280+ Online Courses | 100+ projects | 2000+ Hours | Verifiable Certificates | Lifetime Access
4.6 (65,098 ratings)
Adobe Flash Training (2 Courses, 1+ Projects)4.9
3Ds Max Modeling Training (5 Courses)4.8
1 Shares
Share
Tweet
Share
Primary Sidebar
Footer
About Us
  • Blog
  • Who is EDUCBA?
  • Sign Up
  • Live Classes
  • Corporate Training
  • Certificate from Top Institutions
  • Contact Us
  • Verifiable Certificate
  • Reviews
  • Terms and Conditions
  • Privacy Policy
  •  
Apps
  • iPhone & iPad
  • Android
Resources
  • Free Courses
  • Photoshop Tutorial
  • 3ds Max Tutorial
  • All Tutorials
Certification Courses
  • All Courses
  • Design Course - All in One Bundle
  • Photoshop Course
  • Maya Course
  • Unreal Engine Course
  • Unity Course
  • DaVinci Resolve Course
  • Pro Tools Course

ISO 10004:2018 & ISO 9001:2015 Certified

© 2022 - EDUCBA. ALL RIGHTS RESERVED. THE CERTIFICATION NAMES ARE THE TRADEMARKS OF THEIR RESPECTIVE OWNERS.

EDUCBA
Free Design Course

Banner Creation, Object Selection, Sky Replacement, Advance Filters & others

*Please provide your correct email id. Login details for this Free course will be emailed to you

By signing up, you agree to our Terms of Use and Privacy Policy.

EDUCBA Login

Forgot Password?

By signing up, you agree to our Terms of Use and Privacy Policy.

EDUCBA
Free Design Course

3D animation, modelling, simulation, game development & others

*Please provide your correct email id. Login details for this Free course will be emailed to you

By signing up, you agree to our Terms of Use and Privacy Policy.

EDUCBA

*Please provide your correct email id. Login details for this Free course will be emailed to you

By signing up, you agree to our Terms of Use and Privacy Policy.

Let’s Get Started

By signing up, you agree to our Terms of Use and Privacy Policy.

This website or its third-party tools use cookies, which are necessary to its functioning and required to achieve the purposes illustrated in the cookie policy. By closing this banner, scrolling this page, clicking a link or continuing to browse otherwise, you agree to our Privacy Policy

Loading . . .
Quiz
Question:

Answer:

Quiz Result
Total QuestionsCorrect AnswersWrong AnswersPercentage

Explore 1000+ varieties of Mock tests View more