Updated June 23, 2023
![]()
Introduction to Tkinter Icon
Python encompasses various libraries that serve different purposes. Among them is Tkinter, a library employed in Python for constructing Graphical User Interfaces (GUIs). Tkinter is the easiest and fastest way to create Graphical User Interfaces in Python, and it also provides an object-oriented interface to the Tk GUI toolkit, which is very powerful. Tkinter icon is a way to put up our own customized icon on the different windows created by Tkinter. It is one of the most important parts of creating a Graphical User Interface. This article represents the different methods of the Tkinter icon and how it can be used in the different aspects of a GUI.
Syntax:
- Iconphoto() Method
iconphoto(self, default = False, *args)- Iconbitmap Method
program.iconbitmap('<image path>')- call() Method
program.tk.call('wm','iconphoto',program._w,tk.PhotoImage(file='<image path>'))Methods of Tkinter Icon
Lets us discuss methods with Examples and their working:
1. Iconphoto() Method
This method places a title bar icon on any top-level window. For setting up an image as the icon, the image needs to be an object of PhotoImage class.
Image used in example [i] & example [ii]-
![]()
Image used in example [iii]-
![]()
[i] Basic Iconphoto() Usage Example
This is a basic example of creating a top-level window and putting up an image as its icon.
Code:
# Firstly import Tkinter Module
from tkinter import *
from tkinter.ttk import *
import tkinter as tk
# Then create a program Tkinter window
program = Tk()
# Photoimage class is created
# And Image should be in the same folder where there is script saved
p1 = PhotoImage(file = 'C:/Users/afu/Desktop/tk/Git.png')
# Icon set for program window
program.iconphoto(False, p1)
# Button creation
b = Button(program, text = 'Press Me!')
b.pack(side = TOP)
program.title('iconphoto() method')
mainloop()
Output:
![]()
![]()
[ii] Advance Iconphoto() Usage Example
This example is a more advanced version of the window created in the last example. Here the window contains buttons that have a background color and also an active background color. Along with the buttons, there are colored labels also. The method for setting up an icon is iconphoto, which has been used the same way as in the previous example.
Code:
# Firstly import Tkinter Module
from tkinter import *
from tkinter.ttk import *
from tkinter import Button
import tkinter as tk
# Then create a program Tkinter window
program = Tk()
# Photoimage class is created
# And Image should be in the same folder where there is script saved
p1 = PhotoImage(file = 'C:/Users/afu/Desktop/tk/Git.png')
# Icon set for program window
program.iconphoto(False, p1)
# Button creation
b = Button(program, text = 'Press Me!')
b.pack(side = TOP)
class Icon(Frame):
 def __init__(code):
        super().__init__()
        code.UI()
 def UI(code):
        framedesign = Frame(code, borderwidth=10)
        framedesign.pack()
        button1 = Button(framedesign, activebackground = 'SlateGray3',  text='Change my color', bg = 'red')
        button1.pack(padx=5, side=LEFT)
        label1 = Label(framedesign, background='SlateGray3', width = 15)
        label1.pack(padx=5, side=LEFT)
        button2 = Button(framedesign, text='Mine too',background='blue', activebackground = 'SlateGray3')
        button2.pack(side=LEFT)
        label2 = Label(framedesign, background='SlateGray4',width = 15)
        label2.pack(side=LEFT)
        button3 = Button(framedesign, text='I am Green', background='crimson', activebackground = 'DarkSeaGreen3' )
        button3.pack(side=RIGHT, padx=5)
        label3 = Label(framedesign, background='DarkSeaGreen3',width = 15)
        label3.pack(side=RIGHT, padx=5)
        button4 = Button(framedesign, text='Me too', background='pink',activebackground = 'DarkSeaGreen4')
        button4.pack(side=RIGHT)
        label4 = Label(framedesign, background='DarkSeaGreen4', width = 15)
        label4.pack(side=RIGHT)
        code.master.title("Advance iconphoto() method'")
        code.pack(fill=BOTH)
        code.pack()
app = Icon()
program.mainloop()
Output:
![]()
![]()
[iii] Advance Iconphoto() usage example with texts using multiple fonts
This example represents a way to create a window that sets up an image as its icon using an icon photo, and it also represents a way to set up different fonts in a window.
Code:
import tkinter as tk
from tkinter import Tk
from tkinter import BOTH
from tkinter.ttk import Frame
from tkinter.ttk import Label , Style
from tkinter.ttk import Notebook
program = tk.Tk()
program.iconphoto(False, tk.PhotoImage(file='C:/Users/afu/Desktop/tk/Folder.png'))
from tkinter.font import Font
class Icon(Frame):
    def __init__(code):
        super().__init__()
        code.UI()
    def UI(code):
        code.master.title("program.iconphoto method example")
        code.pack(fill=BOTH, expand=True)
        text = "This example if for creating an icon "
        text1 = 'using program.iconphoto'
        text2 = 'Hope you like it'
        thefont = Font(family="Arial", size=16)
        label1 = Label(code, text=text, font=thefont)
        label1.grid(row=0, column=0)
        label2 = Label(code, text=text1, font="Times")
        label2.grid(row=1, column=0)
        label3 = Label(code, text=text2, font=('Courier', '18', 'bold'))
        label3.grid(row=2, column=0)
app = Icon()
program.mainloop()
Output:
![]()
![]()
2. Iconbitmap Method
For using this method, the bitmap image should be an icon type with .ico as its extension.
Image used in Example [i] & Example [ii]-
![]()
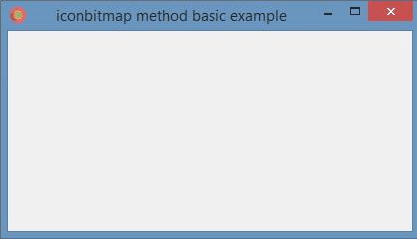
[i] Basic Iconbitmap Usage Example
This is a basic example of creating a window where the icon has been set using iconbitmap. As you can see, the image is of .ico extension, and using an icon-type image in this method is mandatory.
Code:
import tkinter as tk
program = tk.Tk()
program.title('iconbitmap method basic example')
#Setting Icon for window widget
program.iconbitmap('New.ico')
program.mainloop()
Output:
![]()
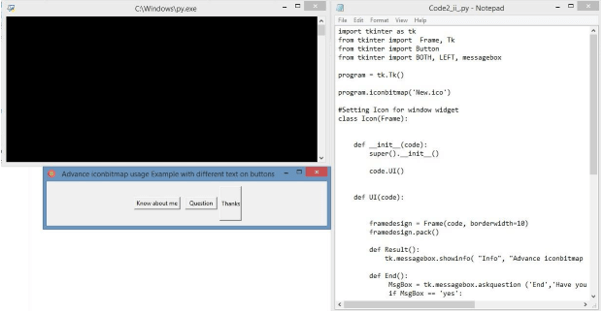
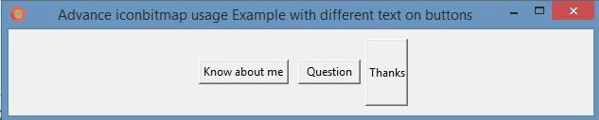
[ii] Advance Iconbitmap Usage Example with Different Messages on pressing Buttons
This example shows us how to create a window with a bitmap image as its icon and buttons that display messages or ask questions when it is pressed. This example also explains how to make the window more responsive to questions and messages.
Code:
import tkinter as tk
from tkinter import Frame, Tk
from tkinter import Button
from tkinter import LEFT, messagebox
from tkinter import BOTH
program = tk.Tk()
program.iconbitmap('New.ico')
#Setting Icon for window widget
class Icon(Frame):
def __init__(code):
super().__init__()
code.UI()
def UI(code):
framedesign = Frame(code, borderwidth=10)
framedesign.pack()
def Result():
tk.messagebox.showinfo( "Info", "Advance iconbitmap usage")
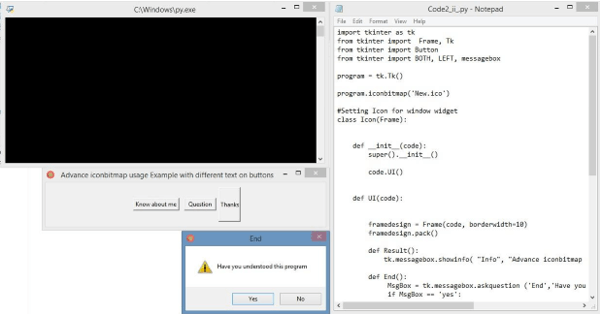
def End():
MsgBox = tk.messagebox.askquestion ('End','Have you understood this program',icon = 'warning')
if MsgBox == 'yes':
program.destroy()
else:
tk.messagebox.showinfo('Return','Check our courses on Python on EduCBA')
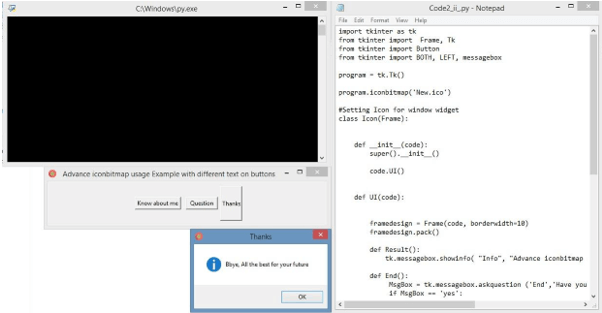
def Thanks():
tk.messagebox.showinfo( "Thanks", "Bbye, All the best for your future")
button1 = tk.Button(framedesign, text='Know about me', command = Result, activebackground = 'Cyan')
button1.pack(padx=5,side=LEFT)
button2 = Button(framedesign, text='Question', width=8, command = End, activebackground = 'Cyan')
button2.pack(padx=5, side=LEFT)
button3 = Button(framedesign, text='Thanks', width=5, height=4, command = Thanks, activebackground = 'Cyan')
button3.pack(side=LEFT)
code.master.title("Advance iconbitmap usage Example with different text on buttons")
code.pack(fill=BOTH)
code.pack()
app = Icon()
program.mainloop()Output:
- When Code is Executed
- When “Know about me” Button is Clicked

- When “Question” Button is Clicked
- When “Thanks” Button is Pressed
- Window
3. tk.call() Method
This method is an interface of Tkinter to the tcl interpreter. Image used in example [i] & example [ii]-

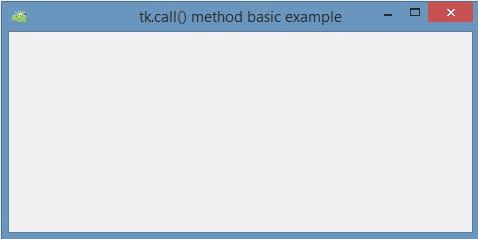
[i] Basic tk.call() Usage Example
This example represents the use of tk.call method.
Code:
import tkinter as tk
program = tk.Tk()
program.title('tk.call() method basic example')
program.tk.call('wm', 'iconphoto', program._w, tk.PhotoImage(file='C:/Users/afu/Desktop/tk/dino.png'))
program.mainloop()
Output:

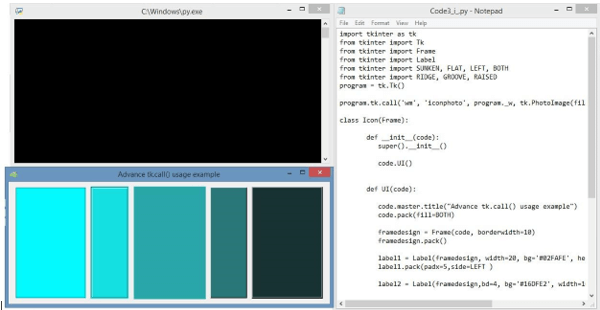
[ii] Advance tk.call() Usage Example
This example represents a way of making the window used in the last example more advanced and using tk.call to set up its title icon. This example sets up an image as the window’s icon and explains how to put up labels with different background colors, width, height, padding.
Code:
import tkinter as tk
from tkinter import Tk
from tkinter import Frame
from tkinter import Label
from tkinter import SUNKEN, LEFT
from tkinter import FLAT, BOTH
from tkinter import RIDGE, RAISED
from tkinter import GROOVE
program = tk.Tk()
program.tk.call('wm', 'iconphoto', program._w, tk.PhotoImage(file='C:/Users/afu/Desktop/tk/dino.png'))
class Icon(Frame):
       def __init__(code):
          super().__init__()
          code.UI()
       def UI(code):
          code.master.title("Advance tk.call() usage example")
          code.pack(fill=BOTH)
          framedesign = Frame(code, borderwidth=10)
          framedesign.pack()
          label1 = Label(framedesign, width=20,  bg='#02FAFE', height=15, relief=GROOVE)
          label1.pack(padx=5, side=LEFT)
          label2 = Label(framedesign, bd=4,  bg='#16DFE2', width=10,height=15, relief=GROOVE)
          label2.pack(padx = 5, side=LEFT)
          label3 = Label(framedesign, bd=4, bg='#28A6A8', width=20,height=15, relief=FLAT)
          label3.pack(padx=5,side=LEFT)
          label4 = Label(framedesign, bd=2,  bg='#2A7778', width=10, height=15, relief=RAISED)
          label4.pack(padx = 5, side=LEFT)
          label5 = Label(framedesign, bd=3,  bg='#173232', width=20, height=15, relief=RIDGE)
          label5.pack(padx=5,side=LEFT)
          code.pack()
app = Icon()
program.mainloop()
Output:
Conclusion
On the basis of the above example, an individual can understand how to set up images as a window’s icon. The different methods and examples describe the process of setting up images as an icon in different ways and also briefly introduce the different aspects of creating a GUI using Tkinter.
Recommended Articles
We hope that this EDUCBA information on “Tkinter Icon” was beneficial to you. You can view EDUCBA’s recommended articles for more information.
