Introduction to Talend Exchange
Talend Exchange is an online marketplace provided by Talend, a company specializing in data integration and management software. The Talend Exchange platform allows users to access a wide range of pre-built components, connectors, and templates, which they can integrate into their Talend data integration workflows. These resources are contributed by both Talend and the user community, providing a valuable ecosystem for sharing and collaborating on data integration solutions.
The platform offers various categories of resources, including connectors for various databases, applications, and cloud services, templates, and examples for common data integration tasks. Users can search for specific components or browse through categories to find the resources they need for their projects. Talend Exchange helps accelerate development by providing ready-made solutions that can be easily incorporated into data integration workflows, saving developers and data engineers time and effort.
Table of Contents:
- Introduction to Talend Exchange
- Overview of Talend
- Key Aspects
- Purpose and Role
- Creating A New Talend Exchange Account
- Talend Open Studio
- Creating Custom Components in Talend Open Studio
- Contributing to the Community
- Staying Updated on New Releases
- Benefits of Using Talend Exchange
- Tips and Best Practices
- Best Practices for Contributing to the Community
Overview of Talend
Talend, a software company founded in 2005, has become a prominent player in open-source and cloud-based data integration. The company primarily empowers organizations to integrate, cleanse, manage, and analyze data across diverse sources.
Key Aspects
- Open Source Heritage: Talend has a strong foundation in open-source technology. It offers open-source data integration tools that developers and data professionals widely use.
- Real-Time Data Integration: Talend recognizes the importance of real-time data integration in today’s fast-paced business environment. The platform offers capabilities for real-time data processing, allowing organizations to take informed and timely decisions based on up-to-the-minute information.
- User-Friendly Development Environment: Talend provides an integrated development environment (IDE) known as Talend Studio, which offers a user-friendly interface for designing, testing, and deploying data integration processes. This IDE supports both code-centric and visual design approaches, catering to the preferences of different users.
Purpose and Role of Talend Exchange
1. Community Collaboration
- Purpose: Talend Exchange fosters collaboration within the Talend community, allowing users to share their expertise, experiences, and innovative solutions.
- Role: It acts as a community-driven repository where users can contribute their data integration components, transformations, and job designs, making their knowledge and best practices accessible to others.
2. Reusable Components
- Purpose: Talend Exchange promotes the reuse of integration artifacts across projects and organizations.
- Role: It serves as a library of connectors, transformations, and job designs that users can easily import into their Talend Studio environments. This reusability enhances efficiency and consistency in data integration processes.
3. Knowledge Sharing
- Purpose: Talend Exchange is a knowledge-sharing platform where users can access documentation, tutorials, and examples related to data integration tasks.
- Role: It promotes continuous learning and improvement by allowing users to learn from each other’s experiences. This knowledge-sharing aspect enhances the skill set of Talend users, both beginners and experienced professionals.
4. Adaptability to Evolving Needs
- Purpose: Talend Exchange reflects the adaptability and responsiveness demanded in the dynamic field of data integration.
- Role: As the data landscape evolves, Talend Exchange evolves with it. Users can access the latest community-contributed components, ensuring the repository stays current with emerging technologies and best practices.
Creating A New Talend Exchange Account
Now, let’s see how we can create a Talend exchange account.
1. Open your web browser and navigate to the Talend Exchange platform.
(https://login.talend.com/register.php)
2. If you already have a Talend account, log in using your credentials. If not, you may need to create a new account to access Talend Exchange.
3. This is what the registration page looks like:
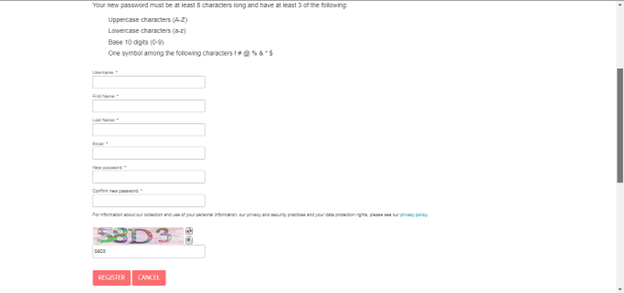
4. Enter the required information and register for an account.
5. After registering, the webpage will display:
![]()
6. Registration is complete. Let’s proceed to Talend Open Studio.
Talend Open Studio
1. We need to download the Talend Open Studio from the official website (https://www.talend.com/products/talend-open-studio/)
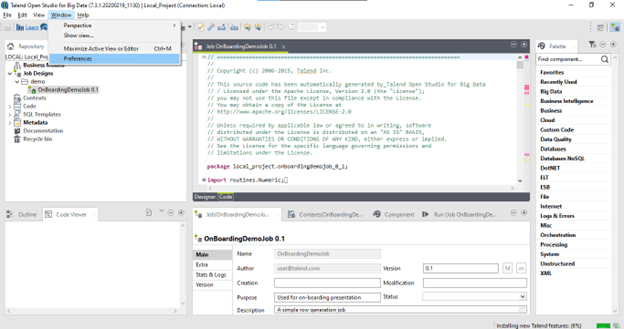
2. Run the Talend Open Studio, and on the toolbar, click windows, then navigate to preferences. You’ll see a “Talend” drop-down menu; expand it and click on “Exchange.” (Preferences>Talend>Exchange>Sign-in)
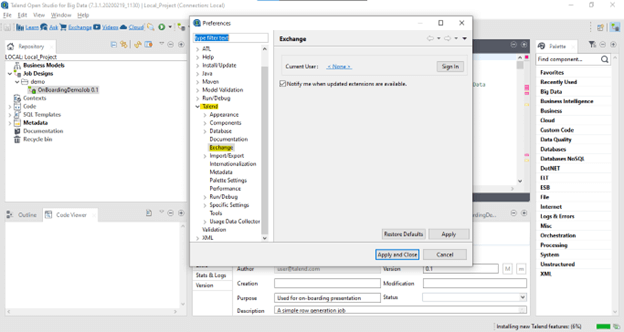
3. Now, you’ll see a sign-in option from the Talend Open Studio. Login with your details. Once done, you can see the different extensions uploaded by different users.
Creating Custom Components in Talend Open Studio
1. First, we need to create a component folder; simply in your preferred location, create a new folder named “Component”.
2. Now in that Component folder, create new files as “demo.xml”, “main.javajet”, “begin.javajet”, “msg.properties”.

3. Now, we need to make some changes inside the demo.xml file; simply right-click and open the file with notepad/notepad++ and add the code below into the file.
<COMPONENT>
<HEADER Platform=””, serial= “”, version=””.  Status=””>
</HEADER>
<DOCUMENTATION>
<Inside the document we can write the URL that we want>
</DOCUMENTATION>
<CONNECTORS>
<Here we can write the different connector as per requirement>
</CONNECTORS>
</COMPONENT>4. Now open Talend Open Studio and navigate to “Preferences > Talend > Components > Browse”

5. Now click the browse button to give the folder’s location we just created.
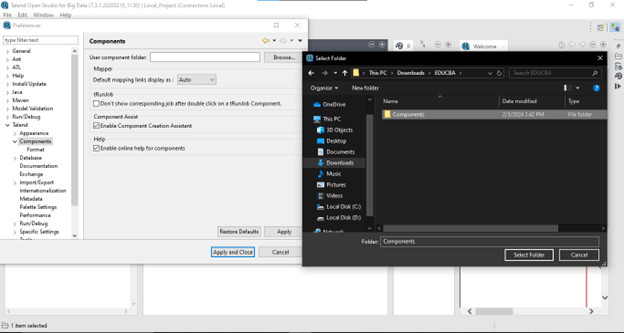
6. Now click “Select Folder,” then at the bottom of the window, click “Apply and Close.”
7. Now, our custom component is ready, and we can test it.
Contributing to the Community
1. Creating a Talend Exchange Account
- If you haven’t already, create a Talend Exchange account.
2. Accessing the Contribution Section
- Look for a “Contribute” or “Submit” section on the Talend Exchange platform.
- This section typically provides guidelines and instructions for contributing.
3. Preparing Your Contribution
- Ensure your connector, component, or template follows any guidelines provided.
- Prepare documentation, version information, and any other required details.
4. Uploading Your Contribution
- Follow the platform’s upload process to submit your contribution.
- Provide accurate information, including a detailed description and use case.
5. Engaging with the Community
- Participate in community forums or discussions to share insights about your contribution.
- Respond to user feedback and collaborate with the community to enhance your contribution.
Staying Updated on New Releases
1. Subscribe to Updates
- Talend Exchange may offer subscription options for specific assets or categories.
- Subscribe to receive notifications about updates, new releases, or community activities.
2. Check Release Notes
- Regularly check the release notes or announcements section on Talend Exchange.
- This is where platform administrators or contributors may share information about new releases.
3. Follow Talend Social Media Channels
- Talend often shares updates, announcements, and highlights on social media platforms.
- Follow Talend’s official accounts on platforms like Twitter, LinkedIn, or other relevant channels.
4. Join Community Newsletters
- If available, subscribe to community newsletters or Talend-related publications.
- Newsletters often include updates on new releases, featured connectors, and community events.
5. Participate in Webinars or Events
- Talend may organize webinars or events to showcase new features or releases.
- Participate in these events to stay informed and engage with the Talend community.
Benefits of Using Talend Exchange
1. Knowledge Sharing
- Importance: Community engagement encourages users to share their experiences, best practices, and solutions to common issues.
- Impact: Users can learn from each other’s successes and lessons learned, leading to a more informed and skilled community. Knowledge sharing accelerates the learning curve for newcomers and helps experienced users discover new techniques.
2. Collaborative Development:
- Importance: Talend Exchange relies on contributions from the community, including connectors, components, and templates.
- Impact: Collaboration allows for creating a diverse and extensive library of integration assets. Users can leverage the community’s collective expertise, leading to more robust, efficient, and versatile integration solutions.
3. Accelerated Development Cycles
- Importance: Community-contributed assets on Talend Exchange, such as connectors and components, can be reused by others in their projects.
- Impact: This reuse accelerates development cycles, as users can leverage pre-built, tested, and proven components rather than starting from scratch. It promotes efficiency and helps organizations deliver solutions more rapidly.
4. Quality Assurance and Feedback
- Importance: User ratings, reviews, and feedback on Talend Exchange provide insights into the quality and effectiveness of connectors and components.
- Impact: Community feedback helps users decide which assets to use. It also offers contributors valuable information for improving and refining their contributions, ensuring the continuous improvement of integration assets.
5. User Empowerment
- Importance: Community engagement empowers users to participate actively in the evolution of Talend Exchange.
- Impact: Users feel a sense of ownership and connection to the platform, leading to a more engaged and committed community. This empowerment contributes to the sustainability and growth of the Talend ecosystem.
Tips and Best Practices
- Stay Informed: Regularly check for updates, new connectors, and community contributions on Talend Exchange. Staying informed ensures you have access to the latest resources and improvements.
- Leverage Documentation: Read the documentation provided for each connector or component. Understanding the features, configuration options, and best practices will help you use them effectively in your projects.
- Review User Ratings and Reviews: Before downloading a connector or component, review user ratings and read comments. It can provide insights into a specific resource’s reliability, usability, and potential issues.
- Contribute to the Community: If you’ve developed a valuable connector or component, consider contributing it to the community. Sharing your work helps others and establishes your presence within the Talend community.
- Participate in Forums and Discussions: Engage with the Talend community by participating in forums and discussions on Talend Exchange. Share your experiences, ask questions, and help build the collective knowledge base.
- Subscribe to Updates: Subscribe to specific connectors, components, or categories to receive notifications about updates, new releases, and community activities. It keeps you informed about changes and improvements related to your areas of interest.
- Stay Security-Aware: Be mindful of security considerations when using connectors and components. Follow security best practices and ensure that community-contributed resources adhere to security standards.
Best Practices for Contributing to the Community
- Understand Community Guidelines: Familiarize yourself with the community guidelines and contribution policies on Talend Exchange. Adhering to these guidelines ensures that your contributions align with community standards.
- Provide Clear Documentation: When contributing a connector, component, or template, include documentation. Clear and detailed documentation helps other users understand how to use your contribution effectively.
- Include Use Case Examples: Provide real-world use case examples to illustrate how your contribution can be applied. It helps users understand the practical applications of your work.
- Ensure Compatibility Information: Clearly specify the compatibility of your contribution with different versions of Talend Studio. It ensures that users can confidently use your resource with their specific Talend environment.
- Respond to User Feedback: Proactively interact with users offering feedback on your contribution. Address queries, resolve issues, and leverage constructive feedback to enhance the quality of your work.
- Regularly Update Your Contribution: Stay committed to maintaining and updating your contribution. Regular updates ensure your resource remains relevant, compatible with newer Talend versions, and aligned with evolving best practices.
- Follow Licensing and Copyright Guidelines: Make certain that your contributions comply with licensing and copyright policies. Clearly outline the licensing terms for your work and show regard for the intellectual property rights of others.
Conclusion
Talend Exchange is a vibrant, community-driven platform that enables users to succeed in their data integration endeavors. As a collaborative space, it shows Talend’s collective strength, encouraging innovation, efficiency, and continuous improvement in the constantly shifting landscape of data integration and management.
FAQs
1. Does Talend support the components on Talend Exchange?
Answer: Components on Talend Exchange may vary in terms of support. Talend provides guidelines for community contributions, and it’s important to check the documentation for each component to understand its level of support.
2. Can I request new features or report issues on Talend Exchange components?
Answer: Talend Exchange typically has a mechanism for users to report issues or request features for the listed components. This might involve community forums or dedicated channels for communication.
3. How do I install components from Talend Exchange in my Talend Studio?
Answer: Talend Studio usually provides a simple mechanism for users to install components directly from Talend Exchange. This process often involves accessing the Talend Exchange perspective within the Studio.
4. What is the difference between certified and non-certified components on Talend Exchange?
Answer: Some components on Talend Exchange may be certified by Talend, indicating that they meet specific quality and compatibility standards. It’s essential to understand the certification status of a component before incorporating it into your projects.
Recommended Articles
We hope this EDUCBA information on “Talend Exchange” benefited you. You can view EDUCBA’s recommended articles for more information,
