
Introduction to Stamp Effect in Illustrator
The stamp is an effective technique in Adobe Illustrator. The stamp effect can be defined as an effect that is used for making a stamp-like structure by using tools, techniques and some features of adobe illustrator. This effect can be used as logo design or for any other object of a particular project which is related to any commercial work.
How to Create a Stamp Effect in Adobe Illustrator?
Here in this article, we will discuss steps of making Stamp Effect for any object or for any logo with an example and understand the parameter of this effect, which is necessary to understand this effect. So let us start our learning regarding this aspect.
Step 1: First of all, take a ‘New Document’ in this software. Go to File Menu of Menu bar, which is at the top of the working screen for ‘New Document’. A New Document box will be open. Make the setting of the document according to your requirement from here, and then press the Ok button of this box to apply the setting made by you.

Step 2: Now, take an Ellipse tool from the tool panel of this software, which is on the left side of the working screen, or you can press the L button from the keyboard as the short key of the Ellipse tool to activate it.

Step 3: Now, make a circle with the help of the ellipse tool of your desired size. Hold the Shift key for making a circle from this tool.

Step 4: Now select this circle by click on it with the Selection tool and go to ‘Object Menu’ of the Menu bar, which is at the top of the working screen. A drop-down list will be open. Go to the Path option of this list and choose the ‘Offset Path’ option from the new drop-down list.

Step 5: ‘Offset Path’ box will be open. Turn the Preview On of this box and decrease the value of offset so that we can make a small circle inside our drawn circle and press the Ok button of this box.

Step 6: Now again offset the path by using the ‘Path’ option of ‘Object Menu’ of the Menu bar.

Step 7: Set the value of the Offset from the offset box for making a circle next to a bigger circle as I was drawn here and press the Ok button of this box.

Step 8: Now, decrease the thickness of the selected circle by 1 pt. from the property bar of the circle.

Step 9: Now select the small circle and make the value of its thickness at 2 pt from its property.

Step 10: Now, make a Rectangle in the center of a small circle by using a rectangle tool of the tool panel. Please select all the shapes by using the selection tool and align them at the center of the small circle by using the align tool at the top of the working area.

Step 11: Now select the small circle layer from the layer box and click on the ‘Create New layer’ option icon of the layer box, which is at the bottom end of this box.

Step 12: Now make the Eye button of all layers ‘Off’ leave small circle and rectangle layer Eye button. Take the scissor tool from the tool panel and click on midpoints of the rectangle for making the intersection of the small circle.

Step 13: You can see two-layer of half circles in the layer section as intersected parts of the small circles have been generated.

Step 14: Now select one half of the intersected circle and Go to the tool panel; click on the Text tool icon. A drop-down list of tools will be open. Choose ‘Type on a Path tool icon, from here.

Step 15: When you click on the half-circle, a Path text tool will be activated like this.

Step 16: Type your desired text in this section with the help of keyboard buttons.

Step 17: You can choose text Font style from the property of the text, which is at the top of the working screen.

Step 18: Now, set the thickness of the font from here according to your requirement.

Step 19: Align this text at the center by using a center align option of the text property.

Step 20: Now make other layers visible, leaving the rectangle layer by clicking on the layers’ eye button.

Step 21: Again, take ‘Type on Path tool’ from the tool panel and click on another half of the intersected circle. Type your text on this path with the help of the keyboard.
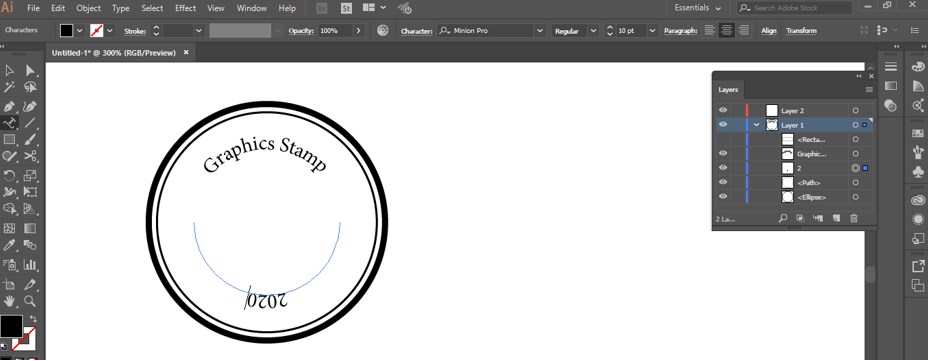
Step 22: Now, take the selection tool from the tool panel and click on the path of text ‘2020’ and move the middle vertical line of a path in the opposite direction for placing this text in the proper format.

Step 23: Now adjust the size and shape of both text by making some changes in their parameters according to the bigger circle. You can adjust their parameters according to your requirements.
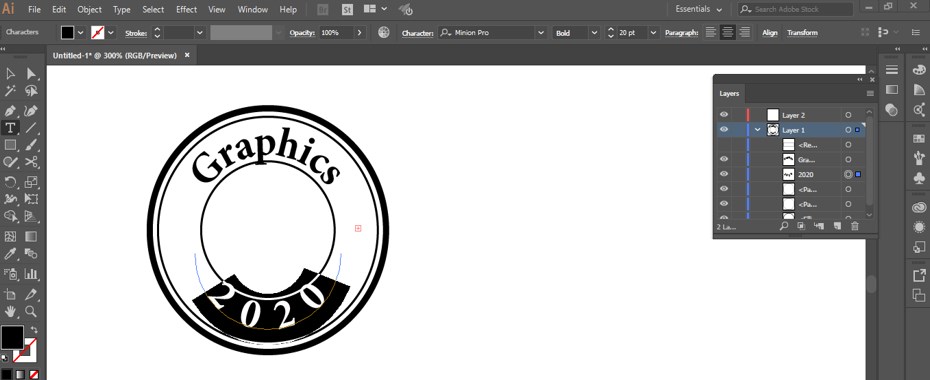
Step 24: Select the text and increasing the gap between the letters. For increasing the gap between letters, press the Alt + right arrow key of the keyboard again and again according to your requirement gaps.

Step 25: Now make a star using the Star tool of the tool panel of this software. You can use any other shape for giving this object a proper stamp look. Just like the hot stamping effect of a real hot stamping machine.

Step 26: Make a copy of this star, hold the keyboard’s Alt button and drag it in other places. Place both stars like this.

Step 27: Now, make the rectangle layer visible by click on the eye icon of this layer. Select the rectangle and small circle by click on them one by one. Hold the Shift button of a keyboard for multiple selections at a time.

Step 28: Open the Pathfinder box after selecting both shapes from the Window menu of the Menu bar of this software.

Step 29: Click on the ‘Minus Front’ icon of this box for subtracting a rectangle from a circle.

Step 30: Now your stamp becomes like this.

In this way, by following the steps of this article, you can easily make a stamp for different purposes in adobe illustrator software.
Conclusion
After this article, you can know the Stamp effect in Illustrator, and you can use it in your professional work to make the different types of objects that will give you an ethical look. Using this effective technique, you can make a highly professional antique project.
Recommended Articles
This is a guide to Stamp Effect in Illustrator. Here we discuss to make a simple, easy Stamp Effect in Illustrator in a step by step manner. You can also go through our other related articles to learn more –
