Updated April 15, 2023

Definition of Spring Boot Tomcat
It is the most popular servlet container which was used to deploy java applications, by default spring boot is built the standalone application which was running on the desktop. After installing Tomcat as a service it will manage multiple applications within a specified application, it will be avoiding the need to set up a server for each application. Spring boot is used the main method which was used to launch the endpoint of embedded server, if we are using a maven build it will create a jar file, it contains all dependencies related to the project. We can deploy our spring boot application on the tomcat server.
What is Spring Boot Tomcat?
- After implementing the spring boot application jar file, we can deploy the same on the apache tomcat server.
- Spring boot is building their application on top of the spring and it will serve when spring is serving.
- To deploy the spring application on the apache tomcat server will involve multiple steps which were we need to be configured.
- To deploy the spring boot application on the apache tomcat server first we need to install the apache server in our server.
- At the time of running the spring boot application, spring boot will be detecting that we have an MVC spring controller and need to start an apache tomcat instance by default.
- At the time of using the tomcat server in our spring boot application, we need to change any configuration settings, first, we need to enable the HTTPS for our web service which was we have used in our application.
- Spring boot web application is running on HTTPs and it is requiring the SSL/TLS certificate and also require the own web server.
- The embedded servlet container customizer will configure most of the explicit power of explicit XML configuration for a standalone instance of apache tomcat.
- We need to define which port we have used for the server, and also need to configure the properties through the command line or by using a loaded property file.
- To change the apache tomcat server port from which it will listen we need to specify the server port if we specify the server port as zero, if suppose we have defined server port as zero it will automatically find out unused port and assign it to the server.
- By default, the spring boot application is using the version of tomcat as 7. If we need to use a higher version of tomcat, then we need to override the maven build property it will trigger the build resolution.
Spring Boot Application into Tomcat
- To deploy the spring boot application on the apache tomcat server it will include the below three steps are as follows.
1) First step is to set up a spring boot application.
2) After creating the spring boot application war file of spring boot.
3) After creating war deploy the same on the tomcat server.
- The first step of spring boot apache tomcat deployment is to create a spring boot application. In this step, we are creating a new application for spring boot.
- The second step is to create the war file of the application which was we have developed; we have to create a war file using a maven build.
- The third step is deploying the application war file on the tomcat server. We need to deploy the same into the webapps folder or directory.
Spring Boot Project in tomcat
The below example shows to create an application:
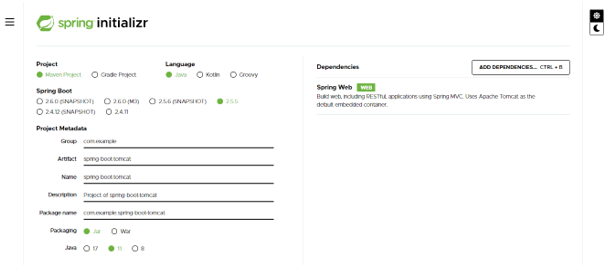
1) Create project template using spring initializer –
Group – com.example
Artifact name – spring-boot-tomcat
Name – spring-boot- tomcat
Description – Project of spring-boot- tomcat
Package name – com.example.spring-boot- tomcat
Packaging – Jar
Java – 11
Dependencies – spring web.
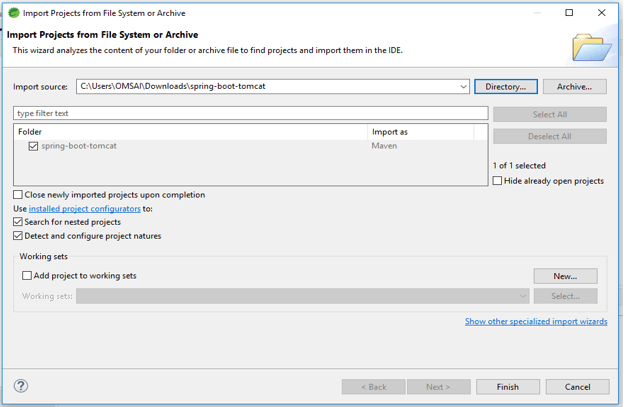
2) After generating project extract files and open this project by using spring tool suite –
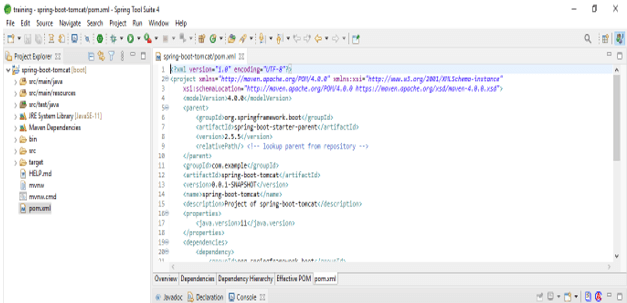
3) After opening project using spring tool suite check the project and its files –
4) Add spring dependency –
Code:
<dependency> -- Start of dependency tag.
<groupId>org.springframework.boot</groupId> -- Start and end of groupId tag.
<artifactId>spring-boot-starter-web</artifactId> -- Start and end of artifactId tag.
</dependency> -- End of dependency tag.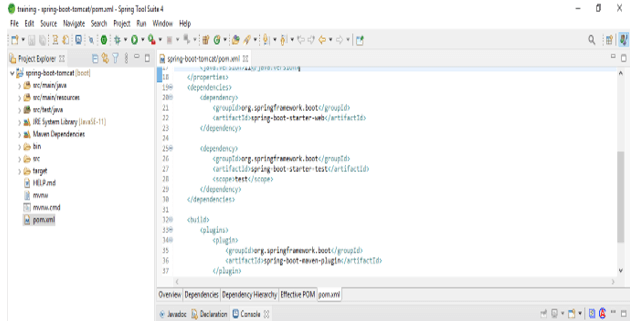
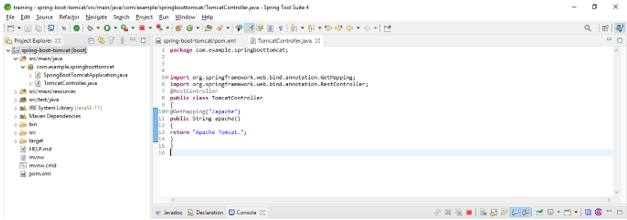
5) Create controller class for application –
Code:
@RestController
public class TomcatController
{
@GetMapping ("/apache")
public String apache()
{
return "Apache Tomcat.";
}
}
6) Run spring boot application –
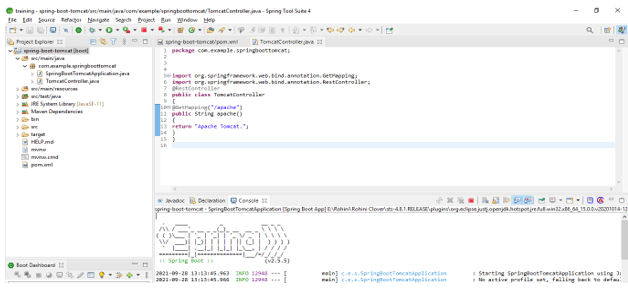
7) Check the output of the application on the browser –
Code:
http://localhost:8080/apache
8) Create a spring boot war file for our project.
9) Add tomcat server dependency –
Code:
<packaging>war</packaging> -- Start and end of packaging tag.
<dependency> -- Start of dependency tag.
<groupId>org.springframework.boot</groupId> -- Start and end of groupId tag.
<artifactId>spring-boot-starter-tomcat</artifactId> -- Start and end of artifactId tag.
</dependency> -- End of dependency tag.
<finalName>web-services</finalName> -- Start and end of finalName tag.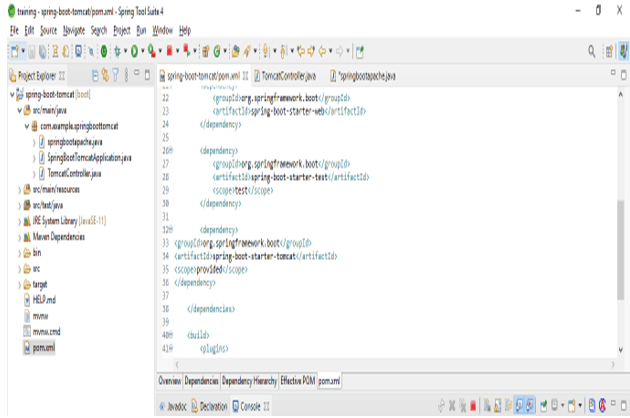
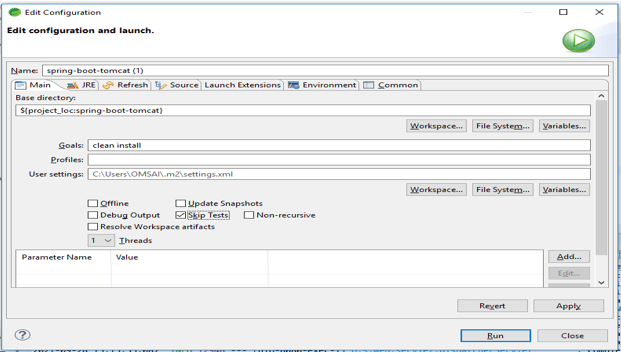
10) Create WAR file of the project –
- First, build the project using a maven build then enter the goals name as a clean install and then click on apply and run.
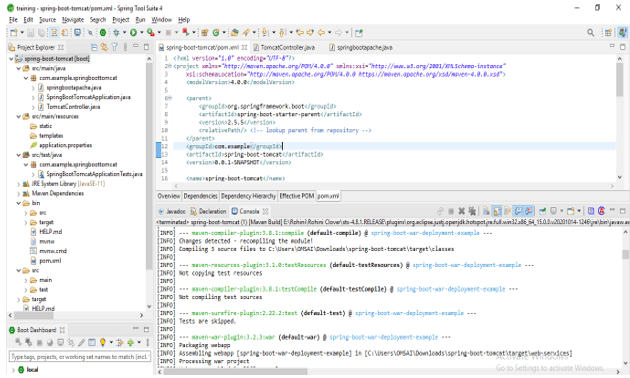
11) Check the build status of the project –
- After running the maven build then we need to check the build status of our application.
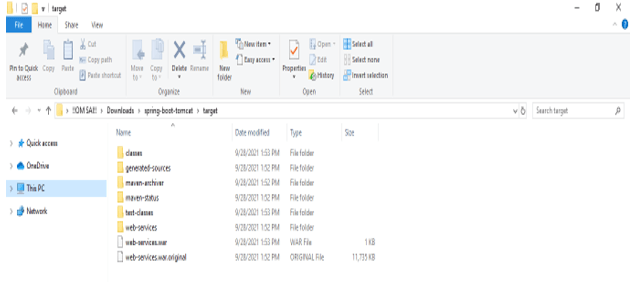
12) Check the war file is generated in a specified location –
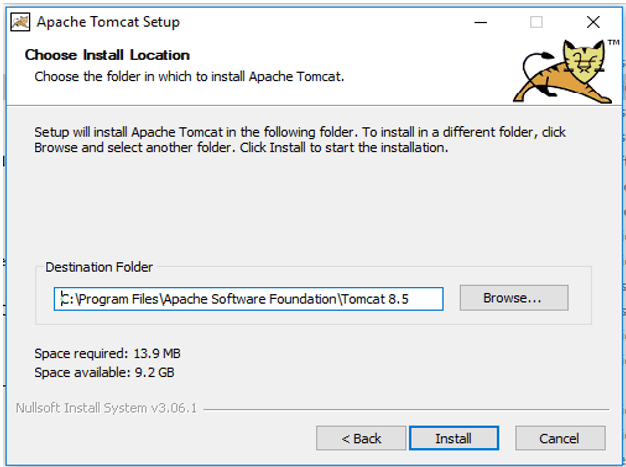
13) Install tomcat server –
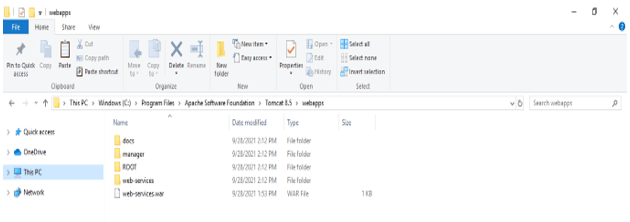
14) Copy the war file and paste the same in the web apps folder of apache tomcat –
15) Open a command prompt and run the startup command –
startup

16) Check war file is deployed successfully or not –

17) After successfully deploying the war file check the application by opening URL –
Code:
http://localhost:8080/apache![]()
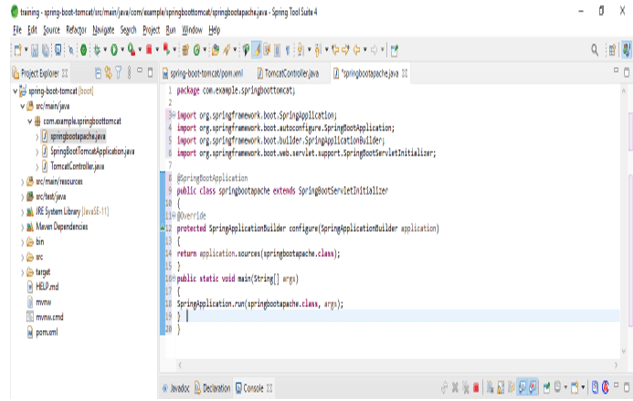
Code for Spring Boot Application class
The below code shows the spring boot application class which was we have implemented for deploying applications on the apache tomcat server.
Code:
@SpringBootApplication
public class springbootapache extends SpringBootServletInitializer
{
@Override
protected SpringApplicationBuilder configure(SpringApplicationBuilder application)
{
return application.sources (springbootapache.class);
}
public static void main(String[] args)
{
SpringApplication.run(springbootapache.class, args);
}
}
Conclusion
It is the most popular servlet container which was used to deploy java applications. To deploy the spring boot application on the apache tomcat server first we need to install the apache server in our server. To deploy the spring application on the tomcat server will involve multiple steps.
Recommended Articles
This is a guide to Spring Boot Tomcat. Here we discuss the definition, What is Spring Boot Tomcat? examples with code implementation. You may also have a look at the following articles to learn more –
