Updated July 1, 2023
Definition of Spring Boot Microservices
As the name suggests, Spring boot-microservices is a group of micro or small services altogether. By using microservices, we can distribute the large application into the smaller process; it works at the process level, but our spring boot work at the component level. Using it, we can make the spring boot application or the service loosely coupled process. To enable this in our project, we have to make the required configurations; otherwise, it will not work as expected. We have so many benefits of using microservices. They are very independent, have their database, and can be written in any programming language irrespective of the core application. In the coming section of the tutorial, we will see its internal working and the full configuration to make the normal spring boot to microservices for beginners.
Syntax:
As we know, it is making our application an independent service, so we have to make some changes to the configuration, then we can continue writing the code as per the requirement.
Let’s take a closer look at the syntax to see below:
@EnableEurekaServerWe are using the spring eureka server in the syntax to add the dependency and annotate the main class with this annotation.
Let’s take a practice look at the syntax to understand it better.
E.g. :
@SpringBootApplication
@EnableEurekaServer
public class TradersApplication {
//
}
As you can see in the above syntax, we have used this annotation in the mainspring boot class to enable the configuration for microservice. In the coming section of the tutorial, we will see its internal working and the practice code using the Eureka server with spring boot for beginners to understand better.
How do Spring Boot Microservices Work?
We already know that microservices is an architecture that allows us to create and build the application into a smaller piece of services. Also, it makes our project a loosely coupled process; it has many benefits, like it is very independent of its core application, and if any other third party uses our service to consume data, they can easily use this without making any changes to it. In this section, we will see one practice example of how to make this happen and start using it.
Let’s get started.
1. Suppose we have one shopping web application with different modules like order server, cart server, account server, and item server. Without microservices, we have a monolithic architecture where all the functions are built into one project. That means if one part of the application breaks, it will stop the whole application from accessing, but this is not the scenario in the case of microservices architecture. We have sorted services for all these, which will be independent of each other and run independently without interfering with other applications.
2. So in this, we will see how we can make the service as microservices using this example see below:
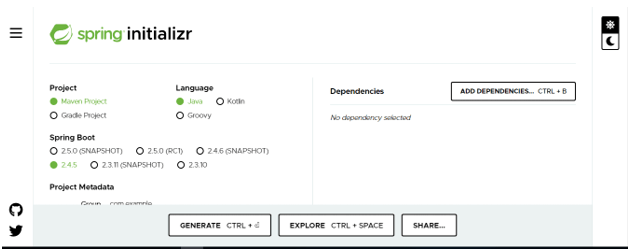
3. First, we have to make the spring boot project from scratch; also, we can use the spring initializer to do so. Follow the below link and complete the required application.
URL: https://start.spring.io/
4. Now we have to add the required dependency to our project like below; Add this into your build file.
E.g.:
org.springframework.cloud
spring-cloud-starter-netflix-eureka-server
5. After this, we have to make the main spring boot application with this annotation but remember we have the required dependency to treat our service as microservices.
Code for main class:
import com. test.Traders. entity.Student;
import org.springframework.boot.SpringApplication;
import org.springframework.boot.autoconfigure.SpringBootApplication;
import org.springframework.scheduling.annotation.EnableScheduling;
import java.util.*;
@SpringBootApplication
@EnableEurekaServer
public class TradersApplication {
public static void main(String[] args)
{
SpringApplication.run(TradersApplication.class, args);
System.out.println(" ");
}
}
As you can see in the above code, we have added the @EnableEurekaServer dependency to the main class, enabling the eureka-server for us in the spring boot. Mentioned the below configuration in the application file; this is necessary:
Code for the application Properties:
eureka.client.register-with-eureka=false6. Now, we have to make one more project from the spring initializer and name it as Item service. This will be the independent service for the core application, which will be responsible for handling the item-related things for the service.
7. Now give a name to the service item into the application property file like below:
Code for item application property file:
spring. application.name=item-service8. Always remember the port for other the property should be different; otherwise, it won’t run and will create a problem for us.
9. After making all the changes, we can start running both applications together and monitor the logs for each of them. If they are running fine after running, you will see the below logs on the console of the spring boot application see below:
Output:

These should be the outputs for both apps.
Points to remember while running the application and using it:
- Microservices is an independent architecture.
- It allows us to distribute the application. Also, we can make small modules for a different part of the application.
- But it also has a disadvantage because as we make the different services in the application, we have to maintain and monitor each. If the service is not working, it will impact the respective service and others consuming data from it.
- We can divide our applications and create different instances for each of them.
Conclusion
As we have seen, it is very useful to treat our application as an independent module with all the code separate; we can reuse the microservices at other places if required. There is dependency; it also makes the development process very fast and easy to handle for the developers. If we skip any of the configurations in the application, then the application will not work and throw exceptions for us.
Recommended Articles
We hope that this EDUCBA information on “Spring Boot Microservices” was beneficial to you. You can view EDUCBA’s recommended articles for more information.
