Updated April 15, 2023
Introduction to Spring Boot Admin
Spring boot admin is the web application that was used to manage and monitor the web application, each client in will consider as a client and it will register at the admin server. Basically, it is the community project used to manage the application of spring boot, those all application is registered with spring boot client of admin and discovered with the spring cloud. To create a project first, we need to set up our server. Spring boot admin server is able to run the web flux or servlet application.
What is Spring Boot Admin?
- As we know it is a community project which was used to manage the web-based and spring boot application.
- We can register our client with the admin server. To register the client, each client needs the spring jars actuator.
- The endpoint which was provided by the actuator jar is pulled by using the admin server of spring boot.
- The actuator monitor is interacting with our application. Spring boot is including the number of endpoints and also we can add our own endpoints.
- Monitoring of our application by using an actuator endpoint is difficult. Because we have an N number of applications. Every application contains the separate endpoints of the actuator, so it will make the monitoring a little bit difficult.
- We can monitor the microservice application.
- To manage and monitor the application by using the server we need to add the starter dependency and need to point the URI in properties of an application file.
- To monitor the application, we need to add the actuator of spring boot endpoints of our microservice application.
- Spring boot actuator is helping to manage and monitor the spring boot services of individual applications.
- It is a simple spring boot project. The endpoint of spring boot is providing lots of insights regarding the application.
- If we are running many applications, then monitor of each application by hitting each endpoint is very tedious. To avoid this problem, we are using a server in our application.
- To create a server module, we need to add maven dependency in our application.
- To develop an application, we need to set up the server first after creating the server we are adding a client to the admin server.
- After adding maven dependency and creating admin server and client we need to do a security configuration.
- We can also set the notification which was received from the server. Following are the notifier available at the time of developing the application.
1) Let’s chat
2) OpsGenie
3) Email
4) Pager duty
5) Slack
6) Discord
7) Telegram
8) Microsoft teams
9) HipChat
- To use email notification in the application we need to add mail starter dependency in pom.xml file.
- Using this notification, after going our client offline the mail is sent to the registered mail address which was configured in the configuration file.
Admin Server Setup
- Below is the step to create an admin server setup.
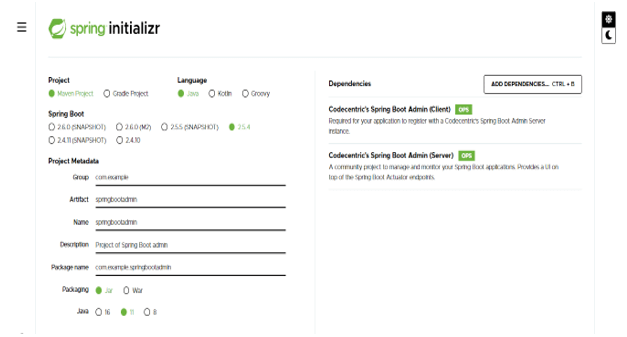
1) Create a new project template using a spring initializer and give the following name to the project metadata.
Group – com. example
Artifact name – springbootadmin
Name – springbootadmin
Description – Project of spring boot admin.
Package name – com. example.springbootadmin
Packaging – Jar
Java – 11
Dependencies – concentric spring boot admin client and concentric spring boot admin server.
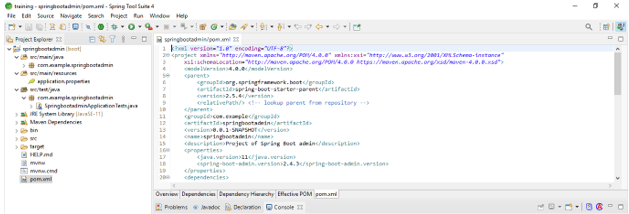
2) After generating the project extract files and open this project by using the spring tool suite
- In this step, we have to extract the zip file and opening the project in the spring tool suite.

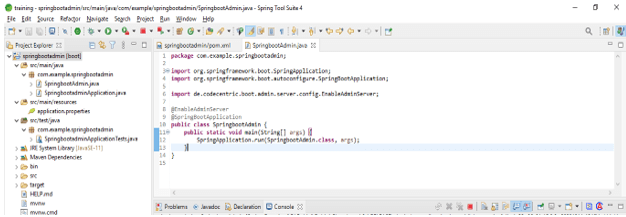
3) After opening project using spring tool suite check the project and its files –
- After opening the project, we have to check all the project files. We need to check the java main and pom.xml files.
4) Add admin server dependency –
- After opening the project next step is to add the admin server dependency in pom.xml file.
Code –
<dependency> -- Start of dependency tag.
<groupId>de.codecentric</groupId> -- Start and end of groupId tag.
<artifactId>spring-boot-admin-starter-server</artifactId> -- Start and end of groupId tag.
</dependency> -- End of dependency tag.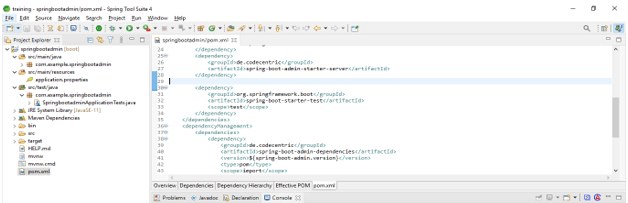
5) After adding the server dependency enable admin server annotation
In this step, we have to enable the annotation of the admin server.
Code:
@EnableAdminServer -- Annotation of admin server.
@SpringBootApplication -- Annotation of spring boot application.
public class SpringbootAdmin {
public static void main /*project main method */ (String[] args) {
SpringApplication.run (SpringbootAdmin.class, args);
}
}
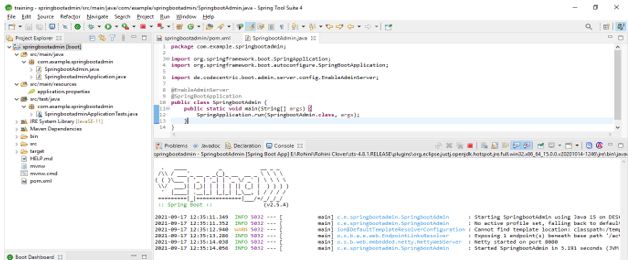
6) Run the spring boot admin app
7) After running the app open the browser and run the application using default port no.
http://localhost:8080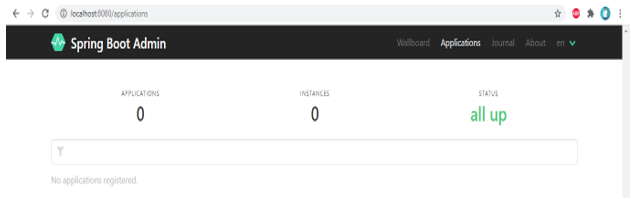
8) Add admin server-client dependency –
- After opening the project next step is to add the admin server-client dependency in pom.xml file.
Code:
<dependency> -- Start of dependency tag.
<groupId>de.codecentric</groupId> -- Start and end of groupId tag.
<artifactId> spring-boot-admin-starter-client</artifactId> -- Start and end of groupId tag.
</dependency> -- End of dependency tag.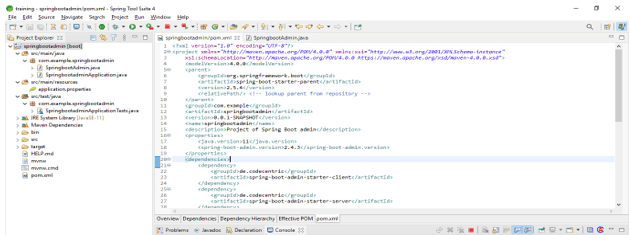
9) After adding admin server-client dependency next step is to create the actuator endpoint. At the time of creating the actuator endpoint, we have to provide the URL of the admin server.
Code:
management:
endpoints:
web:
exposure:
include: '*'
endpoint:
health:
show-details: always
spring:
boot:
admin:
client:
url: http://localhost:8080
application:
name: music Service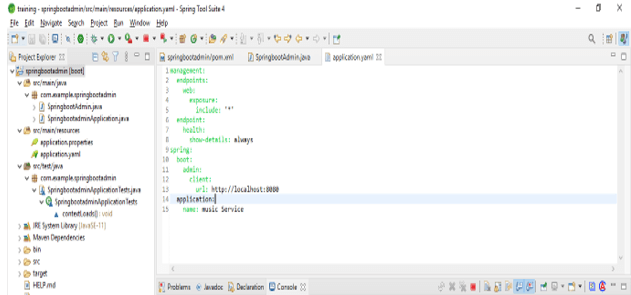
10) After creating the actuator endpoint run the spring boot admin project in the spring tool suite.
- In this step, we are running our project in the spring tool suite are as follows.
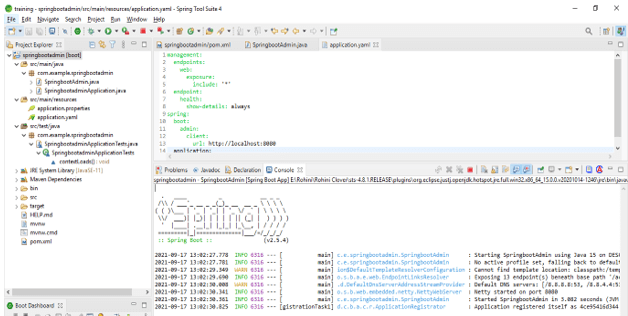
11) After running spring boot admin app open the browser and run the application using default port no.
http://localhost:8080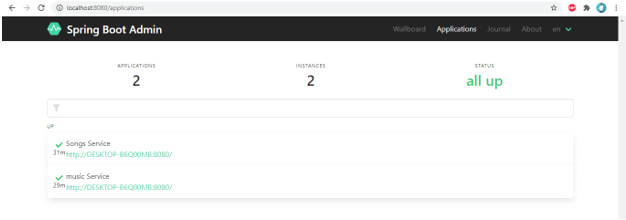
Recommended Articles
This is a guide to Spring Boot Admin. Here we discuss the definition, What is Spring Boot Admin? examples with code implementation. You may also have a look at the following articles to learn more –
