Updated August 25, 2023

Introduction to Shiny Effect Photoshop
With Photoshop Shiny Effect, you can turn a dull, gloomy image into one that shines. You can make the paint stand out and shine by changing the layer properties of the painting. Let us discuss ‘How we can create Shiny Effect in Photoshop?’ very quickly and interestingly. You must follow some simple steps to apply this effect to any text.
Creating Shiny Effect in Photoshop
Creating Shiny Effect in Adobe Photoshop is not a very big task. You have to follow these simple instructions, and by following these steps of instruction, you will get a good result for shiny effects. So let us start our learning.
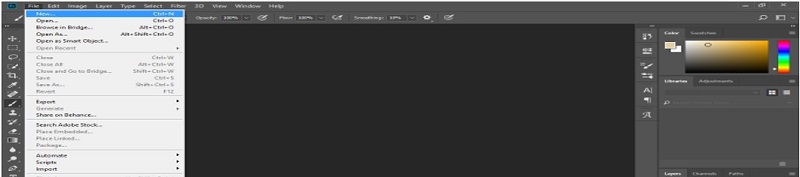
Step 1: First of all, we will make a new document for our learning. For further documents, Go to the Menu bar and click on File Menu. A drop-down list of some options will be open. Choose the ‘New’ option from here.
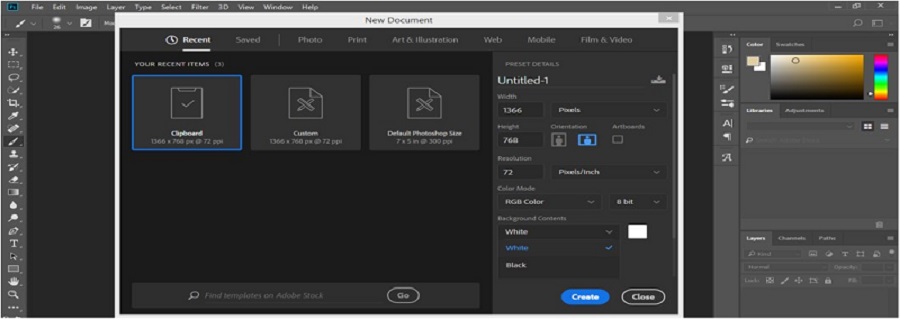
Step 2: A New Document Box will open. Make the setting of the page according to you and take White color as the background color of this document. Now click on Create tab of this dialog box to apply these settings.
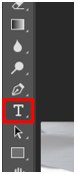
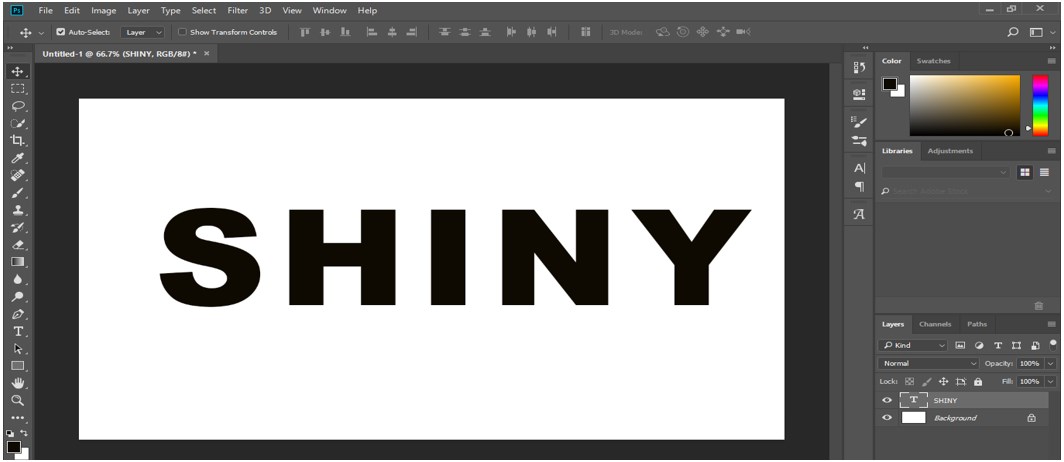
Step 3: Now click on the Text tool of the tool panel of this software, which is at the left corner for typing a text:
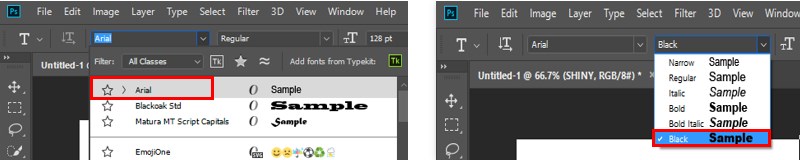
Step 4: Take ‘Arial’ as the font style and Black as the style of Arial font.
Step 5: Take Black color as text color from the property bar of the text tool.
Step 6: Now, type a text on which you want to give Shiny Effect. Using the move tool, I will type ‘SHINY’ as my text for the shiny effect and adjust it at the center of the working area. Adjust the size of this text according to you by pressing Ctrl+Shift > to increase the size of the text or press Ctrl + Shift + < for decreasing the size of the text.
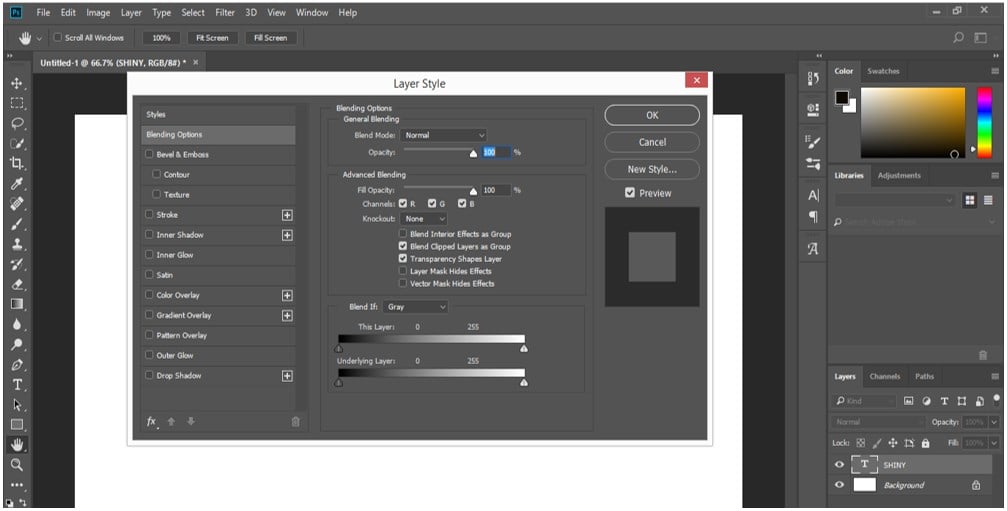
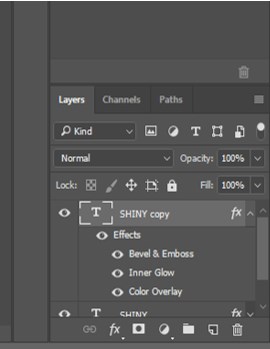
Step 7: Go to the layer section of this software, which is in the right corner, and double-click on the text layer. A dialog box of Layer Style will open.
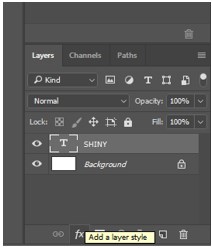
Step 8: You can also open the layer style box by clicking on the layer style icon at the bottom end of the layer section.
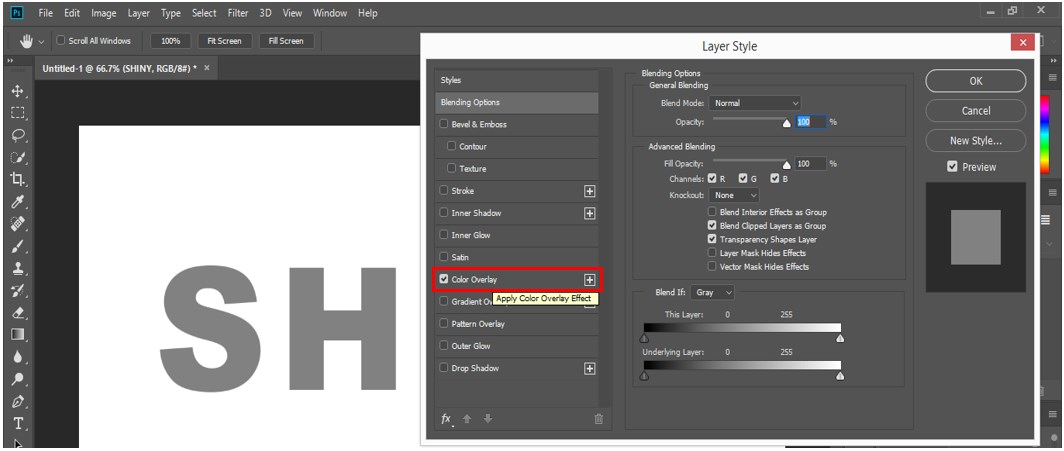
Step 9: Now click on this layer-style dialog box’s ‘Color Overlay’ effect option.
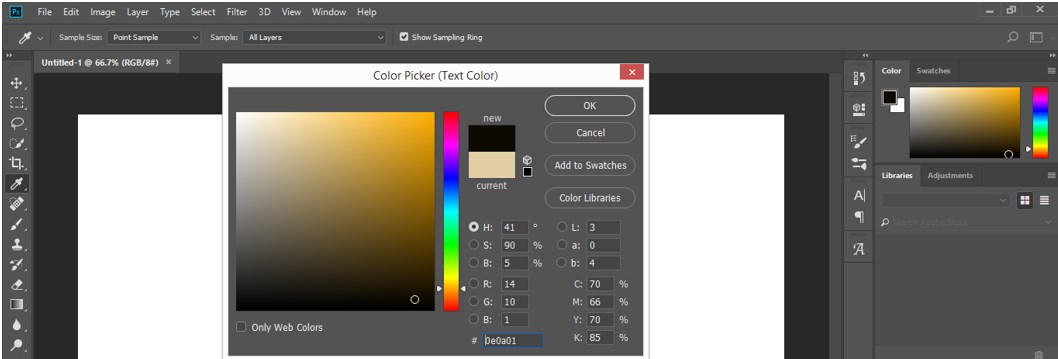
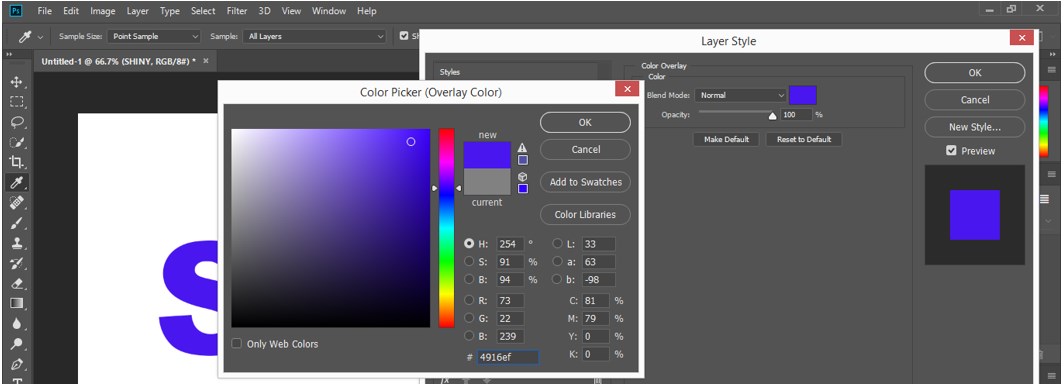
Step 10: And click on the color box of this effect. A Color Picker box will be open. Choose your desired color from here, which you want to give on your text, or you can type the code of the particular color in the color code box.
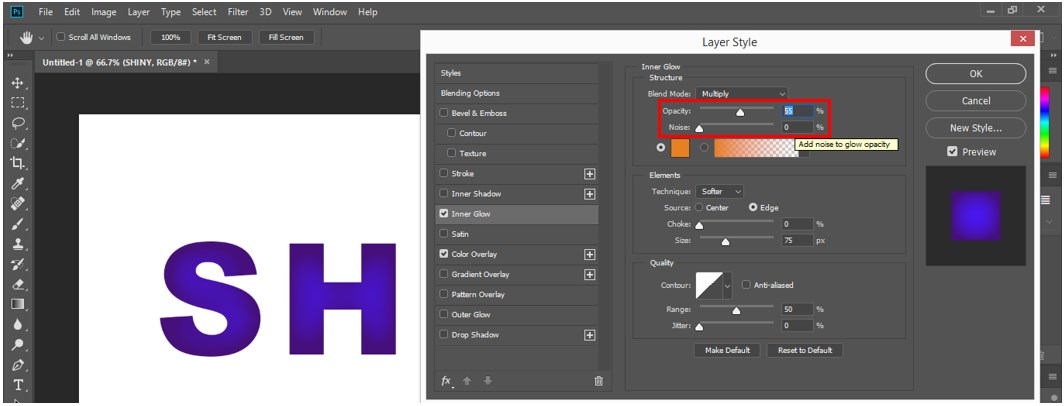
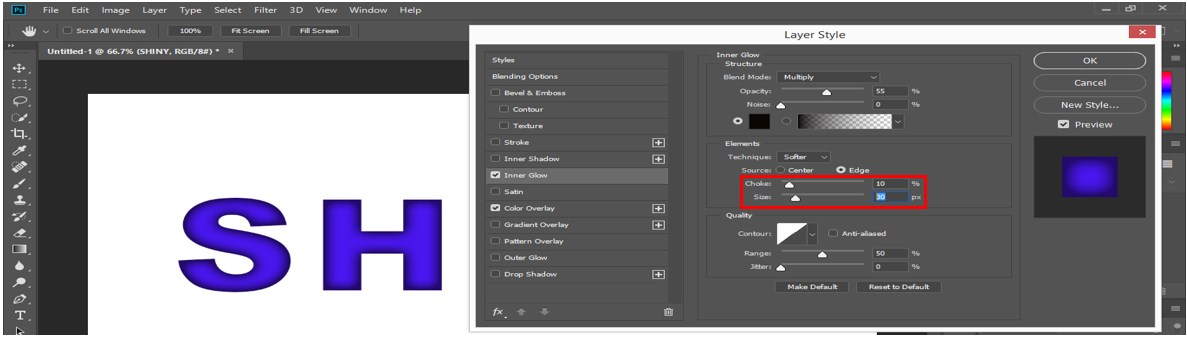
Step 11: Now click on this layer style box’s ‘Inner Glow’ effect.

Step 12: Here, we will set some parameters for this effect. Take ‘Multiply’ in the blend mode option, set the opacity at 55%, and make Noise at 0%:
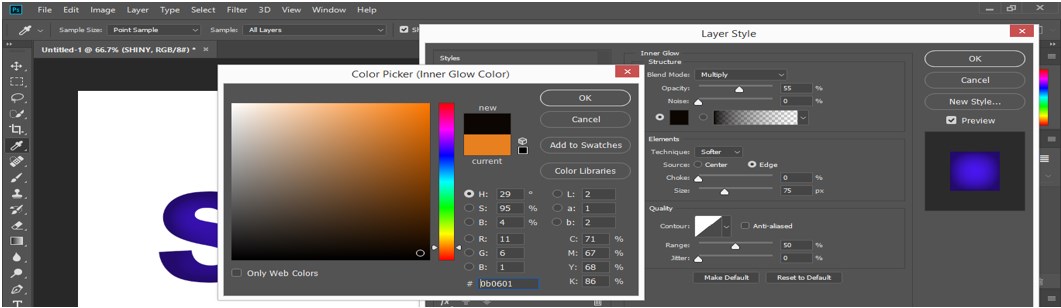
Step 13: Click on this effect’s color box and choose black color for the inner glow from the Color Picker dialog box. Press the Ok tab of this color picker dialog box:
Step 14: In the Elements section, make Choke at 10% and size at 30 px:
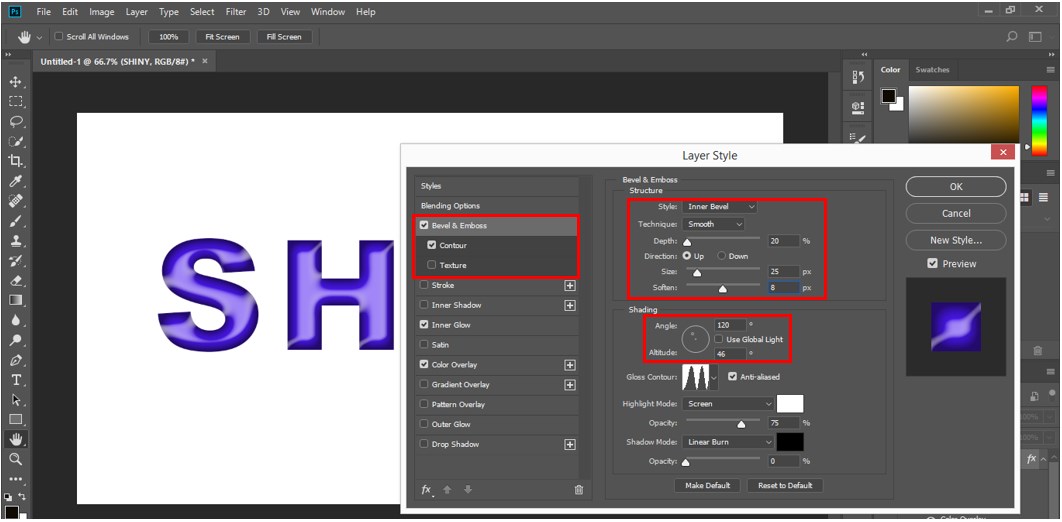
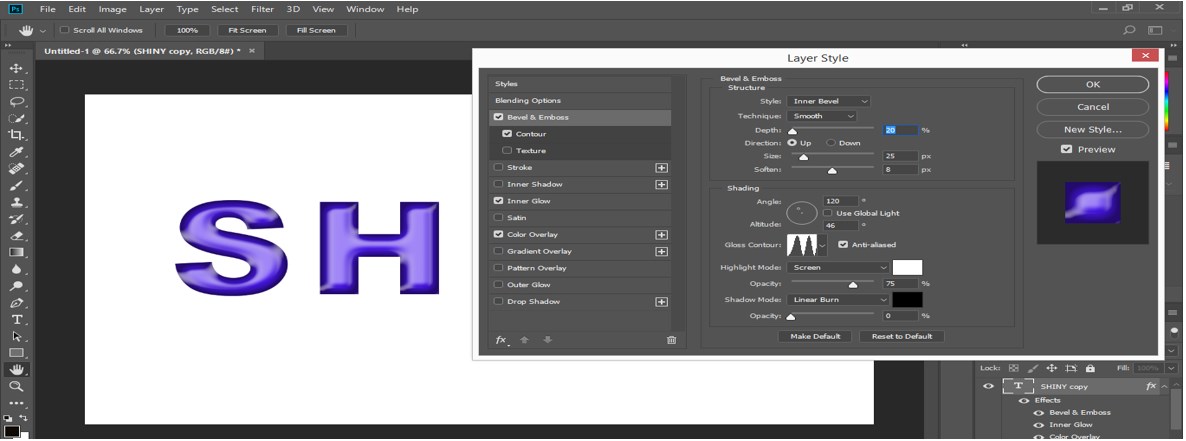
Step 15: Now, let us move to the next effect, Bevel & Emboss, and we make some settings in this effect to enhance the shiny effect on our text. Take ‘Inner Bevel’ in the style of this effect and ‘Smooth’ in the Technique option, set Depth up to 20%, size up to 25 px, and make Soften up to 8 px. In the ‘Shading’ section, make an angle of 120 degrees and an altitude of 46 degrees. Now take ‘Linear Burn’ in Shadow mode and make opacity 0%.
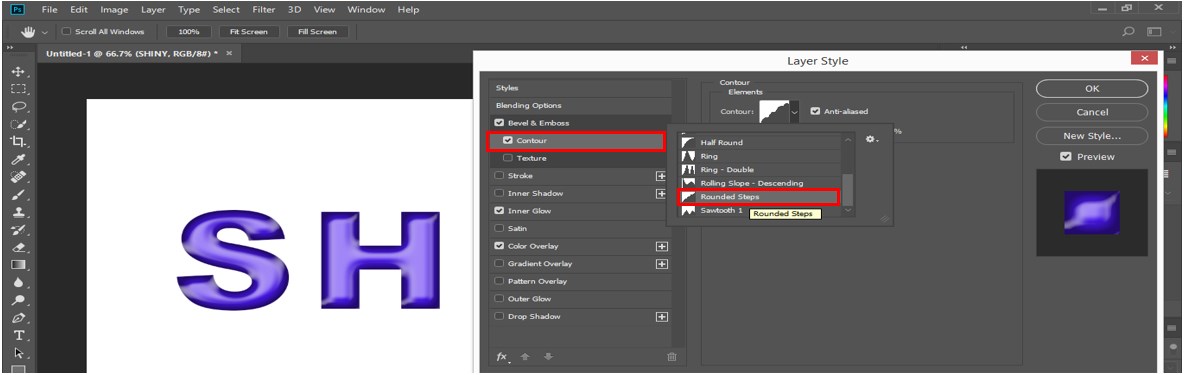
Step 16: Now click on the ‘Contour’ option of the Bevel & Emboss effect and click on the ‘Rounded Steps’ option in the Contour option for a clear look at the shiny effect.
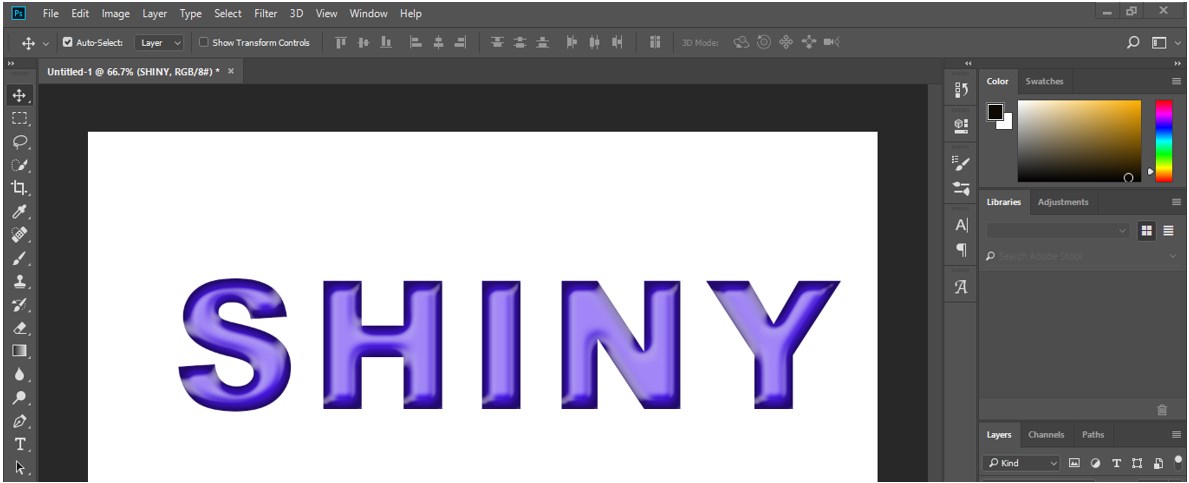
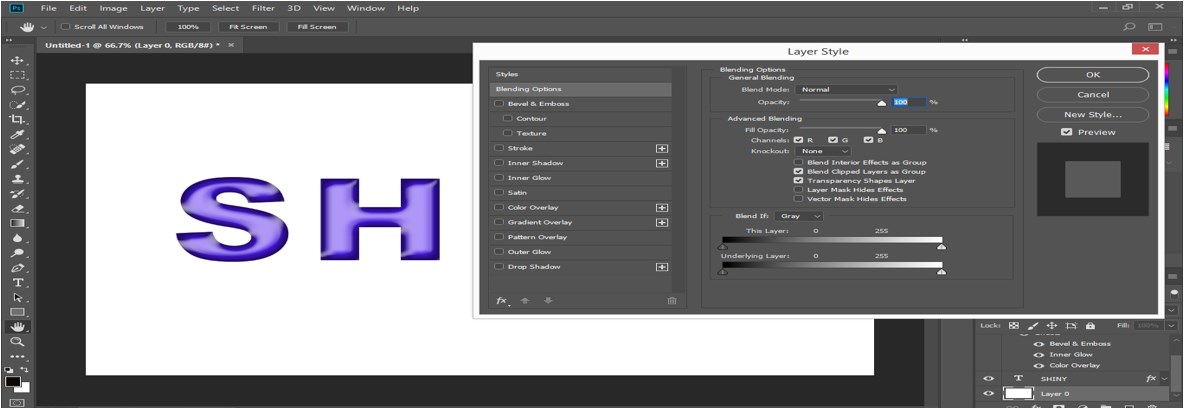
Step 17: Now, click on the Ok tab of this layer style box to apply these effects. Our text will look like this when we press the Ok tab.
Step 18: Now go to the layer section of this software and make duplicate layers of this text layer. To make a duplicate layer, select the text layer and press the Ctrl + J button from the keyboard.
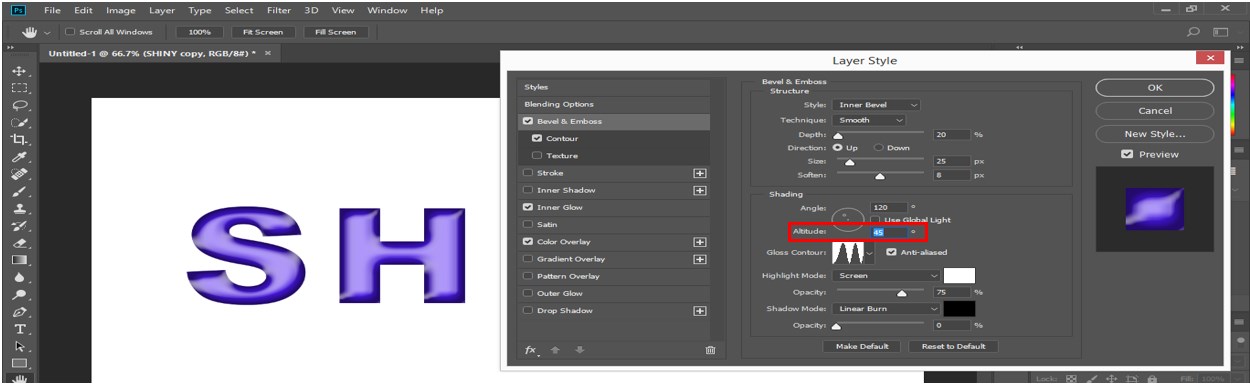
Step 19: Now select the copy layer of our text layer and make double click on the ‘Bevel & Emboss’ effect of this layer. The ‘Bevel & Emboss effect’ layer style dialog box will be open.
Step 20: Now, we will make one change in the Bevel & Emboss effect of this copy layer of the text layer, that is, make the Altitude at 45 degrees.
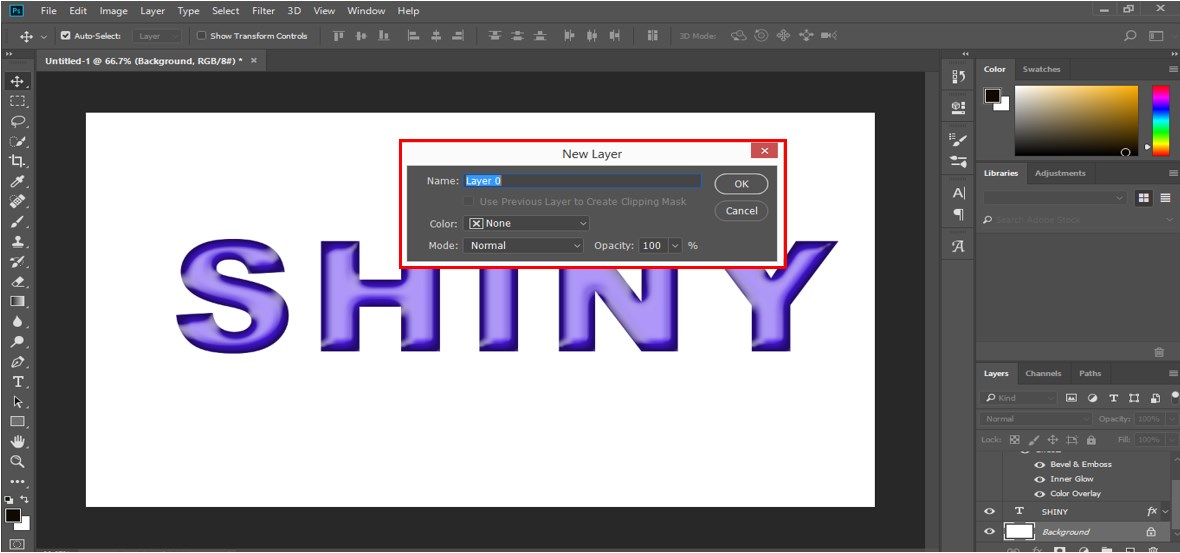
Step 21: Now go to the layer section and double-click on the background layer to make it a simple layer. A new layer dialog box will be open. Give a name to this layer according to you and press the Ok tab of this dialog box:
Step 22: Now make double click on this background layer (layer 0) for the Layer style box:
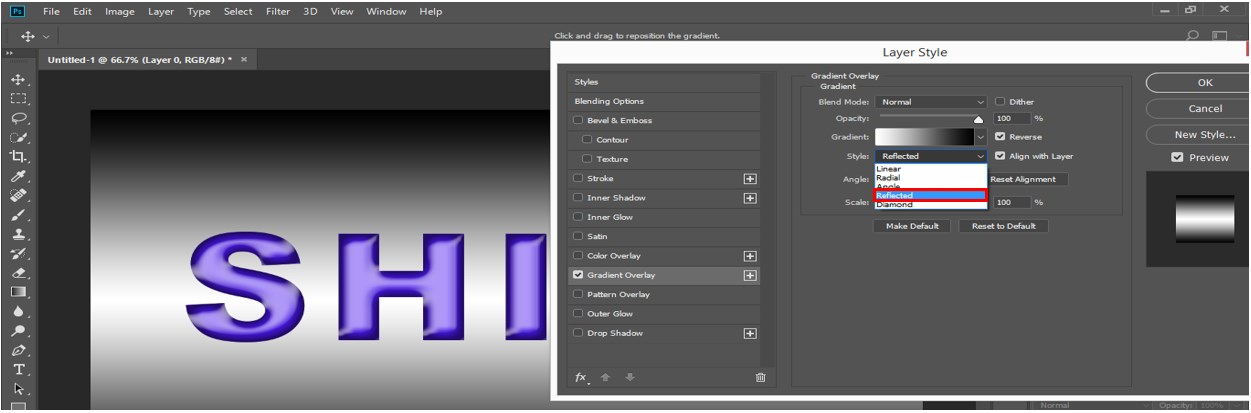
Step 23: Click on the ‘Gradient Overlay’ effect of this dialog box to increase the smoothness of the shiny effect of text and choose the gradient color according to you. I will combine black and white colors for my gradient effect. Now choose ‘Reflect’ in gradient style. You can choose any of the styles which suit your text:
Step 24: Now click on the Ok tab of this dialog box to apply the setting. This is the final Shiny Effect on the text in Photoshop software.
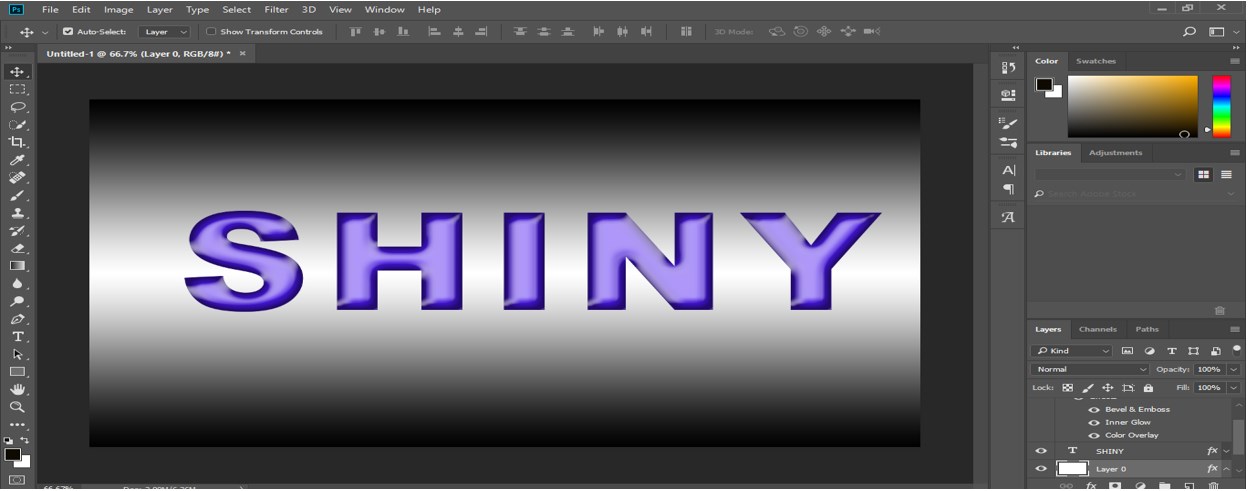
You can apply this Shiny effect on any project object in Photoshop software and make it look more effective.
Conclusion
After looking at this article, you can easily understand ‘what is Shiny Effect?’ in Photoshop and ‘How you can apply it to any object of your project in Photoshop software’? Learning these types of effect features of Photoshop will help you polish your graphic designing skills.
Recommended Articles
This is a guide to Shiny Effect Photoshop. Here we discuss the Introduction and How you can apply shiny effect photoshop in the step by step manner. You can also go through our other related articles to learn more –
