Updated August 16, 2023
Remove Blank Rows in Excel Meaning
When we say “remove blank rows in Excel,” we mean deleting or removing any row in an Excel worksheet that does not contain any data or values. This means that all the cells in that row are blank, not providing helpful information.
These rows can sometimes be random or left behind after data manipulation, making the worksheet look messy and difficult to read. By removing these unnecessary rows, we can clean the worksheet and make it easier to read and study.
How to Remove Blank Rows in Excel?
Let’s understand the different alternatives for removing empty rows in Excel.
There are six methods to remove empty rows in Excel.
1. Remove Blank Rows Manually
2. “Go to Special” Method
3. Excel Filter Functionality
4. Sort-by-column Method
5. Remove Blank Rows Using Power Query
6. Remove Blank rows in Excel using shortcut keys
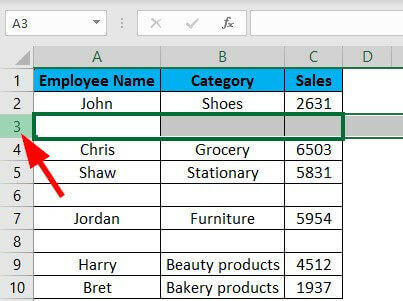
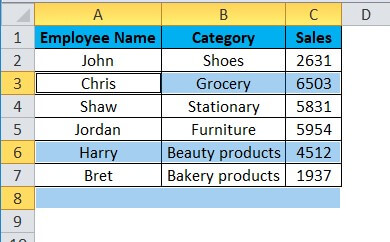
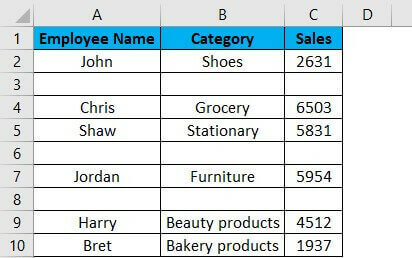
Example #1 Remove Blank Rows Manually
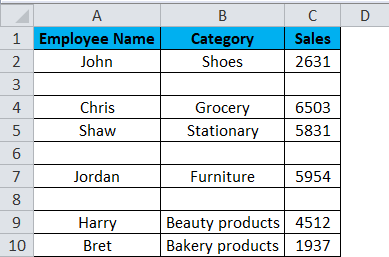
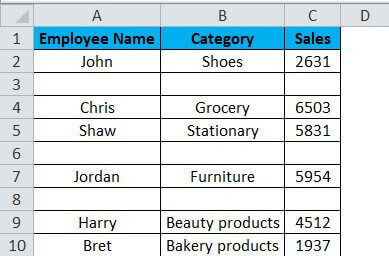
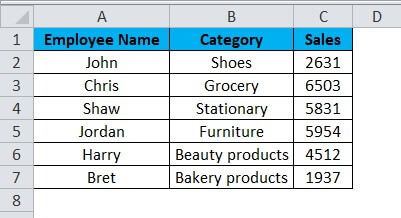
The table contains information about employee sales through three columns: Employee Name in column A, Product Category in column B & Sales in column C. We need to delete empty rows in this table range manually.
Solution:
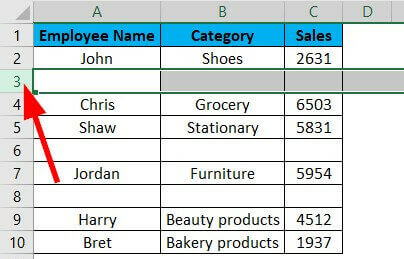
Step 1: Select Row 3 by clicking the number 3 (the blank row).
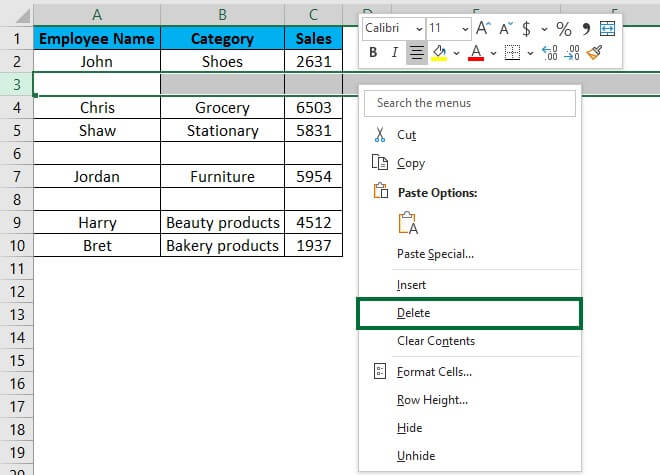
Step 2: Right-click anywhere on this row and select the Delete option.

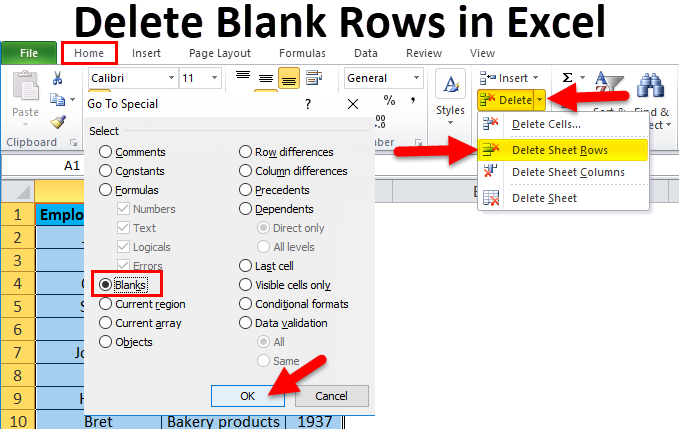
Example #2 Go To Special Method
The table contains Employee Name in column A, Product Category in column B & Sales in column C. We must delete empty rows in that table range with the “Go to Special” function In Excel.
Solution:
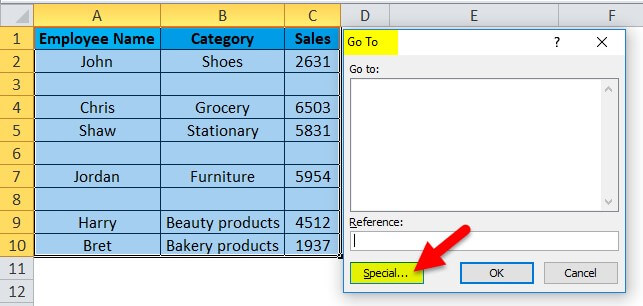
Step 1: Select the entire table. Press the F5 function key.
The “Go to” dialog box appears.
Step 2: Click on ‘Special.’
The “Go To Special” dialog box appears.
Step 3: Click the ‘Blanks’ radio button and press OK.
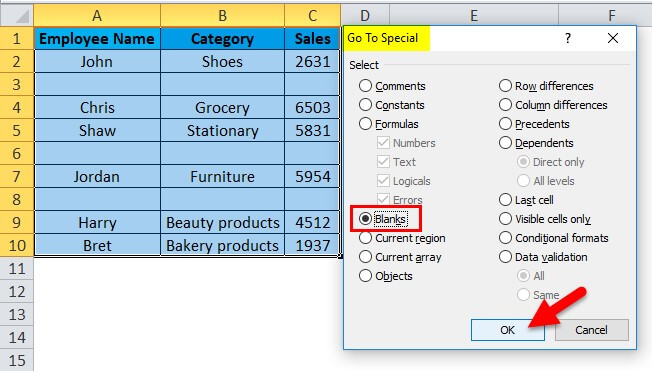
You can see all the empty cells in blue color highlighted format.

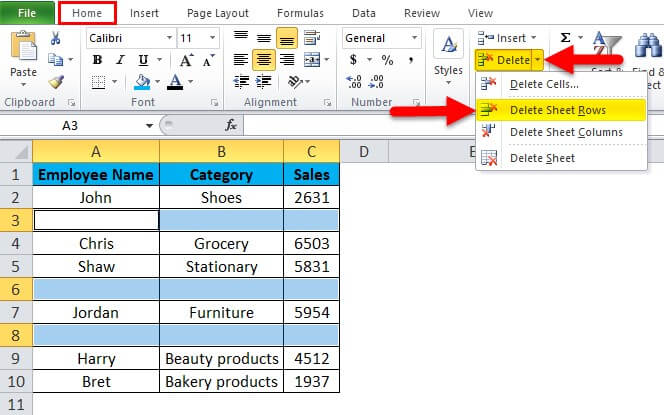
Step 4: Now, click the Home Tab from the Cells section and Delete > Delete Sheet Rows.

After this, the “Go To Special” dialog box appears per Step 3.
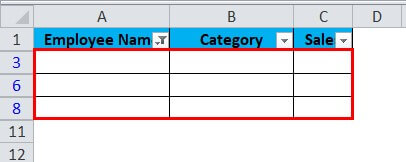
Example #3 Use of Excel Filter Functionality Method
The data in the following table represent Employee Name in column A, Product Category in column B & Sales in column C. We need to delete blank rows in the following table with the help of “EXCEL FILTER FUNCTIONALITY” in Excel.
Solution:
We have to activate the Excel Data Filter for the data table.
Step 1: Select the entire data range or table range, and click the Filter button in the Data Tab in the Excel ribbon.

When you click Filter, each column in the first row will automatically have a small drop-down button or filter icon added at the right corner of the cell.
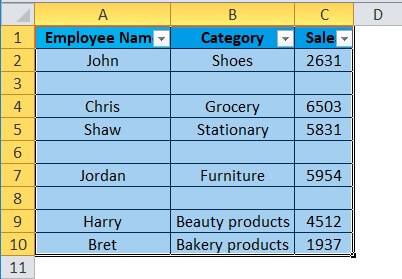
A drop-down arrow will be visible beside every column heading.
Step 2: Click the drop-down in the employee name column.
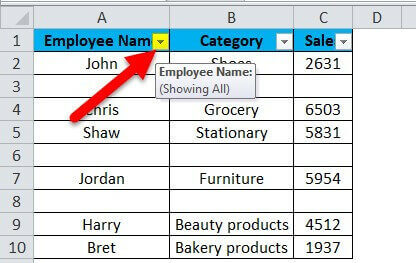
Step 3: Now, uncheck ‘Select All,’ check only the ‘Blanks’ option at the end, and click OK.

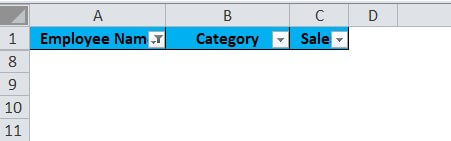
Once you have applied the Filter, only the entire blank rows will be visible.
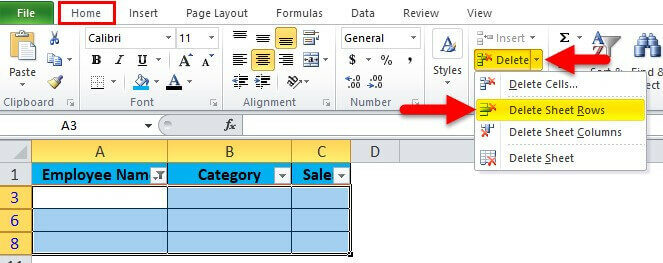
Step 4: Select all the empty rows and remove them by pressing the Delete Sheet Rows button of the Home Tab.
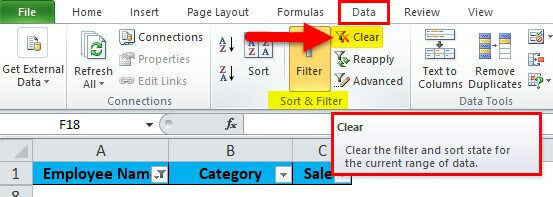
Step 5: Clear the applied Filter by following the below-mentioned steps:
Go to the Data Tab > Sort & Filter group and click Clear.
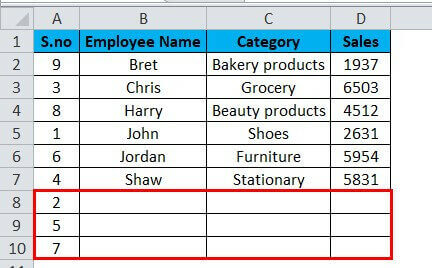
Example #4 Sort by Column Method
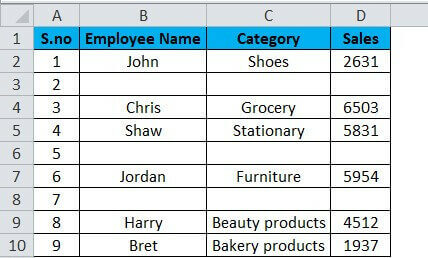
The below-mentioned table contains Employee Name in column A, Product Category in column B & Sales in column C. We must delete empty rows in the following table range using the Excel “SORT-BY-COLUMN” method.
Solution:
We must insert a column before the Employee Name column and enter serial numbers. This procedure is necessary as getting rows back in order after using this method will be difficult.
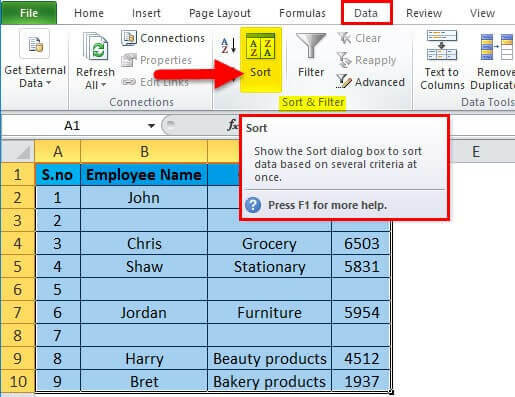
Step 1: Select the data range or table, including headers, and click the Sort button in the Sort & Filter section of the Data Tab.
A Sort dialog box appears.
Step 2: Select the option for Employee Name in the Sort By option and click OK.

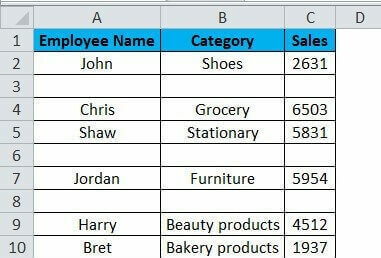
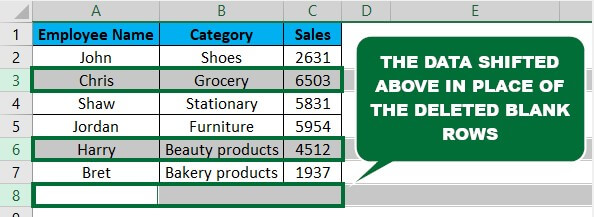
After sorting, data appears as below.
The rows with serial numbers 2,5 and 7 are blank rows that shift toward the end of the table.
Step 3: Select the blank rows and click the Delete button on the keyboard.
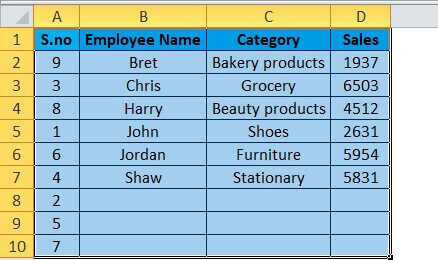
After deleting the rows, the data will be like this.

Before using the sort-by-column method, the order of employee names was “John, Chris, Shaw,” and now it is “Bret, Chris, Harry, etc.”
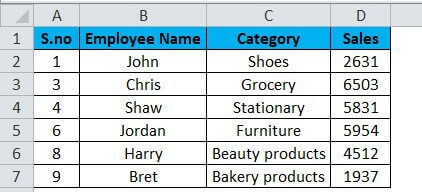
Step 4: Repeat Steps 1 & 2, but this time select the option for S.No in the Sort By option and click OK.

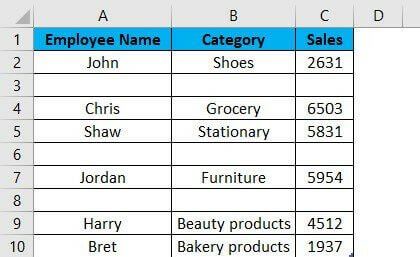
Example #5 Remove Blank Rows Using Power Query Editor
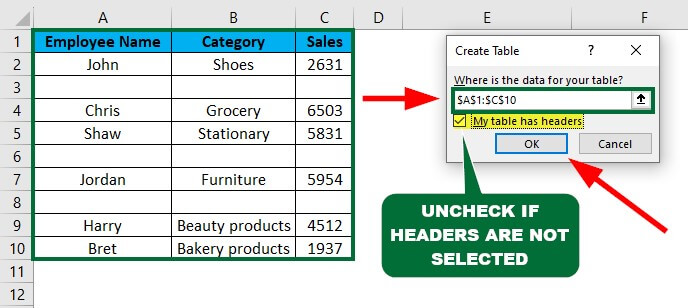
The following table provides a breakdown of sales information in three columns: Employee Name in column A, Product Category in column B & Sales in column C. We need to delete rows containing no data in the following table range with the help of POWER QUERY EDITOR in Excel.
Solution:
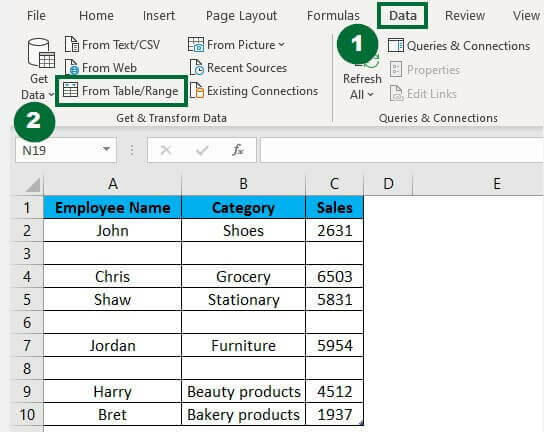
Step 1: Go to Data Tab and click From Table/Range option from the Get and Transform Data section.
Step 2: Select the range or table (A1:C10) from which you wish to remove blank rows and click OK.
The Power Query Editor dialog box appears.
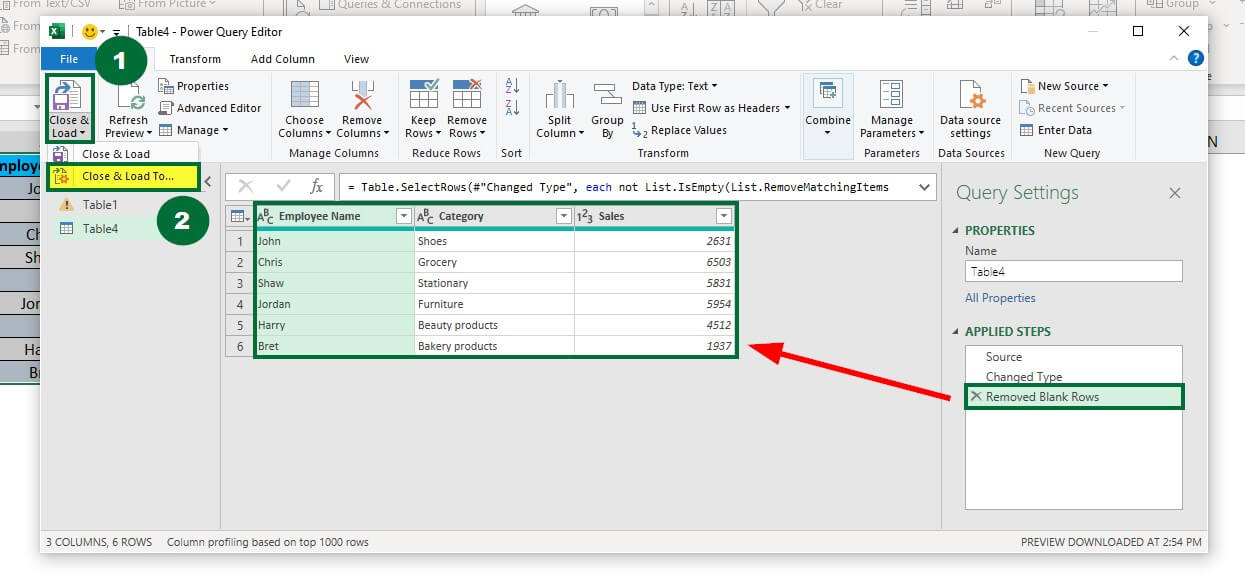
Step 3: Select Remove Blank Rows from the Remove Rows option.

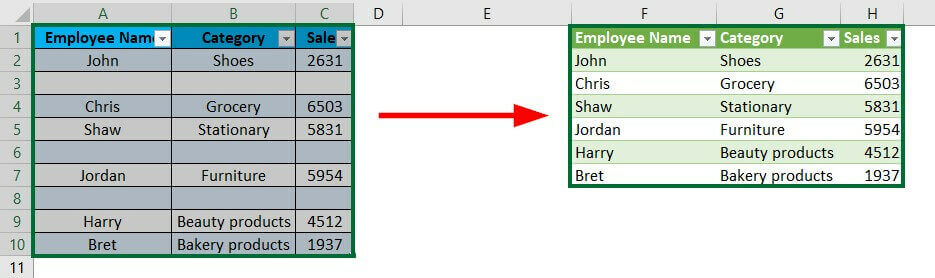
The Power Query Editor changes the data by excluding the blank rows.
Step 4: To Import the new data, close the power query editor by clicking “Click & Load To” from the Close & Load option.
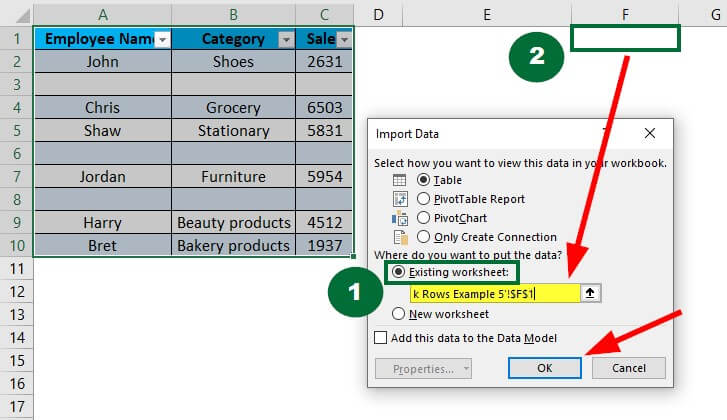
Step 5: Select a desired cell (F1) to import the new data in the “Where do you want to put the data?” section of the Import Data dialog box and click OK.
Example #6 Remove Blank Rows using Shortcut Keys
The table elaborates on the employees’ sales performance for different categories of products in three columns, i.e., Employee Name in column A, Product Category in column B & Sales in column C. We need to delete blank rows in the following table range with the help of SHORTCUT KEYS in Excel.
Solution:
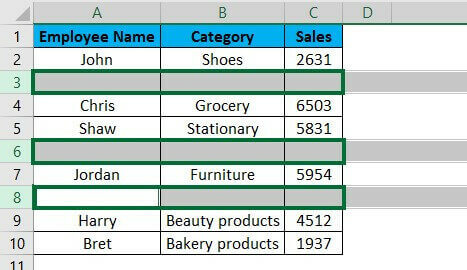
Step 1: Select the first row that needs removal, i.e., 3rd, the one per the image below.
Step 2: Press CTRL and then continue to select the blank rows without leaving the hold on the CTRL key.
Excel will help you select multiple rows individually in case there are unnecessary rows in between, per the image below.
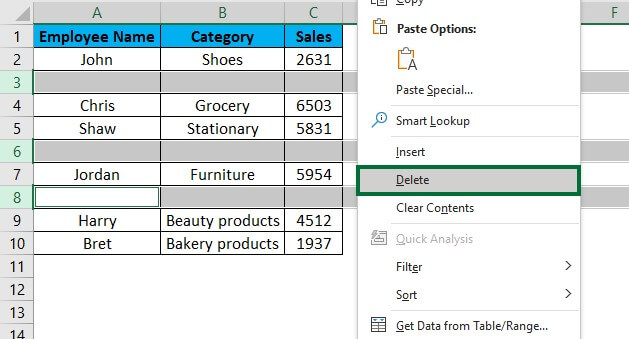
Step 3: Right-click anywhere on this row and select the Delete option.
Things to Remember About Remove Blank Rows in Excel
- It’s always better to back up data (by making copies in other sheets) before deleting a blank row in Excel.
- Blank rows in Excel worksheets or tables can cause problems using Excel tools and functions like sorting or removing duplicates.
- Use the appropriate method for removing blank rows according to the length and complexity of your data.
- Double-check your data formatting after removing blank rows to ensure consistency and accuracy.
- Consult the team members before removing blank rows in a shared spreadsheet to avoid confusion or data loss.
Frequently Asked Questions(FAQs)
Q1. What are the shortcuts to open the “Go To” dialog box in Excel?
Answer: In Excel, you can use several shortcut keys to open the “Go To” dialog box, which allows quick navigation to specific cells. Here are a few options:
- Press the “F5” key on your keyboard.
- Press the “Ctrl” + “G” keys on your keyboard.
- Press the “Ctrl” + “Shift” + “F5” keys on your keyboard.
Q2. How to select multiple rows?
Answer: In Excel, you can apply the following methods to select multiple rows:
- Click and drag: Click the first row you require to select, and while holding down the left mouse button, drag your mouse down to select additional rows.
- Shift key: To select multiple rows, click the first row and hold “Shift.” Click the last row to select every row between the first and the last cell.
- Ctrl key: Click on each row to select all the non-consecutive rows by holding the “Ctrl” key.
Recommended Articles
This article is a guide to Remove Blank Rows in Excel. Here we discuss how to Remove Blank Rows in Excel, practical examples, and a downloadable Excel template. You can also go through our other suggested articles –
