Updated April 4, 2023

Introduction to PyTorch pip
pip is the PyTorch build package that helps install the PyTorch and other programming languages on various platforms such as Linux, Windows, and Mac operating systems. In this article, we will try to dive deep into the topic of PyTorch pip and understand what is PyTorch pip, how to install PyTorch pip, how to use PyTorch pip in work, PyTorch pip Code Example and finally conclude our statement.
What is PyTorch pip?
PyTorch pip is the package management system that helps in the installation of various frameworks, packages, languages in the PyTorch build process. This package can be used when you want to install PyTorch on windows, Mac, or Linux operating systems. A pyTorch package that is python package consists of tensor computation functionality as well as tape-based systems such as deep neural networks.
How to install PyTorch pip
When you want to install PyTorch on the windows operating system using pip, you will first have to go for the installation of python. Once python is successfully installed on your system, you can go for following the below steps –
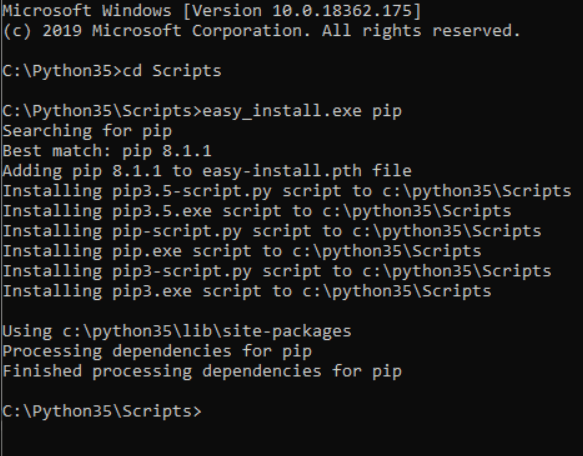
- The first step is to navigate to the existing folder named python37 and then enter it into the inner folder named Scripts with the help of the change directory or cd command.
- Now, installing pip can be done by checking the requirement of a version you want. This can be done by using the command that involves an executable file named easy_install.exe along with the pip command on the terminal or a command prompt. You will return to the previous scripts folder once the dependencies are processed completely, as shown in the below image –
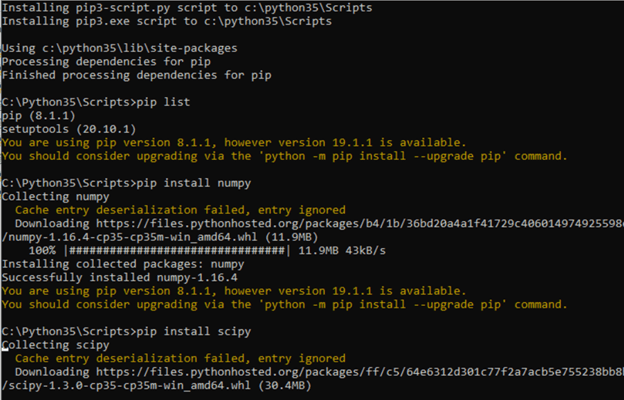
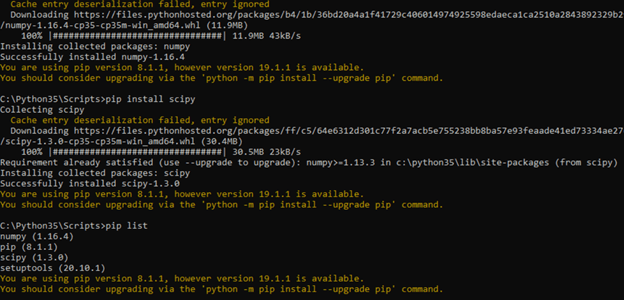
- Now, it’s time to install the numpy package present in python for pip installation. We can use the command pip install numpy command to install the necessary numpy package. There are two possible cases that might happen. First, if the package is already installed in python, then a message saying “Requirement Already Satisfied” will be displayed on the command prompt; else, it will continue for the process of installation. We can check the list of packages existing and installed by using the command “pip list,” as shown in the below image. There will be a display of a successful message once the downloading process is finished. After this, you will be navigated back to the scripts folder.
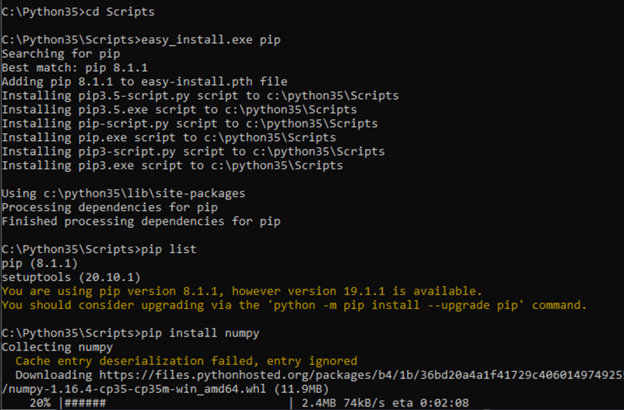
- Now, we will need to install one more package name scipy, to install pip. For this, we will have to make use of the command pip install scipy, as shown in the below image. Again, the same thing will repeat; you will be navigated back to the scripts folder after the download process. Sample output from the link after choosing my parameters –

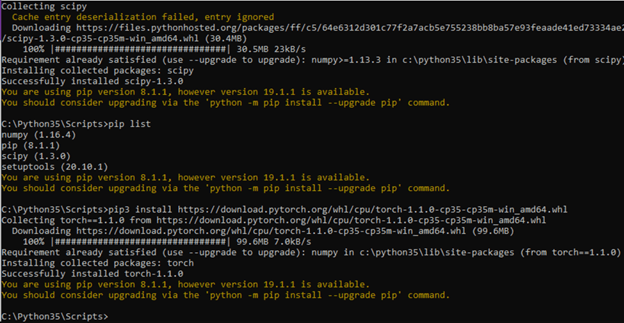
- It’s time to verify all the installed packages that will be useful for PyTorch. We can check them by using the pip list command as shown below –
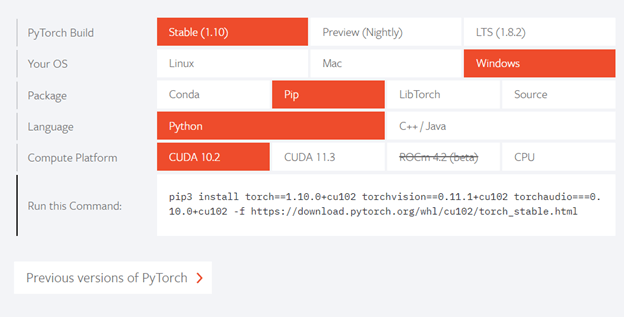
- You can now navigate to this link to retrieve the command that you can use for PyTorch installation. We can choose our operating system, language, package, and CUDA, including the PyTorch build, which then returns two commands that can be used to install PyTorch on the windows platform.
- You will have to run both retrieved commands on the command prompt. Failing to do so will result in an error.
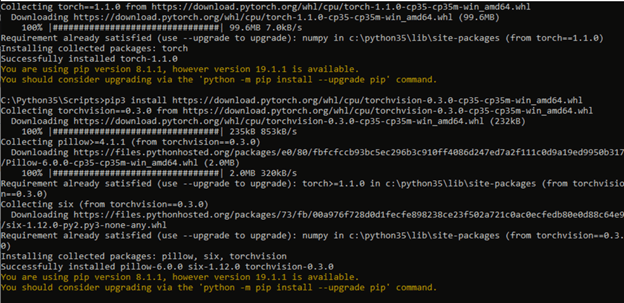
- We can verify the installation of PyTorch by again firing the pip list command –
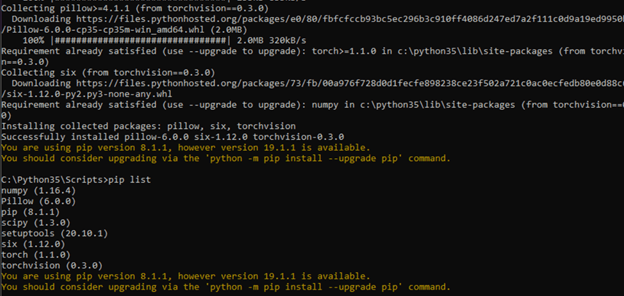
We are now free to run the python command and, if needed, import the torch for PyTorch working for performing various operations.
How to Using PyTorch pip in work?
Pip is used for the management of packages in the system, which involves the installation of libraries and packages of software written in the programming language python. The files generated while installation are stored at a Python Package Index, PyPi, a huge online repository.
The default source for installation of dependencies and packages used by pip is PyPi. So when we go for firing the command pip install name of the package at that time pip will go and search for packages on the online repository of PyPi and if it gets it over there, then downloads and installs the specified package in your system.
We can install and download pip using the commands on the command prompt by following the below steps –
Get the get-pip.py file. After downloading, please keep it in the directory where the installation of python is done. Now, run the command
python get-pip.pyto execute the downloaded file, which will begin the installation process. The output of executing the above command is as shown below –

We can confirm the installation of pip on the system by executing the command
pip -Vor
pip --versionthat will give the following output if the pip is installed on the system –
![]()
Note that the version may differ depending on the latest version during that time when you will install. You can refer to this link for the installation of pip.
PyTorch pip Code Example
Let us consider one example of using pip for the installation of a particular package. The process of installing the packages is quite simple if you have pip installed. The steps required to do so are firstly open the terminal or command prompt and then navigate to the directory where the installation of python is done on the system. So, for example, if we want to install the package named camelcase, we can make use of the command.
pip install camelcaseThe output will be as shown in the below image –
![]()
After doing so, you can use the camel case package in your programs by simply importing it. Camelcase package is used to set the first letter of all the words to capital case.
Consider this sample code –
import camelcase
sampleCamelCaseObject = camelcase.CamelCase()
sampleEducbaText = "educba is one of the most widely used technical learning website."
print(sampleCamelCaseObject.hump(sampleEducbaText))
The output of the above code is as shown in the below image –
![]()
Conclusion
PyTorch pip is the management tool for package installation. It becomes very easy to install other libraries and packages onto your system if you have pip installed on your system.
Recommended Articles
We hope that this EDUCBA information on “PyTorch pip” was beneficial to you. You can view EDUCBA’s recommended articles for more information.
