Updated August 25, 2023
Introduction to Photoshop GIF Effect
GIF stands for Graphics Interchange Format that means an image file (has image file extension or format) which gives you the effect of a video file (when you open it, then it has some motion effect). It was developed by CompuServe in 1987, an American computer scientist. In Photoshop, we can create it by using some properties of the image as well as a video clip on the Timeline tab. By making a GIF effect in Photoshop, you can create magic on any image without changing its file extension. So what do you think? Are you ready for creating this magic? I think yes, so let us start.
How to Create GIF Effect in Photoshop?
Creating GIF is a very exciting and amazing feature in Photoshop, and today we will analyze all aspects of this feature for going through this topic properly.
Let us move to our learning. First of all, we will place an image in which we want to make GIFs. So click on the Open option of the File menu of the Menu bar of this screen or simply press Ctrl + O button as short cut key.
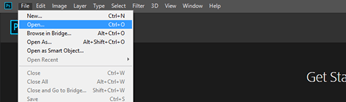
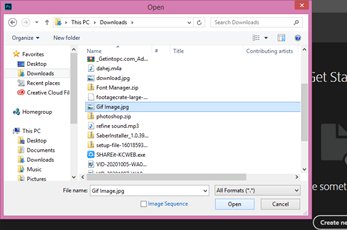
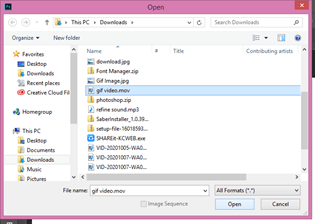
A dialog box will be open, search your desired folder where you have saved that particular image, and click on that image, then hit on the Open button of this dialog box.
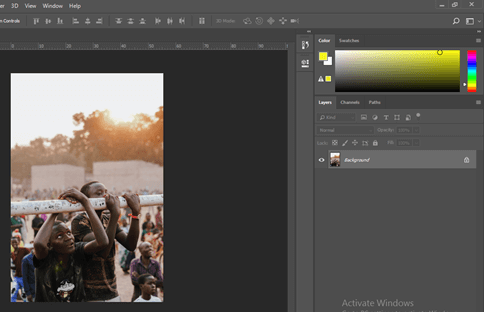
Your image will open on a new tab; adjust its size as per your choice.
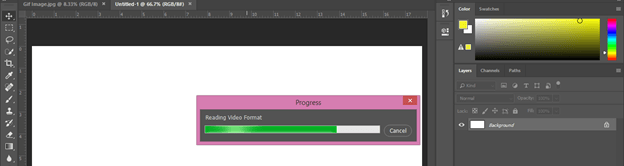
Now I want to place one video clip in our work. So again, go to the open option and this time, choose a video clip file from the opened dialog box, then hit on the Open button.
Once you hit on the Open button, it will take some time for importing your video clip into the Photoshop document tab.
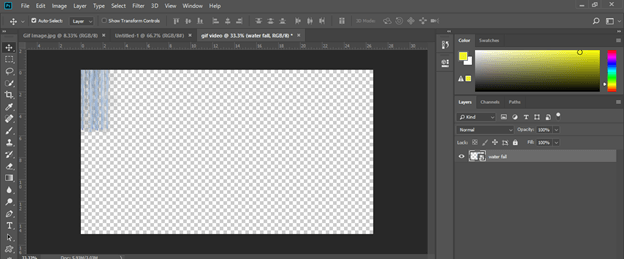
Wow! This is a waterfall video clip. Let us play with it for making our GIF. This video clip will open with the Timeline section, which is at the bottom of this document tab.
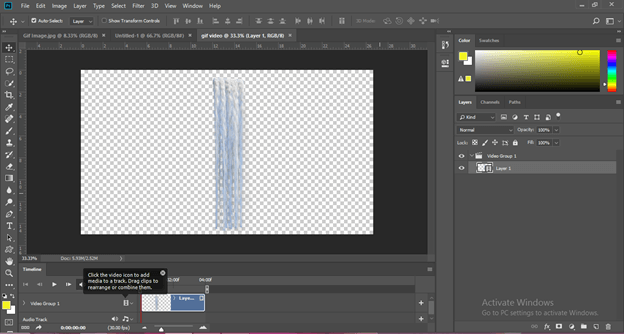
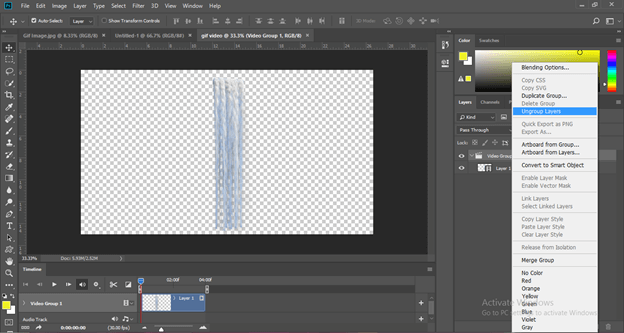
Now go to the layer panel of this software and make right-click on the Video Group layer; choose the ‘Ungroup layers’ option from the scroll up list for the ungrouping imported video file.
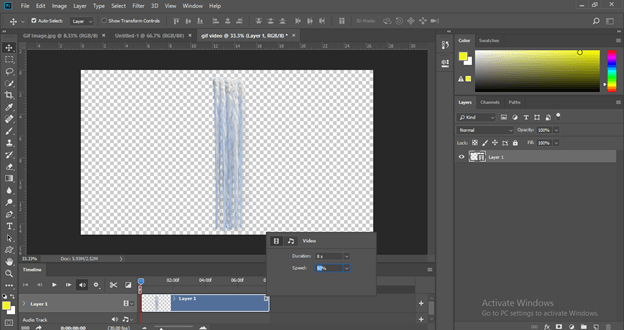
Now go to the Timeline sections and click on the player icon of the layer of the video clip. Decrease the speed of video footage by 50% from this box. You can increase speed if your video clip is very long and you want to add each frame of the video clip in your GIF.
Make a copy of this video clip. Select this layer in the layer panel and press the Ctrl + J button for making a copy.
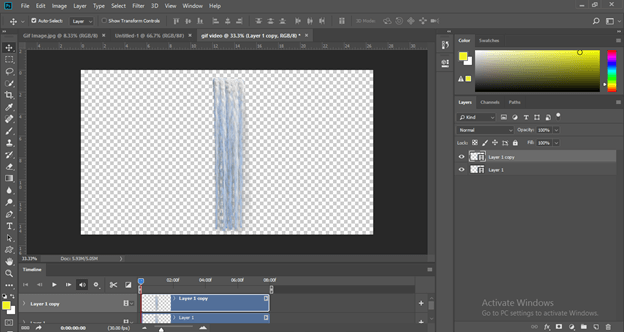
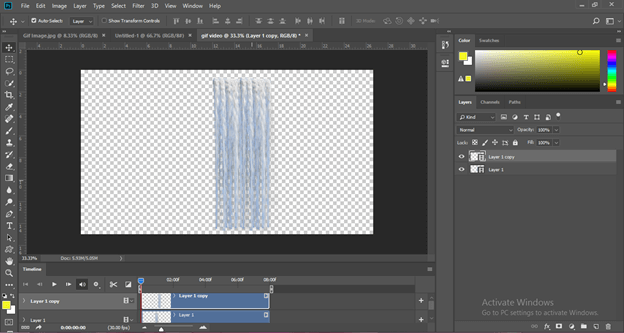
Move the copy layer to the right side of the waterfall for increasing the density of the waterfall.
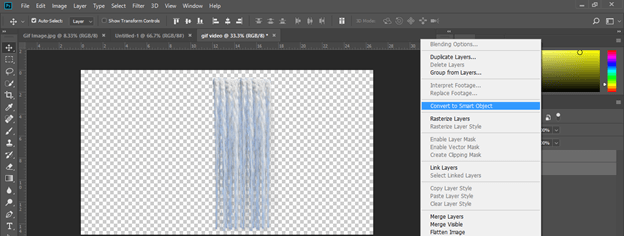
Select both layers and make the right-click. Click on the Convert to Smart Object option to scroll up the list.
Rename this video clip as Waterfall.
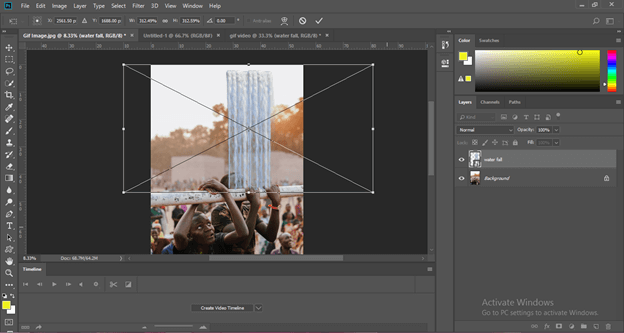
Now drag this clip to the GIF Image tab with the help of the mouse left button.
It will place here like this. Press Ctrl + t button for the transform box and adjust the size of this waterfall clip as per your choice. I will set it like this.
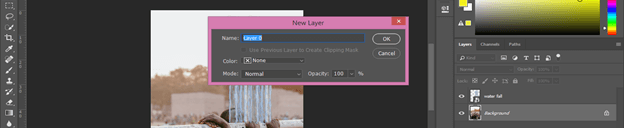
Now make double click on the background layer for making it editable. A dialog box will be open; name this layer according to you, then hit the Ok button.
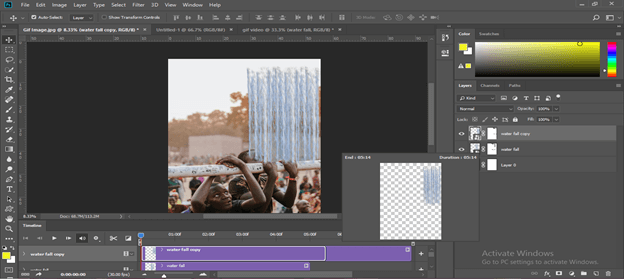
Select both layers and click on the ‘create video timeline’ button of the timeline section. Once you make a click, layers of these two layers will come on the timeline area.
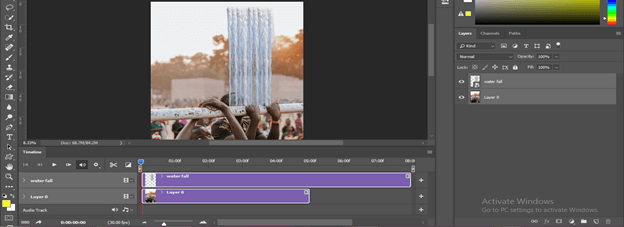
Decrease the length of the video clip up to the length of the image layer by dragging it, or you can increase the image layer length also.

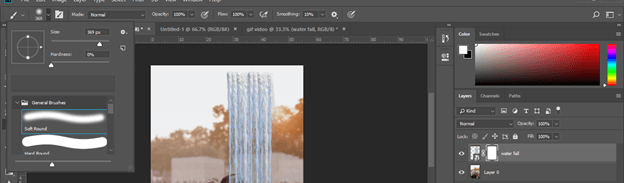
Now select the waterfall layer and click on the Add mask button of the adjustment layer for adding masks in this layer.
Take the Brush tool from the tool panel, adjust its size and take the soft brush.
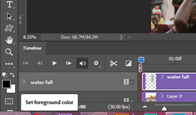
Set black color as the foreground color.
Select the mask thumbnail icon of this layer and remove sharp edges of the upper portion of the waterfall with the brush tool.
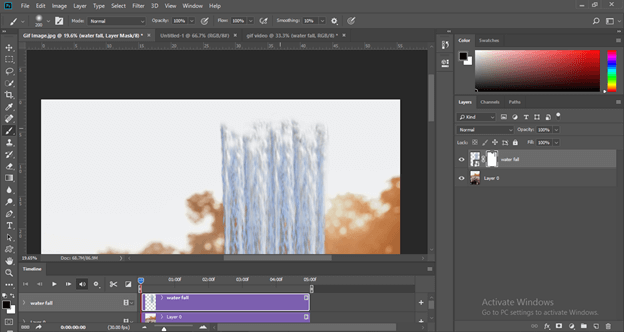
Do the same with the brush tool at the bottom of the waterfall.

Now add a layer mask to the image layer also and set brush size.
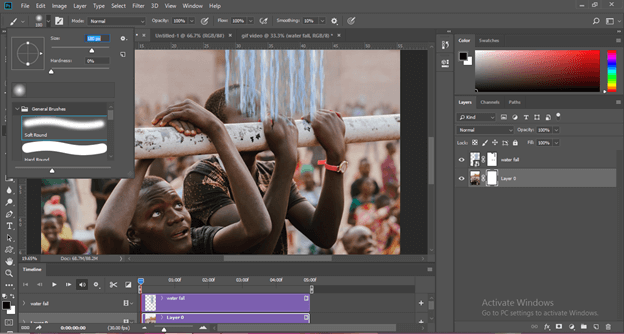
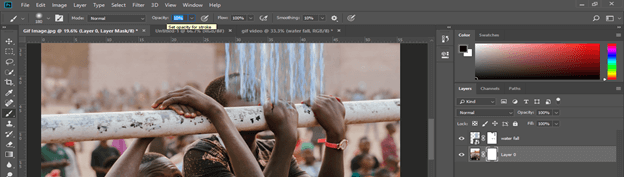
Decrease the opacity of the brush tool to 10%.
Now make clicks on the head of the boy behind the waterfall to give it a real water effect on his face.
I think we should make a copy of this video clip for an effective look at the waterfall. So select the waterfall layer, then press Ctrl + J button and drag the copied layer to the right of the first layer. Adjust this copied layer length in the timeline section.
You can also add an audio track to your GIF from this option.

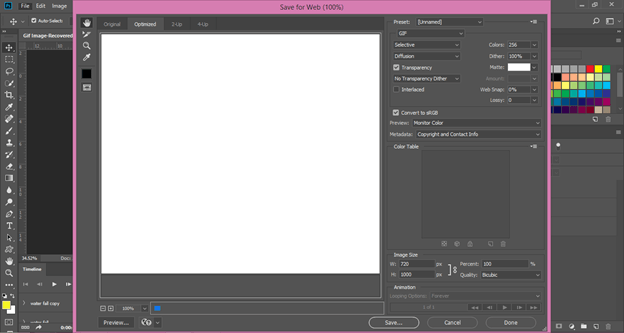
Now let us save it as GIF. Go to the File menu and click on it, then go to the Export option. Now click on the ‘save for web option.

It will take some time for processing the preview of the GIF on this dialog box. The time of processing depends on the Ram speed of your computer system. So if you try it the first time, I will suggest you take the size of the image a little bit less for the fast result if your computer Ram is slow.
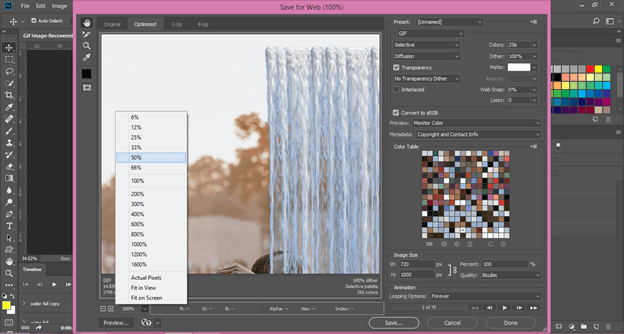
Set preview size 50% from here.
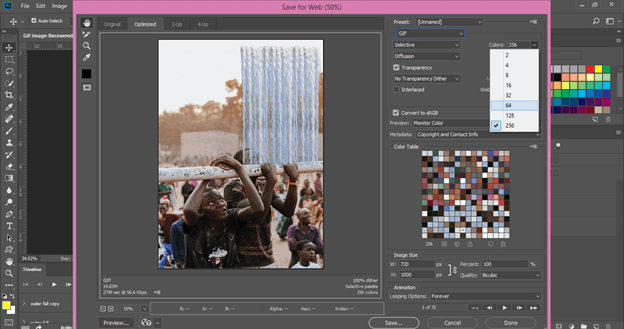
Choose GIF format on this list.
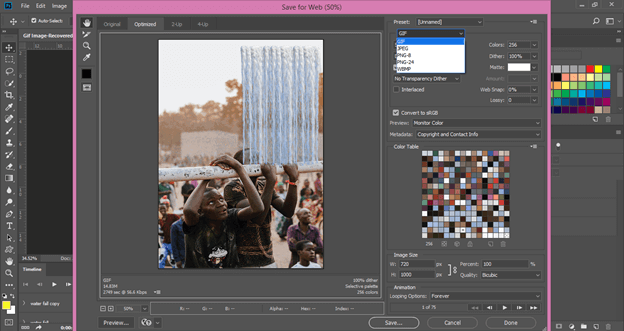
You choose a color range from this option. If you take the highest value of the color range, your image has a good quality of color, but it may make your file size heavy. You can choose 64 values that make a little bit change in the color quality of your image gif file size is more than 5mb.
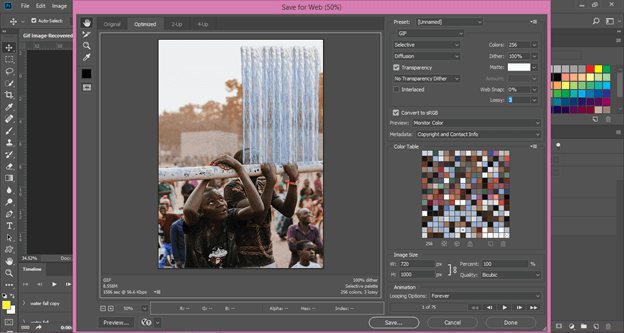
Set 3 as the value of the Lossy option, which helps in the compression of the GIF file.
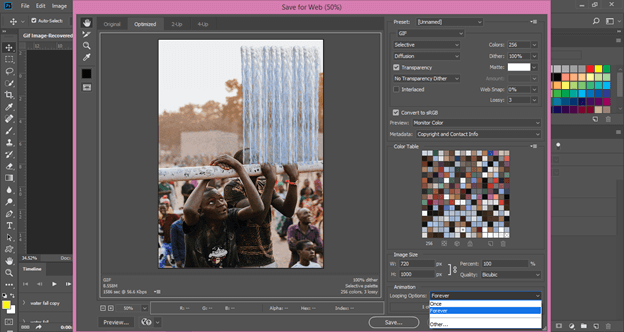
Choose the Forever option in Looping Options so that once you play this video, it will automatically repeat its frame for giving a GIF effect.
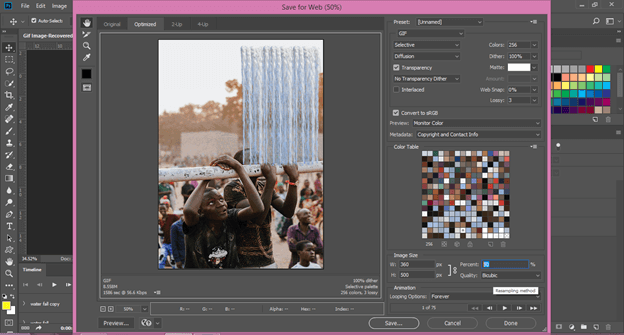
You can change the size of your image here also. I will set it at 50% size.
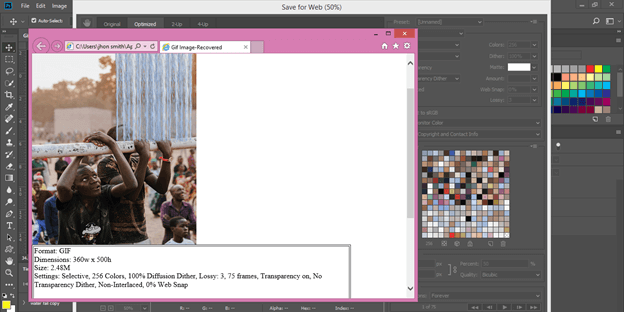
Click on the Preview button for seeing this GIF on the web page.

On the web page, you can see its preview with file size and other details.
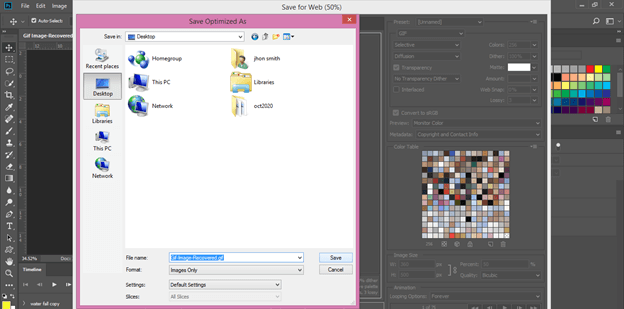
If you are ok with it, then hit on the Save button and choose the location and name for your GIF file.
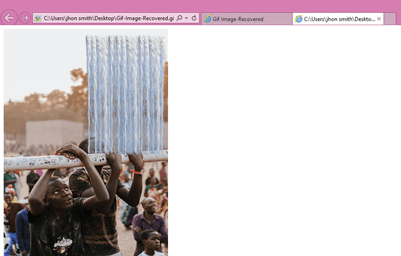
Now you can check it by playing it
Conclusion
How was your experience with learning this topic with us? I think it was very good, and now you have great knowledge about the GIF effect of Photoshop. After this article, I am sure you can easily handle the parameter of creating the GIF effect in this software.
Recommended Articles
This is a guide to Photoshop GIF. Here we discuss How to create GIF Effect in Photoshop, and we also analyze all aspects of this feature. You may also have a look at the following articles to learn more –
