Introduction to Photoshop Cinemagraph
Photoshop is a raster image editing software which the image editing professionals widely use for their professional work. We can use different types of effects in this software for making effective image editing with the help of its exciting feature. Cinemagraph is one of the effects of adding motion effect on any image by using some technique and tools of this software. In this article, we will discuss cinematography as well as its important parameters so that we can make a good cinematic effect on our image by using this technique of Photoshop. So let us start our discussion about this topic.
What is Cinemagraph in Photoshop?
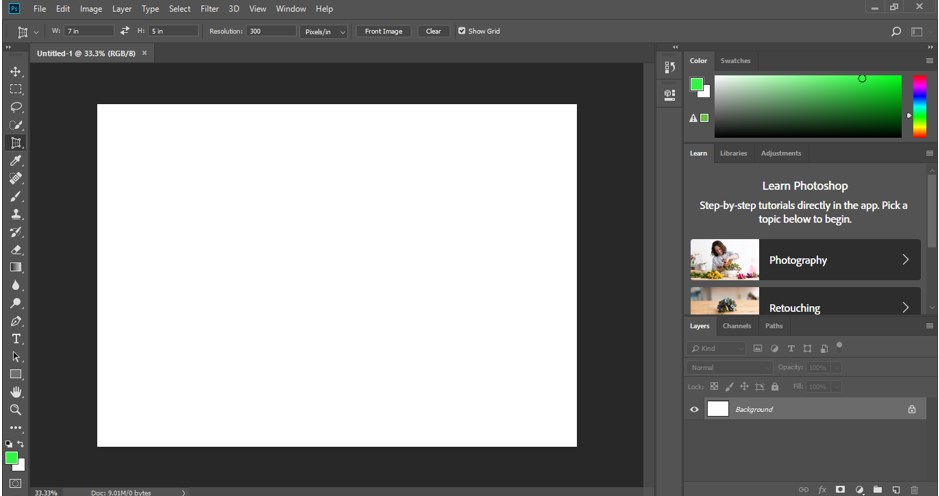
We can make a good cinema effect in our steady image in this software by following some simple steps of the cinemagraph effect, but before starting, let us look at the working screen of this software to better understand this topic throughout our learning in this article.
Step 1: At the top of the working screen, there is a Menu bar which has a number of menus for adjusting different parameters in our work in this software; below this, we have the property bar of our selected tool through which you can change the parameters of your selected tool, below this property bar at the left side of working screen we have a toolbar which has different types of tools which helps in photo editing work, at the center of this working screen we have a display window in which we can see our current working, at the right side of the working screen we have some sections such color box, layer panel and some others.
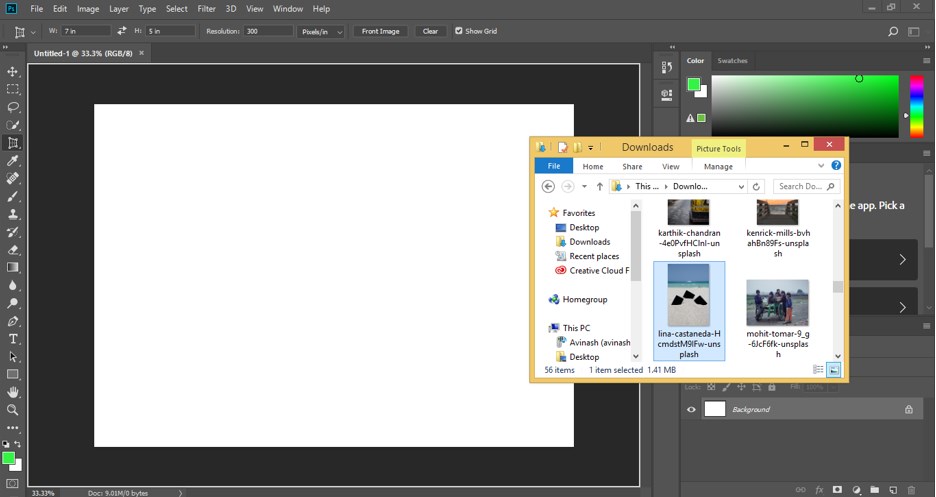
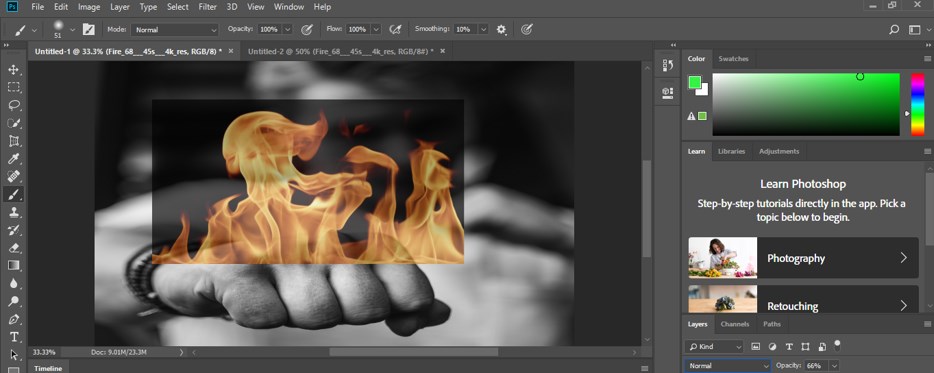
Step 2: Now, let us import an image in this software for our learning about cinemagraph. I have downloaded an image from the internet. You can take your own or download it from the internet. For placing an image in this software, just open the folder where you have saved it, then pick it from there with the mouse button, then drop it in the display window area of this software by releasing the mouse button.
Step 3: Now click on the checkmark button, which is at the property bar of this image, for placing it at your desired place in the display window area.
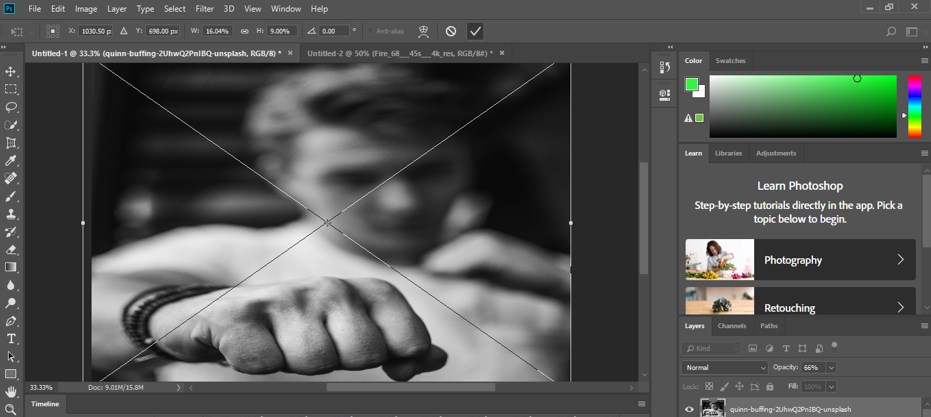
Step 4: Now, I will take a video effect of fire; you can take any other effect according to your image for making a cinemagraph effect with it. I have downloaded it from the internet. You can take your own or downloaded it from the internet. For placing video footage, go to the folder where you have saved your effect, then pick it from there with the mouse button, then drop it in the new document of this software by releasing the mouse button.
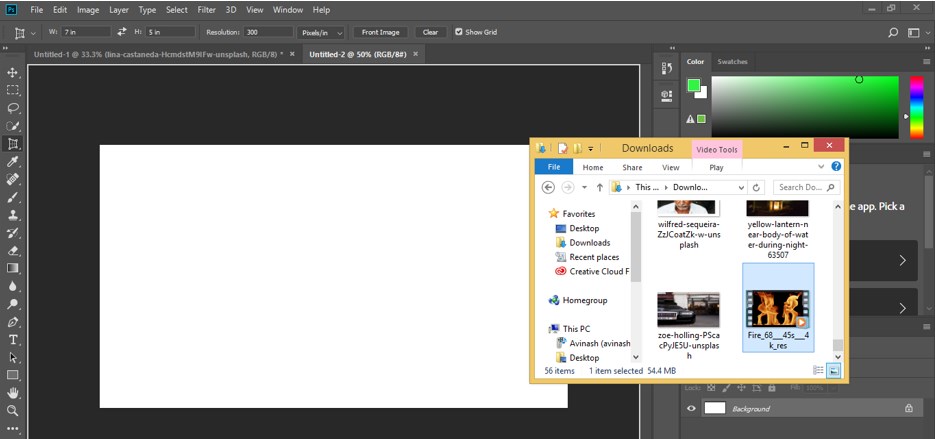
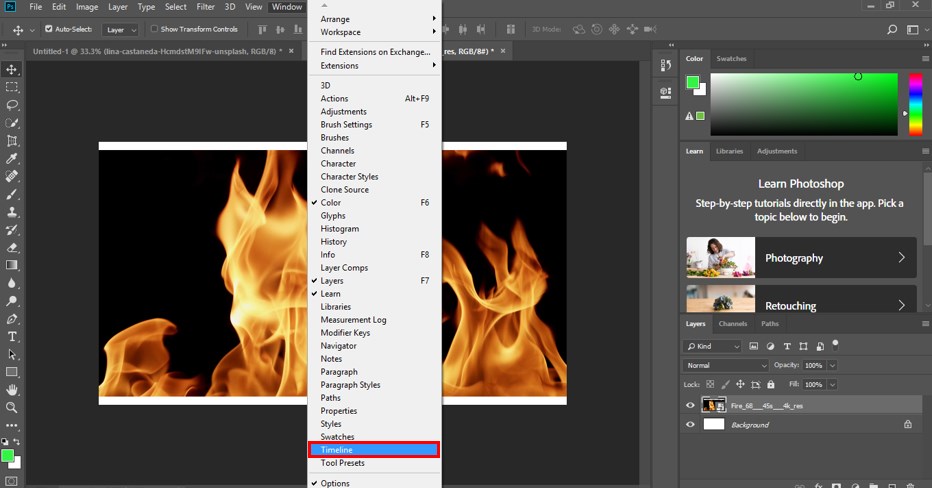
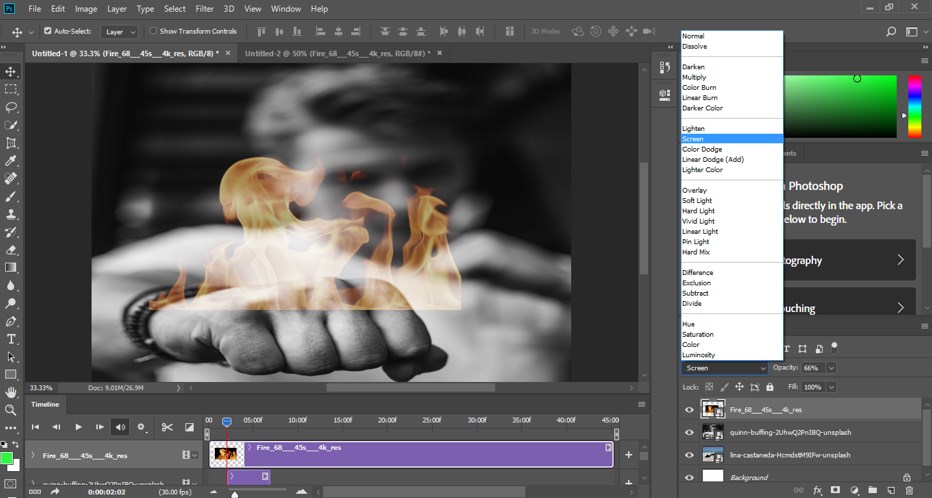
Step 5: Now click on the Window menu of the menu bar of this software which is at the top of the working screen of this software. Once you click on this menu, a drop-down list will be open. Click on the Timeline option of this list for opening the timeline panel in our video footage window.
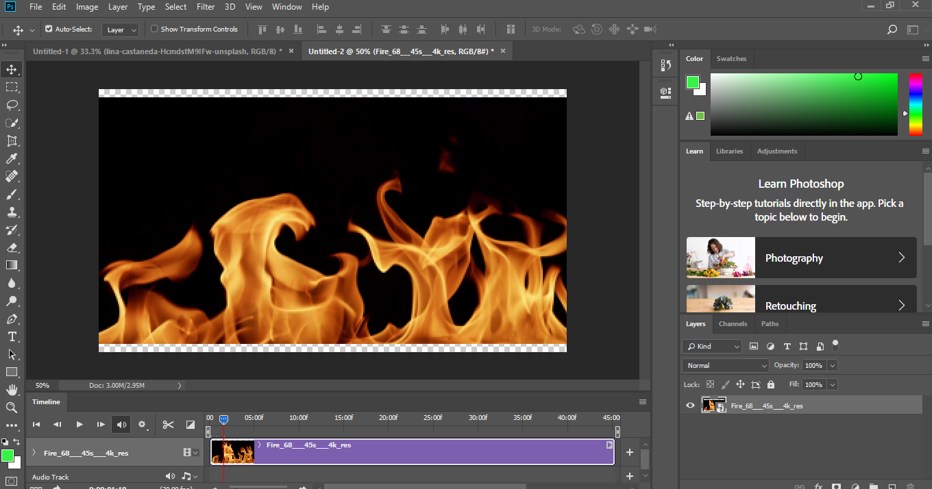
Step 6: Now click on Create video option of the timeline panel with the mouse button, and the frame of your video footage will open in this section. You can drag the play head of the video effect at your desired place of fire motion effect for any particular area of fire effect choosing it.
Step 7: Now drag this video footage to the image tab of this software for placing it on our image with the help of a mouse button like this.
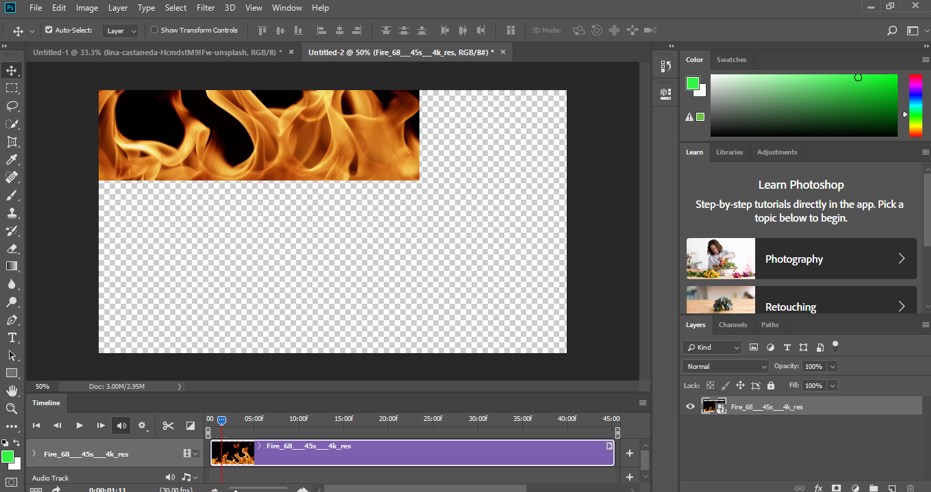
Step 8: Now, it will place like this on our image. You can adjust it to your image by moving it with the help of the move tool.
Step 9: Now select this video footage layer in the layer panel by click on it, then click on the drop-down button of the blending mode of this layer for blending it with our image. A drop-down list will be open like this; choose the Screen option from this list by click on it.
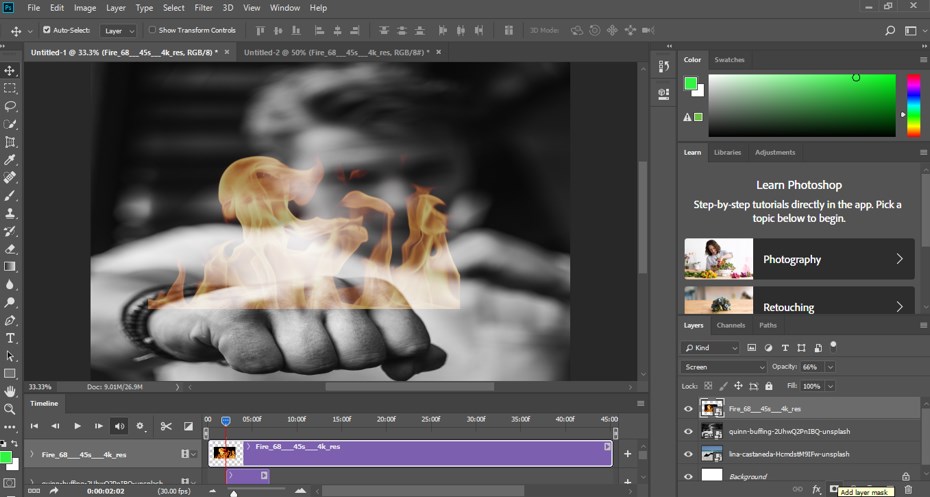
Step 10: You can see the black background of the image removed from the video footage, and there is a sharp edge in your video footage, so for removing it got to layer panel and select this footage layer by click on it then click on the Add mask button of layer panel which is at the bottom of the layer panel.
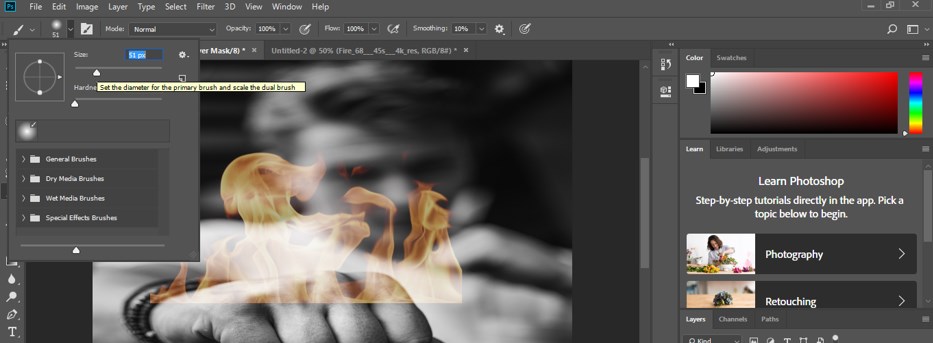
Step 11: Now, a mask will be added to this layer. Now click on the mask with the mouse button and go to the tool panel of this software, which is on the left side of the display window of this software. Then take the brush tool from there by click on it with the mouse button, or you can take a brush tool from the layer panel also; just click on the brush icon in the layer panel for having a brush tool.
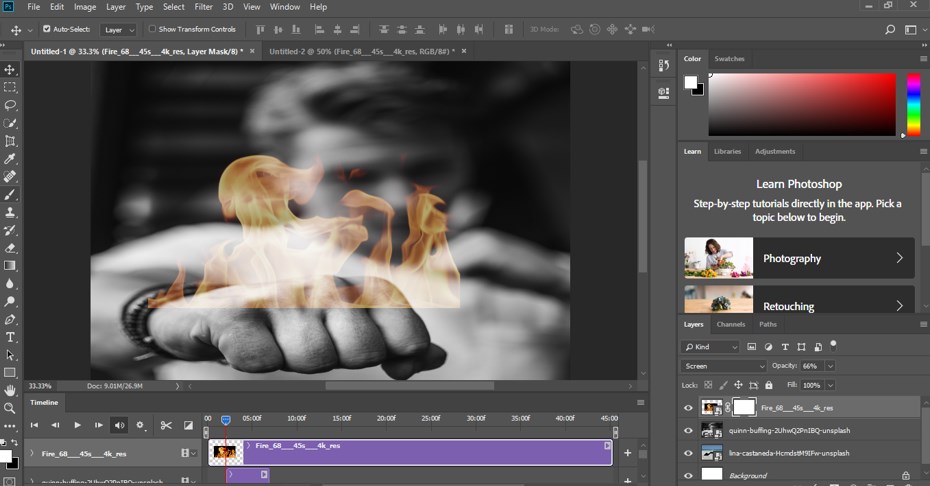
Step 12: Now adjust the parameter of the brush tool according to you, such as the size of the brush and the hardness of the brush from the property bar of the brush tool, which is below, to the Menu bar of this software.
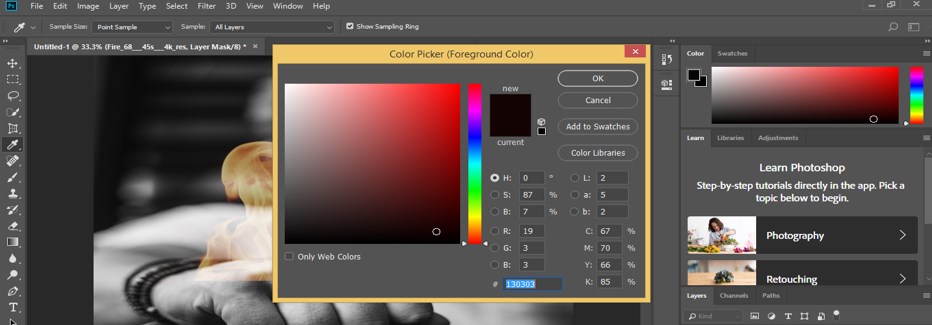
Step 13: Now go to the color box of this software which is at the right side of the display window, and click on the small square box of color. Once you click on it, a color picker box will be open, choose a black color from here as a brush color for removing an extra portion from our video footage, and add details to our effect.
Step 14: Now, remove the extra portion of video footage from your image by using the brush tool. You can remove unwanted portions from video footage according to your choice. Now when you play it from the timeline, you will see a fire effect on your steady image.

Conclusion – Photoshop Cinemagraph
Now, after this article, you can understand what cinemagraph is in Photoshop and how you can adjust the different types of parameters of it. You can make good command of this feature of Photoshop after practicing on it and add a plus point in your image editing skill.
Recommended Articles
This is a guide to Photoshop Cinemagraph. Here we discuss the Introduction, use Cinemagraphin photoshop, and adjust the different types of parameters of it. You can also go through our other related articles to learn more –
