Updated August 25, 2023

Introduction to Photoshop automate
In this article, we are going to learn how to use photoshop to automate features. Automation is the task done in photoshop to eliminate repetitive processes like saving images or performing other actions. So, we can automate tasks using automate or scripts in the file menu. In the script, we can use the image processor to work on multiple images at the same time. In automate, we can use batch, which gives even more options. Apart from that, we will also look at fit image automation functionality.
Steps of Photoshop Automate
Here are the following steps mention below
Step #1
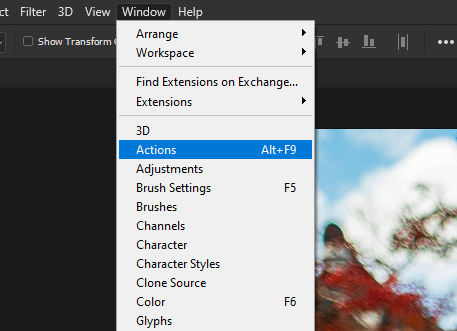
Automation can be done to a simple process like saving an image to a different format. It is fine if there are a couple of images. But imagine if there are hundreds of images then it would be very time-consuming. So here is where we can save time, and let us start by creating some actions which can be used for scripts or automation. Let’s open the actions panel from the Window menu or press Alt + F9
Step #2
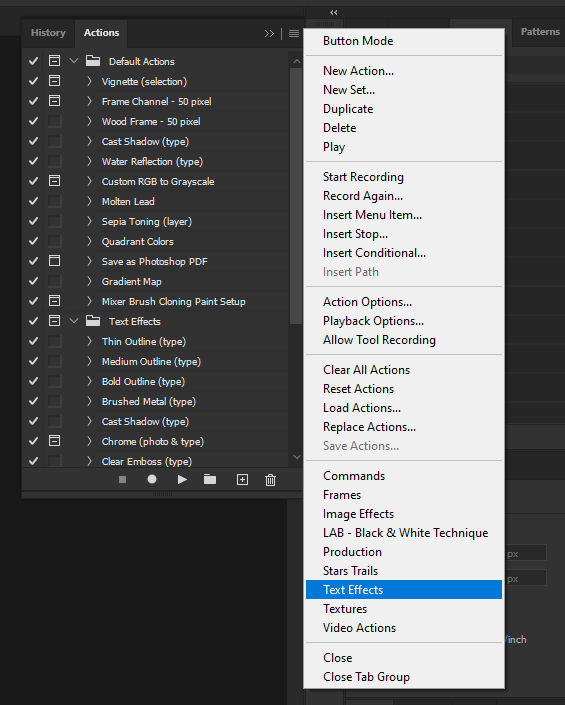
Apart from default actions, you can use other like text effects.
Step #3
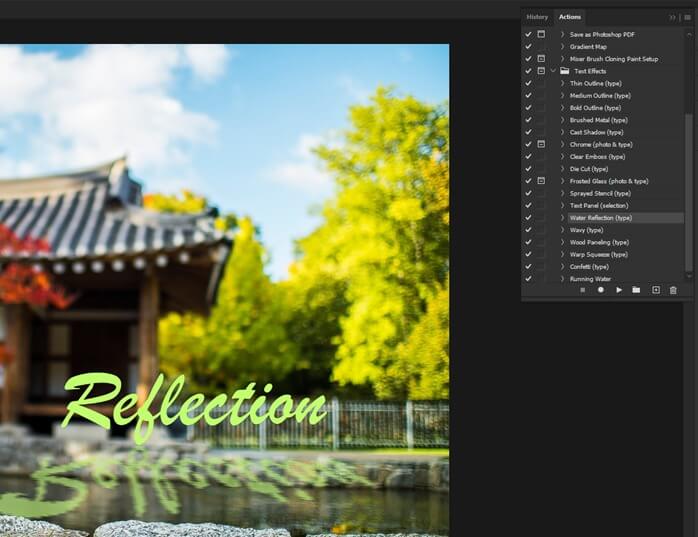
Type some text and then run water reflection action to see how the stuff gets automate.
Step #4
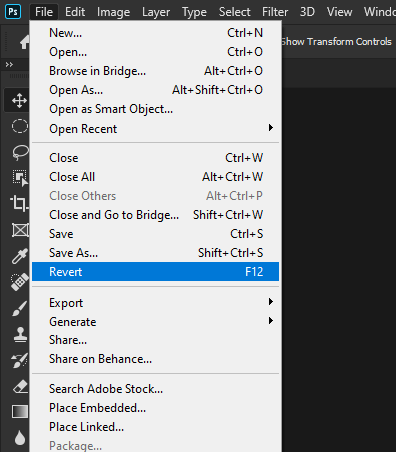
Now we will do File->Revert to get to the original file as there are multiple steps done in action which we do not want to undo.
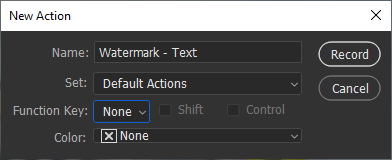
Step #5
Let’s create a new action by clicking the plus icon at the bottom right corner of the actions panel. You can set the name, set, and also a shortcut key and color if you wish to do so. When you click record, all the actions are recorded.
Step #6
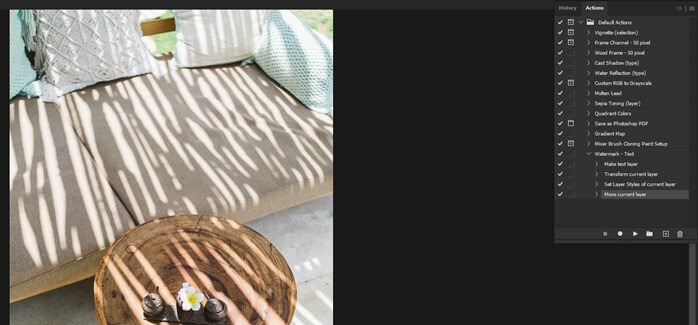
As we can see, the text we have created is now recorded in the action panel.
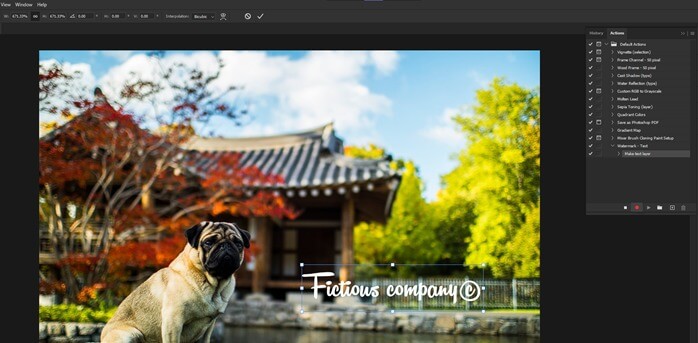
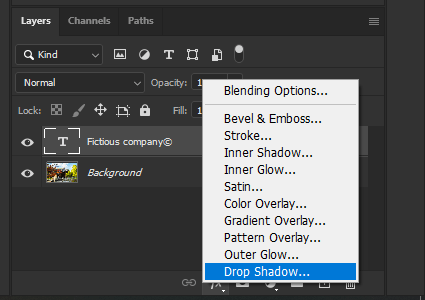
Step #7
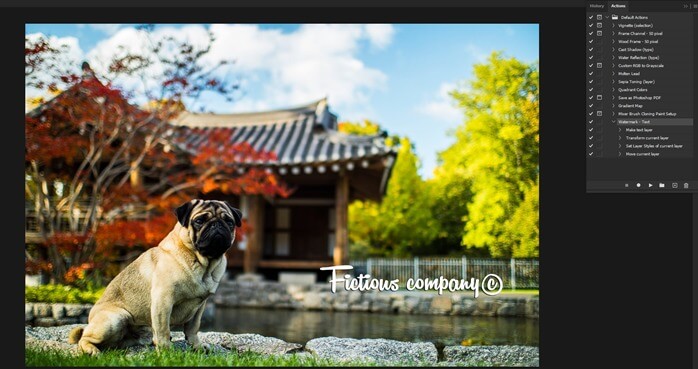
Next, add a drop shadow to the text so that our watermark is visible on dark and light surfaces.
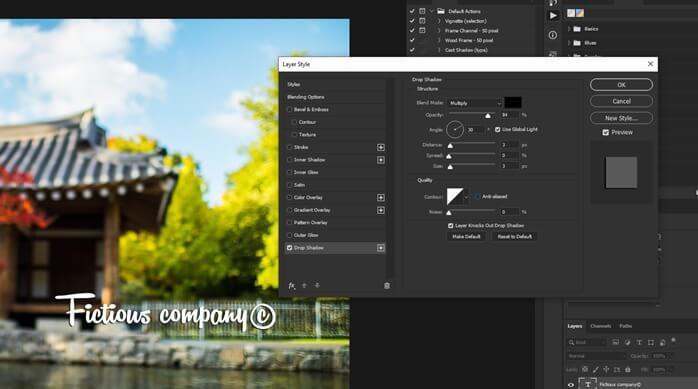
Step #8
So, we have done the drop shadow by setting the distance, spread, and size as shown.
Step #9
Now click the stop button, which will save our watermark text action.
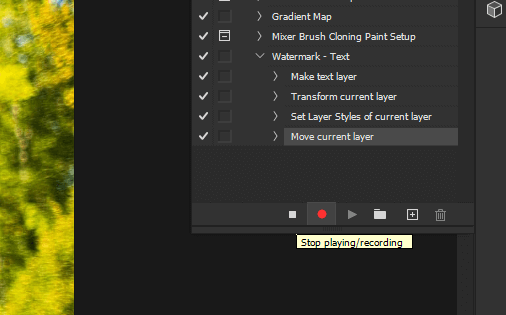
Step #10
Now we can use this recorded action on other images but make sure that you first select watermark text instead of the last selected action, or else it will run from there.
Step #11
As we can see, the watermark text is added.

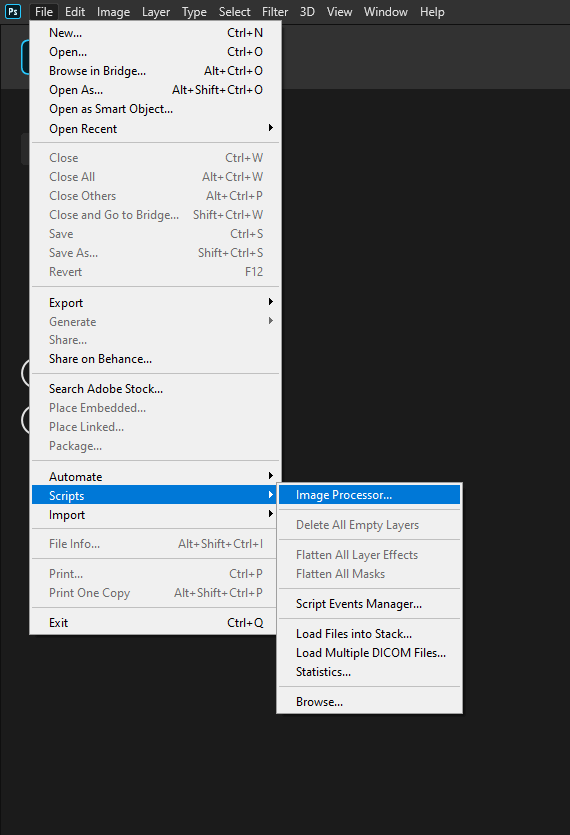
Step #12
Let’s start our automation process in photoshop by using Script -> Image Processor in the file menu.
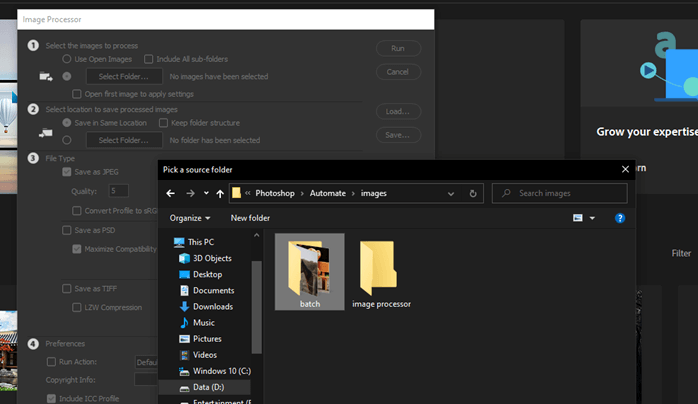
Step #13
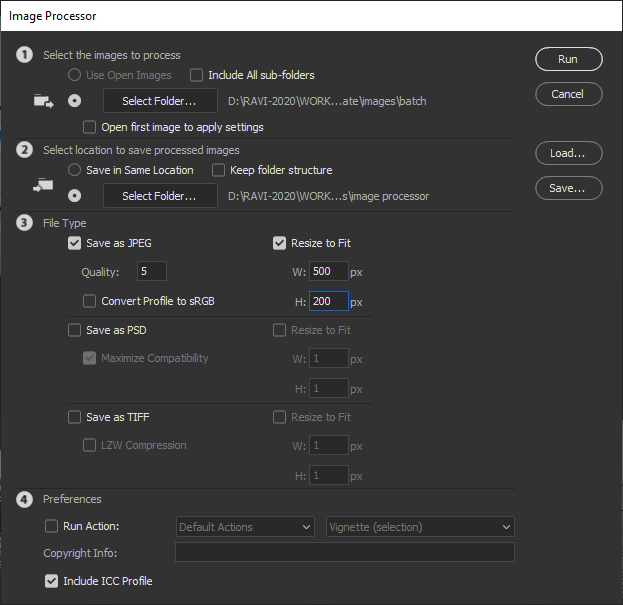
We have five images in the batch folder which we want to process. So, let’s first select the folder.
Step #14
Then let’s select the folder where the images will be saved; we have selected the image processor in our case. You can even save in the same location.

Step #15
If you want to just change the file type or resize and optimize the images, you can select the jpeg or the file type you want and resize to fit with the required dimensions.
Step #16
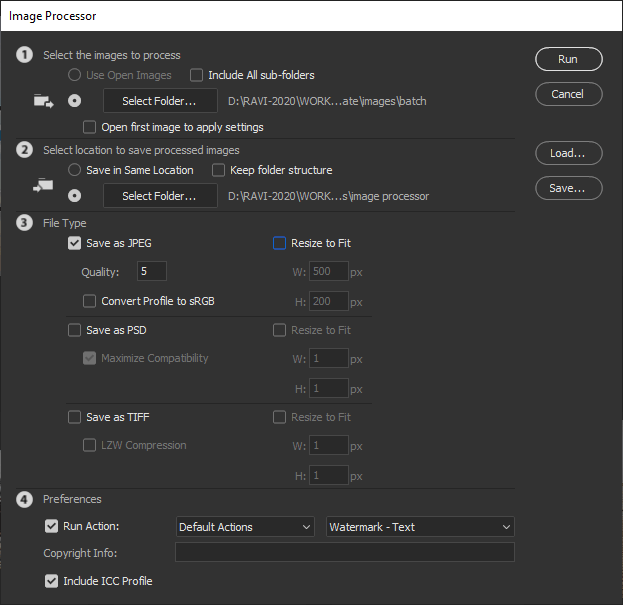
What we are going to do is that we will run action and select the action of watermark text from the drop-down which we have created earlier. Then click run and kick back and relax as it will take some time depending on the number of images as well as the capability of the machine you are running on. Also, make sure that you do not have any background tasks running as it will slow this process.
Step #17
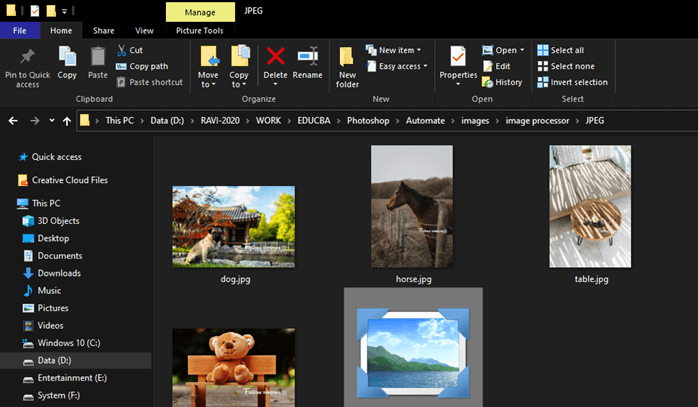
As we can see, all our images are watermarked in the image processor folder.
Step #18
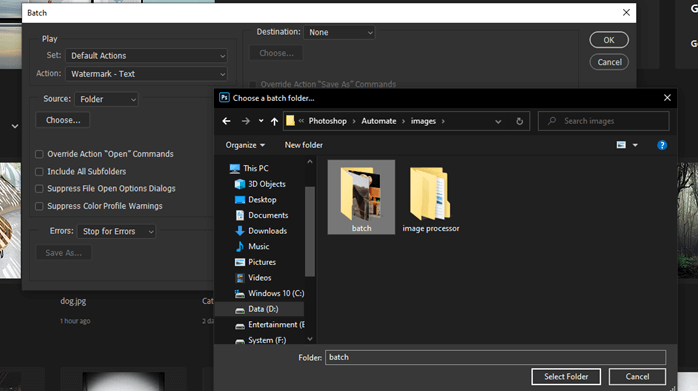
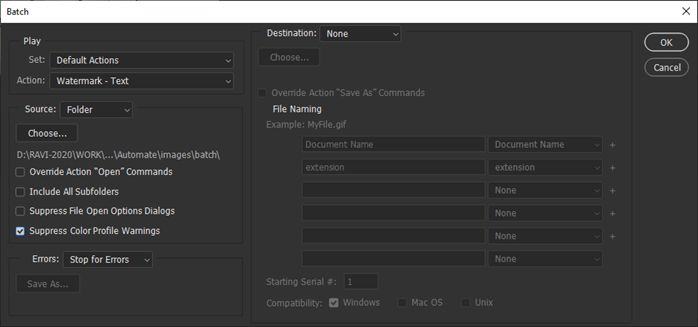
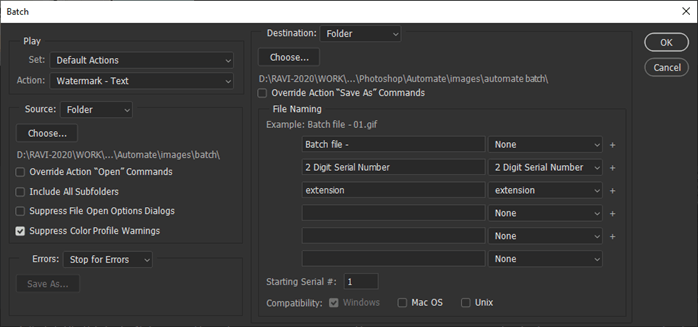
Next, we will look at Automate -> Batch in the file menu. It is similar to an image processor, but this is all about actions, and they were created at different times by different persons, so they are both there.

Step #19
Here again, you can select the set of action and then the actual action, and in our case, it is watermark text.

Step #20
Then let’s select the source folder which will be used for batch processing.
Step #21
Then you have some options for suppressing color profile warnings, file open options dialog. Also, you can include all subfolders if you have them in your source folder. There is also the option of how the errors are handled, as in you want to stop for errors or you want to log errors to file.
Step #22
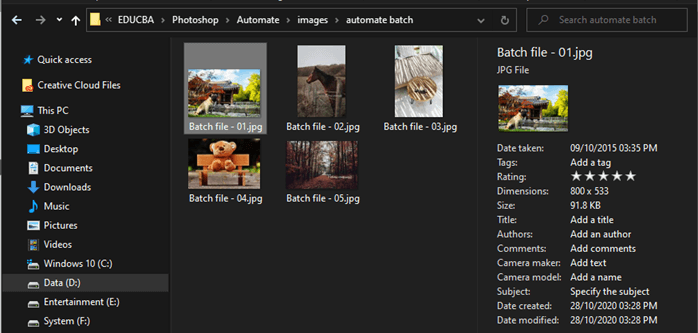
Then I have created an automate batch folder to put the processed file in it.

Step #23
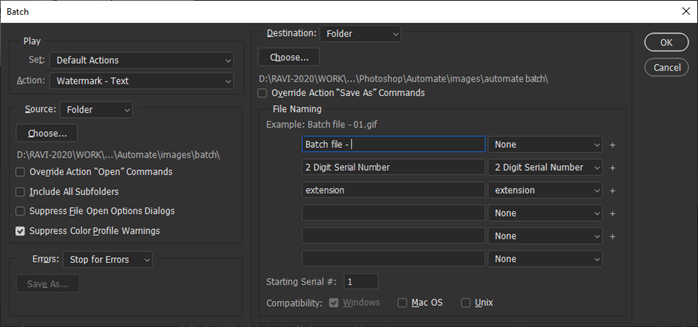
Then there are file naming options where you can give custom file names with loads of other options. Another option includes to set the document name in the upper or lower case. Then you can append up to 4 serial digit numbers. You can also add serial letters in upper or lower case. Even there is an option to add the date in multiple formats. At last, there is an option for extension. Example give you the sample file name, and also you can set the starting serial number.
Step #24
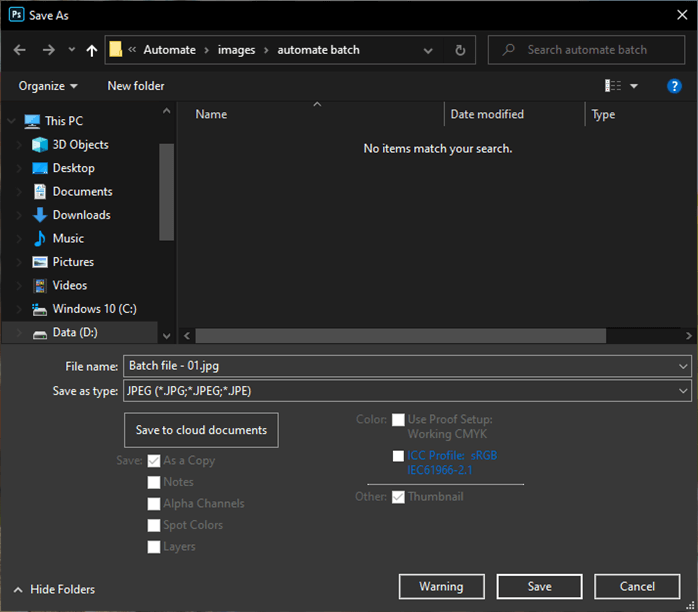
One of the quirks of this method is that it will ask you to save in your required format.
Step #25
Now, remove that saving popup for all images, open any image, and then run the watermark text. Select the last action inside it and record and while we are at it first, let’s reduce the opacity.
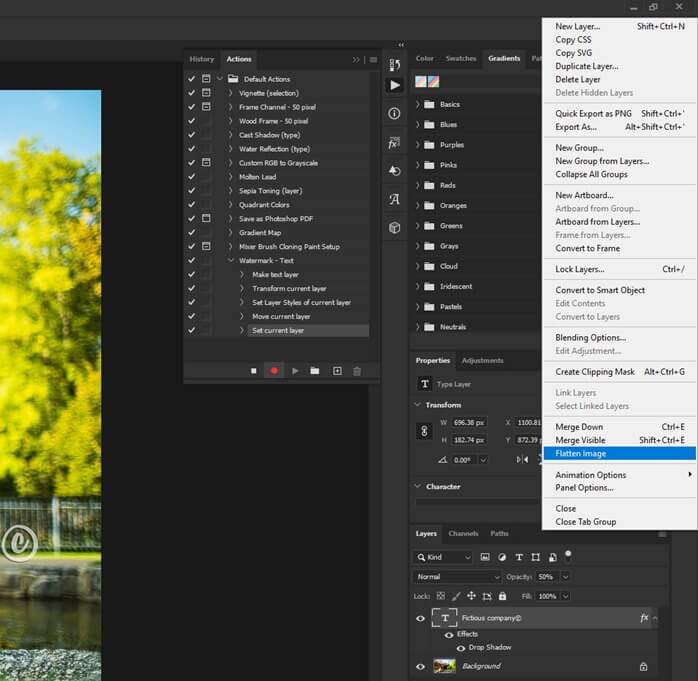
Step #26
Reduce the opacity to 50% of the text layer and flatten the image from the layer panel options. Then stop the action and close the image.
Step #27
Again, open the file, automate, batch, and all the previous option should fill up and click ok. Now you do not have to save it as a jpeg as it is already saved.
Step #28
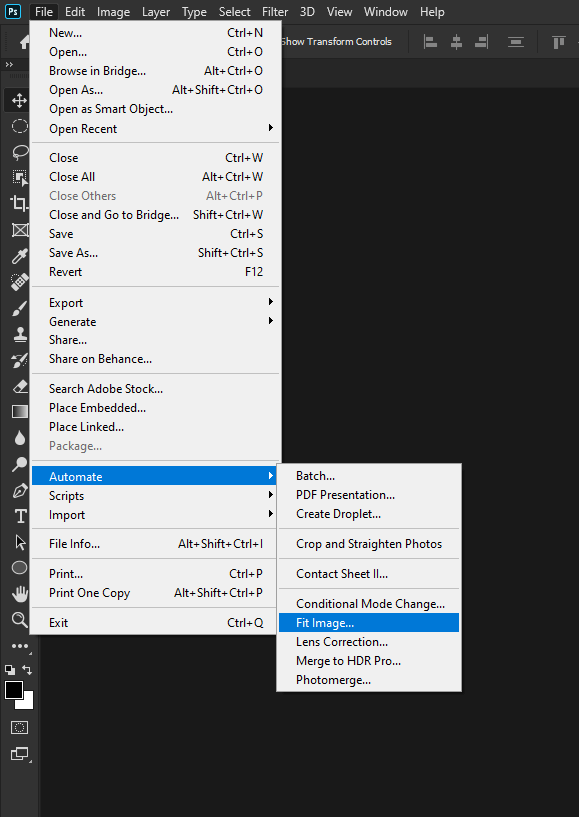
Suppose if you want to constrain the size of the image in a certain dimension, you can fit the image from the automate.
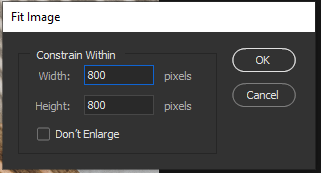
Step #29
This will constraint it within 800 px, whichever is higher
Step #30
Again let’s run the batch with the same option, and we have constraint the dimensions within 800 px.
Conclusion
In this article, we have seen how we use automate feature in photoshop. First, we have seen the script image processor, a simple and versatile tool to quickly run some actions. Then we have seen the batch processor and fit images function, which gives us much more control of how we process and name the images.
Recommended Articles
This is a guide to Photoshop automate. Here we discuss how we use automate photoshop features and seen the batch processor and fit images function. You may also have a look at the following articles to learn more –
