Updated August 25, 2023
Introduction to Oil Paint Filter in Photoshop
The filter Oil Paint was first implemented in Photoshop CS6 as an actual filter. But it vanished for whatever reason at first Photoshop CC. Fortunately, the Oil Paint filter is back from November 2015! And although it essentially is the same filter as it was in CS6 (which isn’t bad), the CC version is now carrying a much lower, less frightening dialog that makes it simpler to use than ever before.
One of the common techniques most of us attempt is to apply a colored impact to a picture at one point. The Photoshop CS4 and CS5 extensions called Pixel Bender containing an Oil Paint layer have been in place for some moment now.
In the Photoshop CS6 filter line-up, this filter is currently a continuous residence that is simpler to operate than in older variants of Photoshop. Here we will demonstrate how our test picture can be prepared for use with the Oil Paint solution, and then the filter is applied. Start with a tiny picture if you use your own picture, as the screen operates finest when not stretched too far.
In Photoshop, there are several methods to do photography, and over the years, I have discovered that individuals really like to turn pictures into drawings. The oil paint lens offers a unique appearance in Photoshop.
Smart Oil Paint Filter
Step 1: Now unlock the picture folder that you would like to transform into an oil painting.
Step 2: To pick the picture, click STRL+ A, and duplicate it by pressing STRL+ C.
Step 3: Then generate a fresh element in your paper and click Ctrl+ V to insert the picture. Go to Edit > Free method for transforming and resize the picture with this instrument as you need it.
As a starting point, converting a sheet to a Smart Object (or Smart Filter) texture is generally a good idea. It is a nice thing. In this situation,
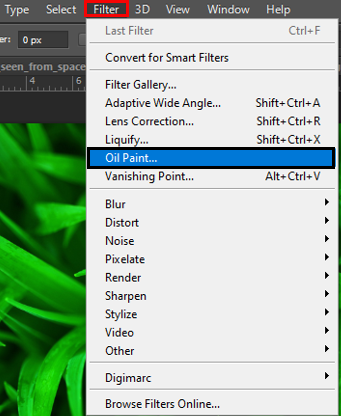
Step 4: I have opened a raw image as an Intelligent Object to myself as a headstart. After that, select Filter and click the option Oil Paint.
Step 5: Next, in most pictures, you want to plug in at a minimum of 33 or 50%, if they are very big, more so. The concept is to see both the opposite sides and the grain and precision in the shots.
If you want to check everything, transfer the Styling Control shoulder by hand and view the demo; can you see any apparent modifications? If not, at least one more amount should be zoomed in. The interesting impact is the Styling Control. The finest comparison I can create is the reduced prices that offer a more spontaneous and clumpy image to the fake petroleum picture, almost as if it had been placed on a red tower or an old comb with a lot of spilled ink. I like petroleum portraits to sound more smooth, so I put this instance to be just over 7 (plus 10).
By using Brush Controls
The Slider for cleanliness works in a comparable way to styling except that the comparison rows (i.e. fake color strings) tend to be broken up. The reduced the price; the more color rows seem to be shattered. However, I believe that it provides an aspect of realism to maintain the quality under 5; you may believe in boosting this environment. After all, we likely will have an aspect of waviness in contrast to what we generate with the true pen, so it should be the same as the digital one if we are painted with a human hand and not the robot fingers.
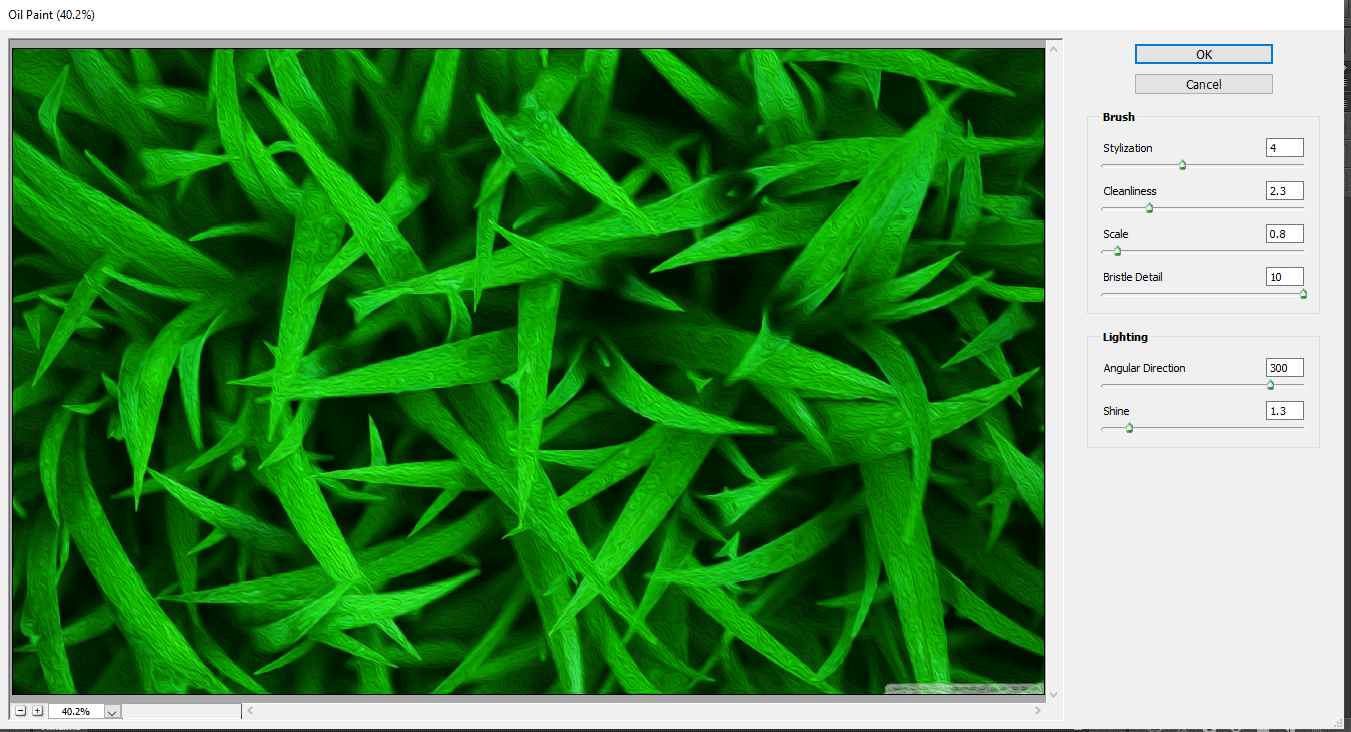
The Control Scale is very essential, and you want to zoom in to assess it as you set. The command is quite essential. Think about the comparative magnitude of the picture and attempt to imitate that magnitude if you can. The bigger the scale, the clearer the models. Slide the slider on a few occasions in order to understand what the impact is doing. Normally I’m fixing a 3-7 valuation. The cap is 10, and decimals are used in the same way as for the previous two environments.
Bristle Detail is the final hair check, and you can see this as imitating a comb that displays separate rows of bristles against very soft paints. In general, based on the first few configurations, I keep this importance quite low. I guess it leaves the personality of the oil paint somewhat if you create it too small. This is one that you want to see obviously zoomed in. It could be a bit hard even then.
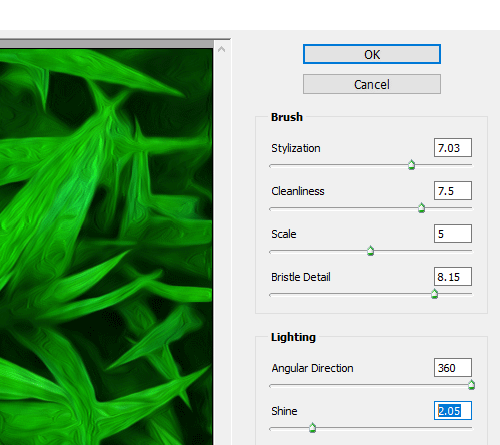
Lighting
The command of the angular path “turns” the impact (e.g. shifting from 180 to 360 basically inverts the contrast lines so that the sun shines from the other side of the panel), whilst the command of the shining changes the petroleum fabric from smooth to moist (i.e. transparent in sunny regions) to the comparison line. Try to move the impact in order to run perpendicular to the most significant graphic rows (or features to show).
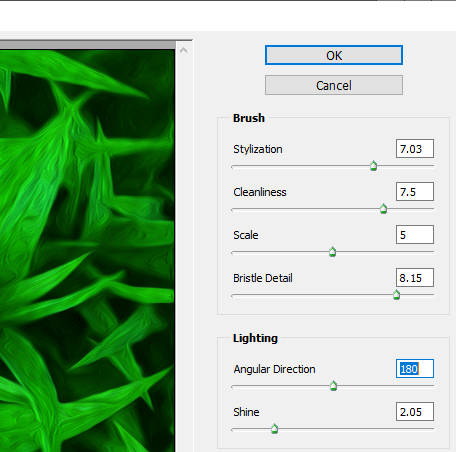
The shine can place the final touch on the shots and distinguish something like paint or not. It’s usually better to scroll a little too ordinary display amplifications with these two checks.
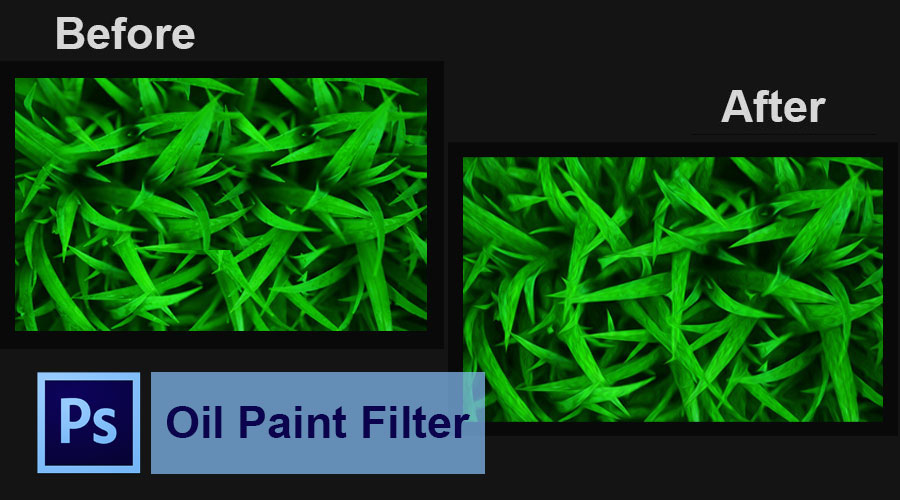
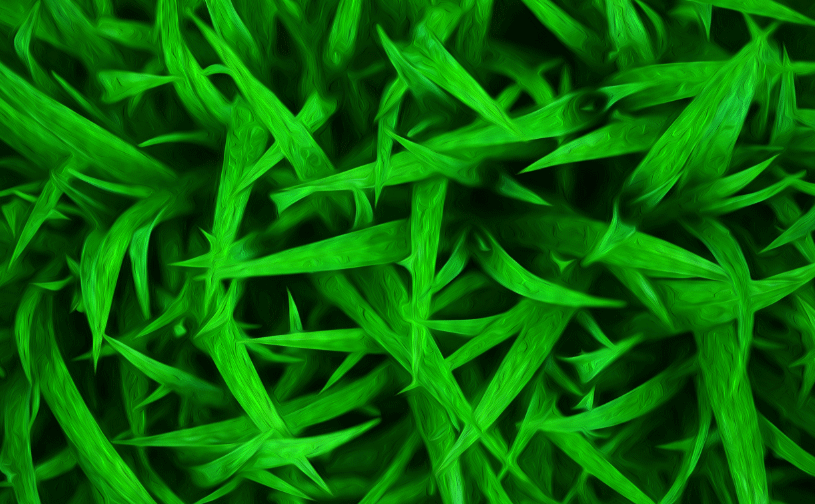
Below is the ultimate outcome. When you finished, double click on a filter (under the surface) to move the filter to your fresh Smart Object layer. Any moment you want to change your configurations, double click on a filter title. Tip: Do not overlook your intelligent filter coating before your oil paint has been scaled!
Conclusion
Now I’m going to be the first to confess I’m not a painter. And you would be the second person to confess that I’m not a painter if you saw anything I attempted to paint. But I don’t have to be grateful to Photoshop and its filter Oil Paint! Without a shred of real-world evidence, I can still pretend that I’m Vincent Van Gogh’s next. Though a Photoshopped oil painting impact can never confuse professionals or stick on a gallery’s screen, it’s still enjoyable to turn one of your pictures into an oil painting, and the findings are very spectacular.
Recommended Articles
This has been a guide on Oil Paint Filter in Photoshop. Here we discuss how to convert a normal image to Oil Paint Filter with a proper step-by-step explanation. You may also look at the following article to learn more –
