Updated May 12, 2023
Introduction to Named Range in Excel
Named Range in Excel makes working with formulas exciting, especially in keeping track of things. It is just very convenient to assign a name to a range. If there is any change in that range, it becomes infinitely easier to update the range through the Name Manager. Also, in cases of nested formulas, where one formula has to be used in another formula or maybe just used in a different location, all that needs to be done is to refer to the formula by its name. It allows us to bypass the process of manually updating every formula.
Namely, ranges are important because one can use any names in the formula without worrying about cell addresses/references. Any name can be assigned to a range. Any named constant or any data can be given a named range, and these names can be used instead of the actual formula. In this way, it becomes easier to understand the formulas. So, what this does is that it gives a range of cells in Excel a human-understandable name. By making use of named ranges, one can make the usage of formulas straightforward in Excel. One can give a name to a range in a formula or function, a constant, or a table. After starting to use names in a sheet, one can easily comprehend these names.
Define Names from a Selected Range
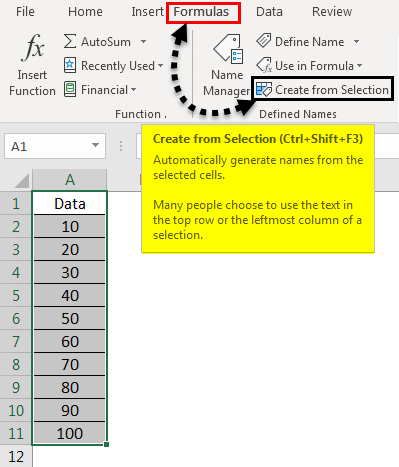
Firstly, you must select the range you want to give a name. After that, navigate to Formulas and then select Create from Selection.
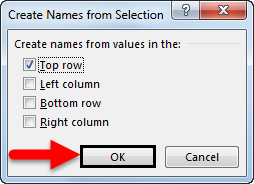
From the “Create Names from Selection” box, select Bottom Row, Top Row, Left Column, or Right Column, then click OK.
- First, use names in formulas, focus on a cell, and then enter a formula.
- To use a named range, open the list of options with the first letter of the name and place the cursor where you want to use it in a formula.
- After typing the first letter of the name, a list of options will open up from which you can select the desired name.
- Alternatively, navigate to Formulas, Use in Formula, and select the name you intend to use.
- Press Enter.
It is also possible to update the named ranges from the Name Manager. We must select the name we wish to change and then change the reference directly. The shortcut to update the named ranges from the Name Manager is Ctrl+F3.
How to Create Named Ranges in Excel?
Let us understand the concept of the Named Range through some examples.
Example #1
Create a Named Range by using the Define Name option
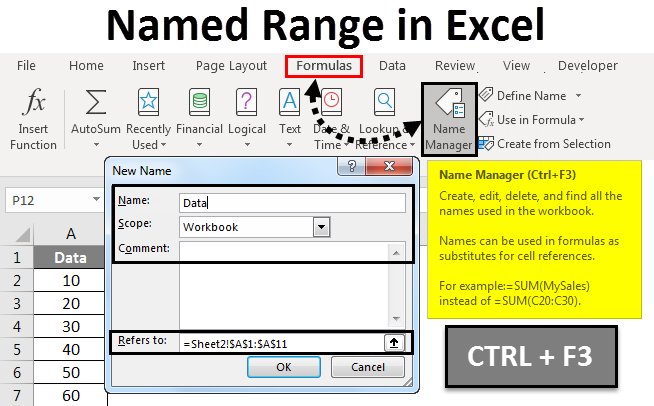
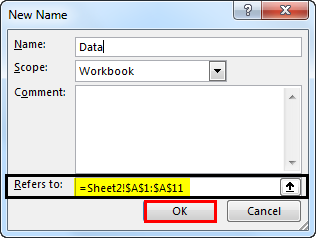
- First, focus on the cells by selecting the range of cells.
- Now, navigate to the Formulas tab. Next, go to the Defined Name group. Click to select Define Name.
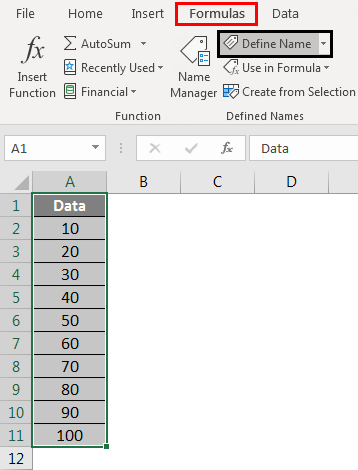
- Once the New Name dialog box opens, mention Name, Scope, and Comment.
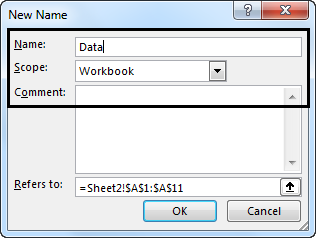
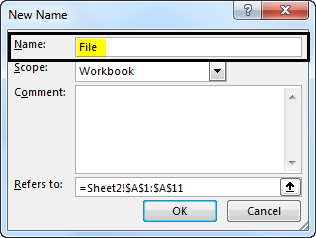
- Now in the “Name:” category, provide a name for the range.
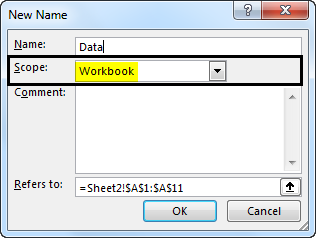
- Now in the “Scope:” category, from the dropdown, the name scope has to be set (by default, it is Workbook)
- Now move on to the ‘Refers to:’ section, verify the available reference, and modify it if required. After that, click OK to save the changes you made and close the dialog box.
Example #2
Create a Named Range by utilizing the Name Manager
- Navigate to the Formulas tab, proceed toward Define Name Group, and click on Name Manager.
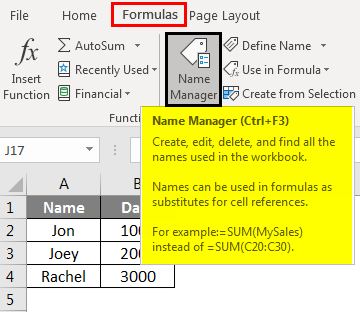
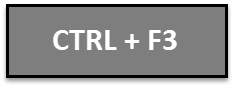
- Alternatively, you can also press Ctrl+F3, which is the shortcut for the same.
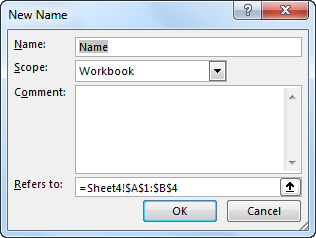
- The New’ button is on the top, towards the Name Manager’s left corner. Click on it.

Then the New Name dialog box will open.
Example #3
Create a Named Range using VBA
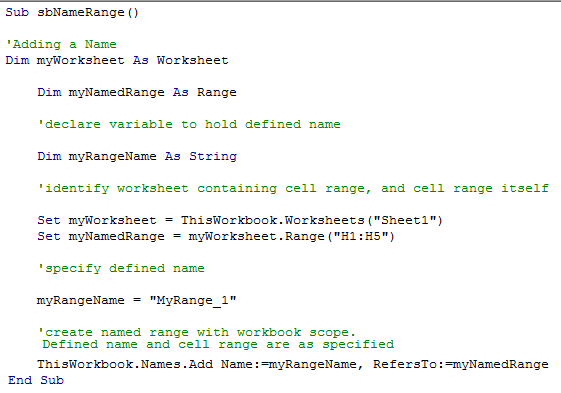
We can also create a Named Range in VBA.
So, this is what we did in the code snippet above:
- We created three variables – myWorksheet of Worksheet datatype, which will store the name of the Excel Worksheet, and myNamedRange of Range datatype, which will hold the name of the range of cells that we wish to name. And myRangeName, of String datatype, will hold the name of the Named Range.
- We defined our Worksheet (in the variable Worksheet).
- We then defined the range of cells we wanted to name (in the variable myNamedRange).
- After that, we defined the name of our Named Range in the variable myRangeName.
- After that, we create the Named Range and provide the reference to which it will point.
This concludes the Named Range creation process through VBA.
Things to Remember
The following things must always be considered while creating or dealing with Named Ranges in Excel.
- Named Ranges can have names starting with a backslash (\), letter, or underscore (_). Numbers or other special symbols are invalid as the starting character. Excel will throw an error if any other character other than letters, backslash, or an underscore is given as the starting character.
- There is also a limitation on how long the name of a Named Range can be. The maximum length of a word can be 255 characters. Anything above 255 characters will cause Excel to throw an error.
- Every name has to be a continuous sequence of characters. There is no scope for spaces, tabs, or punctuation marks in the name. This is done to maintain uniformity and make the names easier.
- Another important instruction while working with Named Ranges is that a Named Range’s name must not conflict with cell references.
- As we saw, there is a limit on the maximum length of a name. Names are allowed to be of a single character length; however, a few characters, such as ‘r’ and ‘c’, are reserved by Excel and can not be used as Names. Conversely, a name must also be of at least one character length at a minimum.
- As a bonus, Names aren’t case sensitive, which means that names such as “Jon”, “JON”, and “Jon” are all the same in Excel.
Recommended Articles
This has been a guide to Named Range in Excel. Here we discussed how to create a named range in Excel, practical examples, and a downloadable Excel template. You can also go through our other suggested articles to learn more –
