
Introduction to Kibana Query
The following article provides an outline for the Kibana query. Kibana query helps us to explore our big data to convert useful information. The elastic search does an index of our data, but indexing of data is not enough. We have to dig the data to find the meaning of all those data. So this we can do with the help of an elastic search query, but that is not user-friendly, so Kibana comes under this situation to solve user-friendly issues for the query. In kibana, we can use both the search query and click option on the visualization.
Kibana Discover
Kibana Discover is the method where we can use the Kibana query with the help of a click option.
To open the Kibana query discover, we have to follow the following steps:
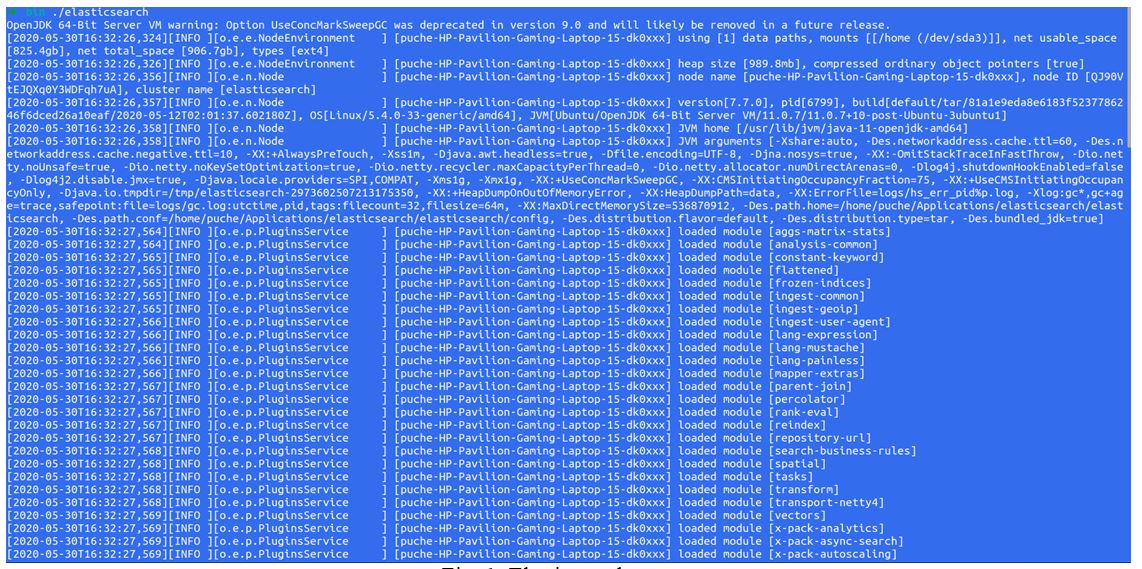
1. First, run the elastic search if you are using Ubuntu like this:
path-of-the-elasricsearch/bin$ ./elasticsearch
Then it will show elastic search running like this way as below. We must have to start the elastic search before starting Kibana because Kibana uses data that comes from the elastic search.
2. After starting the elastic search, then we have to start the Kibana. The process is the same as above if you are using Linux/Ubuntu.
path-of-the-kibana/bin $ ./kibana
After Kibana runs, then you go to any browser and run the localhost:5601 and you will see the following screen.
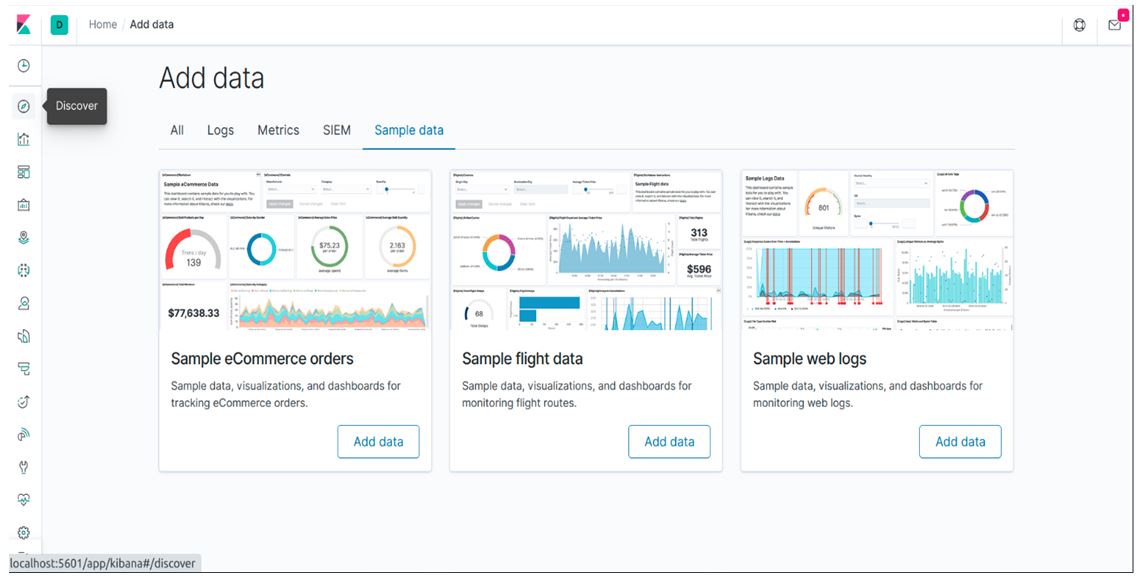
In Kibana, on the left-hand side, we can see some toolbars, and there is the first option Discover. Just click on that and we will see the discover screen for Kibana Query.
In Kibana discover, we can see some sample data loaded if you don’t have your own dataset. We are using the same sample data for this blog.
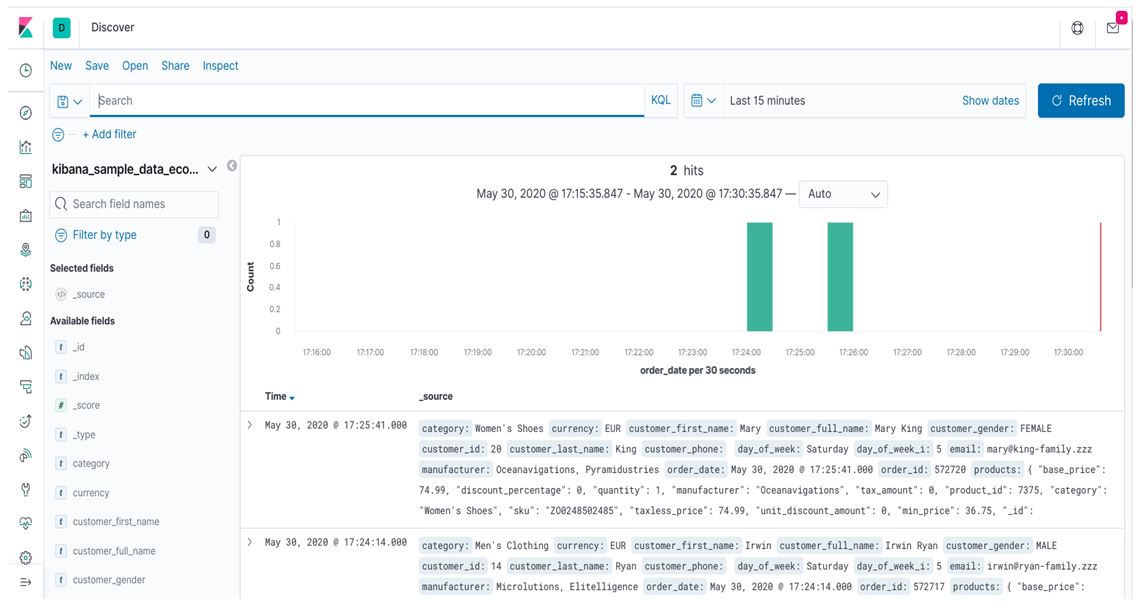
In the above screen, we can see two major concepts, which are _source and Time. The Time, we show the exact date and time when that data is inserted for index and _source will show all those data in JSON format.
In the above screen, there is one arrow sign before the Time option in every row, if we expand this we will get all data in two formats JSON and Table as shown below on the screen.
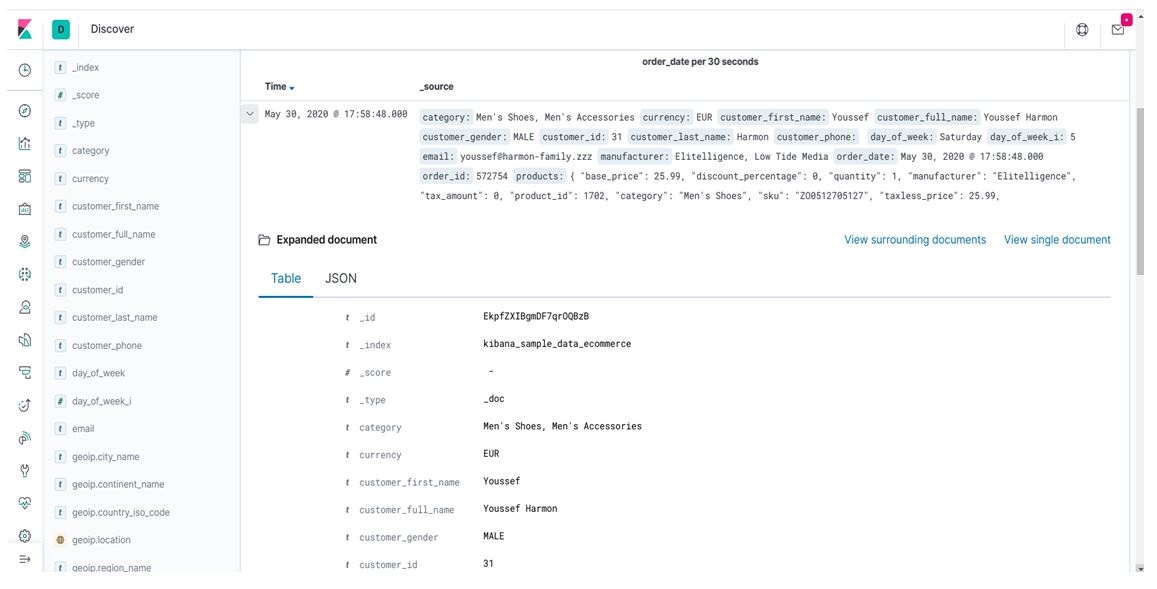
Apart from the above two expanded documents, there are also two tabs which are as follows:
- View surrounding documents.
- View single document.
When you click the view surrounding documents, it will display all data in JSON format.
The view of a single document will show particular data only in detail.
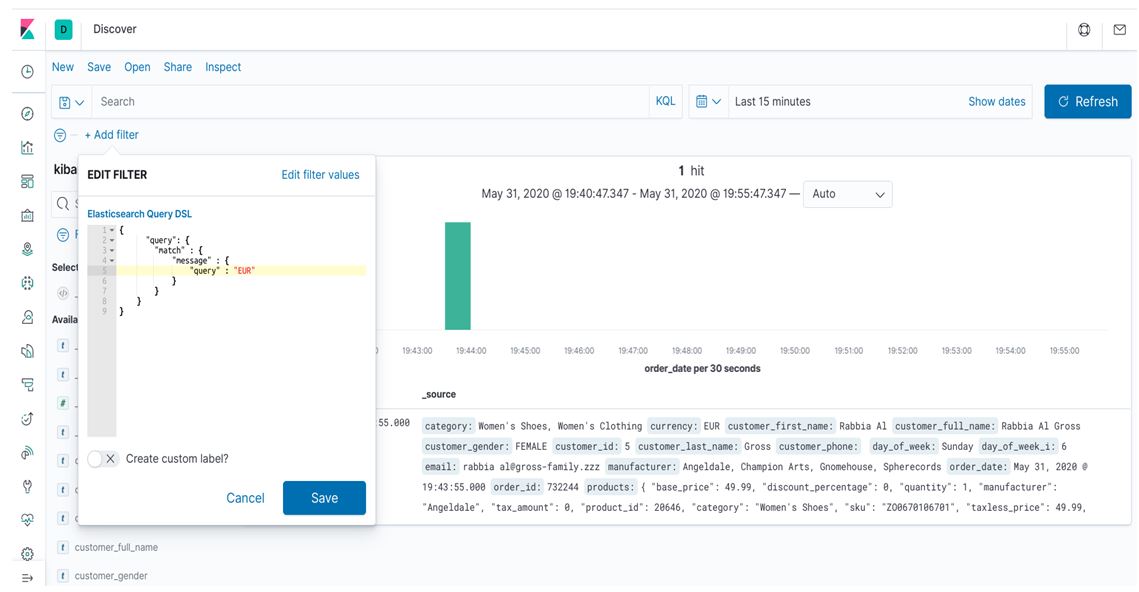
Apart from the above information, we also have a search box in the discover window. In that, we can search particular data information, and below the search box, there is a filter option, and if we click on that, it will show a small window with two options, Label and Text, as shown below:

Edit Filter Query:
In the above screen, we have shown the filter option available in Kibana discover. If we have very large data and we want to filter big data on behalf of some information, then we can use the above method, which is user-friendly. Here we are trying to search currency EUR; after that, all EUR are highlighted with yellow color.
Query DSL:
You can see that there is one more option: Edit as query DSL (Domain Specific Language). With this DSL query option, we can use our search for more specific data requirements. The screenshot below shows how we can use query DSL of elastic search in Kibana to get more accurate results according to our requirements.
Apart from this above information, Kibana discovers also has a histogram option where we can see all those data, at which time they were inserted into the index, as shown below in the screenshot.
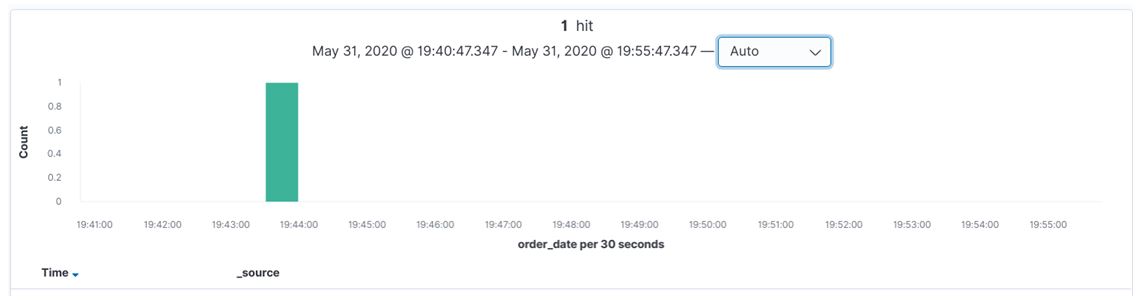
We can also set the refresh rate of the data which is coming for the indexing so that after that particular time slice, we get details of the data in the histogram diagram.
KQL Nested Query
Kibana also have the facility of nested query which we can do with the help of the KQL special syntax. But nested queries will require extra thinking to write those nested queries.
Also, a nested Query requires two more important things when thinking about the nested query, which are given below:
- Search result for nested query only from the single nested.
- Search result for nested Query from large documents which are also nested itself.
Examples of Kibana_query
Given below are the example mentioned :
Example #1
The example belongs to the first category where the item itself is nested, and each document has its own details.
Code:
{

"items_name": "Fruits and Vegetables",

"itemName": [

{

"name_": "Orange",

"stock_": "13",

"categoryName": "fruits"

},

{

"name_": "apple",

"stock_": "12",

"categoryName": "fruits"

},

{

"name_": "cucumber",

"stock_": "19",

"categoryName": "vegetables"

},

{

"name_": "potato",

"stock_": "15",

"categoryName": "vegetables"

}

]
}
To access the required document in a single nested, we have to write the query like this:
Code:
itemName:

{

name_   :       apple

and

stock_ > 10

}
Example #2
Nested filed inside of another nested.
This is another approach where a nested field has nested items. For example, it is given below, and to access those, we have to write the query like this.
Code:
{

"nestedlevel1": [

{

"nestedlevel2": [

{

"properties1": "val",

"properties2": "val2"

},

{

"properties1": "val3",

"properties2": "val4"

}

]
}

]
}
To extract the required document from nested like above, we have to write the query like this:
Code:
nestedlevel1.nestedlevel2:

{

properties1 :val and

properties2 :val2

}
Conclusion
Kibana has given a lot of features directly from discover where we can write queries very easily and instantly visualize results from Query. There are a lot of options apart from the above, which are very difficult. By running the application, we get to know more shortcut stuff, and options to run queries in Kibana are also available.
Recommended Articles
This is a guide to the Kibana query. Here we discuss the introduction to kibana query, kibana discover, KQL nested query, and examples, respectively. You may also have a look at the following articles to learn more –

