
Introduction to InDesign Wrap Text
The following article provides an outline for InDesign Wrap Text. Wrapping Text in Adobe InDesign is a significant feature and an important function that helps the user to manage and adjust texts around objects, frames, symbols, images and vector shapes as well. Designers and creative artists use this feature while working with imported images, multiple page layouts and objects created in the program.
How to Wrap Text in InDesign?
- Adobe InDesign is an unconventional program that includes a blend of multiple page formatting functions, text formatting, creating vector objects, effects and layout formatting with numerous ways of performing a single activity. Additionally, to manage and guide the course of the text around the objects and images and adjust the spacing between the text and objects, the user uses text wrap options.
- When the objects are formatted with text wrap, these objects are recognized as Wrap Objects. Also, it is important to note that whenever a text wrap is created around an object, that text boundary and object happens to become interlinked and connected.
How to Wrap Text around Basic Shapes?
When we create pages with vector objects, shapes and text, the text should be adjusted in such a way that the object is visible clearly with the Text and the spacing is also managed in a proper way. To acquire with this task, Text Wrapping is used.
Following are the steps to work with text wrapping and shapes:
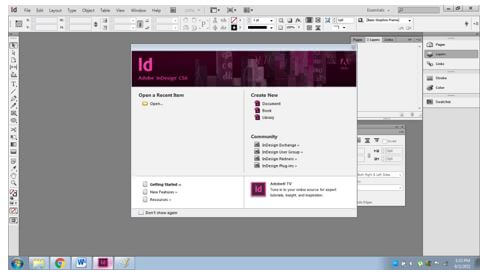
1. Launch Adobe InDesign.
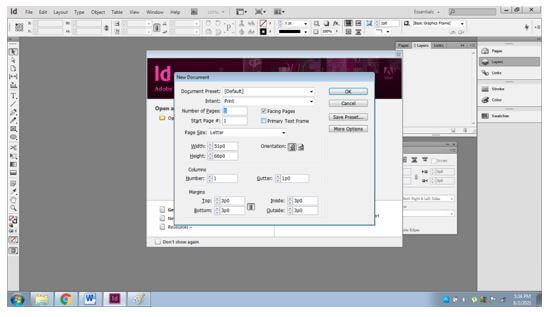
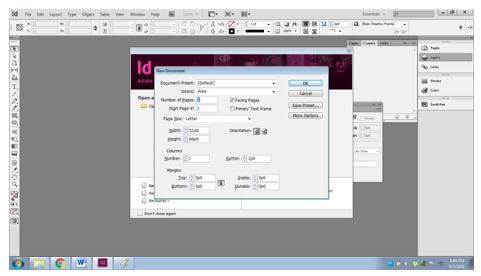
2. Create a new document as shown below.
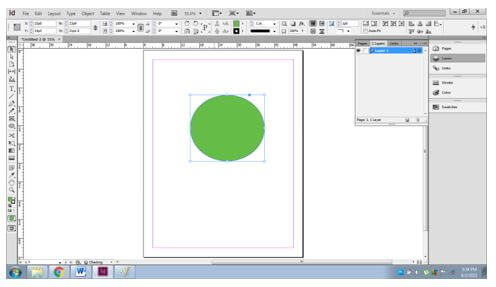
3. Create a basic shape – Circle on the page.
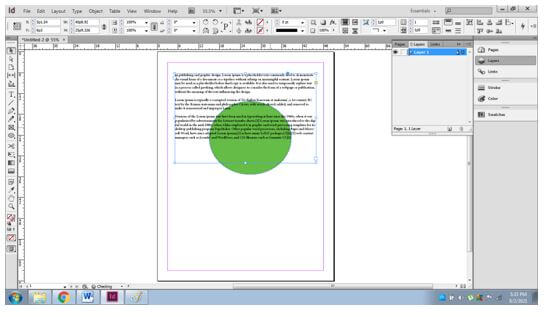
4. Write a sample text with the Text tool as shown below.
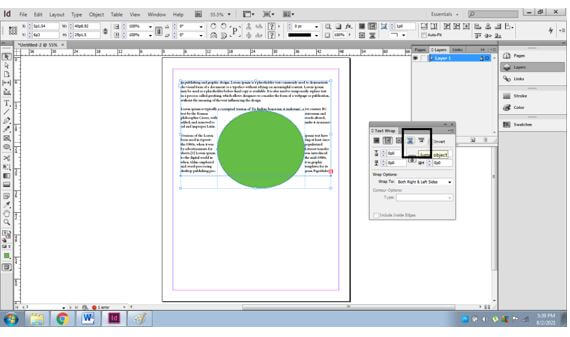
5. Now, to wrap the text around the circle we use Text Wrap options.
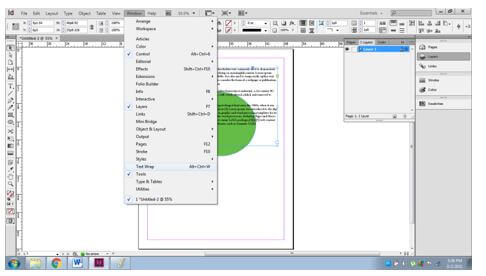
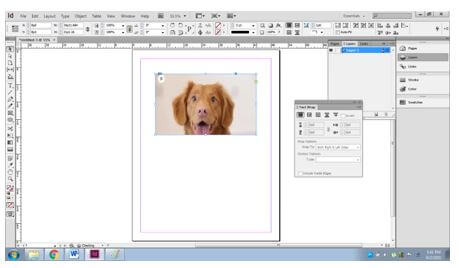
6. Go to Windows> Text Wrap. Click on the option.
7. You will see a new dialog box of Text Wrap.
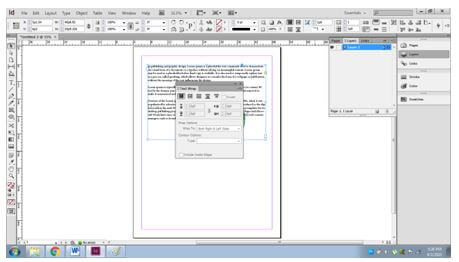
8. Now, select the text and the object, and click ON WRAP AROUND OBJECT SHAPE as shown below.

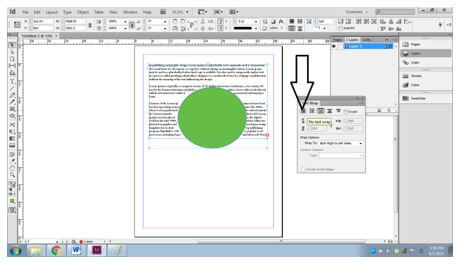
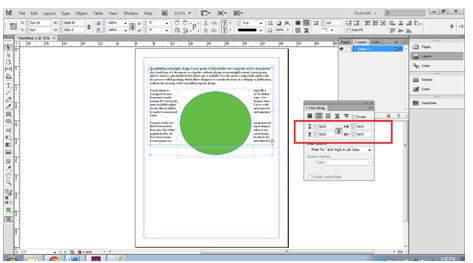
9. By Default, the text is set on NO TEXT WRAP.
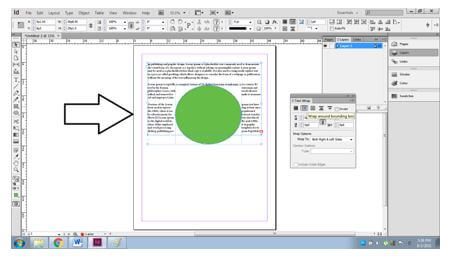
10. To change the settings, select the text boundary and the object both and click on WRAP AROUND BOUNDING BOX. This will create a boundary around the object and wraps the text around that box.
11. Jump Object and Jump To column are used to wrap text below and sideways to the object.
12. We can also use the Invert Option to wrap text inside the object as shown below.
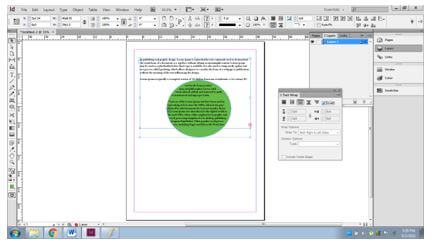
13. Further, the function also helps the user in adjusting the space between the object and text as shown below.
Similarly, we can also change the shape of the object by using the Direct Selection tool or Pen tool and wrap the text according to the object.
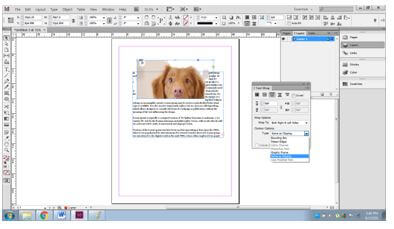
How to Wrap Text around Images?
The process of wrapping text around imported images is quite similar to wrapping text around objects. The only difference is that we can change the clipping path or boundary of the image.
Following are the steps to create the wrap text:
1. Launch InDesign and create a new document.
2. Download and place (File > Place) an image as shown below.
3. Write a sample text with the help of Text tool as shown in the below image.
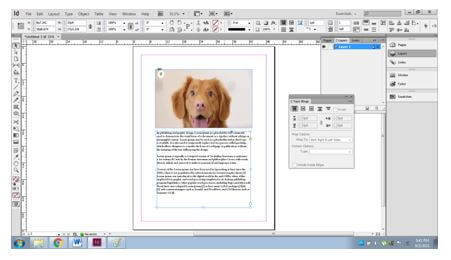
4. Select the image and the text and click on WRAP TEXT AROUND SHAPE in the Text wrap dialog box.
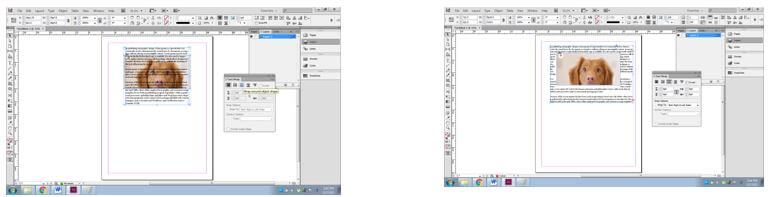
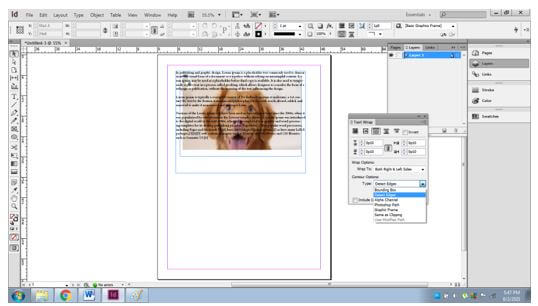
5. Now, to create a manual boundary around the image; go to Objects> Clipping path> Options. Adjust the Tolerance and Threshold accordingly.
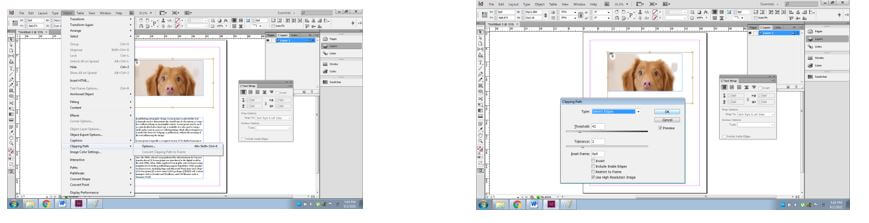
6. To wrap the text according to the Clipping path, Select SAME AS CLIPPING in the Text Wrap Options of Contour.
7. Similarly, select DETECT EDGES, to automatically create a rectangle bounding box around the image and wrap the text according to the edges.
8. Similarly, we can also wrap text around images with captions or titles. Just Group the image and the title and in a similar process create a wrap text around the image.
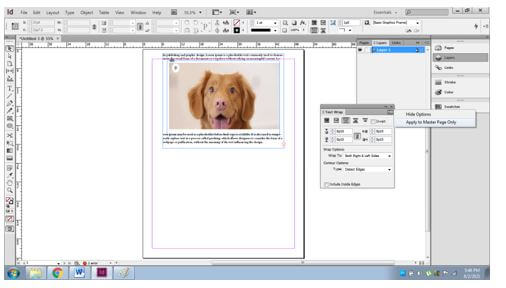
Wrap Text with Master Pages
To apply the text wrapping around an object on the master page only, Go to Windows and select the Text Wrap Option. Now, click on three lines on the dialog box on the right-hand side and select APPLY TO MASTER PAGE ONLY. With this setting, the text wrap will only be applied to the objects and text that are placed on the master page only.
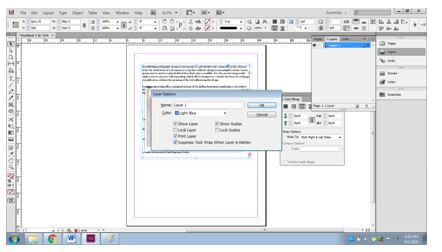
Wrapping/Unwrapping Text with Hidden Layers
When the user wraps a text around the object on a particular layer and then hides the layer, the text frame happens to wrap around another object on the other layers.
So, to avoid this phenomenon, we use the option of SUPPRESS TEXT WRAP WHEN LAYER IS HIDDEN. Double click on the Layer and select the above option to change the composition of the text on the layer.
Given below is the demonstration of the same.
Conclusion
Concluding this article, Text Wrapping is a broad topic but an important aspect in learning the basics of creating pages and layouts on Adobe InDesign. The user must study the fundamentals of Texts Formatting and Wrapping with practical examples for acquiring the proper knowledge of the software and creating creative designs and artworks.
Recommended Articles
This is a guide to InDesign Wrap Text. Here we discuss how to wrap text in InDesign, around basic shapes & wrapping/unwrapping text with hidden layers. You may also have a look at the following articles to learn more –
