Introduction to Illustrator auto trace
Auto Trace as its name showing its work as a tracing feature on something. Yes, it is a feature through which you can trace any raster image and converts it into a vector shape. You can trace the image with or without outline according to requirement with this feature. An auto trace allows you to trace in gray color mode, in a different range of color combination, in black and white color mode and so on. It depends on your choice you can go with anyone of tracing method. This article will discuss auto trace with an example and learn important parameters of this feature. In this topic, we are going to learn about Illustrator auto trace.
How to use Auto Trace feature in illustrator?
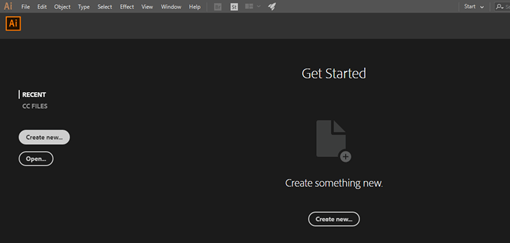
Auto trace is a very exciting feature of this software, and it helps in the quick tracing of any image which you have picked from anywhere and want to convert into a vector image. Now let us have a new document for starting our article, so click on Create New document button on the welcome screen of illustrator software.
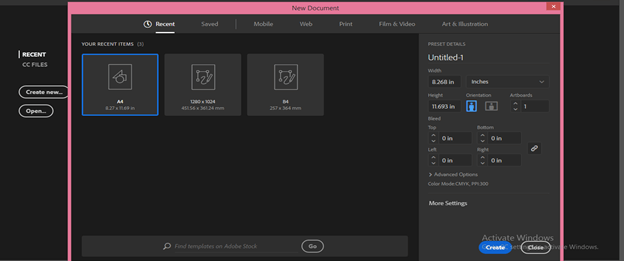
Choose your desired document size from this ‘New’ document dialog box and hit the Create button.
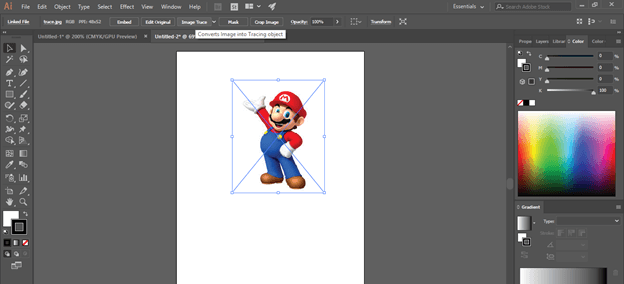
Now let us take an image that we want to trace or convert into a vector shape. For this purpose, go to the saved location of your desired image, pick it from there, and then drop it into the document area of illustrator.

Set its size as per your choice. We have two options for going to the Image trace feature. The first one when you select any image, you will have some parameters and properties active at the parameters’ bar of this software. You will have the Image Trace tab in this bar, which is next to Edit Original tab.
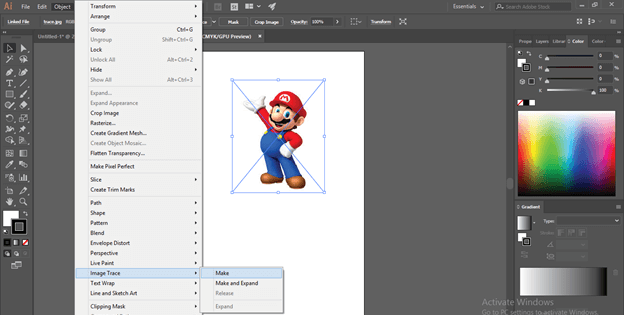
The next option is to go to the Object menu of the Menu bar and click on it. You will find the Image Trace option at the bottom of the drop-down list with its other sub-options.
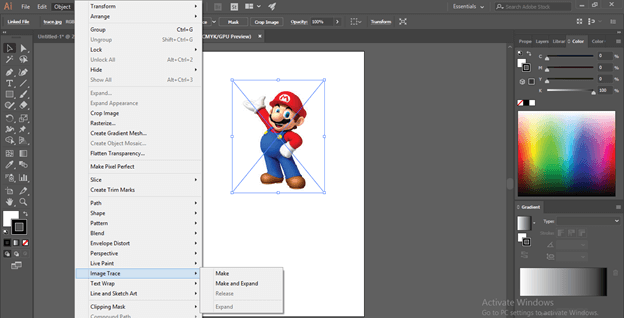
Now let us go through this feature for learning about it. So go to the Image Trace option and click on the Make option for tracing your selected image.
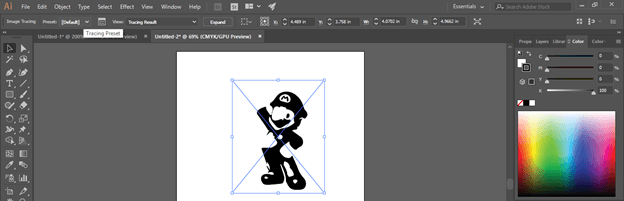
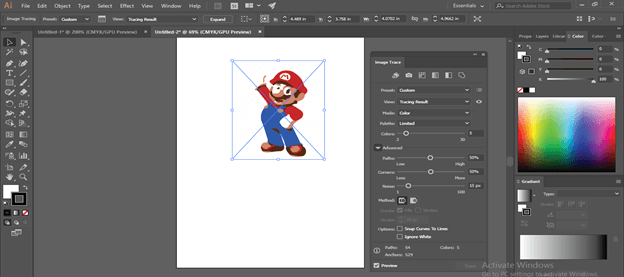
Now, after tracing your image, it converts it into the default format of tracing, which is black & white color tracing. Once tracing is completed, you will have the Image Tracing option parameters at the parameters’ tab.
If you want a separate panel of parameters of the Image Trace option, then click the on ‘Image Trace Panel’ tab the of parameters’ barthe of Image trace option.
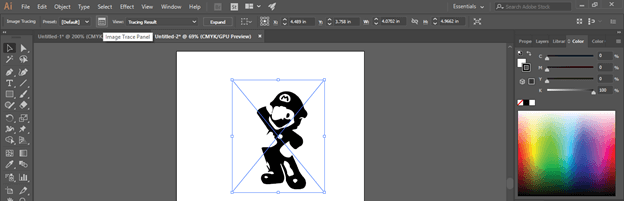
This is the Image Trace panel box. Before changing the parameter in this box, make a tick mark On at the Preview button at the bottom of this box.

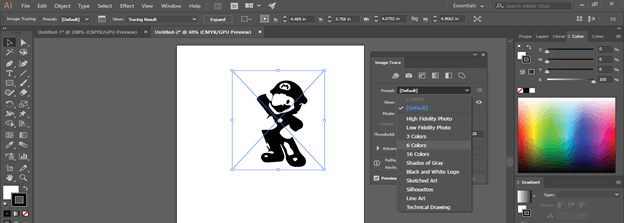
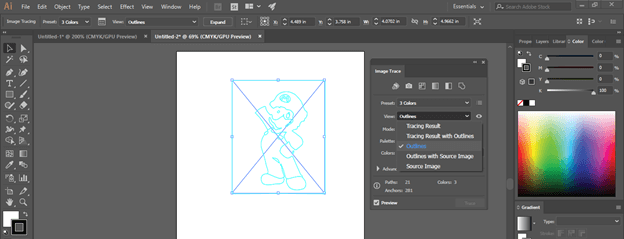
We have different tracing presets in this box with color tracing, gray color tracing, sketch art tracing, and many other presets. You can go with anyone, and I suggest you analyze each and every preset during your learning for a better understanding about tracing.
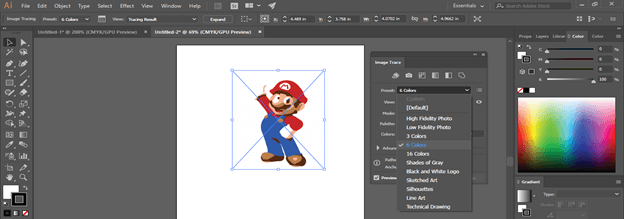
If you choose the 6 colors option, then it will trace the maximum color of the image during tracing.
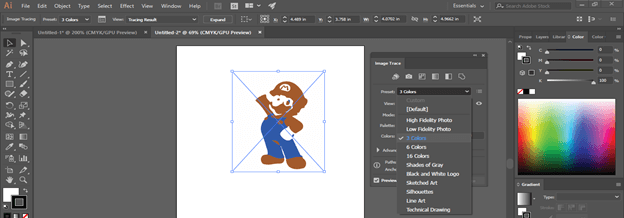
For better tracing in this image, I will go with 3 colors tracing preset, and I will get this result.
You can trace this image with an outline with this option.
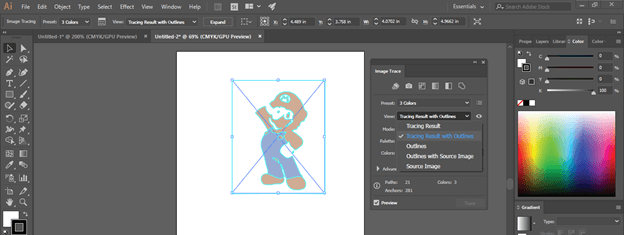
If you want to trace just the outline of your selected image, then go with the Outlines option of view option.
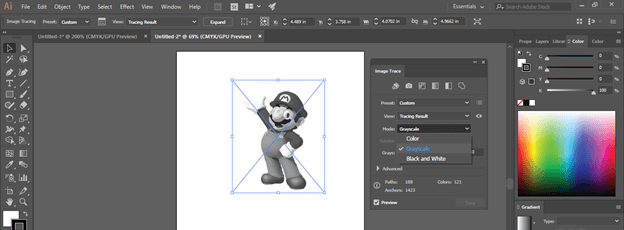
Now come to the Mode option of this box. Here if you choose the Grayscale option, then you will get this type of gray color result.
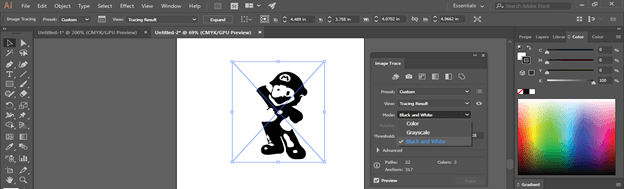
You can go with the Black and White option also for this type of result.
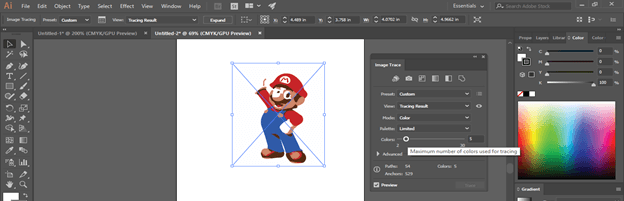
Here come customize preset option. With the Colors scale option, you can define the range of color used in your image. I suggest you to use minimum color for better result.
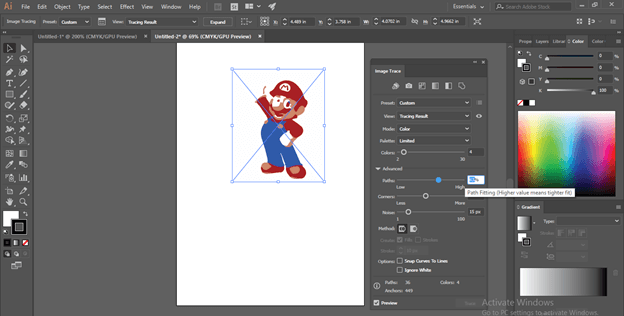
Now come to the Advance option. Click on the drop arrow of this option for having all advance parameters of the advance option.
Path scale defines the path used in your image. If you choose less value of path than in your traced image, there will be less paths, but it may disturb the shape of your image, so while setting path value to choose that value which is minimum and not to disturb the shape of your image. The minimum path will give you less anchor point in vector shape, which will be easy to handle.
Corner’s value works the same as the path option. Less corner means less nodes that will easily handle working with vector shape but make sure your chosen corner should not damage vector shape.
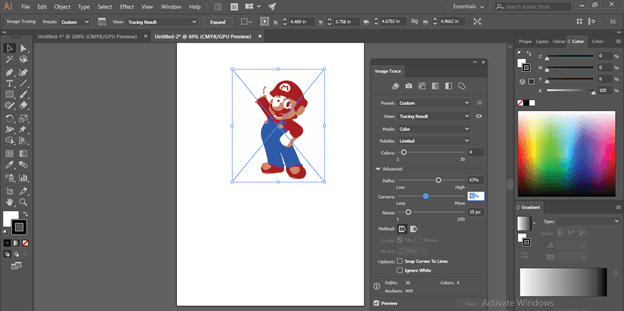
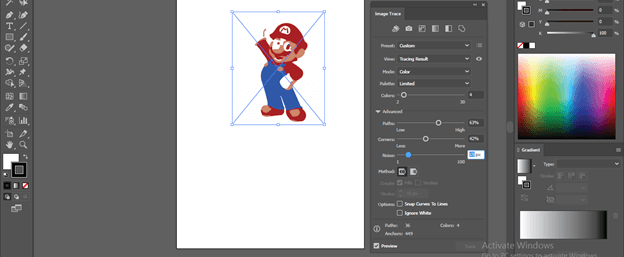
Noise value will define pixels used in your vector shape, so according to your requirement, take noise value, but less value will be good. You can check the best result by changing the value of noise on the Noise scale.
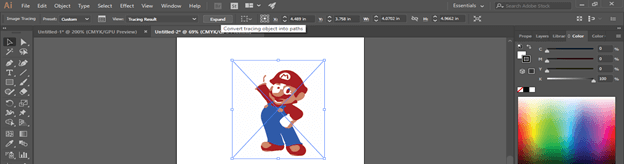
Once you set all parameters in the Image trace box according to you, go to Expand option tab, which is at the parameters’ bar and click on it for converting your image into the path by tracing…
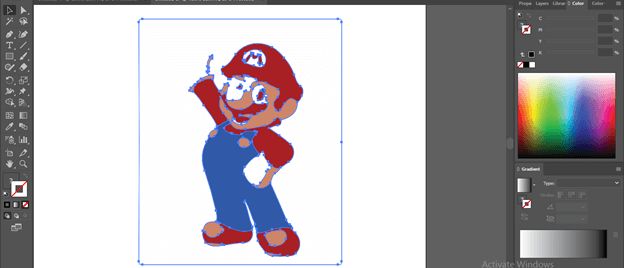
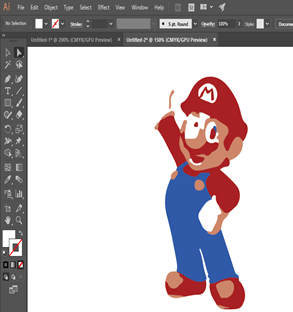
And you will get this type of vector shape.
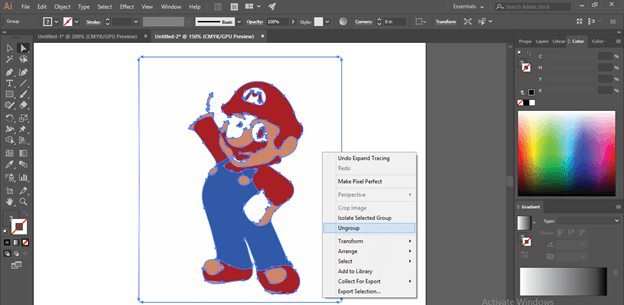
For using all path separately, make right-click on this image and click on Ungroup option of the list.
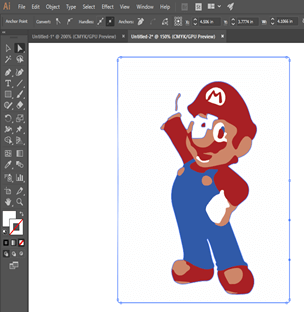
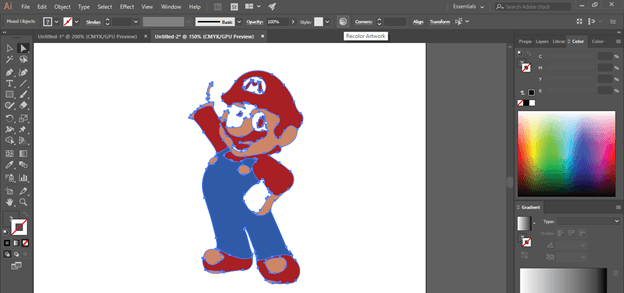
I will delete the background of this image by selecting and pressing the delete button.
Now for changing its color, select it with the direct selection tool and click on the Recolor Artwork option of the parameters’ bar.
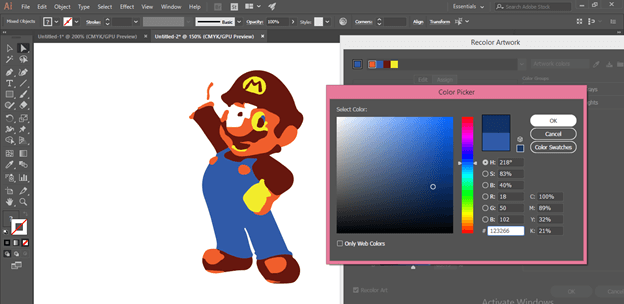
Here in this box, you will get all color scales which are used in this image. In this image 4 colors are used. Select color scale by click on it which you want to change, then click on color square box, which is at the bottom of this dialog box for color picker box.

Choose your desired color with which you want to replace the previous color, then hit the Ok button.

Do the same with all color if you want to change all colors.
This way, you can use Auto Trace in illustrator.
Conclusion
So what do you think? Isn’t Auto Trace feature is a very good feature of illustrator after learning it from this article. I think your answer is yes; it is a very exciting and helpful feature through which you can quickly trace any image and converts it into a vector shape.
Recommended Articles
This is a guide to Illustrator auto trace. Here we discuss How to use the Auto Trace feature in illustrator with an example and learn important parameters of this feature. You may also have a look at the following articles to learn more –
