Introduction to Halftone in Photoshop
Photoshop is an image editing software that works with raster images. Image editing professionals widely use it for their professional editing work. We can create a very good effect on our image in this software. Halftone is a type of effect through which we can create an illusion on our image of disintegrated pixels. This article will discuss how we can create this effect on our image and use them for our project work. We also analyze the parameters of the creation of this effect to use it very easily and apply it to our image with our own ideas. So let us start our discussion.
How to Use Halftone Effect in Photoshop?
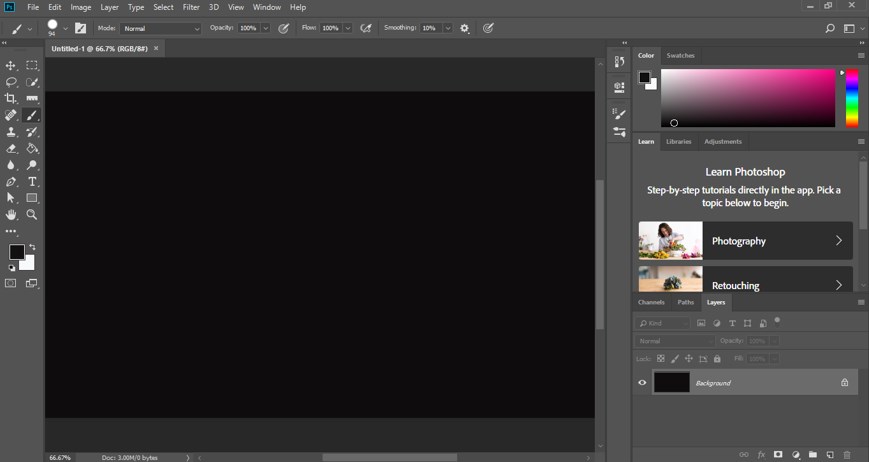
We can use this effect on our image by following a few simple steps and get knowledge about the handling of parameters of this feature. But before starting, let us have a quick look at the working screen of this software so that we can understand this topic in a better way.
Step 1: At the top of the working screen, a Menu bar has a number of menus for handling parameters of this software; below this bar, we have another bar that is a property bar of active tool or active image. Below this property bar, we have three sections in which at the left corner we have a toolbar, at the center, we have a display window, at the right corner, we have some panels such as color, layer panel, and some others.
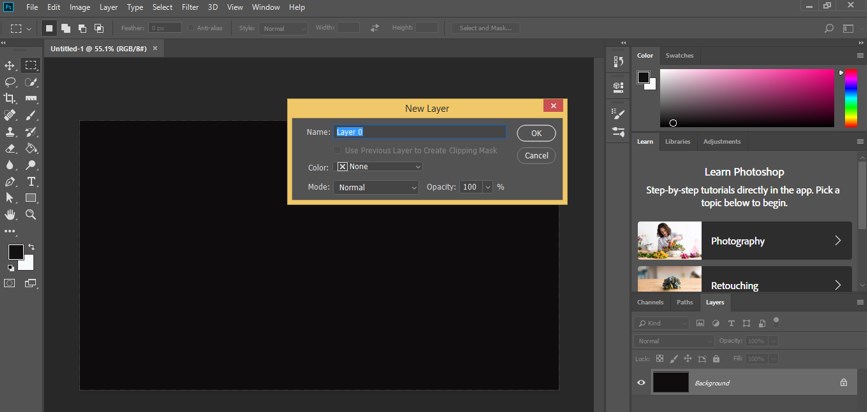
Step 2: We have created a document in this software which is as a background layer, so for making it an editable layer, make double click on it, and a dialog box will be open like this. You can name this layer by entering the name in the Name box. Now press the Ok button of this dialog box.
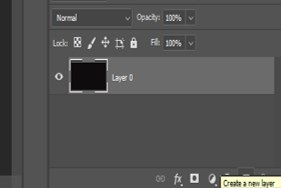
Step 3: Now go to the bottom of the layer panel and click on the ‘create new layer’ button for creating a new layer in the layer panel.
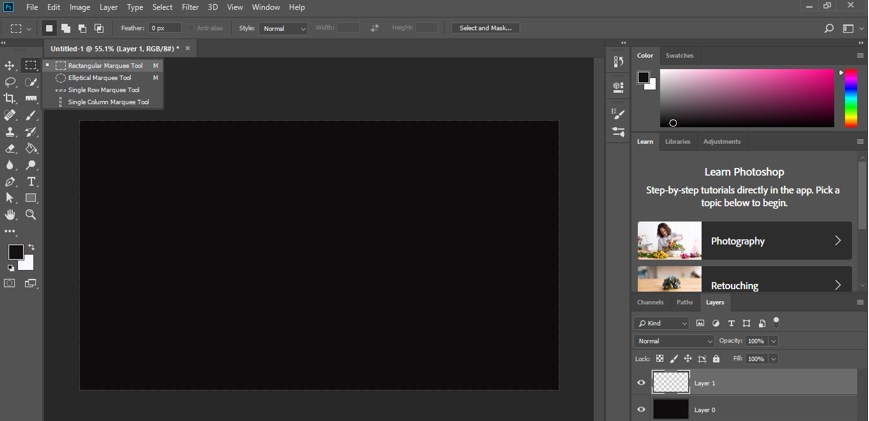
Step 4: Now select this new layer by click on it, which is named Layer 1, in the layer section and go to the tool panel of this software. Take the Rectangular Marquee tool by click on its icon.
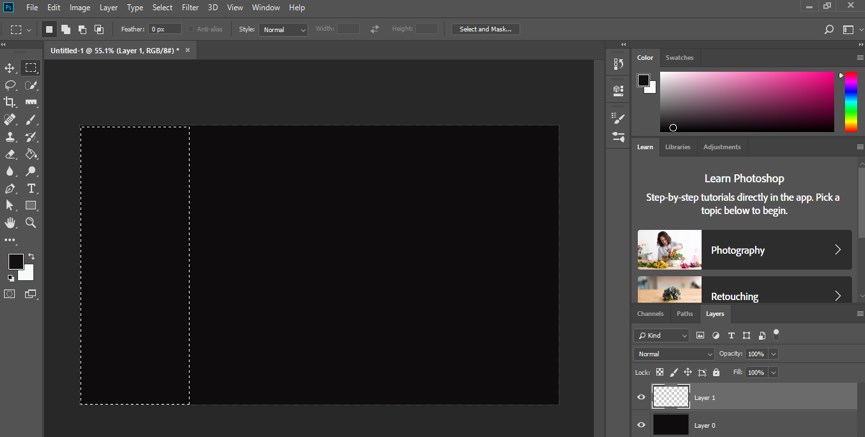
Step 5: Now, make a selection like this with the marquee tool on Layer 1.
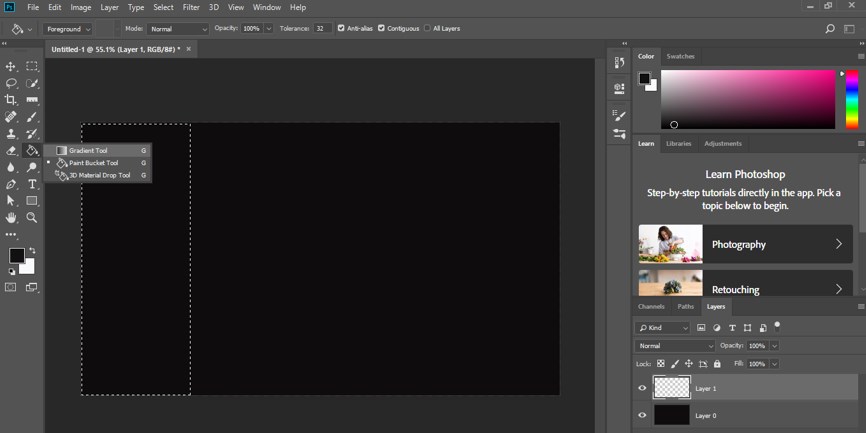
Step 6: Now again, go to the tool panel of this software and take the Gradient tool by click on it.
Step 7: Go to the property bar of the gradient tool and click on ‘click to edit the gradient option’ with a mouse button.

Step 8: Once you make click on it, a gradient editor box will be open.

Step 9: Now delete mid color stop on the gradient scale by dragging it in a lower direction and click on Opacity stop.
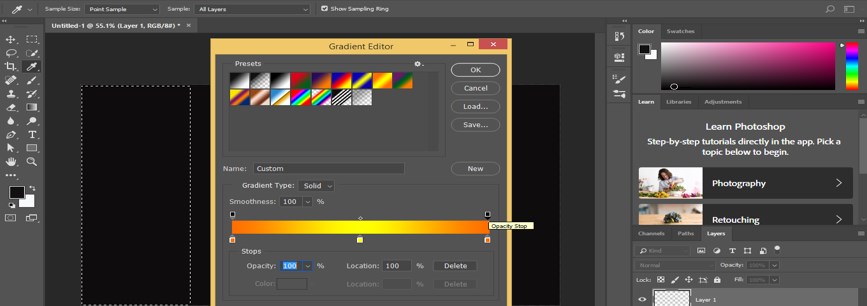
Step 10: Decrease the value of the opacity of this stop as 0. So that one side of the gradient becomes transparent like this.
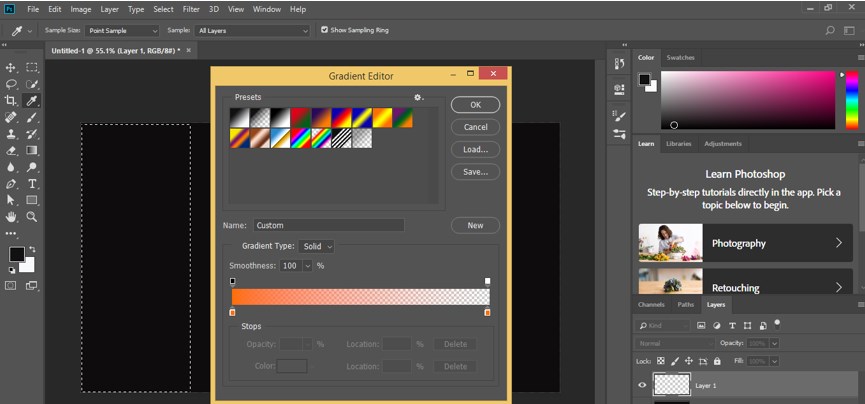
Step 11: Now drag the point of gradient tool on this selection in the horizontal direction for filling this type of gradient in this selection of marquee tool.

Step 12: When you off the background layer (layer 0) from the layer panel of this software, by click on the eye button of this layer, you can see the effect of gradient on your layer.

Step 13: Now go to the Filter menu of the menu bar of this software and go to the Pixelate option of the drop-down list. Now choose the Color Halftone option from the new drop-down list.
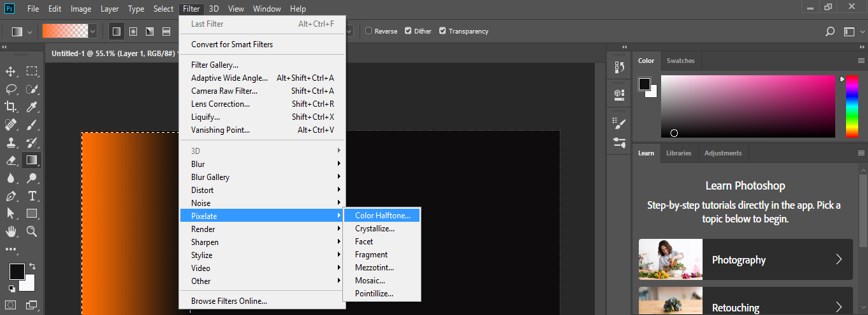
Step 14: Now, a dialog box of Halftone will be open. Set the radius of pixels of halftone from the Max radius option of this box and remain in other settings as it is. Now press the Ok button of this box.

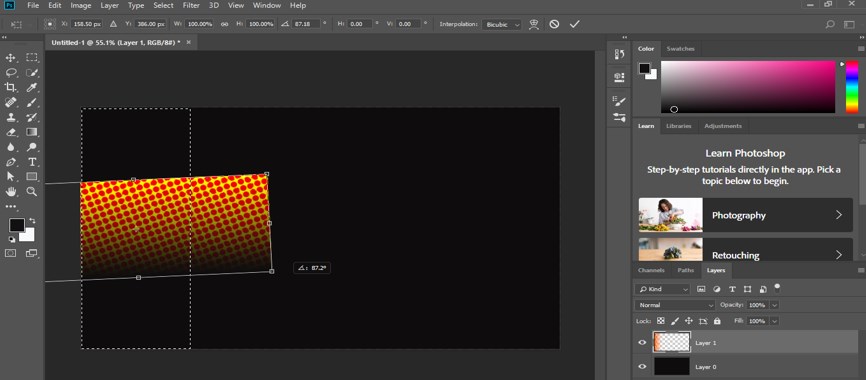
Step 15: And halftone effect will created on your selected area like this.

Step 16: You can make a change in this selection at any time of your work by moving or rotating it by using the transforms property of it.
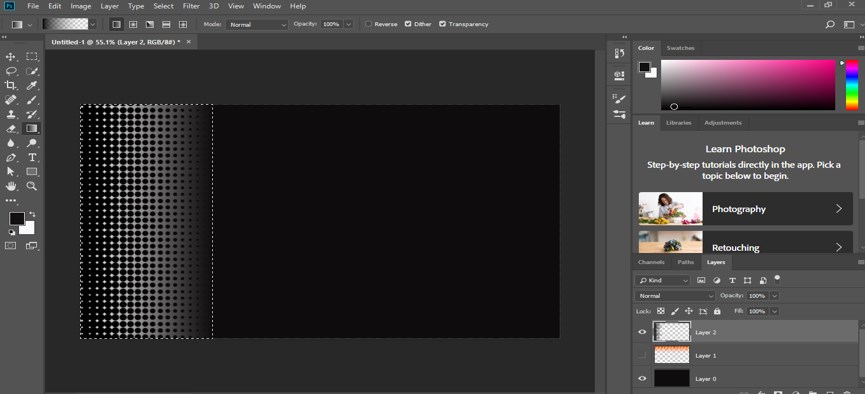
Step 17: You can also create this effect with black and white colors by following the same steps.
Step 18: Now, let us understand this effect on any image. So let us place an image in this software. Go to the File menu and click on it. Choose the Open option from the drop-down list.

Step 19: Now, a dialog box will be open, choose your desired image by click on it from the folder where you have saved your image, then click on the Open button of this dialog box.

Step 20: Now, your image will open in a new tab of this software as a background layer. Now go to the layer panel and make double click on this layer for making it an editable layer. A dialog box will open, name your layer according to you, then press the Ok button of this box.
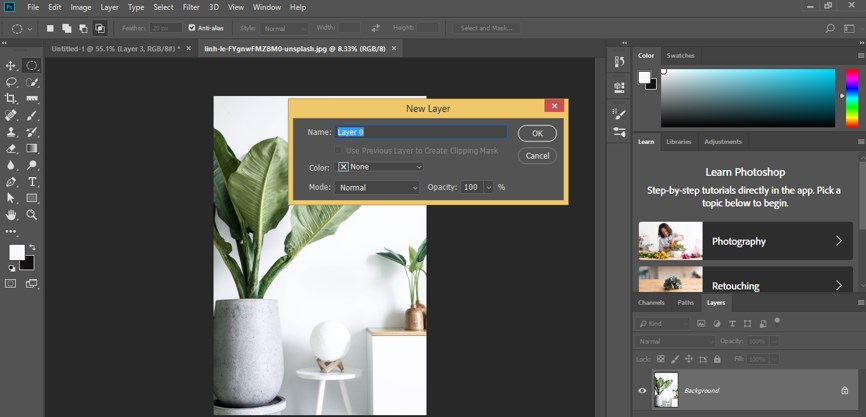
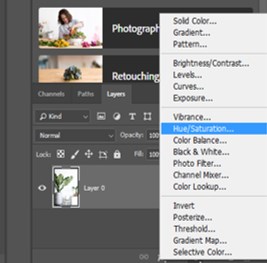
Step 21: Now go to the bottom of the layer panel and click on the Adjustment layer button. Choose the Hue/Saturation option from the drop-down list.
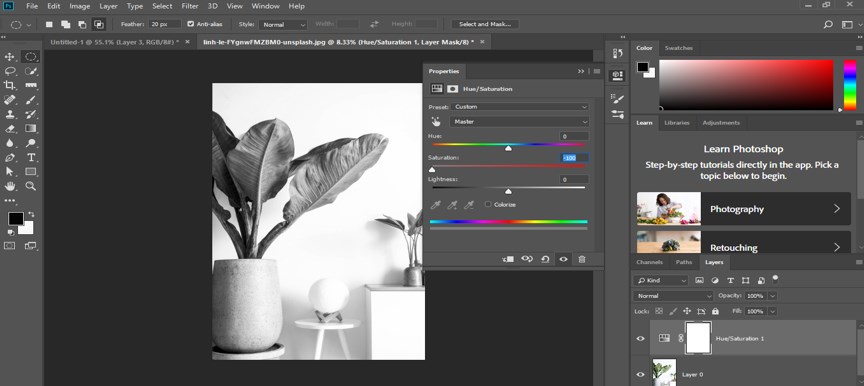
Step 22: Make the Saturation value as negative on the slider of the Saturation option of this Hue/Saturation box for making our image black and white.
Step 23: Now again, go to the adjustment layer button of the layer panel and click on it. Choose the Brightness/Contrast option from here.
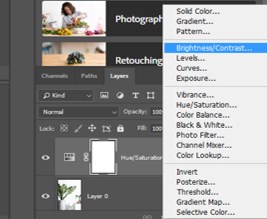
Step 24: Set the value of Contrast up to 50 in the Brightness/Contrast box so that the halftone effect can show its result clearly.
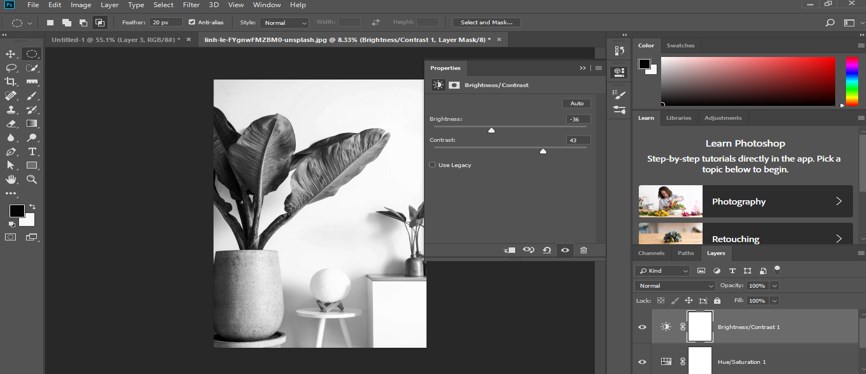
Step 25: Now go to the layer panel and select Layer 0 by click on it, which is the image layer, then go to Filter Menu of the menu bar and click on it. Go to the Pixelate option of the drop-down list, then click on the Color Halftone option of the new drop-down list.
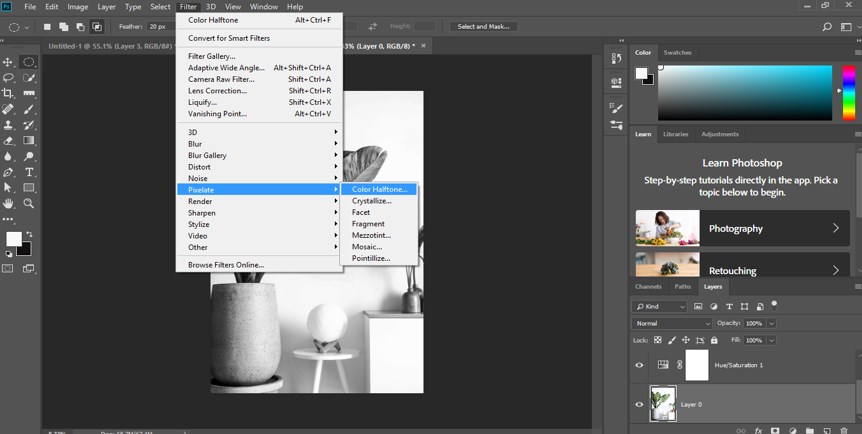
Step 26: A Color Halftone box will be open. Set the radius value as 10, then press the Ok button of this dialog box.

Step 27: Once you make a click, your image will disintegrate in pixels like this.
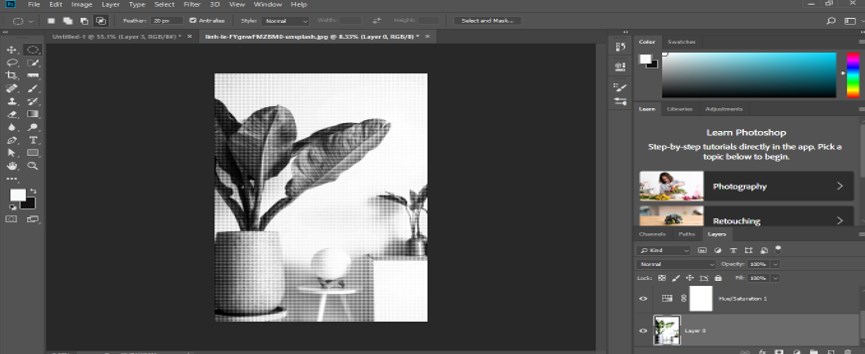
Step 28: You can see the pixels effect on your image by zoom in it like this.
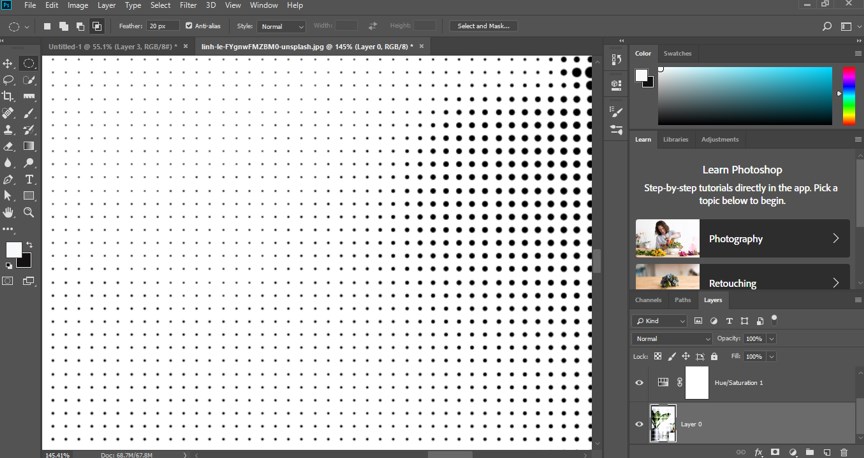
In this way, you can create a halftone effect on your image and use it in your project work for different purposes.
Conclusion
Now, after this article, you can understand what the halftone effect is in Photoshop software and how you can easily handle the parameter of creating this type of effect on your image. Keep practicing on these types of effects of this software so that you can add plus point to your image editing skills.
Recommended Articles
This is a guide to Halftone in Photoshop. Here we discuss an introduction, how to use Halftone in Photoshop in a step-by-step manner. You can also go through our other related articles to learn more –

