Updated February 17, 2023
Introduction to Gulp.js
Gulp is used to run different tasks with the help of Node.js, as a platform. Gulp depends on the JavaScript code, provides the platform to run the front-end tasks, and helps us run large-scale web applications. Commonly gulp is used to build the automated system to perform different tasks such as CSS and HTML. It also provides the provision for concatenating additional library files and compiling SASS files. In this operation, we need to act on the command line using Shell or Bash scripts.

What is Gulp.js?
Gulp is an order line task sprinter for Node.js. Gulp lets us computerize cycles and run redundant errands efficiently. Gulp is not the same as other assignment sprinters because it utilizes Node streams, channeling yield starting with one undertaking as information and then onto the next. It has to peruse a record once, process it through numerous errands, and compose the result document. These outcomes result in quicker constructs since there is a compelling reason to make and peruse middle-person documents on the hard drive.
Present-day web improvement has numerous tedious assignments like running a nearby server, minifying code, enhancing pictures, and preprocessing CSS; the sky’s the limit. This text examines Gulp, a forming apparatus for robotizing these errands.
It is more limited, less complex, and quicker when contrasted with another assignment.
- Utilizes SASS and LESS as CSS preprocessors.
- Consequently, it invigorates the page in the wake of altering the source records.
- Straightforward and fabricate the Gulpfile.js because it utilizes unadulterated JavaScript code to construct the assignment.
Using Gulp.js
Using gulp helps us automate the two different tasks; here, we try to remove the white space from the HTML file and modify the JavaScript files. Here we need to use gulp to copy the resultant files into the built folder.
Let’s consider our application placed under the folder C:\Gulp\Demo. There is no need to use the global installation of gulp; instead of global, we can install a local version.
For execution, we need to reach the application and open the command line prompt; after that, configure our application using npm package manager because we install gulp using npm, so use the npm init command and hit enter to create a JSON file. Here we get some question lists relevant to the application, and finally, we created a package, a JSON file, under the root folder. This newly created file stores all the dependencies.
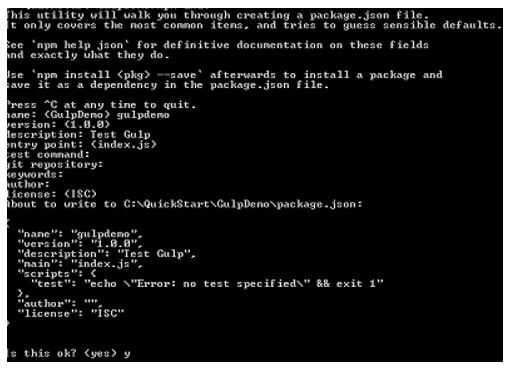
The created JSON file we can see below is as follows.
Code:
{
"stud_name":"Jenny",
"Class":"First",
"RollNo":"10",
"scripts":{
"exam":"echo\"Error Message: no exam specified\ " && exit 2"
},
}
Explanation:
- The package.json for npm is like a package.config utilized by Nuget to store the application conditions.
- By having a neighborhood establishment of Gulp, when the application is most recent from adaptation control, it will design the application with every one of its conditions locally instead of utilizing a worldwide establishment.
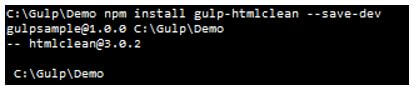
We need to add an HTML task; gulp provides the plugin to remove the white space from the HTML file, so use the following command.
Code:
npm install gulp-htmlclean --save-devExplanation:
- Inside the root folder, we will get an unlearned HTML file; now, we need to create a gulp runner to clean the HTML file and transfer it into the destination folder under the root folder.
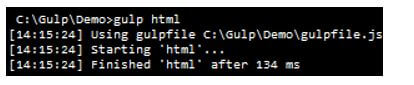
- After executing the above command, we get the following screen.
Output:
We usually know that gulp writes all tasks in a JavaScript file called gulfile.js, so first, create that file and write the following code.
Code:
var gulpfile = require('gulp'), htmlcleanfile = require('gulp-htmlclean');
var f = {
src: 'src/',
build: 'build/'
};
gulp.task('html', function() {
var o = folders.build + 'html/';
return gulp.src(folder.src + 'html/**/*')
.pipe(htmlclean())
.pipe(gulp.dest(o));
});
Explanation:
- In the above code, we use different methods, such as gulp.task, gulp.src, gulp.dest, and gulp.watch.
- Gulp.task: It is used to create a newjobk per our requirement.
- Gulp.src: It is used to read files from a specified source folder.
- Gulp.dest: it is used to write the file after the operation.
Another strategy called readable.pipe() really chains the above swallow techniques to play out an assignment. Swallow works with Streams, for example, the gulp.src() technique peruses records as stream from the source and passes it to a swallow module through the pipe() strategy for doing an assignment. This way, the line() technique peruses the stream from the gulp.src(), executes the module assignment and passes it to the objective stream through gulp.dest() to compose it to the objective.
Creating Server Gulp.js
Now let’s see if we can create server gulp.js as follows.
Server creation helps us reload live tasks on the browser; after that, we can integrate all required tasks. So first, we need to install the Browsersync module on the machine using the following command.
Code:
$npm install –save-dev browser-sync
After that, we need to write a function as below.
gulp.task('webserver', function(){
connect.server({
livereload:true});
});
In the second step, we can set up an automatic compilation of fewer files to the CSS style sheet and move them into the browser. We may need to change the hostname and port in the next step. Gulp provides the connect plugin, and it has many configuration options. As per our requirement, we can modify the hostname and server port.
Code:
connect.server({
port:80,
host: ‘gulp.dev’
}) ;
Configure and Workflow Gulp.js
After installing gulp and Node.js, we need to create a starter using the express-generator.
Code:
$ npx express-generator -v ejs –sample-project
$ cd sample-project
$ npm install
Code:
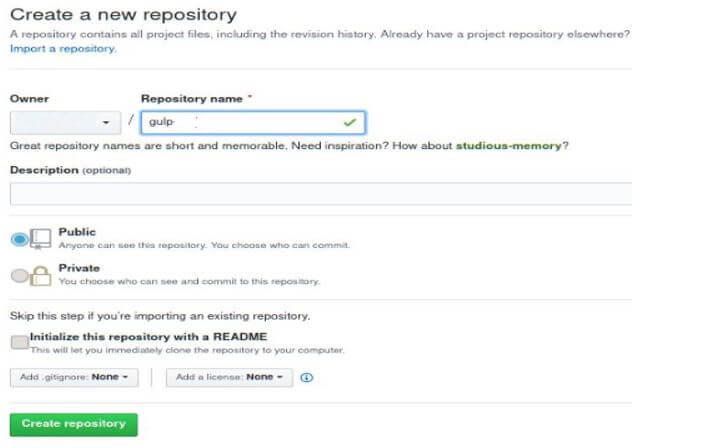
Now create a GitHub repository for our project, as shown in the below screenshot.
Copy the repository URL and make the initial push using the following command.
Code:
$git init
$git remote add origin specified url
$git add –A
$git commit –m “commit”
$git push origin master
gulp js Project Structure
Now let’s see the project structure as follows.
The following screenshot shows the project structure of gulp.js follows.
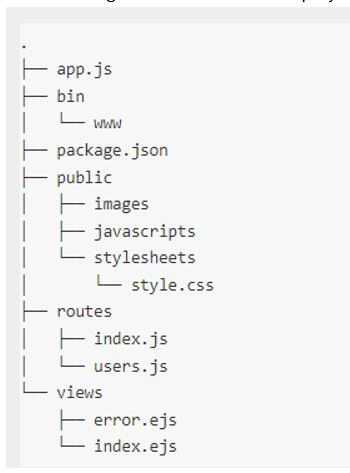
Using the above structure, we can create an automated workflow such as compiling CSS files from the source, creating HTML pages, checking application code, etc.
Conclusion
With the help of the above article, we saw about Gulp.js. From this article, we saw basic things about Gulp js and the integration of Gulp.js, and how we use it in Gulp.js.
Recommended Articles
This is a guide to Gulp.js. Here we discuss the introduction, creating server Gulp.js, configure, and workflow for better understanding. You may also have a look at the following articles to learn more –

