Updated April 18, 2023
Introduction to Flask logging
Flask logging is defined as a module that enables developers to implement a flexible, event logging system for Flask applications and includes all kinds of functions and classes that are necessary for the implementations. Logging in Flask uses the same standardized Python logging framework. The benefit of having a logging framework by standardized library module in Python is that all Python modules can interact and participate during logging. The messages are logged using app.logger and the Flask object instantiating is done with the same variable as that of app.name. This module provides a lot of functionality and flexibility to the developers of the Flask application.
Syntax
Logging is an essential part of any coding practice which allows developers to understand the flow of the program at a deeper level. With this deeper understanding comes the way of making the code running more transparent. With the below syntaxes we would get a sense of how it looks aesthetically before we jump on to learning about working of logging in our next section.
Instantiating the Python’s default logger (basicConfig):
import logging
logging.basicConfig(filename='<filename>.log', level=logging.<log_level>, format = '<message_structure>')
Setting the logging level to DEBUG:
<flask app name>.logger.debug("<Message that goes into the logger">)Setting the logging level to INFO:
<flask app name>.logger.info("<Message that goes into the logger">)Setting the logging level to WARNING:
<flask app name>.logger.warning("<Message that goes into the logger">)Setting the logging level to ERROR:
<flask app name>.logger.error("<Message that goes into the logger">)Setting the logging level to CRITICAL:
<flask app name>.logger.critical("<Message that goes into the logger">)Removing the default handler:
<flask app name>.logger.removeHandler(default_handler)Mailing errors to admins:
import logging
from logging.handlers import SMTPHandler
handlerSMTP = SMTPHandler(
mailhost=<host IP address>,
fromaddr='<from mail address>',
toaddrs=['<list of to address separated by comma>'],
subject='<subject of the mail>'
)
handlerSMTP.setLevel(logging.ERROR)
<flask app name>.logger.addHandler(handlerSMTP)
How does logging work in Flask?
To understand the working of logging in Flask we need to understand the different components as a part of the logging framework in Flask. The different components bind together the process of logging in Flask and make it a complete circle when it comes to working. These components are:
1. Logger: This is the entry point of any logging system which provides an interface to the Flask application for logging events for the application. The events which get recorded are known as log records. Each of the levels of record has its own severity and they are:
- Debug: 10
- Info: 20
- Warning: 30
- Error: 40
- Critical: 50
Each of the log records consists of records matching to the severity of the levels mentioned above. Now a logger is configured to contain a log level. Any log record which has severity higher than that of the log level decided are only recorded in the logger. It is now, that the logger passes the log records to the handler.
2. Handlers: This component helps in directing the log events or records to be directed into their respective destination. By using different handlers, the events are routed to different files that might be even placed in multiple locations. If needed the logging framework might require multiple handlers to cater to the need of the application.
3. Formatters: After the logs are handled by handlers, the formatters are used for modifying the aesthetic feel and look of the log record. This component specifies the layout of the log record and is modified by mentioning the format of the log which is getting stored.
4. Filters: Finally, once the aesthetic look and feel is decided, this component helps developers on filtering the log record by parameters. These parameters can also be anything other than the log level.
With the above 4 components the process flow of Flask logging is well understood but we are still left with some minute details regarding the working of logging in Flask. Flask application in background uses the python logging system framework for tracing the events during the application’s run time. In this article we will be mostly talking about using the Python’s default logger “BasicConfig”. If one feels the need to not use filename, the filename attribute can be removed, and the logs will be displayed to console itself but otherwise in presence of filename the log files are stored with .log extension. The last and final nail is the format which consists of various attributes so that proper message of log is stored and in a standardized way!
In our next section we will see the use of logging in a simple Flask application!
Examples
In this section we will look at all the uses of logging in a Flask application, as by now we have already looked at the syntax and the way of working of logging of Flask application. This will be a hands-on feel of the theoretical learning we did above.
Example #1
Instantiating the Python’s default logger (basicConfig)
Syntax
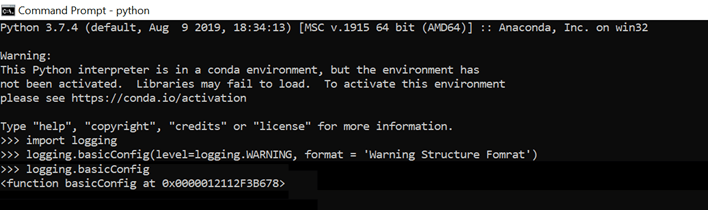
import logging
logging.basicConfig(level=logging.WARNING, format = 'Warning Structure Fomrat')
Output:
Example #2
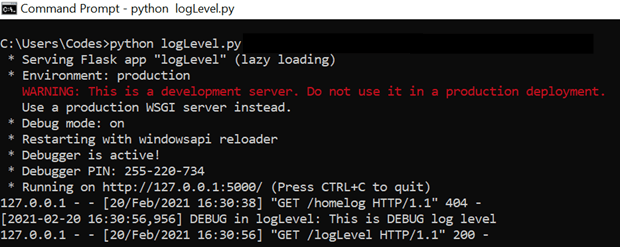
Setting the logging level to DEBUG
Syntax
from flask import Flask
appFlask = Flask(__name__)
@appFlask.route('/logLevel')
def logLevel():
appFlask.logger.debug("This is DEBUG log level")
return "Testing the debug log level"
if __name__ == "__main__":
appFlask.run(debug=True)
Output:
Example #3
Setting the logging level to INFO
Syntax
from flask import Flask
appFlask = Flask(__name__)
@appFlask.route('/logLevel')
def logLevel():
appFlask.logger.info("This is INFO log level")
return "Testing the info log level"
if __name__ == "__main__":
appFlask.run(debug=True)
Output:

Example #4
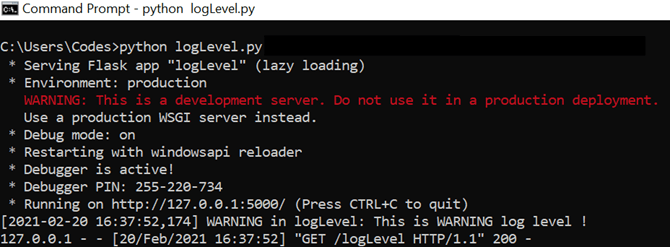
Setting the logging level to WARNING
Syntax
from flask import Flask
appFlask = Flask(__name__)
@appFlask.route('/logLevel')
def logLevel():
appFlask.logger.warning("This is WARNING log level")
return "Testing the warning log level"
if __name__ == "__main__":
appFlask.run(debug=True)
Output:
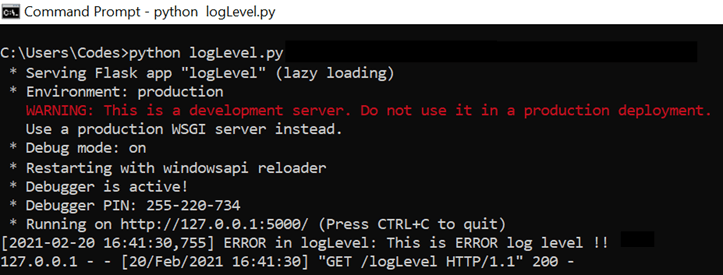
Example #5
Setting the logging level to ERROR
Syntax
from flask import Flask
appFlask = Flask(__name__)
@appFlask.route('/logLevel')
def logLevel():
appFlask.logger.error("This is ERROR log level")
return "Testing the error log level"
if __name__ == "__main__":
appFlask.run(debug=True)
Output:
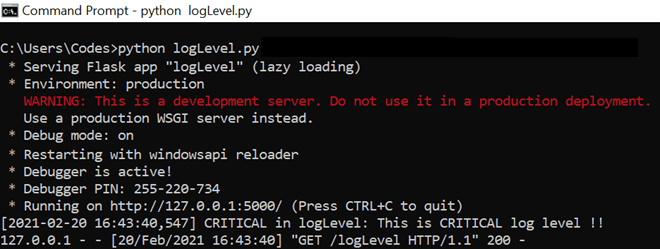
Example #6
Setting the logging level to CRITICAL
Syntax
from flask import Flask
appFlask = Flask(__name__)
@appFlask.route('/logLevel')
def logLevel():
appFlask.logger.critical("This is CRITICAL log level")
return "Testing the critical log level"
if __name__ == "__main__":
appFlask.run(debug=True)
Output:
Conclusion
In this article, we have got to know about the working of Flask logging and how it internally uses the Python logging framework. Along with that, we also took a dig into each of the levels separately so that one can understand the difference and use it as per their requirement. As usual, other experiments is left to readers to perform and learn!
Recommended Articles
This is a guide to Flask logging. Here we discuss the working of Flask logging and how it internally uses the Python logging framework. You may also have a look at the following articles to learn more –
