Updated April 10, 2023
Introduction to Flask authentication
Flask authentication is defined as a process of identifying the eligibility of a user to access any resource by a simple challenge and response mechanism where at first the user requests the access of the resource, post which the server asks for information that will validate the eligibility of the user and the client then passes the information taken from the user to the server in an authorization header and with encoding as base-64. The authentication can be thought of as an act of negotiation that is been done between the client and the server so that it knows that the resource falls into the right hand. There are various ways one can authenticate in Flask and in this article, we will take a deep dive into those!
Syntax
Any initial request from the client is an anonymous request which is denied by the Flask server and indicates that authentication is required. A www-authentication header is sent which contains the supported authentication schemes. In this section, we will learn about authentication from the syntax perspective so that when we learn about various ways of authentication, it is easier to map it back with the syntax learned here for a complete picture of the topic in discussion.
Installing HTTPAuth module:
pip install Flask-HTTPAuthInstalling the Flask JWT module:
pip install jwtUse the password hashing mechanism:
from passlib.apps import custom_app_context as hash_pass
pwdHashed = hash_pass.encrypt( < password variable > )
How to Perform Authentication in Flask?
Just imagine building a web application and allowing every user to access every URL endpoint in the web application. This will be like opening the entire website to the public, which is not wrong in any sense, but if the website needs to contain member-related URL endpoints which are only accessible to authorized users, we will need the authentication game plan. Now, in learning about the authenticated we came across an interesting word that is authorization. Quite generally, people get confused about authentication and authorization. Let us understand the difference in few short sentences. Though strikingly similar to hear, the processes are strikingly apart in their functionalities. Authentication is done to confirm who the users are, and authorization is the process of giving permission to access a particular resource. If this is still confusing, we just need to remember we authenticate followed by authorizing the user in accessing a resource!
There are multiple ways in which authentication takes place in general. For example, the common processes are:
- Using Passwords: Usernames and passwords are the most common way in which we can authenticate the user. Entering correct information will allow you to get authenticated and finally authorized to access the resource.
- Using OTPs or One Time Pins: These are generally used by banks as a second layer of authentication to be doubly sure if the user is actually the right user to be authenticated.
- Using of Authentication apps: Some corporates use apps on mobile systems to generate a passcode that keeps regularly refreshing to allow users to authenticate into the corporate network.
With the above ways of authentication, Flask supports various ways of authentication applicable to all the ways listed out above. The ways we will discuss here are most widely used:
- Using password hashing: This methodology is the simplest of all others. Here, we would hash the password sent by the user and checked it against the hashed password for authentication. The reason we choose hash password is that hashing method is single route authentication, where the password is non-retrievable from the hashed value, hence securing the process. But this leads to the hard coding of the password and is not possible to be used in a dynamic multi-user authentication.
- Using HTTP Basic Authentication: Here the Flask-HTTPAuth extension comes in very handy wherein there is a decorator present known as login_required which couples with verify_password callback and provides a True if the username and password match. This methodology allows checking for multiple users at a time but still lacks dynamic updates in the list of the users.
- Using HTTP Digest authentication: Another similar authentication methodology is by using digest authentication present in the Flask-HTTPAuth extension. This is designed to be more secure than the traditional digest authentication schemes. Also, over basic authentication (which provides non-encrypted base64 encoding), digest applies a hash function to the username, password, and the nonce value.
- Using JSON Web Tokens: This methodology is the most secured amongst the ones discussed here. Firstly, the user login through a specially created route that returns a token. As soon as the token is generated, it is sent along with the rest of the request for authentication. This allows users to be kept logged in for a time the token is valid.
Examples
Here are the following examples mention below
Example #1
Build a flask authentication using HTTP basic auth:
Syntax
from flask import Flask
from flask_httpauth import HTTPBasicAuth
from werkzeug.security import generate_password_hash, check_password_hash
appFlask = Flask(__name__)
basicAuth = HTTPBasicAuth()
users = {
"user1": generate_password_hash("pass1"),
"user2": generate_password_hash("pass2")
}
@basicAuth.verify_password
def verify_password(username, password):
if username in users and \
check_password_hash(users.get(username), password):
return username
@appFlask.route('/')
@basicAuth.login_required
def index():
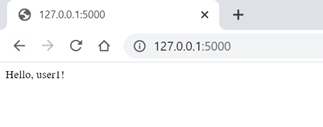
return "Hello, %s!" % basicAuth.current_user()
if __name__ == '__main__':
appFlask.run()Output:
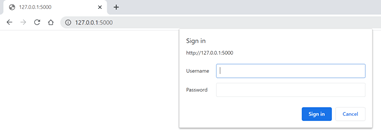
Putting the wrong username or password will make the pop-up box open again and again.
Example #2
Build a flask authentication using JSON Web tokens:
Syntax
from flask import Flask, jsonify, request, make_response
import jwt
import datetime
from functools import wraps
appFlask = Flask(__name__)
appFlask.config['SECRET_KEY'] = 'eduCBA'
def token_required(f):
@wraps(f)
def token_dec(*args, **kwargs):
token = request.args.get('token')
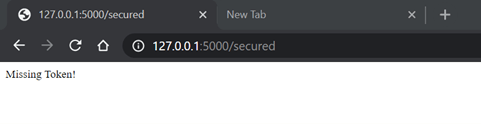
if not token:
return "Missing Token!"
try:
data = jwt.decode(token, appFlask.config['SECRET_KEY'])
except:
return "Invalid Token"
return f(*args, **kwargs)
return token_dec
@appFlask.route('/insecured')
def insecured():
return "This resource is public. Anyone can access this"
@appFlask.route('/secured')
@token_required
def secured():
return "You are authenticated to see the resource"
@appFlask.route('/login')
def login():
userAuth = request.authorization
if userAuth and userAuth.password == 'secret':
token = jwt.encode({'user' : userAuth.username, 'exp' : datetime.datetime.utcnow() + datetime.timedelta(seconds=180)}, appFlask.config['SECRET_KEY'])
return token.decode('UTF-8')
return "Login Required"
if __name__ == '__main__':
appFlask.run(debug=True)Output:

Copy the token above and then use the token in the web address bar like
http://127.0.0.1/secured?token=<token number>
Using no token
Using the wrong token:

Using the right token:

Use the same valid token after 3 minutes:
![]()
Conclusion
In conclusion, in this article, we have learned about the different ways of authenticating Flask applications and some hands-on examples on widely used ways of Flask authentication. And like we say every time in every article, the experiment is the mother of invention, so keep experimenting and keep learning!
Recommended Articles
This is a guide to Flask authentication. Here we discuss the different ways of authenticating Flask application and some hands-on examples on widely used ways of Flask authentication. You may also look at the following article to learn more –
