Updated May 12, 2023
Introduction to Docker Export
Docker export is a command that is used to export the container’s file system as an archive, i.e., tar, that can be imported as required as a Docker image using the Docker import command. It includes all the files and folders created in that container. However, it does not export the data of volumes mounted on that container. It is very useful to create a single layer or flat Docker image to improve performance or to share the Docker image with others without the need for the Docker registry. It is like creating a template, as we create a template of VMs to speed up the process.
Syntax:
docker export [OPTIONS] container
Options:
-o, –output – It is a string type and is used to write the output to a file instead of STDOUT.
Command:
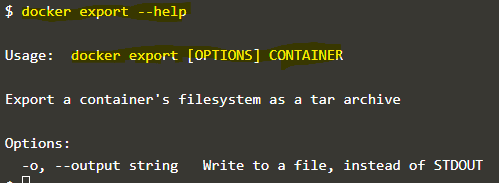
docker export --help
Explanation:
We use ‘–help’ to know about the ‘docker export’ as shown above. We can see that this command has only one option, ‘-o’, for redirecting the output to a file.
How Does Export Work in Docker?
It takes at least one argument, that is, a container name or container ID. When we run this command, it saves the container’s file system as an archive. It creates a flat Docker image that makes the Docker image slightly smaller in size. However, it lost its history and metadata, which means we cannot perform any rollback to a previous layer if we import a Docker image using any exported tar file.
Below is a snapshot of a folder structure of an exported container:
Command:
tree -L 1 alpine-export
Output:
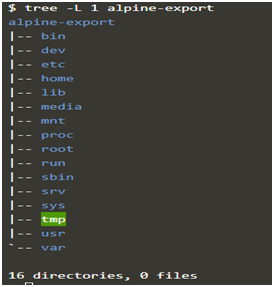
Explanation: We export a Docker container in a tar file and extracted the tar file in a folder ‘alpine-export’. The above example is the tree structure of that folder.
Example to Implement Docker Export
Below are the examples:
Scenario 1: Update any File of the Docker Image
We have built an nginx Docker Image, and a container is running using this Docker image; however, when we browse the web application, we realize that something is missing on the homepage. We need to update the homepage and create a new Docker image but building the image from scratch using Dockerfile is going to take more time, so we are going to make the changes in the index.html file when the container is running, and we export the container and then import it as a Docker image. So let’s get started:
1. Below is the snippet of Dockerfile and index.html files:
index.html
Code:
<!DOCTYPE html>

<html>

<head>

<title>Docker Export</title>

</head>

<body>

<h1>Example of Docker export</h1>

</body>

</html>
Dockerfile
FROM ubuntu

RUN apt-get update && apt-get install -y nginx

add index.html /var/www/html

CMD ["nginx", "-g", "daemon off;"]
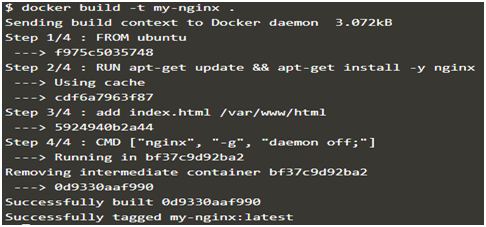
2. Build the docker image named ‘my-nginx’ using the below command:
docker build -t my-nginx
Output:
3. Run a container using the above Docker image as below:
docker run -d -p 80:80 my-nginx
Output:


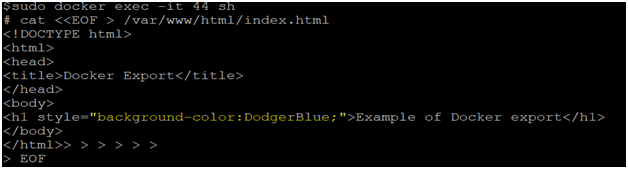
4. Now, let’s assume that we got a requirement to change the background color of the heading ‘Example of Docker Export’ to blue, so we will update the index.html file in the running container and export it as an archive using the below command:
Command:
sudo docker exec -it 44 sh
Replace the line “<h1>Example of Docker export</h1>” with the below line in the index.html file as shown in the snapshot:
<h1 style="background-color:DodgerBlue;">Example of Docker export</h1>
Output:
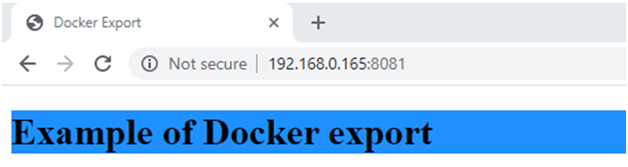
5. Export the running container after making the changes using the below command and import it as a Docker image named ‘my-nginx:v2’;
Command:
docker export 44 > my-nginx.tar

docker import -c ‘CMD [“nginx”, “-g”, “daemon off;”]’ my-nginx.tar my-nginx:v2

docker run -d -p 8081:80 my-nginx:v2
Output:

Explanation: Run a new container using the imported Docker file to verify the changes are successfully applied as expected. When we browse the default page, we can see that the background color of the heading has been changed to blue in the below image.
Scenario 2: Create a Single Layer Docker Image
When we create a Docker image, it has multiple layers, as each instruction in a Dockerfile creates a layer while building the image. If we want to create a single-layer Docker image to enhance the performance of the container, we export the container and import it as a Docker image as shown in the below steps:
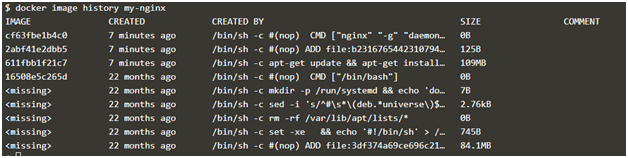
1. Check the layers of any Docker image using the below Command:
Syntax:
docker image history <image_name>
Command:
docker image history my-nginx
Output:
2. Now, again, run a container using this image and export it as an archive:
Command:
docker run -d -p 80:80 --name nginx-container my-nginx

docker export nginx-container > my-nginx.tar
Output:

3. Import the exported archive file or tar file with the command and message below and check the history of the newly imported Docker image:
Command:
docker import -c 'CMD ["nginx", "-g", "daemon off;"]' -m "single layer Docker image" my-nginx.tar my-nginx:v3

docker image history my-nginx:v3
Output:

Explanation:
In the above snapshot, only one layer shows after importing the exported archive. It helps to improve the performance. However, it is not recommended by Docker as Docker encourages building a multilayer Docker image to use the cache function of the image-building process.
Advantages of Docker Export
- Speed: Docker export is faster than rebuilding the Docker image if any minor changes are required.
- Image Sharing: As we know, if we want to share the Docker image, we need to push it to a registry; however, we can use Docker export to export it as an archive, and we can share it with others like we share files.
- Performance: When we import the exported library using Docker import, it creates a single-layer Docker image that improves the performance of the container.
Conclusion
Docker export is a command-line tool to export any container as an archive. The archive contains a regular Linux filesystem with all the container data except data of mounted volumes. Docker export and docker import both commands primarily work together.
Recommended Articles
We hope that this EDUCBA information on “Docker Export” was beneficial to you. You can view EDUCBA’s recommended articles for more information.

