Updated August 25, 2023

Introduction to Distortion Effect Photoshop
Photoshop is a graphics editing software that was developed by Adobe systems as its image editing software. We can make different types of effects on our image with the help of different features of this software. Distortion is one of the effects through which you can make a creative distortion work on your image and get benefit from it. This article will discuss different parameters of the distort effect and get introduced to the different steps of how to apply this effect on your image and get the best result from it. So let us start our discussion about the dissertation topic of Photoshop software.
How to Use Distortion Effect in Photoshop?
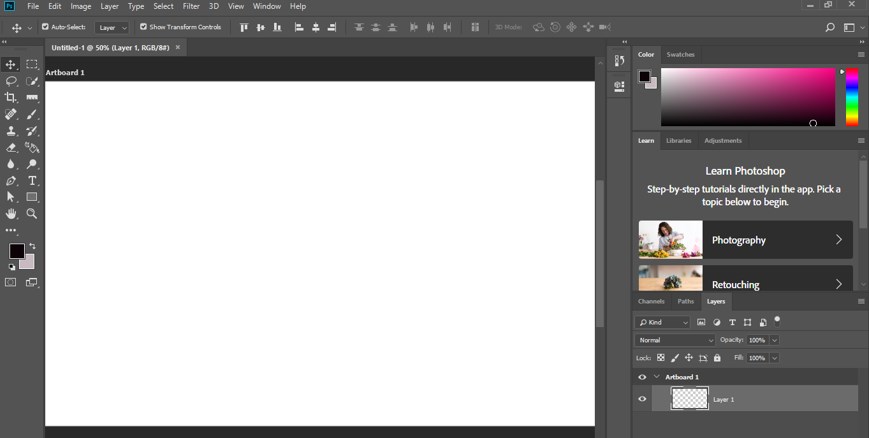
We can apply the distortion effect on our image in Photoshop by using some steps of this feature in a very simple manner. But before starting, let us get introduced to the user interface of this software so that we can understand this topic better and have good knowledge of this topic without any problem.
Step 1: At the top of the working screen, we have a bar which is called the Menu bar. This bar has some Menus, which helps us in the management of different parameters of this software. Below this bar, we have another bar which we called Property bar. This bar shows you the parameters of the active tool of this software during your work. Below this property bar, we have some sections in this software in which at the left side we have tool panel which has some tool for making our work easy, at the center we have display window for seeing our current work in it, at the right side we have some tabs such as color tab, layer panel and some other different tabs those helps in our work during our project work. You can adjust them according to your requirement at any place in the user screen of this software.
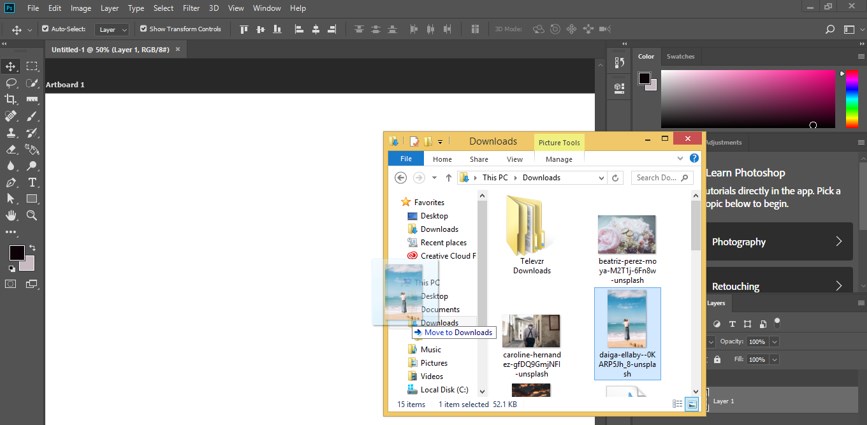
Step 2: Let us have an image in this software for our learning about this topic. For placing an image in Photoshop, just open the folder of your personal computer of your saved image, pick your desired image from that folder, then go to the display window of Photoshop software and release the mouse button to place it here.
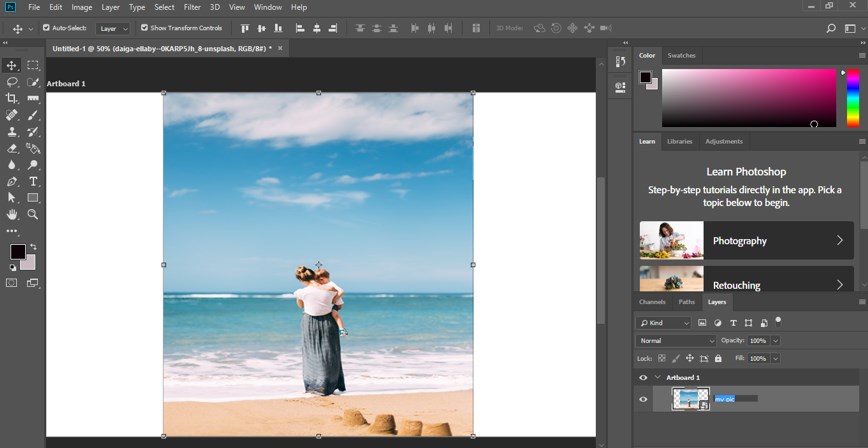
Step 3: Now, make adjustments to the size of your image according to your requirement by adjusting the width and height of your image. Once you have done the adjustment, click on the commit option or tick mark option of the property bar of this image of your software. You can also press the Enter button on the keyboard for applying your settings. Rename this image according to you. I will name it as My Pic. For naming your image, make double click on the name area of your image.
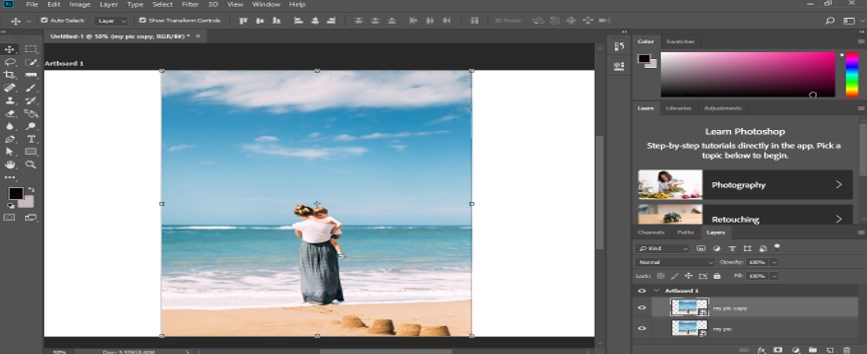
Step 4: Go to the layer panel of this software, which is at the right side of the working area and click on this image layer for selecting this image with mouse left click. Now press Ctrl + J button from the keyboard for making a copy of this image.
Step 5: Go to the Tool panel of this software, which is on the left side, and make click on the Quick Selection tool with the mouse left button for having this tool active.

Step 6: Now select Copy of My Pic image layer in layer panel by click on it, then make a selection around the lady of the image with the help of this Quick selection tool.
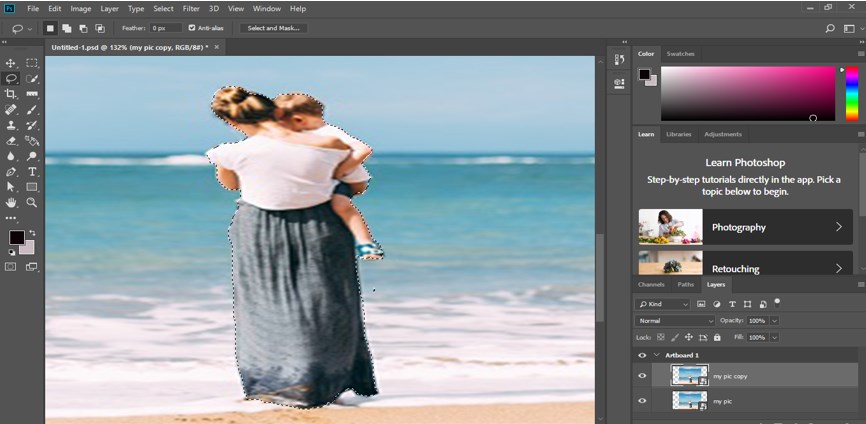
Step 7: Once you made the proper selection, press Ctrl + J from the keyboard for separating this lady from the original image.
Step 8: Now again, go to Copy of My Pic image layer and make right-click with the mouse button on this image in the display window area. A pop list will be open. Choose the Select Inverse option for inversing your selection from the list.
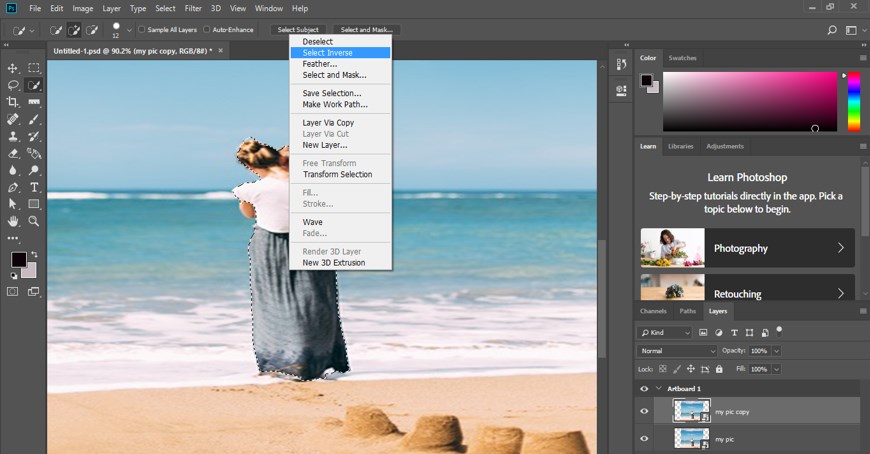
Step 9: Again, press the Ctrl + J button from the keyboard for separating the background of this image from the original image.
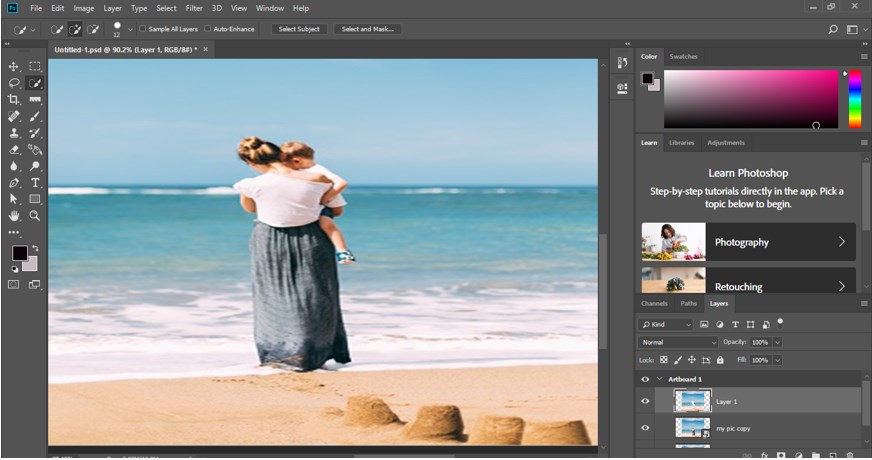
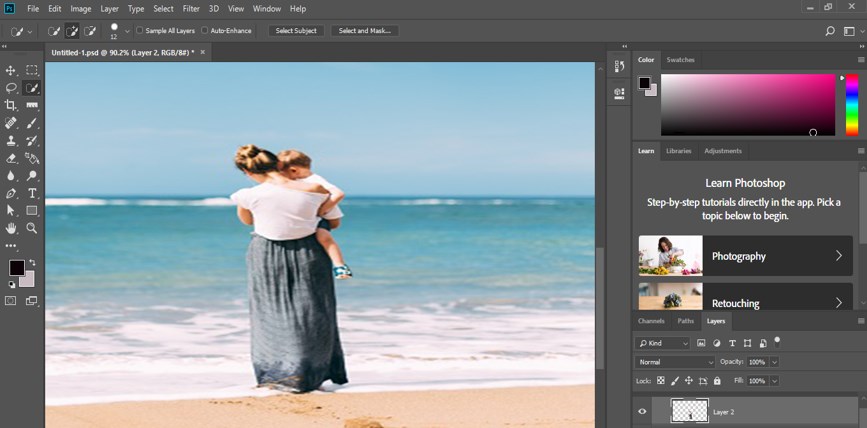
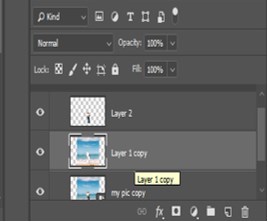
Step 10: Place the separator image of the lady (named as Layer 2 ) above to this background layer and then select this separated background layer (Layer 1 copy) by click on it.
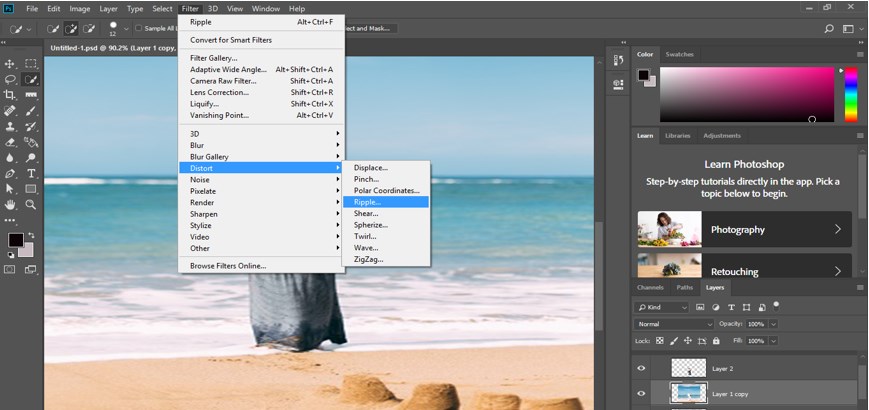
Step 11: Go to the Filter Menu of Menu bar of this software and click on it. Once you click on the Filter menu, a popup list will be open, go to the Distort option of the list, and click on the Ripple option of the new drop-down list. You can choose any one of the options of Distort effect from the list. I will explain to you distortion by using this ripple option of the Distort effect of Photoshop software.
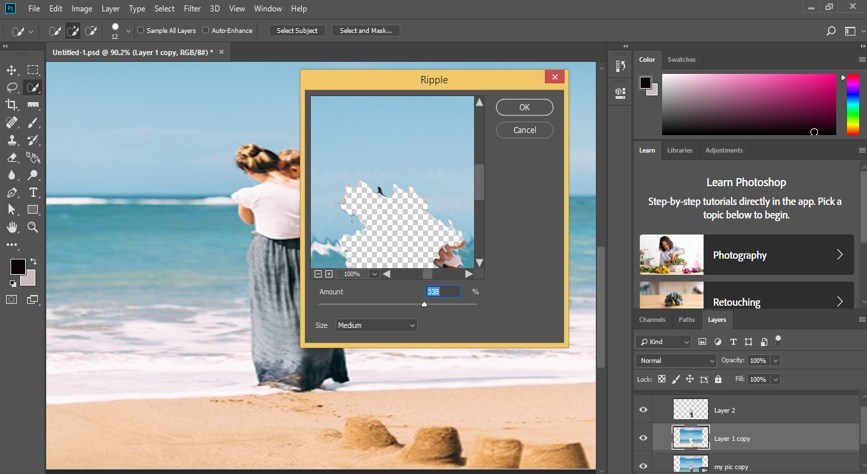
Step 12: Now, a dialog box of the Ripple effect will be open like this. Adjust the amount of ripple by increasing or decreasing its value on the slider of the Amount option. You can input any value directly by using the keyboard entry method. Once you are done, click on the Ok button of this box.
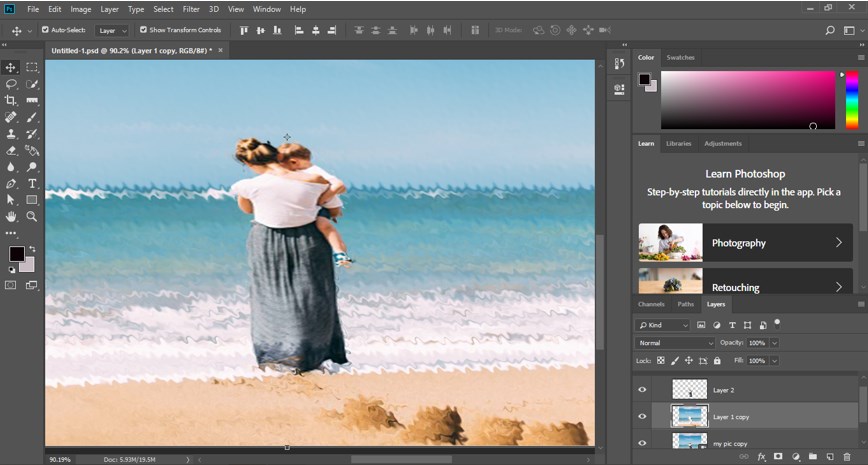
Step 13: Once you click on the Ok button, this type of effect will create with this distort option.
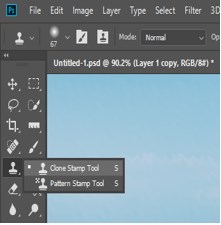
Step 14: Again, go to the tool panel of this software and click on the Clone Stamp tool of the list of tools with the mouse left button.
Step 15: Set the size of the clone tool by the property bar of this clone tool according to you. I will set its size as 18 px.
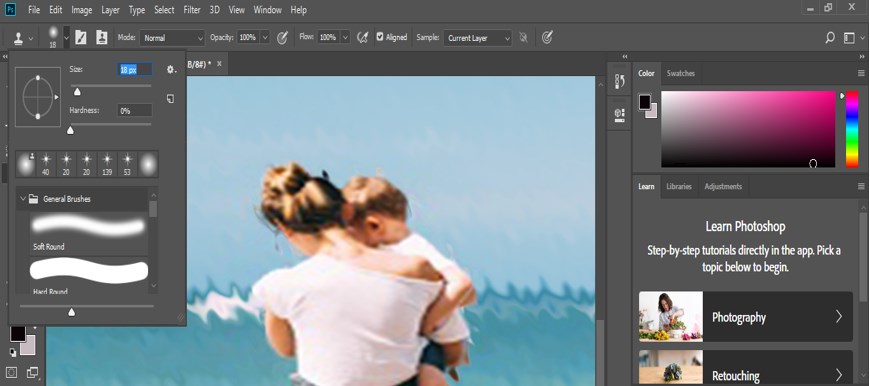
Step 16: Now copy the area of the image with which you want to cover unwanted areas of your image by holding the Alt button of the keyboard. I want to remove the unwanted area around the lady, so I will copy the area nearby this by holding the Alt button of the keyboard and clone it around the edge of the lady.
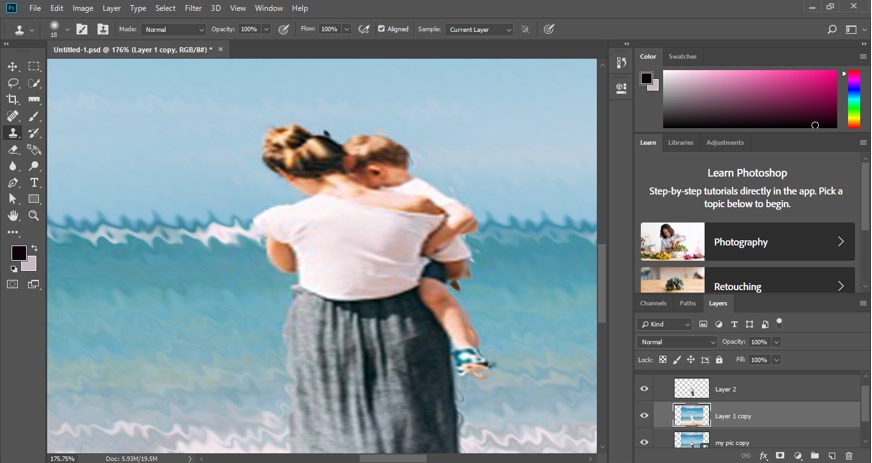
Step 17: Once I did all the cloning around the edge of the lady of the image, it will look like portray.
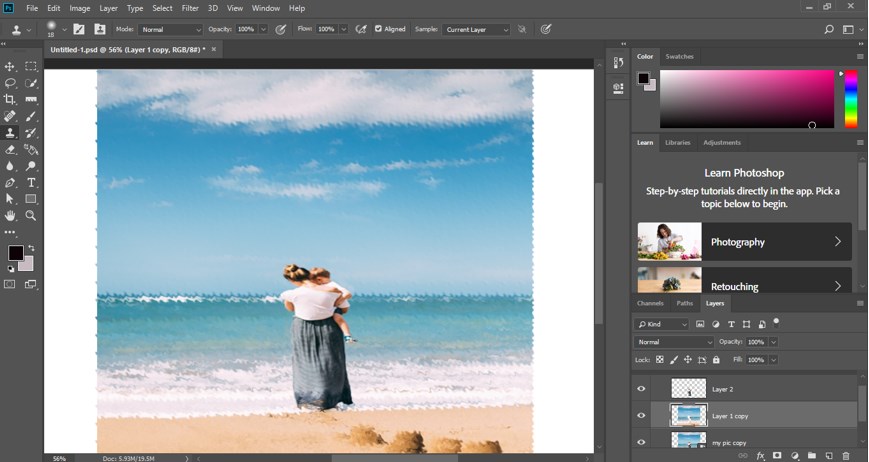
In this way, you can make different types of creative editing in your image by using the distortion effect of this software.
Conclusion
Now, after this article, you can understand what distortion effect is in the Photoshop software and how you can handle its parameters for getting distortion effect on your image. You can have a good command of an application with the option of the Distort effect of Photoshop by practicing on them one by one.
Recommended Articles
This is a guide to Distortion Effect Photoshop. Here we discuss an introduction, how to use the Distortion Effect in Photoshop in a step by step manner. You can also go through our other related articles to learn more –
