Introduction to Illustrator Direct Selection Tool
Direct Selection tool illustrator is one of the most important parts of the Selection tools. The Direct Selection tool helps the user to select a part of the object that includes anchor points or segments. We can also select multiple anchor points and edit them using the direct selection tool in illustrator. With the properties available in an illustrator, the user can add or subtract an anchor point from the object using this tool. With the tool, we can also add curves or make curves straight as per the requirement of the user.
What is Direct Selection Tool Illustrator?
The direct Selection tool allows a user to select individual points of any object. We can also select segments of any object and drag them according to the requirement. With the Direct Selection tool, you can select individual path points and segments; you can also add or subtract items to/from the selection. In addition, you can also use the Direct Selection method and drag a marquee to pick sections of the path and drag a part of it to create a selection rectangle.
We can delete or add more points or segments into the object. This is the most useful tool for Adobe Illustration. This tool is used with all other tools to create the final object.
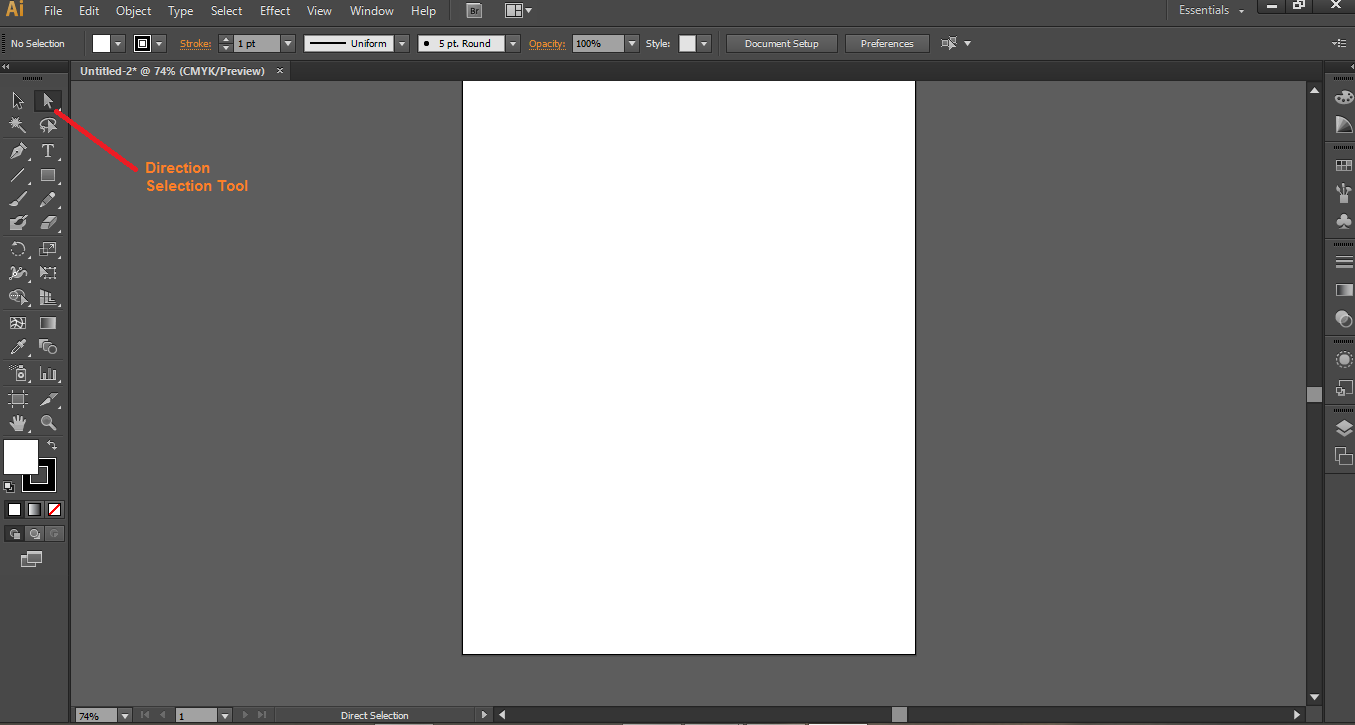
Using the Direct Selection Tool Illustrator
Now we will draw the object and tell how we can use this tool in a constructive way.
Step 1: To use this tool; first, we need to create a shape. Keyword A is the keyboard key for activating the Direct Selection tool on your system. To construct a shape here, we will construct a rectangle from the toolbox present on the left side of the screen. After we had selected the rectangular command, a toolbox will appear on the top side of the screen showing the rectangle inner/fill color, outline colour, line thickness, line profile, opacity, graphic style panel, recolor artwork, align tool in case we need to align 2 or more rectangle, transform tool to change the position of rectangle, Isolate selected object tool to isolate rectangle from any other shape.

Step 2: We will use the properties of a rectangle shape according to our requirements and construct a rectangle shape.
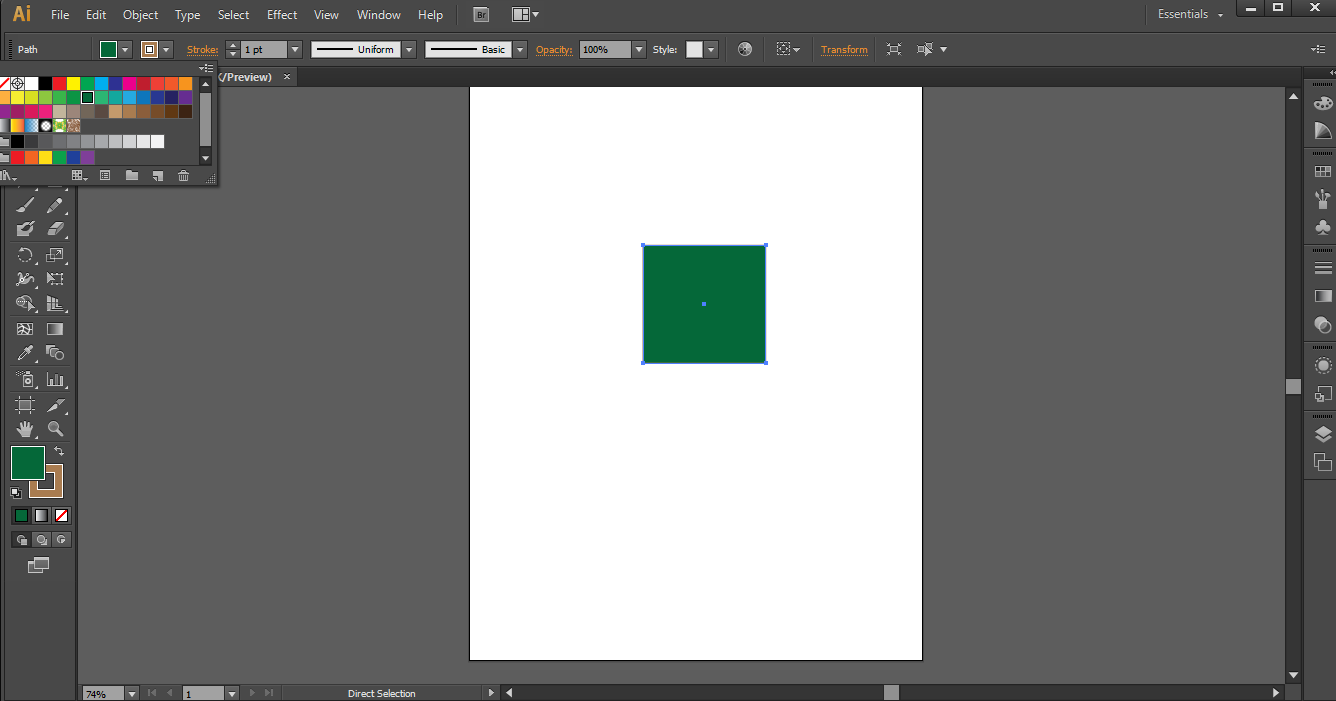
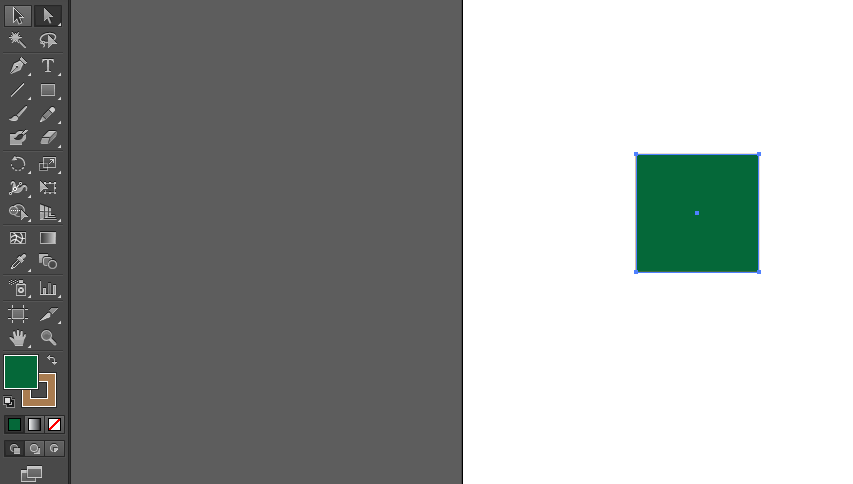
Step 3: If we use the Selection tool present beside direct selection, we can see the 9 points that are 4 points on the center of the line and 4 points on the corners of the rectangle and 1 at the center of a rectangle, as shown below.
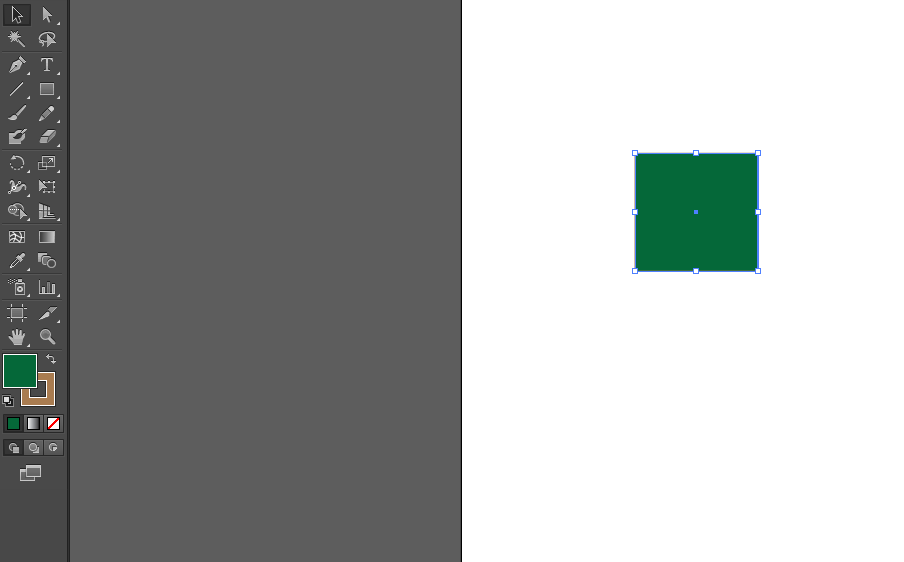
Step 4: But if we will select Direct Selection Tool, we can only see 5 points, 4 at the corners of a rectangle and 1 at the center of a rectangle, as shown below.
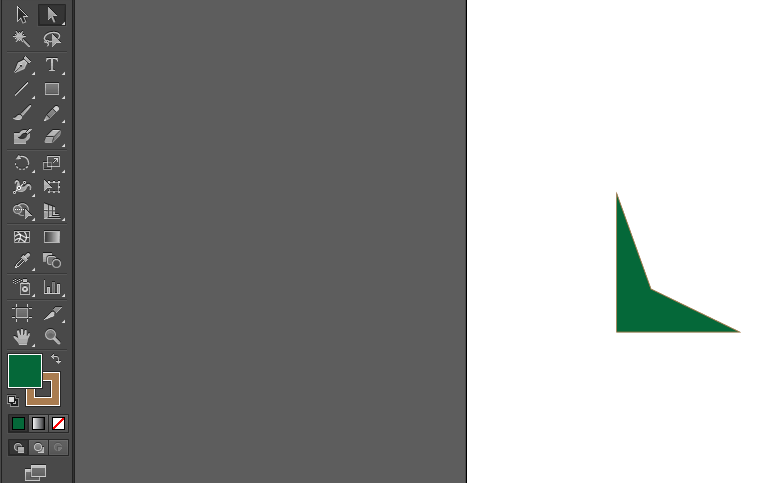
Step 5: We can press and move the right cursor of the mouse to change the location of the rectangle while using the Direct Selection Tool.

Step 6: Now, we can press any corner of the rectangle and move it by pressing the right cursor of your mouse to change the position of your corners with respect to the center of the rectangle.
Step 7: Now, we will construct another rectangle by using the rectangle command again.
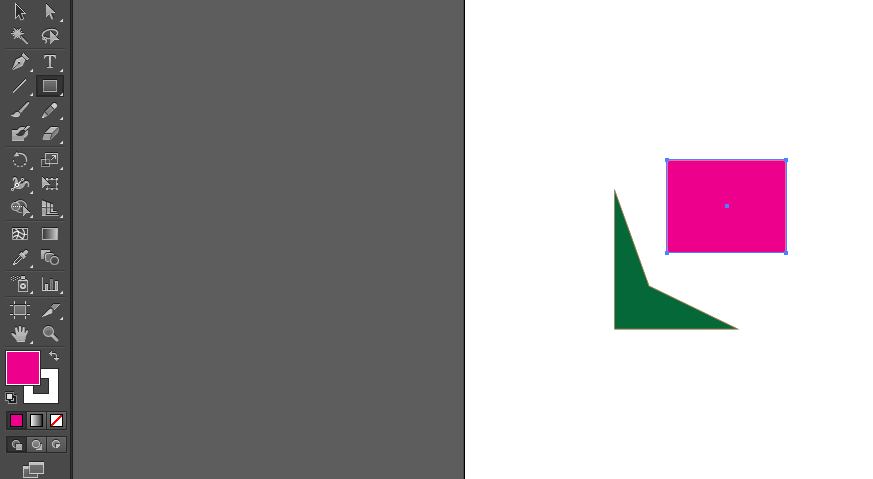
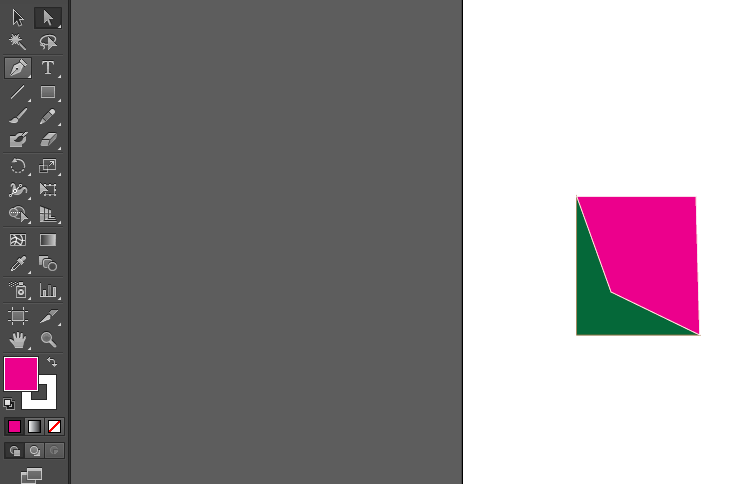
Step 8: Again, we will use the Direct Selection tool to change the position of 4 corners with respect to the first rectangle to form a geometric shape according to the user’s will. We will match the corners with the first rectangle.
Conclusion
Above, it has been explained how we use the direct selection tool to get the required shape. Likewise, we can use any other command like line, arc, circle, and spline and form a suitable geometry using the Direct Selection Tool. This tool is very much useful in designing the logo. We can construct any suitable geometry and construct wonderful logos. Since this software is a vector base, we can scale up or scale down the object without degrading its quality.
Recommended Articles
This is a guide to Direct Selection Tool Illustrator. Here we discuss What Direct Selection Tool is and how to use this tool to get the required shape. You may also look at the following articles to learn more –
