Updated May 24, 2023
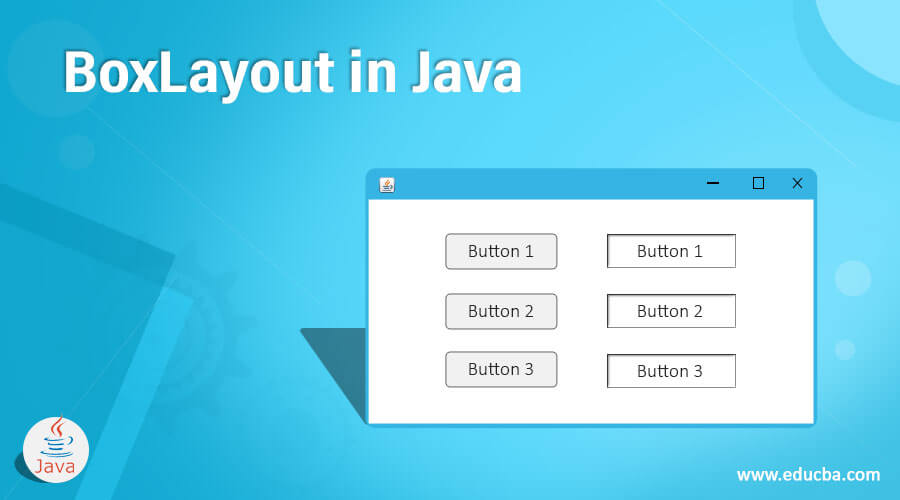
Introduction to BoxLayout in Java
BoxLayout is a standard layout manager that comes along with the Java platform. It helps in arranging the components horizontally or vertically inside the container. In this, the arrangement of components will be as such, even though we resize the frame.i.e.vertical arrangement stays vertical even if the frame resizes occurs. In other words, the components inside the container will not wrap. Unlike other layout managers, the BoxLayout constructor passes the required containers to the layout manager constructor. The following sections will discuss constructors, Methods, and Examples of BoxLayout Class.
Constructors of BoxLayout in Java
To implement the BoxLayout class in Java, the following constructor will be used:
- public BoxLayout(Container c, int axis)
The two arguments passed are container and axis, which helps create the container with the axis mentioned.
The two valid directions are:
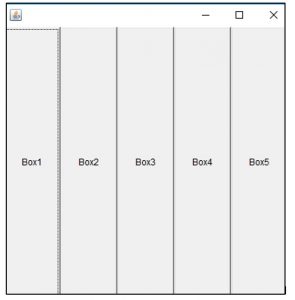
- Left to right – BoxLayout.X_AXIS
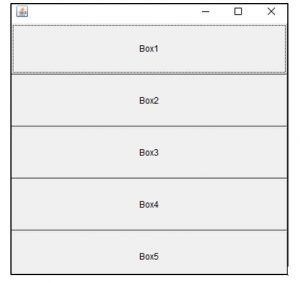
- Top to bottom – BoxLayout.Y_AXIS
If we pass the constructor as BoxLayout.Y_AXIS, a layout like the following figure(one column) will appear.
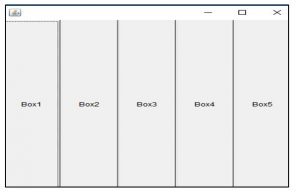
If we pass the constructor as BoxLayout.X_AXIS, a layout like the following figure(one row) will appear.
Methods of BoxLayout Class in Java
Below are the various methods of boxlayout class in Java:
1. addLayoutComponent(Component comp, Object obj): This method aims to add the mentioned component to the container using the constraint object specified.
Modifier and Type: Void
2. getLayoutAlignmentX(Container contnr): This method returns the alignment of the container in the left to the right direction. i.e., X-Axis. The value between 0 and 1 can be given, where 0 is the origin’s alignment, 1 is the furthest alignment away from the origin, and 0.5 is the centered alignment.
Modifier and Type: Float
3. getLayoutAlignmentY(Container contnr): This method returns the alignment of the container in the top-to-bottom direction. i.e., Y-Axis. The value between 0 and 1 can be given, where 0 is the origin’s alignment, 1 is the furthest alignment away from the origin, and 0.5 is the centered alignment.
Modifier and Type: Float
4. maximumLayoutSize(Container contnr): This method returns the maximum value of size the target container can use to layout the containers that are added to it.
Modifier and Type: Float
5. minimumLayoutSize(Container contnr): This method returns the minimum value of size the target container can use to layout the containers that are added to it.
Modifier and Type: Float
6. removeLayoutComponent(Component comp): This method removes the mentioned component from the container’s layout.
7. layoutContainer(Container contnr): This method lays the container’s layout when called by the Abstract Window Toolkit (AWT).
8. invalidateLayout(Containercontnr): This method discards the cached information of the layout. In other words, it invalidates the layout.
Examples of BoxLayout Class in Java
Now, let us see examples of BoxLayout class with some of the methods explained in the above section.
Example #1
Java program to create a BoxLayout with X-Axis.
Code:
//Java program to demonstrate BoxLayout with X Axis
import java.awt.*;
import javax.swing.*;
//A subclass BoxLayoutProgram that extends Frame Class
public class BoxLayoutProgram extends Frame {
Button buttons[];  //Button reference variable
//Constructor of BoxLayoutProgram
public BoxLayoutProgram ()
{
buttons = new Button [5];
for (int i = 0;i<5;i++)
{
buttons[i] = new Button ("Box" + (i + 1));
add (buttons[i]);  //adds button
}
setLayout (new BoxLayout (this, BoxLayout.X_AXIS));  //sets the layout by mentioning the axis
setSize(400,400);  //sets the width and height of the frame
setVisible(true);  //sets the GUI visible to user
}
public static void main(String args[]){
BoxLayoutProgram b=new BoxLayoutProgram();  //object of the class
}
}
Output:
Here, the class created will be extended from the Frame class imported from java.awt. Then a layout with the mentioned content, width, and height will be created with the help of the constructor created.
Example #2
Java program to create a BoxLayout with Y-Axis.
Code:
//Java program to demonstrate BoxLayout with Y Axis
import java.awt.*;
import javax.swing.*;
//A subclass BoxLayoutProgram that extends Frame Class
public class BoxLayoutProgram extends Frame {
Button buttons[];  //Button reference variable
//Constructor of BoxLayoutProgram
public BoxLayoutProgram ()
{
buttons = new Button [5];
for (int i = 0;i<5;i++)
{
buttons[i] = new Button ("Box" + (i + 1));
add (buttons[i]);  //adds button
}
setLayout (new BoxLayout (this, BoxLayout.Y_AXIS));  //sets the layout by mentioning the axis
setSize(400,400);  //sets the width and height of the frame
setVisible(true);  //sets the GUI visible to user
}
public static void main(String args[]){
BoxLayoutProgram b=new BoxLayoutProgram();  //object of the class
}
}
Output:
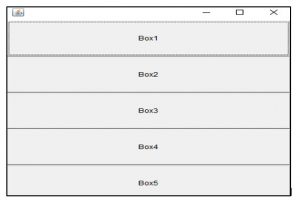
The above program is similar to Example 1, except it creates buttons in the Y-axis.
Example #3
Java program that creates buttons in both X-axis and Y-axis.
Code:
//Java program that creates buttons in both X axis and Y axis
import java.awt.*;
import java.awt.event.*;
import javax.swing.*;
//Class that extends JFrame Class
public class BoxLayoutXY extends JFrame
{
//Constructor
public BoxLayoutXY()
{
//helps in adding the object to the container
Container cp = getContentPane();
//sets the layout of container as FlowLayout where the components are placed in a line
cp.setLayout(new FlowLayout());
//create an object of the box class
Box hbox = Box. createHorizontalBox();
//create an object of the box class
Box vbox = Box. createVerticalBox();
//add horizontal and vertical components to the container
hbox.add(new JButton("Horizontal Button 1"));
hbox.add(new JButton("Horizontal Button 2"));
hbox.add(new JButton("Horizontal Button 3"));
vbox.add(new JButton("Vertical Button 1"));
vbox.add(new JButton("Vertical Button 2"));
vbox.add(new JButton("Vertical Button 3"));
cp.add(hbox);
cp.add(vbox);
//method similar to setsize that places the content in preferred size
pack();
//GUI visible to user
setVisible(true);
}
public static void main(String args[])
{
//calls the constructor of the class
new BoxLayoutXY();
}
}
Output:
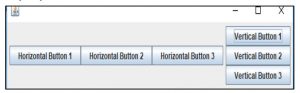
Unlike Examples 1 and 2, this program extends the JFrame class to implement the BoxLayout. Several other methods, such as pack() and createVerticalBox, perform the same tasks in Examples 1 and 2.
Conclusion
BoxLayout is a layout manager that helps arrange a container’s components in the specified format. i.e., X-axis and Y-axis. The class’s constructor, which contains methods that perform different functionalities, will be used to implement this.
Recommended Articles
This has been a guide to BoxLayout in Java. Here we discuss the constructors, methods, and examples of BoxLayout in Java with code implementation and output. You can also go through our other suggested articles to learn more –

